Monday Articles - July 2022
Scroll down for latest instalment

Well, where did June go? I’ve been so busy with building sheds and preparing to move all of my tools that the project bike has taken a back seat. And so, in the blink of an eye, July is here - where is this year disappearing to? I’ve never known time to pass so quickly. But, I’ve finally managed to sneak a little time in the garage. Not a lot, but a little and as long as I keep plugging away at it, the bike will eventually get done. (Good job there is no deadline!)
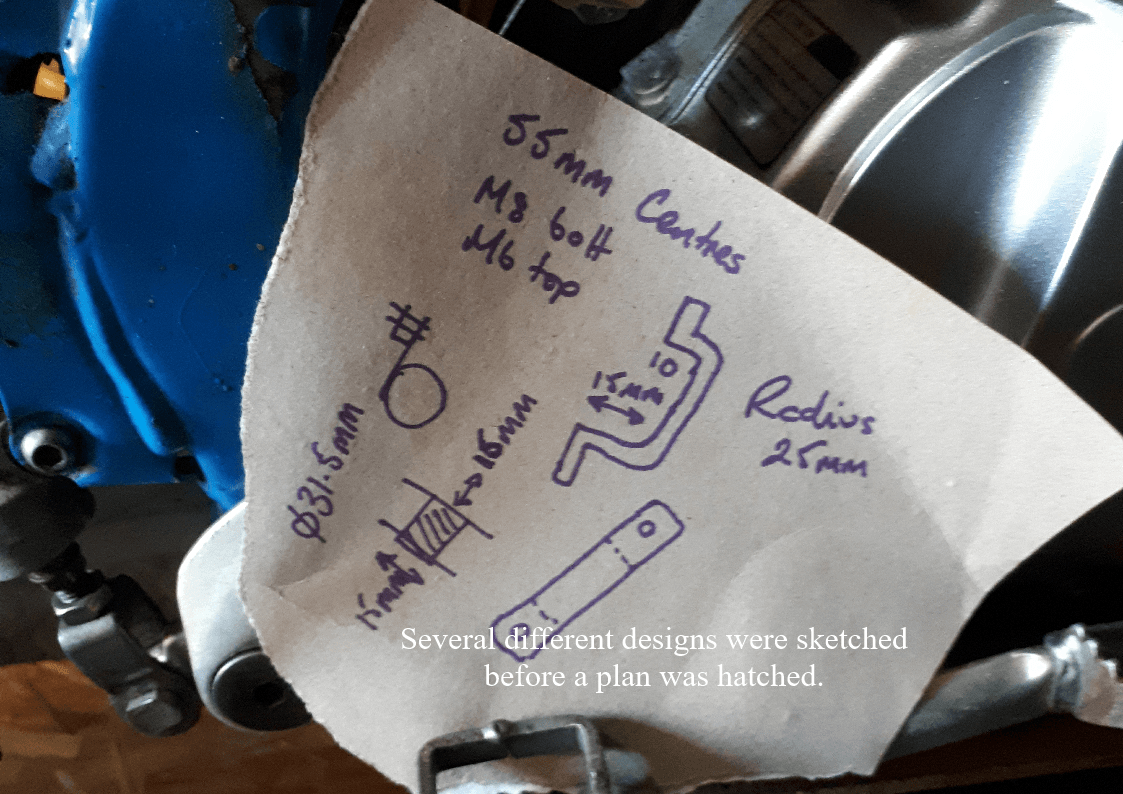
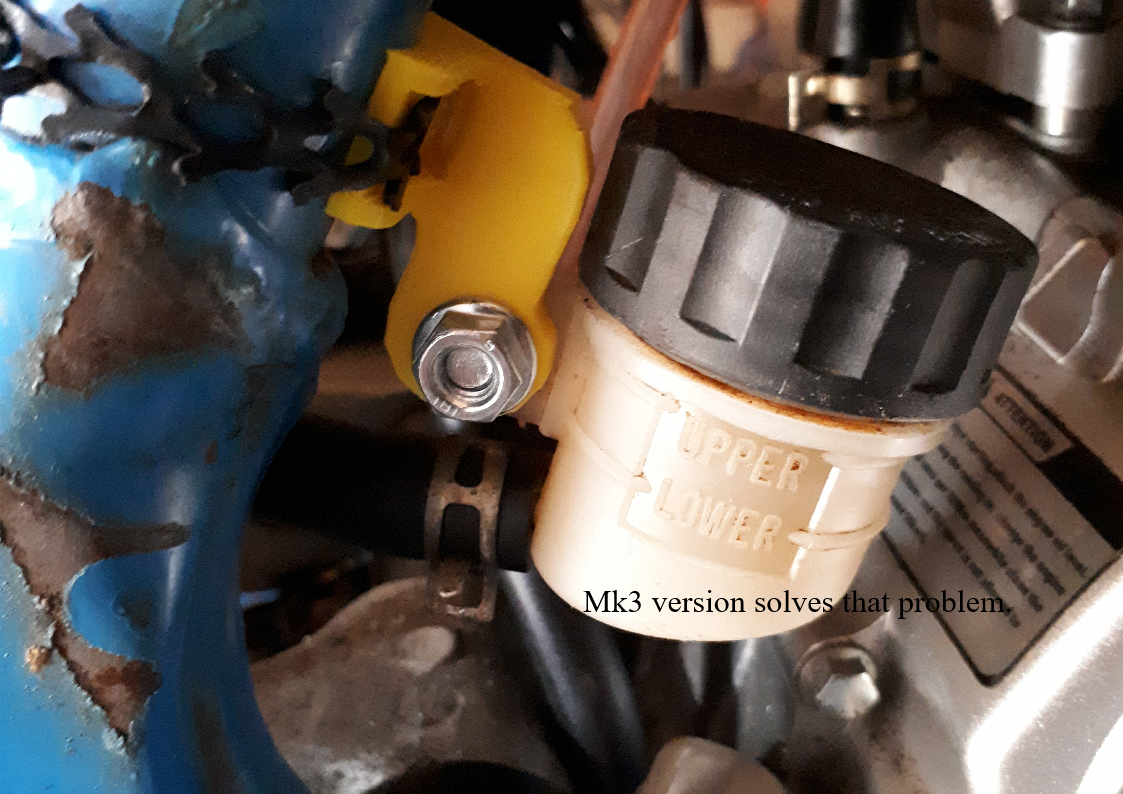
What did I manage to do? Well, I think I’ve finally sorted where the rear brake reservoir is going. After much deliberation (including looking longingly at the cheap rear master cylinders with integral reservoirs on the internet) I decided that I really wanted to stick with the original Yamaha parts as I know I can get rebuild kits for these should they be required in the future. That meant that I had to find the reservoir a home. Head scratching, scribbled notes and umpteen different hose routings later, I came up with a prototype design that could be 3D printed. Still hedging my bets, I made the mk1 version adjustable.
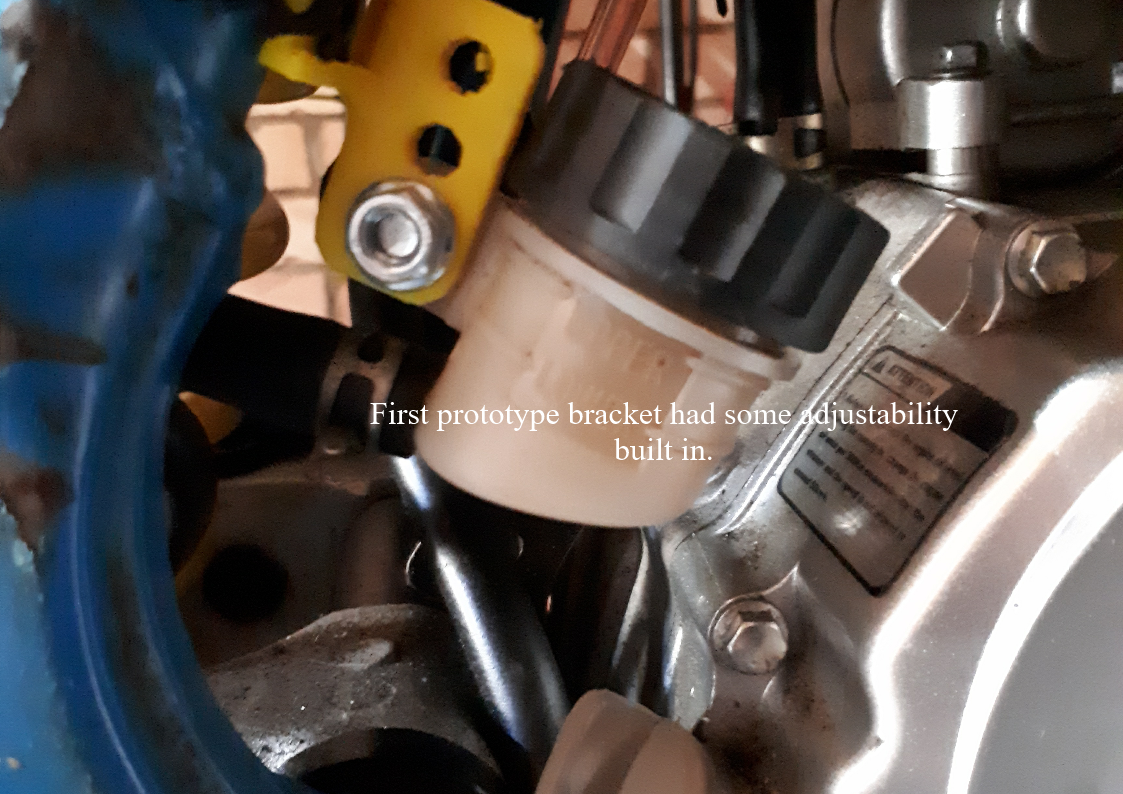
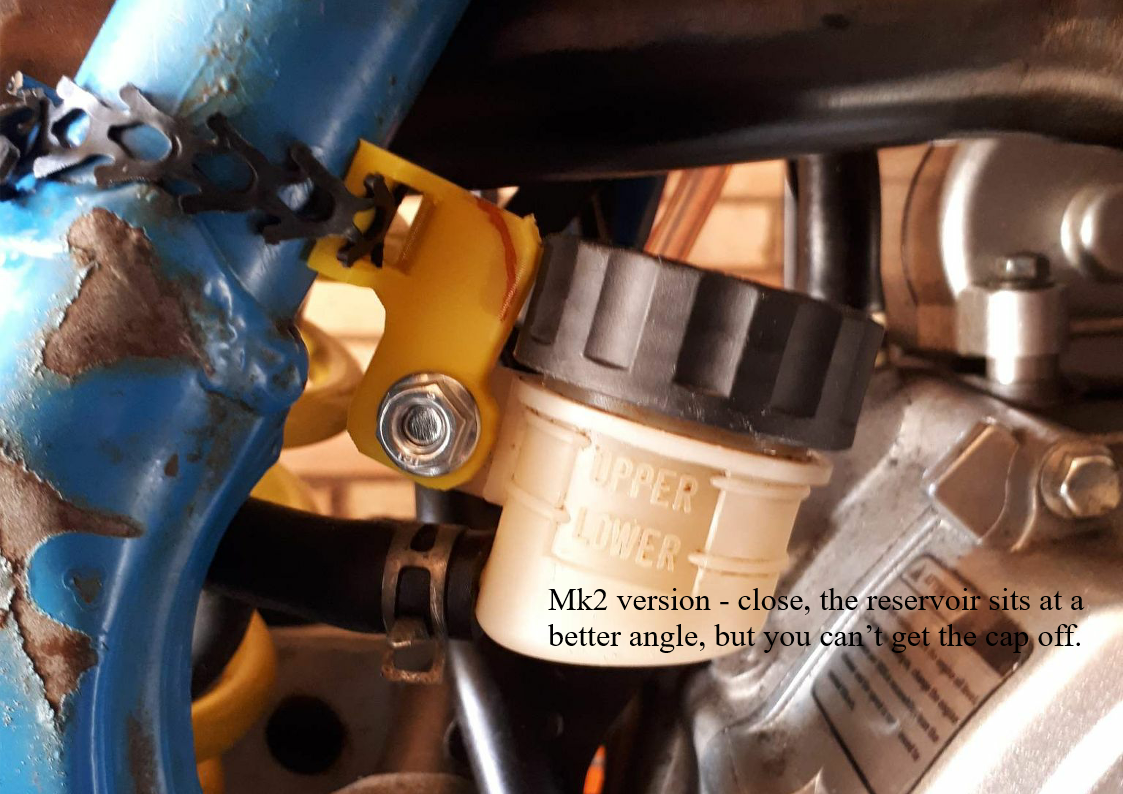
Mk1 showed that the bottom hole was the best one to use, but now it needed modifying so that the reservoir was more upright. And so, behold, the mk2 version. This was nearly there, but this in turn needed a bit more clearance so that the cap could easily be removed, which was solved in the mk3 version by increasing the radius at the top.
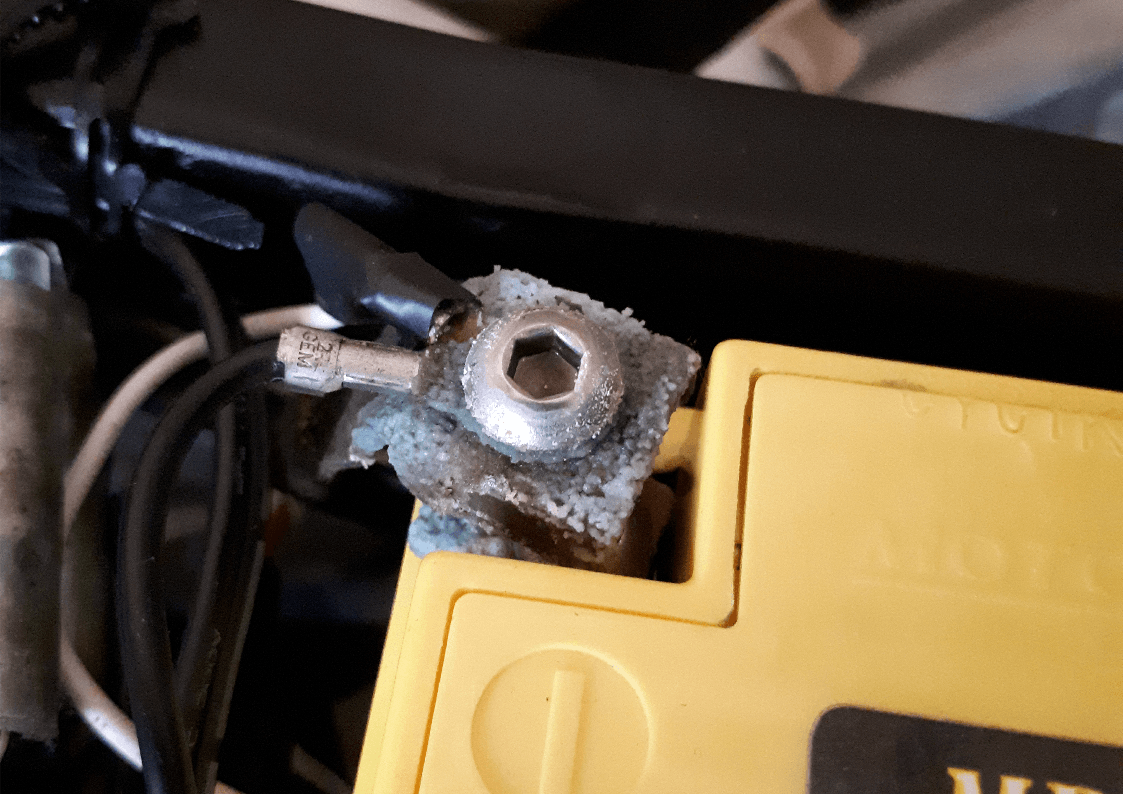
For the moment, the bracket is held on by a cable tie. That’ll do for now. It gives me some wiggle room should a slight change of location be needed. Eventually, when I get the welding gear set up over here, it may be replaced with a metal bracket, welded in place. It’s quite possible though that all it’ll end up getting is a more robust cable tie! I also need to spend a little time on the rusty but trusty Suzuki as last time I rode it, the neutral like was flickering at idle - not something it had done before. My first step was to pop the seat off to look at the battery / charging system. I think that corroded battery terminal might be a good place to start…I might get some more project bike work done before the end of July, but the way things are going, don’t bank on it!
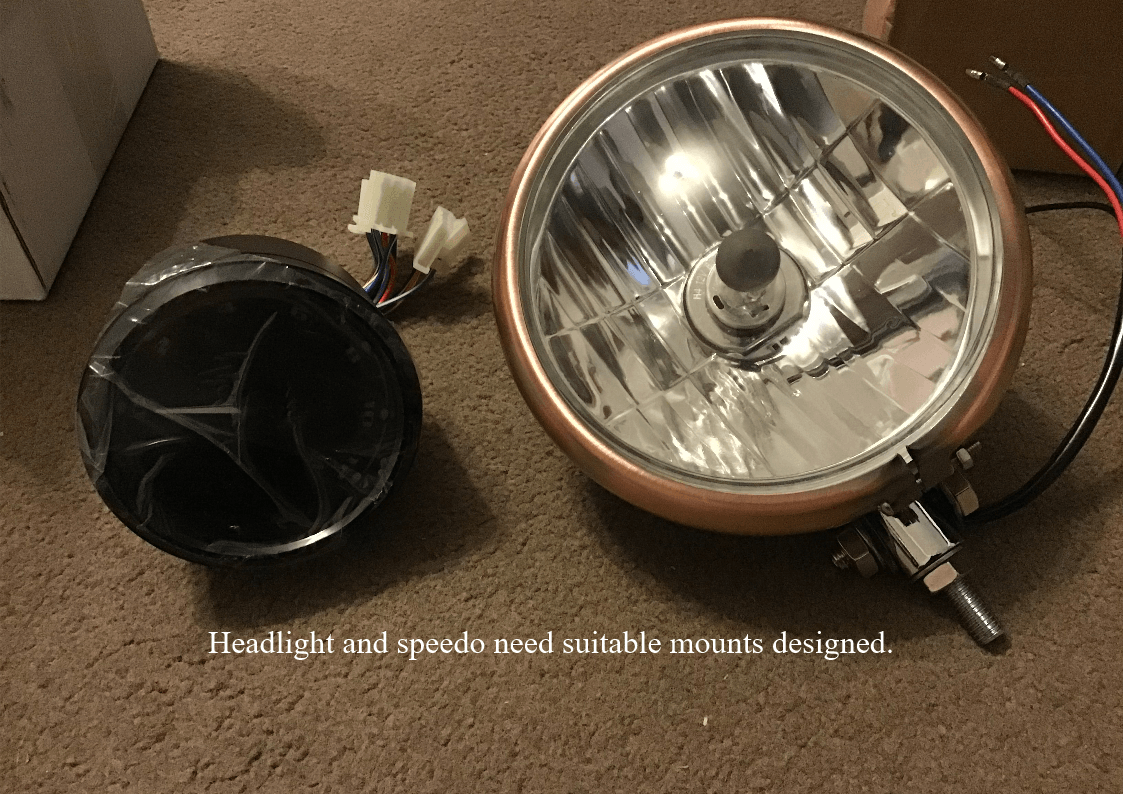
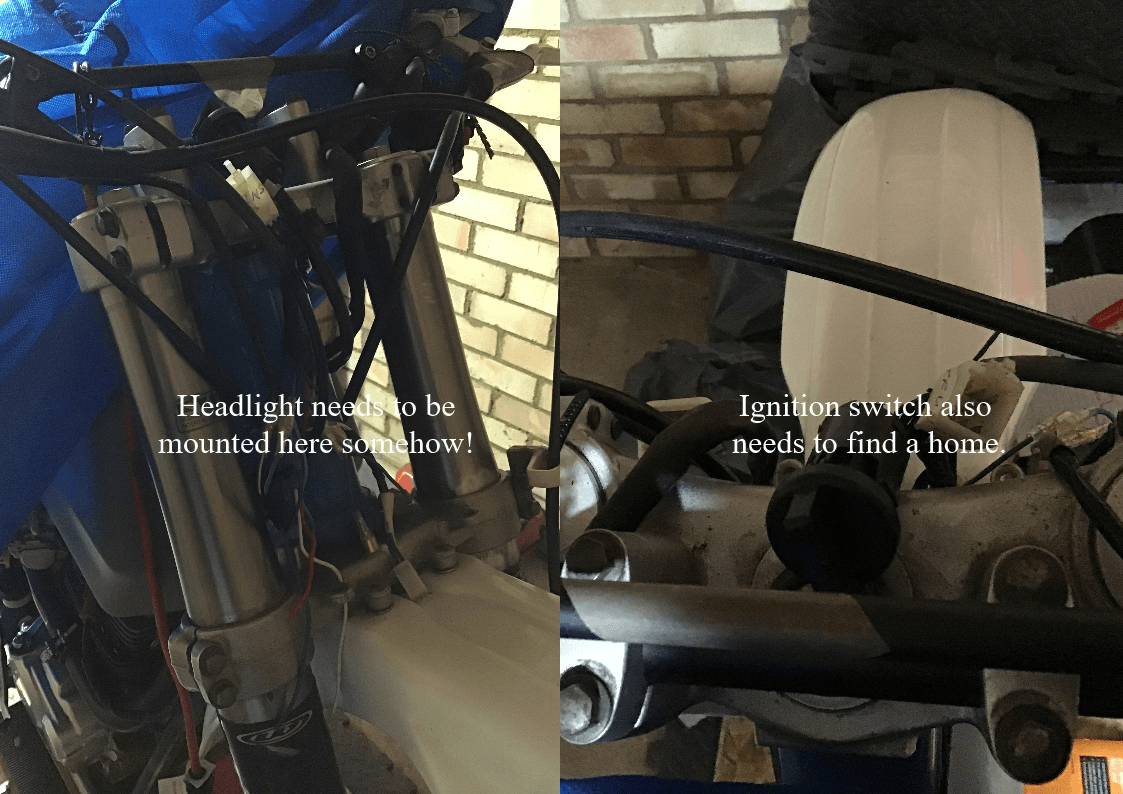
England’s in the grip of a heat wave, so I’m hiding indoors where it’s slightly cooler. I’m putting the time to good use by starting to design the headlight / headlight cowl and also mountings for the ignition switch and speedo unit.
I bought the headlight and speedo some time ago, mostly the criteria was cost (cheaper the better) but I wanted the headlight diameter to be smaller enough to fit between the front fork legs. That narrowed the choice somewhat and the lacquered copper finish wouldn’t have been my first choice, but actually I think it will look okay.
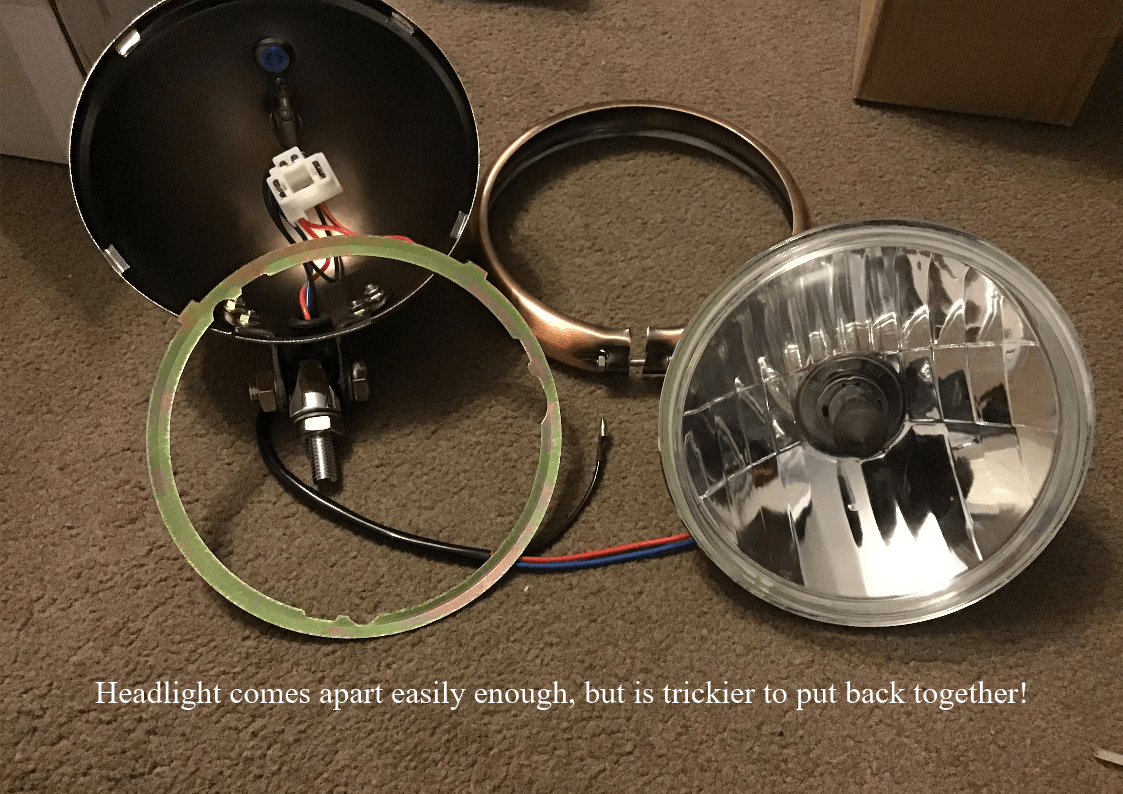
At the moment I’m not sure whether I will use the copper housing or whether I’ll just use the light unit from it and make a new housing. It comes apart easily enough although you really need three hands the put it back together; one to squeeze the retaining bezel, one to hold the nut and a third to turn the screwdriver! Eventually I managed to do it on my own by squishing the bezel between my knees to leave both hands free.
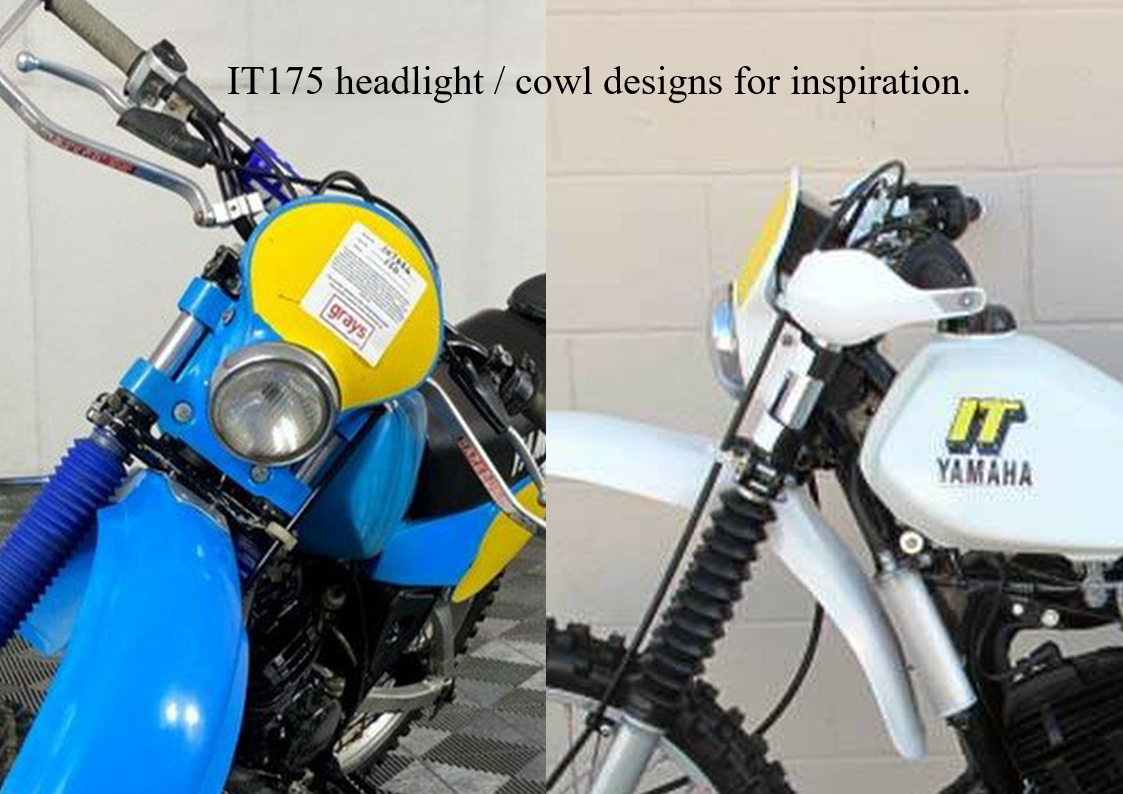
As inspiration, I looked at some pictures of Yamaha IT175s, the bike that I spent many years drooling over in a motorbike book that I had as a sproglet. There are at least 3 different headlight cowl designs over the various models of IT175, but the earliest had round headlights and it’s this kind of look that I’m aiming for.
So, armed with some ideas floating around in my brain, I popped to the garage to take some photos and rough measurements of the bike itself.
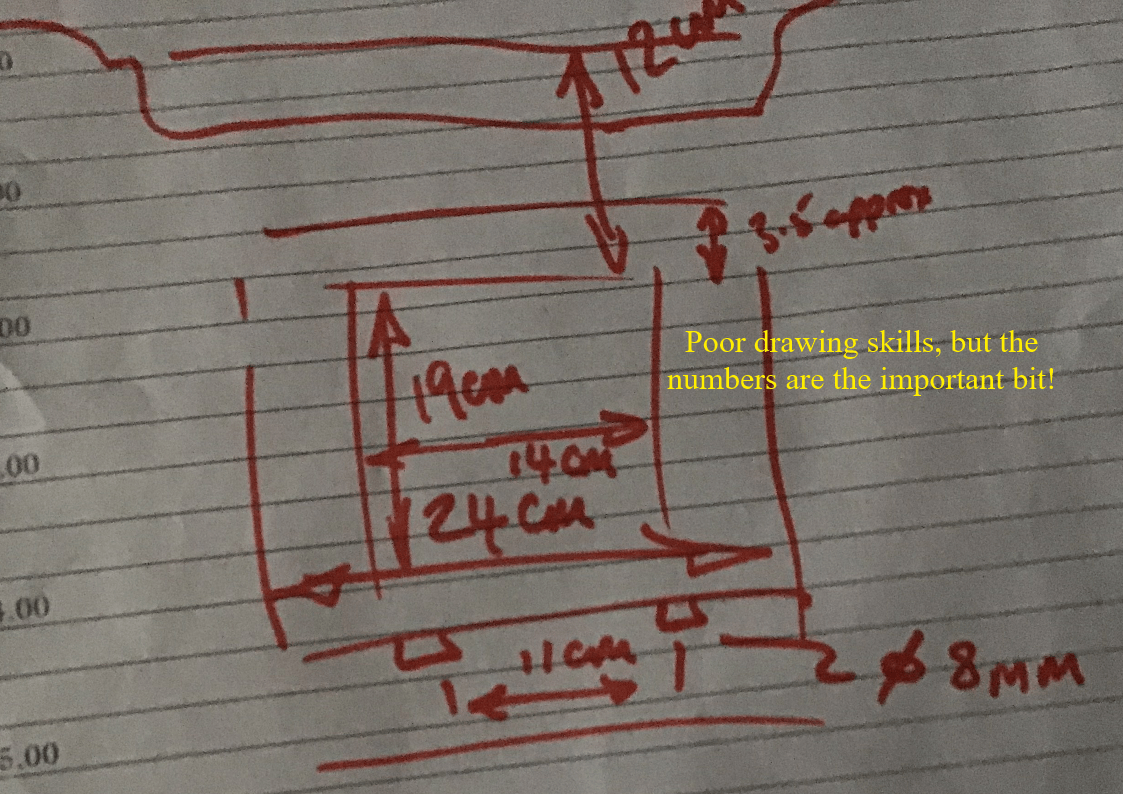
Being someone who has to have something physical to work with, the ideas and numbers have been turned into a basic cowl design which I’ll now 3D print. (It’s going to take a while. It’s too big to print as one unit, so I’ve split it into 4 parts. Each part will take around 7 hours to print.) Once that’s assembled, I can then start to refine the design.