

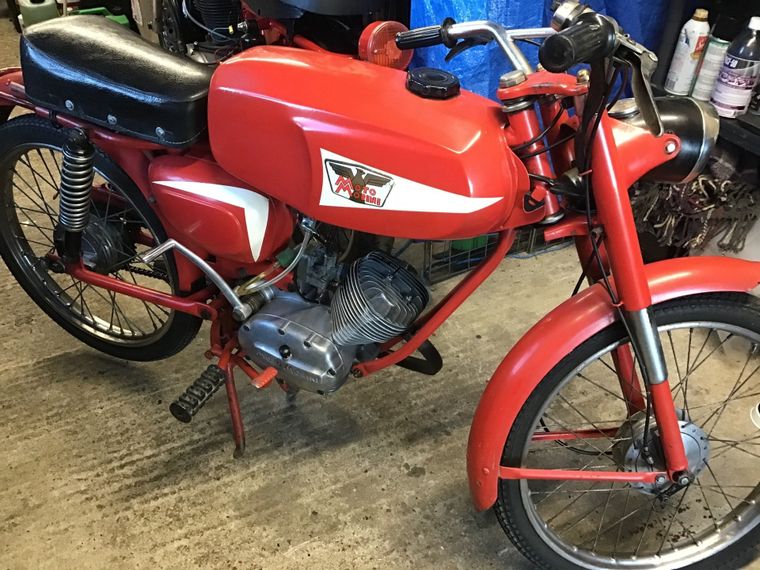
Moto Morini
Corsarino
As well as the project bike currently featured in the Monday Articles, this little Morini has also found its way into the garage. I'd like to be able to potter around on it this summer, but first it needs a little work. The intention is to just get it up and running this year. In the future it may also get a cosmetic refresh. (The paintwork looks much better in the pictures than it is in real life.)
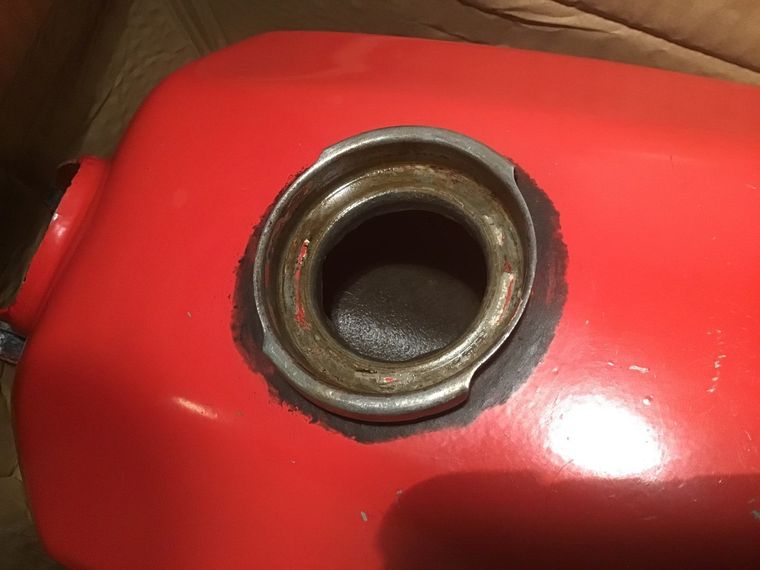
One of the first jobs was to clean out a very rusty petrol tank. This is it after 3 attempts. It's still not perfect, but all of the loose, flaky rust is gone.
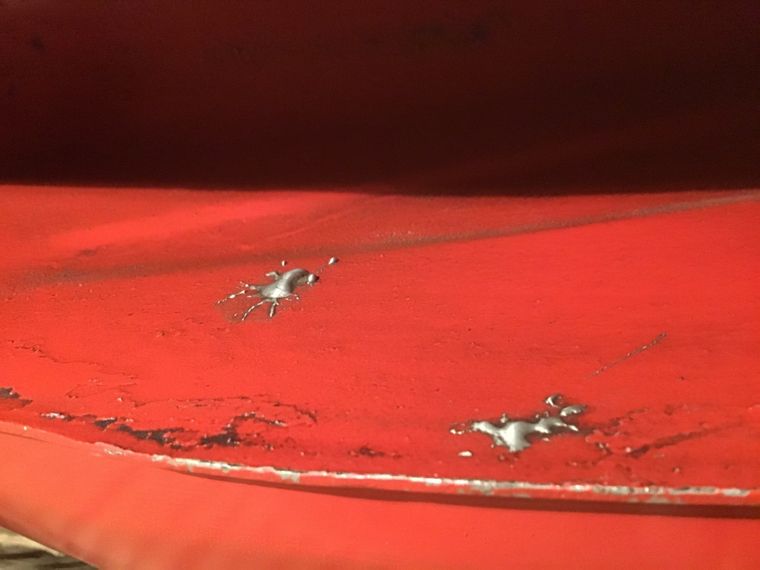
Slightly worrying are these blobs of solder on the tank's tunnel. I don'y know if they've landed there by accident, or if they are sealing pin holes. The tank feels solid and doesn't leak, so at the moment, I'm leaving these alone.
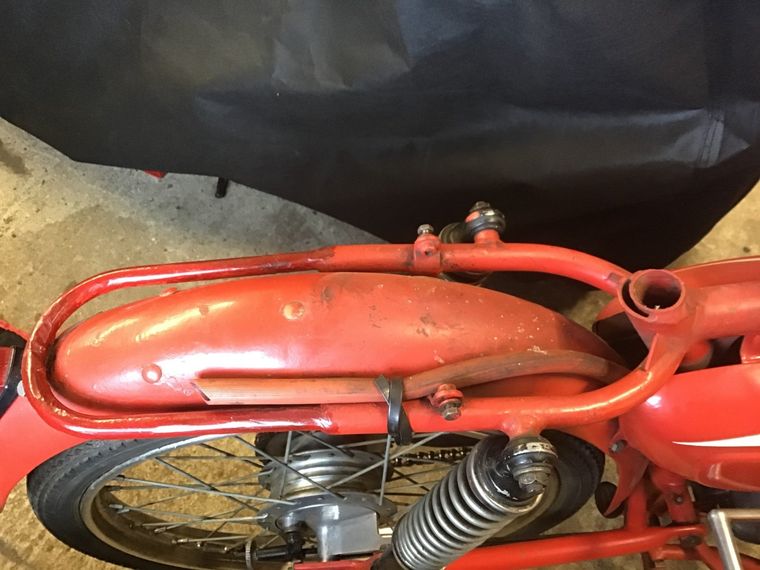
There's also been some kind of repair at the rear here. I think that originally there may have been some kind of rack here that's been removed. Again, although not pretty, it seems solid, so for the moment it's staying just as it is.
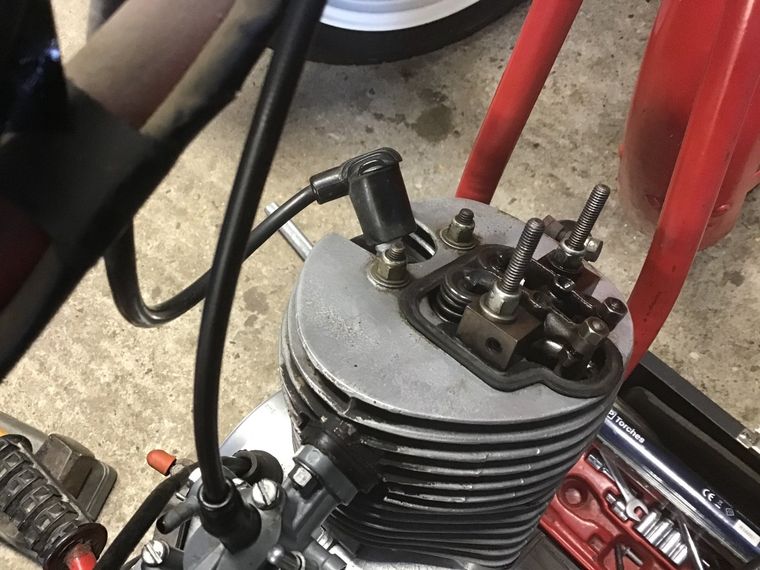
Push rod operated valve gear is new to me, something to learn about, then.
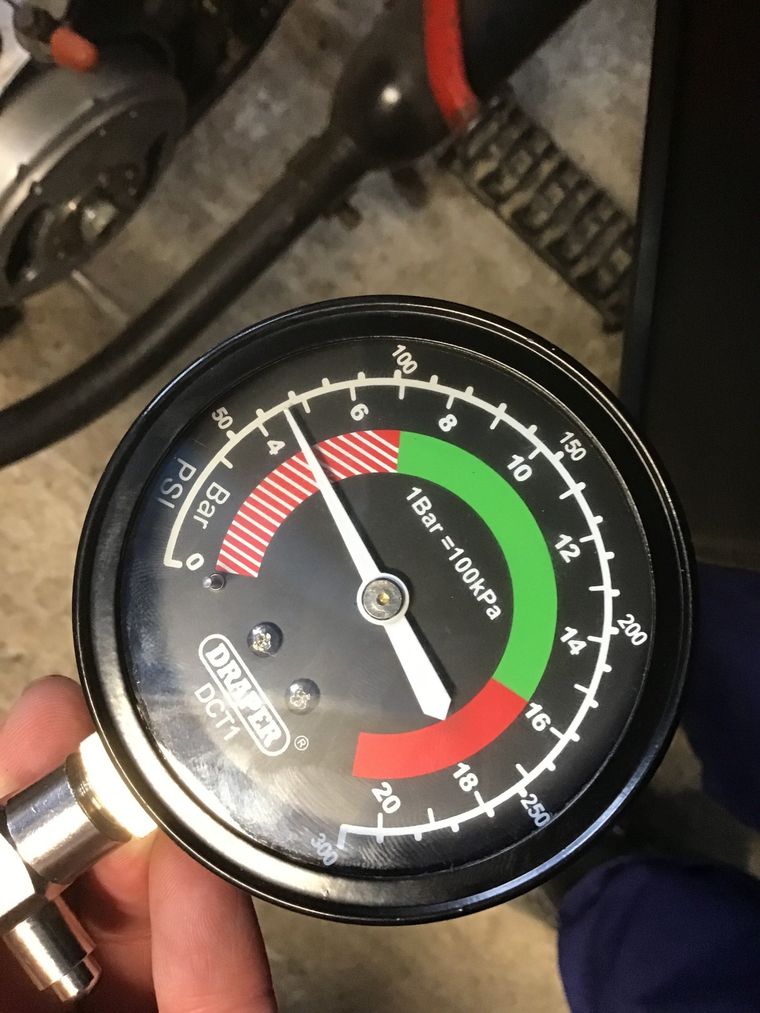
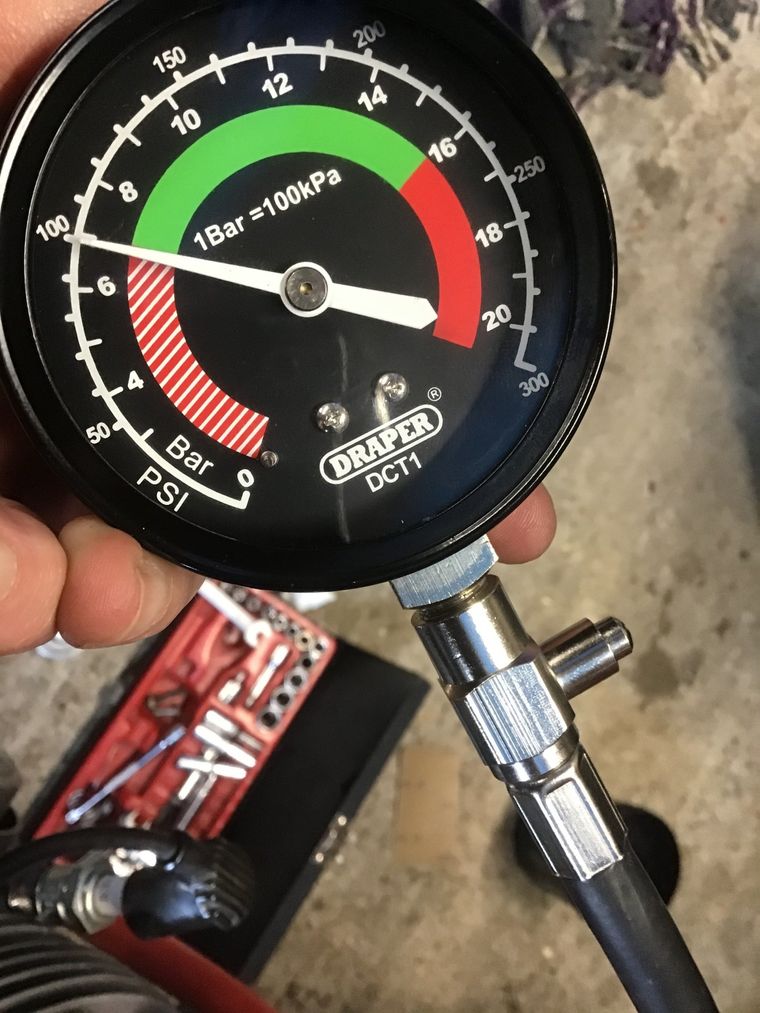
Although the engine will run, it's clearly not in the best of health. A compression test only recorded 70psi and that was with the help of a little oil in the bore to help it seal.
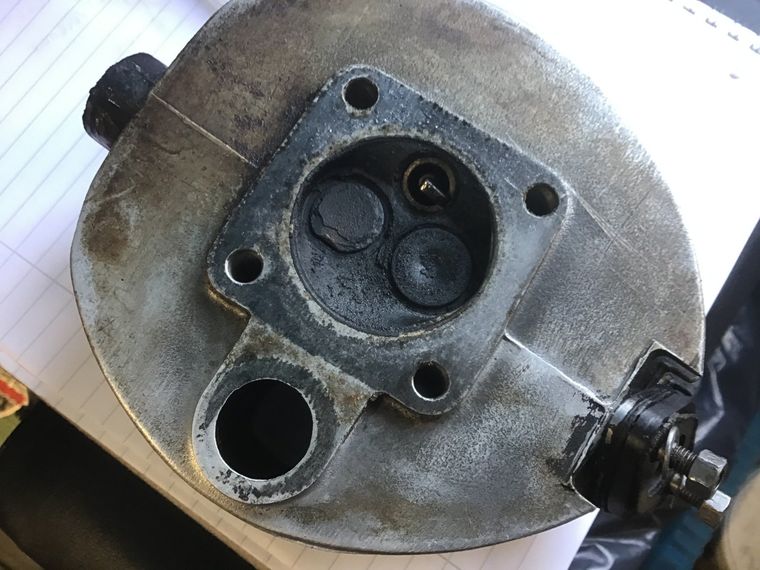
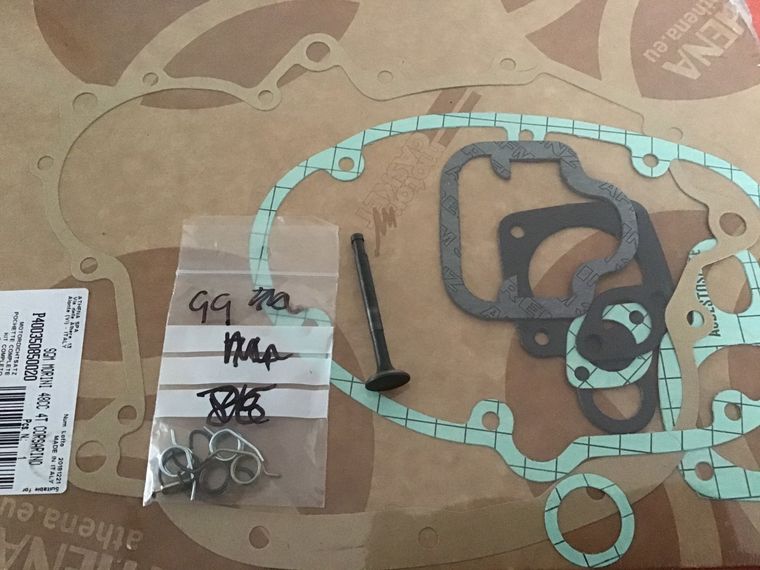
And this is one reason why the compression is so low - damaged exhaust valve.
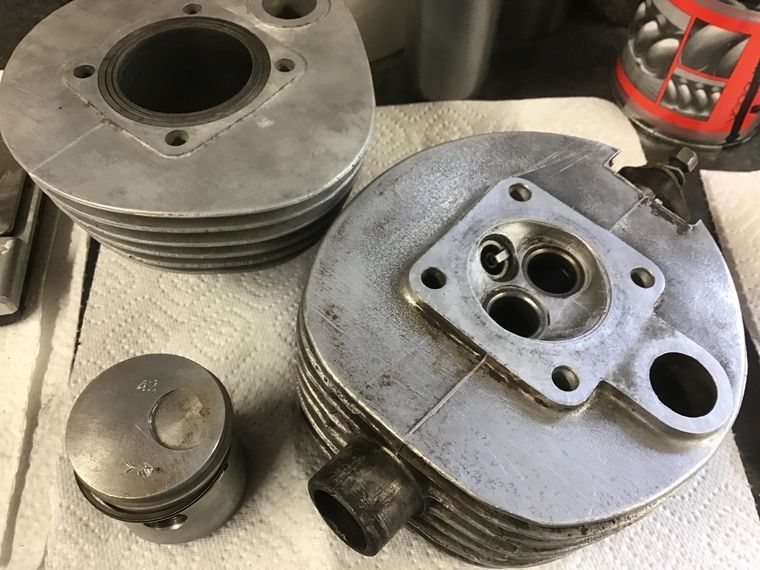
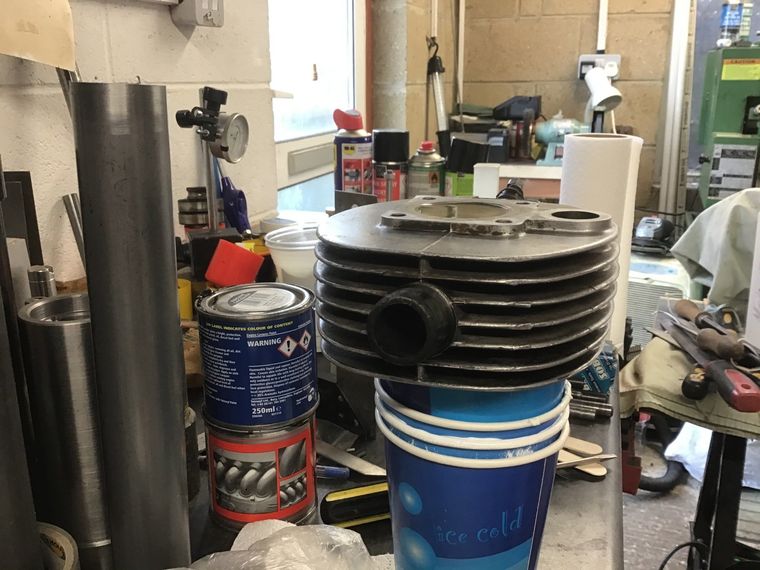
The head, cylinder and piston after a clean up in the ultrasonic cleaner. They look a little better.
Parts have arrived from Italy, hopefully these will make the engine feel better.
More updates as work progresses, but work on this has to fit around everything else, so expect updates to be sporadic...
New exhaust valve has been installed and the head successfully managed to remain leak free overnight, so the engine is now all back together again - and running!!!
Another compression test with the new valve installed yielded 100psi (cold engine) so that's an improvement and the engine runs happily enough.
I've also replaced the broken front brake cable, although as it turns out this hasn't made much difference to the bike's braking performance - must investigate that front brake further. Thankfully, the rear works and I've now had a little ride up and down the drive. Heel / toe operated gear change will take a bit of getting used to. If I can find the time, I'll cobble up a number plate mount and take it for a little spin down the road.
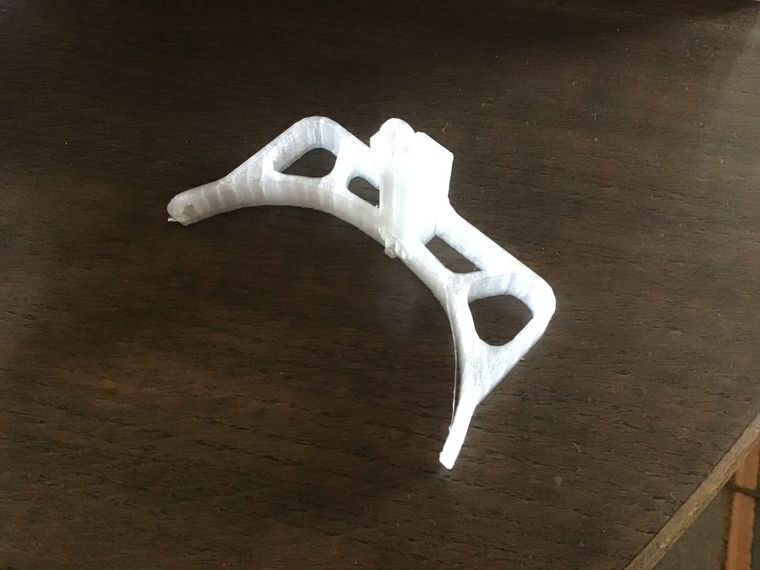
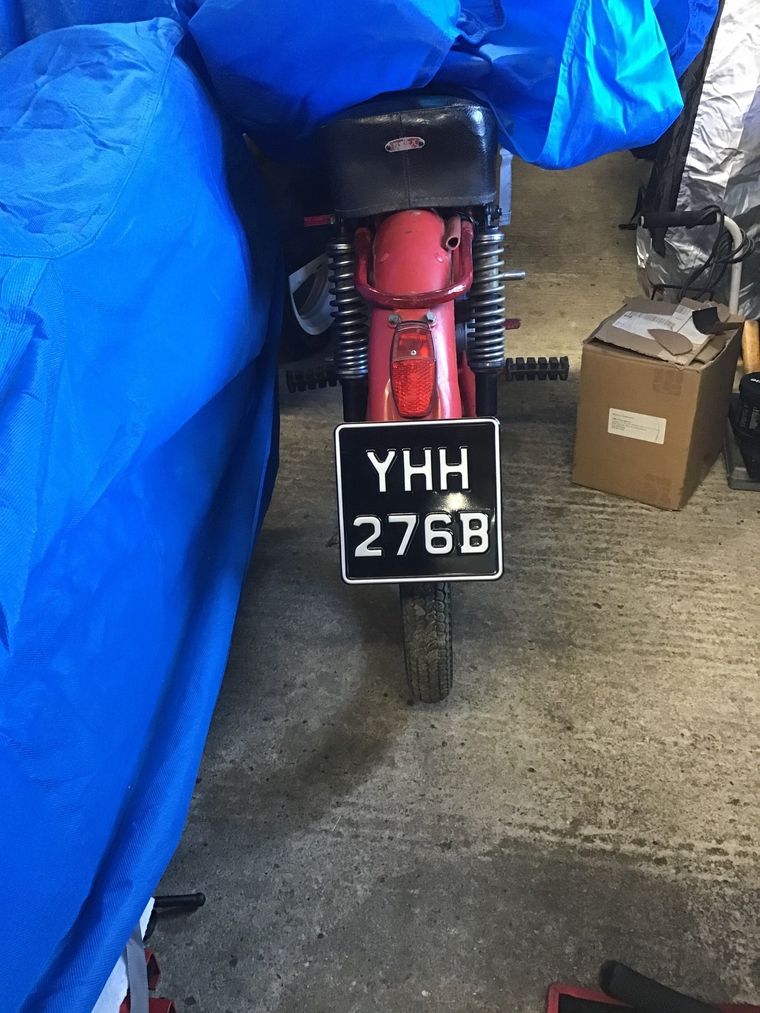
This is the temporary number plate mount, fresh off the 3D printer. There are four holes in the rear mudguard, none of them seem to line up with each other, so all the mounting holes are slotted!
Number plate is on as straight as I could get it! We're all on lock-down because of Coronavirus, so test riding has been confined to up and down the driveway. Engine and gearbox seem fine, but the front brake is shocking.
Front wheel removal to investigate the poor front brake turned in to full front fork dismantling. There's a lot of free play, I don't think the fork design will allow me to remove it completely, but I hope to make it better - nothing seems to be round or straight!
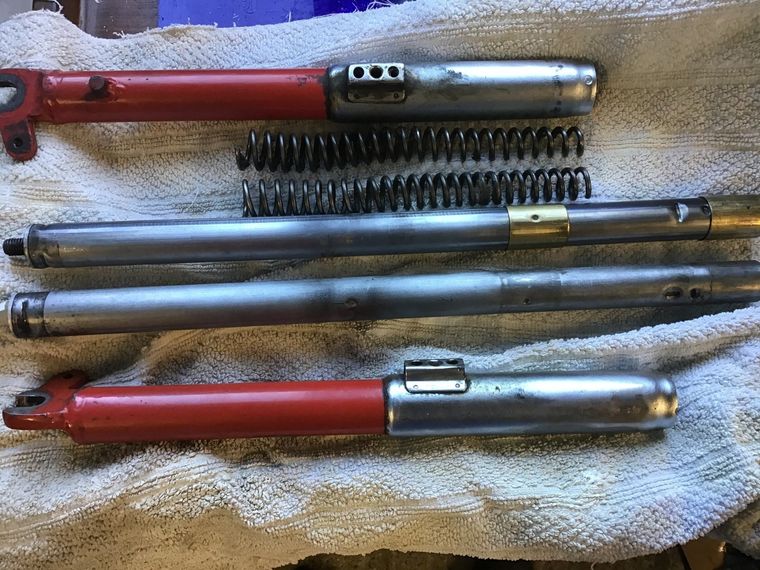
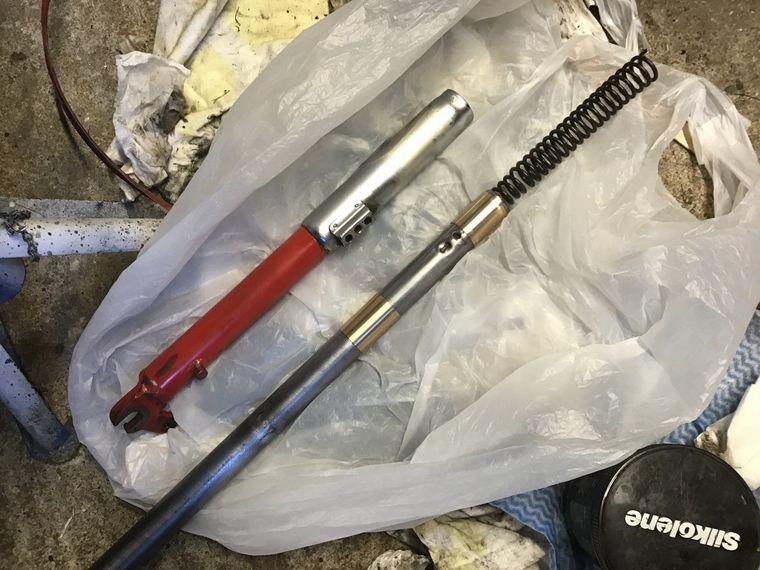
Fork design is interesting. The tapered fork spring is used as a giant screw to hold fork upper and lower together, you screw small end of spring up the inside of the upper part of the fork and the fork bottom screws onto the fat end of the spring. The fork is just spring, there's no damping of any kind.
You can see that I've already removed the bushes from one of the legs, I'm going to try and turn up some new ones.
This is what the original bushes looked like, they were well worn. Turning up and fitting new ones will be an interesting challenge...
Here's the high-tech fork bush removal tool, a piece of nylon machined to the appropriate size and an off-cut of tube to hit it with. Didn't require too much force, the bushes were just dimpled in place. The next picture down shows that better.

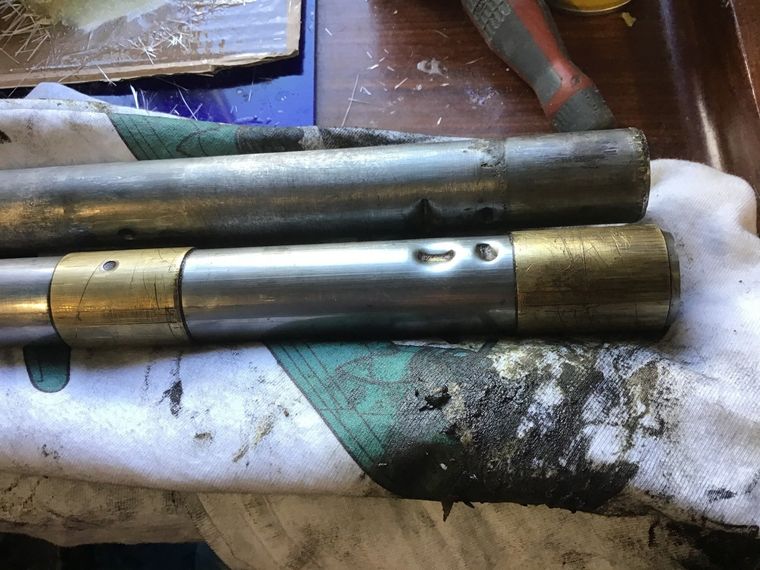
The two fork legs side by side. You can see the dimple in the bush on the bottom leg, and the corresponding dimple in the fork tube on the top leg. I assume, that when originally manufactured, the dimples were put in by press after the bushes were assembled onto the tube. For my new replacements, I'm planning on using the highest strength retaining compound I can find.
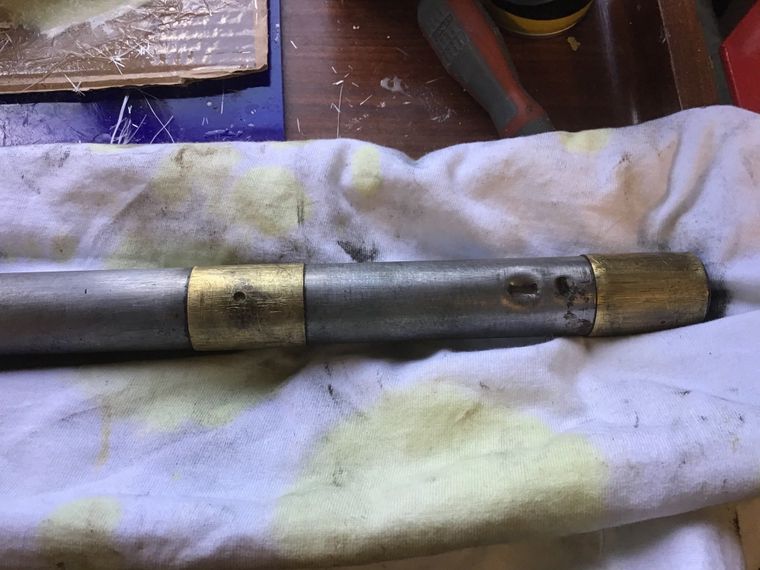
The other marks, to the right hand end of the fork legs, form respectively; a crude thread for the spring to screw into and a stop, so that it doesn't screw in too far.
The other marks, to the right hand end of the fork legs, form respectively; a crude thread for the spring to screw into and a stop, so that it doesn't screw in too far.
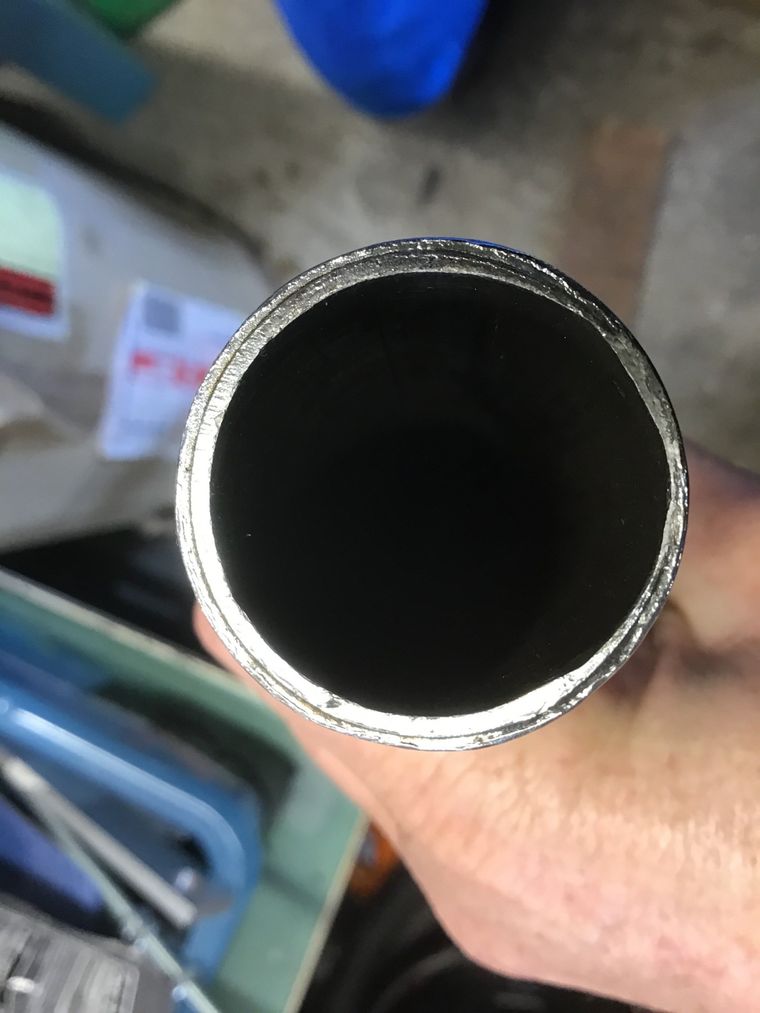
Neither of those upper fork legs were straight, with the worst one being out by around 4mm. This has caused significant wear to the lower fork leg. The picture (below) shows how the right hand side has worn away. It's more obvious if you compare the wall thickness of the tube on the left hand side with the right hand side.
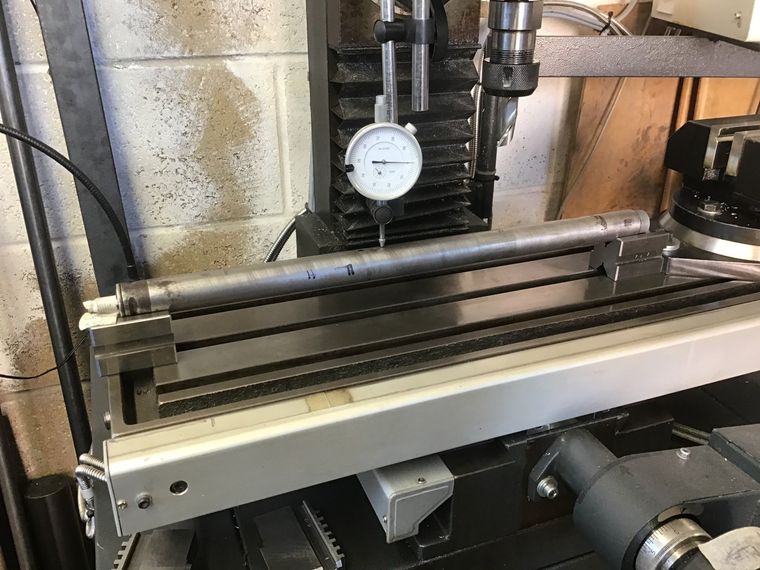
Not the most accurate of test rigs, but it's all I had available. With the aid of a hydraulic press, the legs were straightened to a more acceptable level. They were also not remotely round. They are made from ERW steel tube, which is not perfectly round, even when new, but where the forks have been dimpled for the bushes and the spring retainers, they are a nice oval shape.
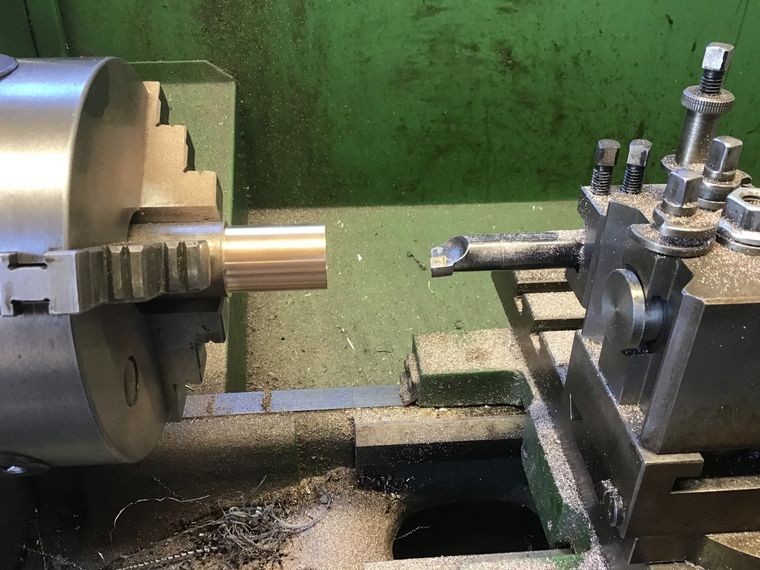
Machining the fork bushes. The inside diameter was bored to size. The outside was left oversize at this stage.
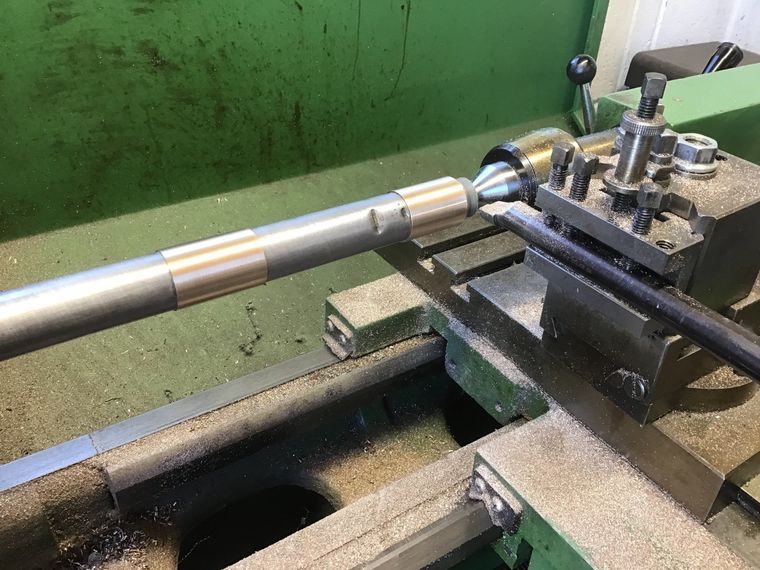
Bushes assembled on the fork leg and 'loctited' in place. A bung was made for the open end of the fork leg to allow it to be turned between centres. Using the centre meant that the fork leg could be removed from the lathe to test it in the fork lower. But, should it need to go back in the lathe, it should 'hopefully' still run true.
Machining this went well until I tried it in the lower fork leg. Despite my best effort, I hadn't managed to completely clean many years of muck out of the lower fork leg. As I tried the leg for fit, the two parts jammed on some remaining grit. They jammed so tightly that when I eventually managed to part upper and lower fork legs, my newly installed lower fork bush was left jammed in the lower fork leg. Cue much swearing!
I put some more 'loctite' on the upper leg, shoved it back into the trapped bush and then left it for a long while. This gave the retaining compound time to fully set and me time to calm down.
I'm happy to report that the fork bush was successfully retrieved from the lower fork leg. In an effort to prevent a repeat performance, I fashioned this tool to remove any burrs and dislodge any grit remaining inside the lower leg.
After the deburring tool came the cleaning tool. Eventually, after several replacement cloths, the fork lower was deemed clean.

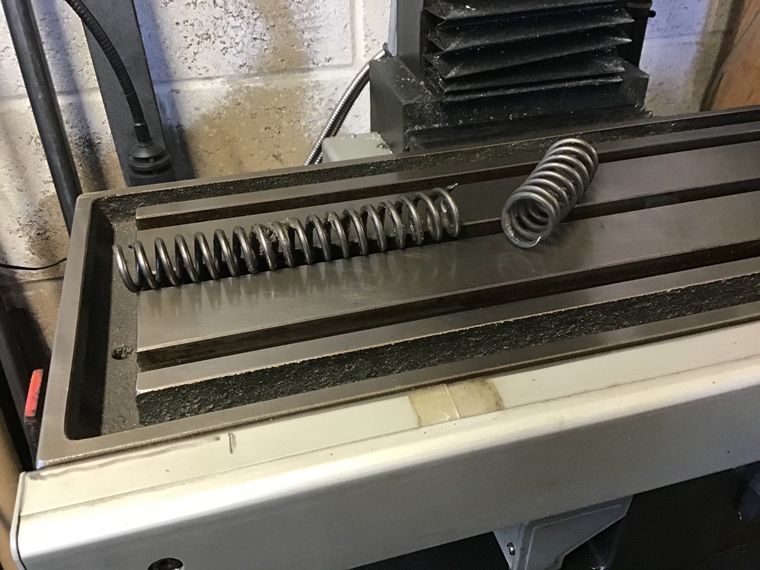
After cleaning the fork leg and skimming a little more off the fork bushes, an acceptable fit was obtained. Time to have a look at the springs, which were a little out of shape. Could I tease them back in to shape? Snap was the reply to that. New springs required!
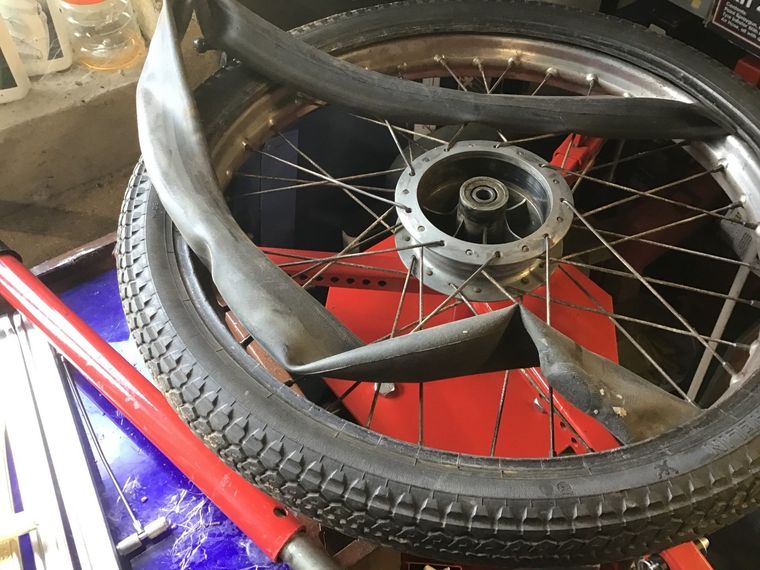
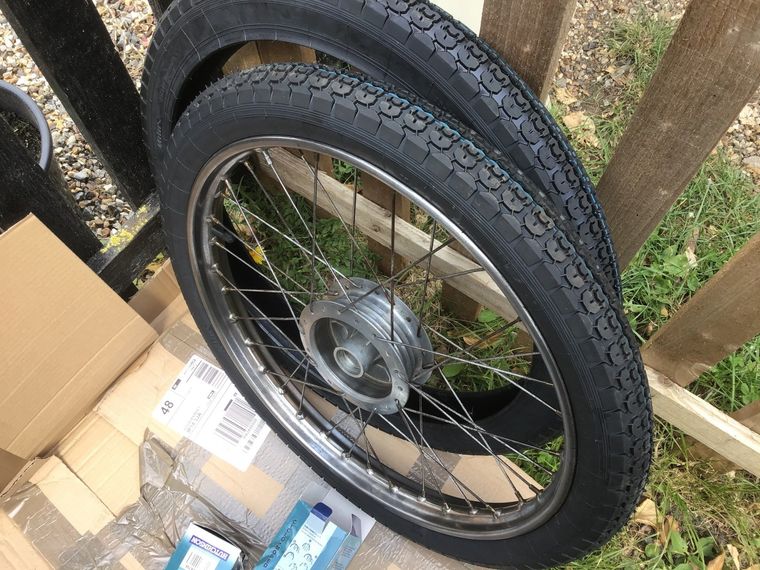
While the front wheel was out, it also seemed a good idea to sort the rusty rim and replace the perished tyre.
I toyed with the idea of using aluminium foil and coca cola to clean the rim, which is supposed to do a good job, but that sounded like too much work to me, so I found a big tray and used Evapo-Rust instead.
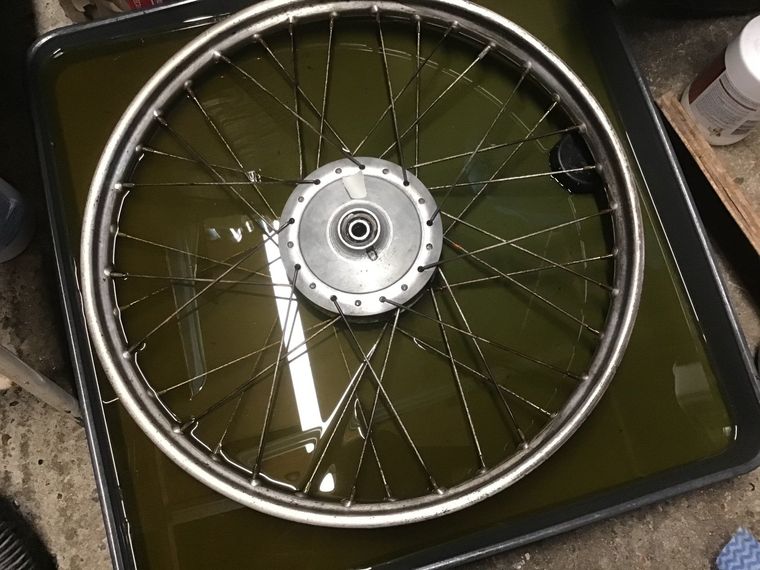
The Evapo-Rust did remove the rust from the rim quite quickly, but the spokes were still rusty. I could have left it longer in the solution, but I noticed that it was dulling the remaining chrome. Not wanting to chance completely ruining the chrome, I decided quit while I was ahead and finish cleaning the spokes by hand.
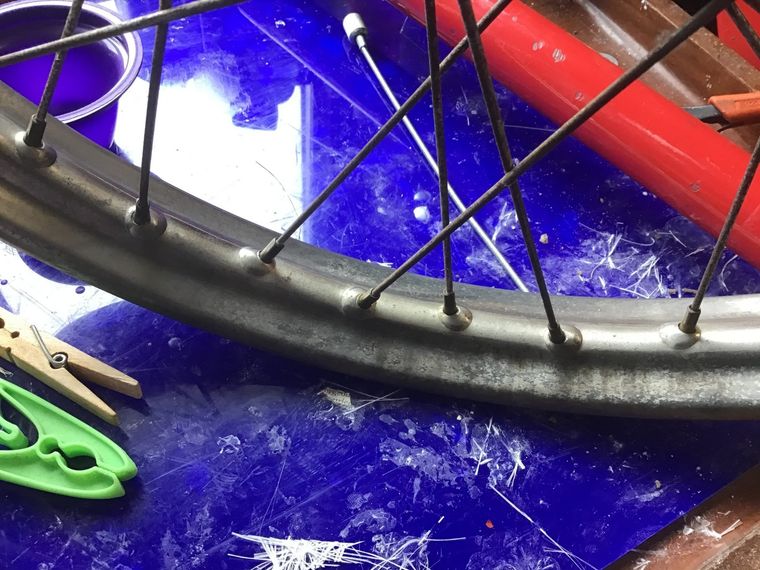
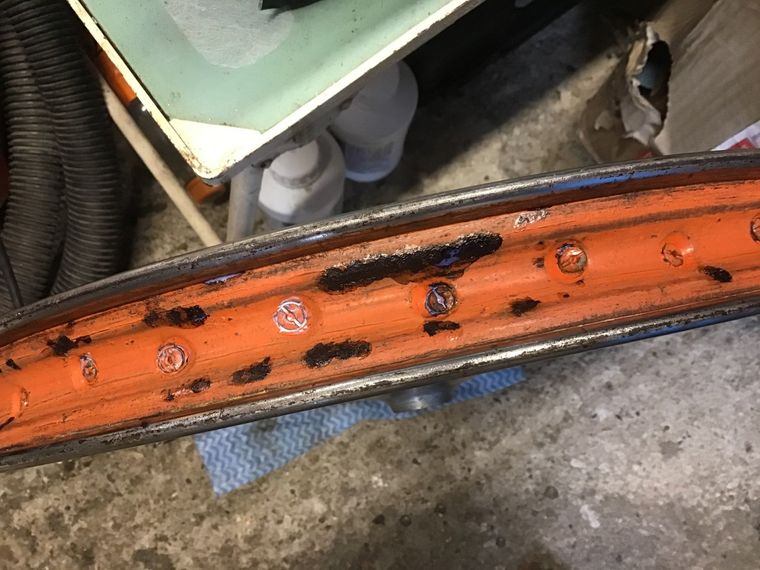
At some point during the last 56 years, a previous owner has painted the inside of the rim, so it is in reasonable order. I chose to just treat any remaining rust spots with Kurust and then repaint them.
With the front end already stripped to this extent, I've decided to go the whole hog and do the steering head bearings as well while I'm at it.
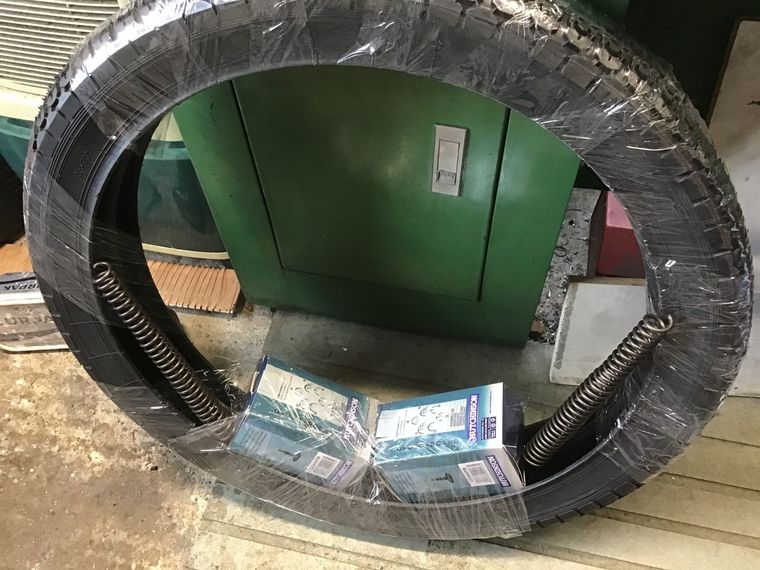
New tyres, tubes, rim tapes and fork springs, time to start rebuilding the front end.
Front tyre fitted. It's been quite a long time since I fitted a tubed tyre - I managed not to pinch the tube!
Wheel rim has been polished using Autosol. The spokes had the coca-cola and tinfoil treatment, which is currently a popular 'home brewed' rust treatment. I just found it messy, although it did make the spokes look a little better. I then polished them with Autosol as well.
Wheel rim has been polished using Autosol. The spokes had the coca-cola and tinfoil treatment, which is currently a popular 'home brewed' rust treatment. I just found it messy, although it did make the spokes look a little better. I then polished them with Autosol as well.
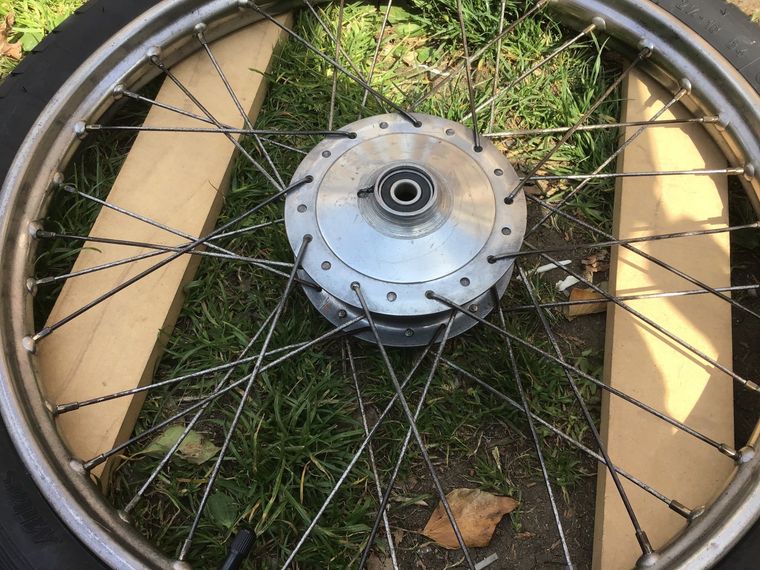
Wheel bearings are next, after remembering to put the spacer in!
New springs, one end screws into the upper fork leg and the other end into the fork lower - it's all that holds the fork together.
Steering head bearings needed a clean and regrease. They're loose balls, many of which tried to make a bid for freedom. I rounded them all up - eventually.
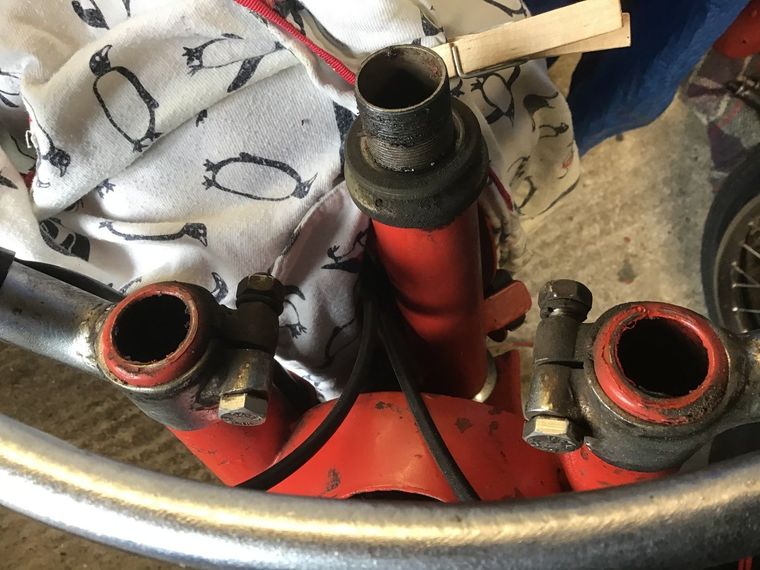
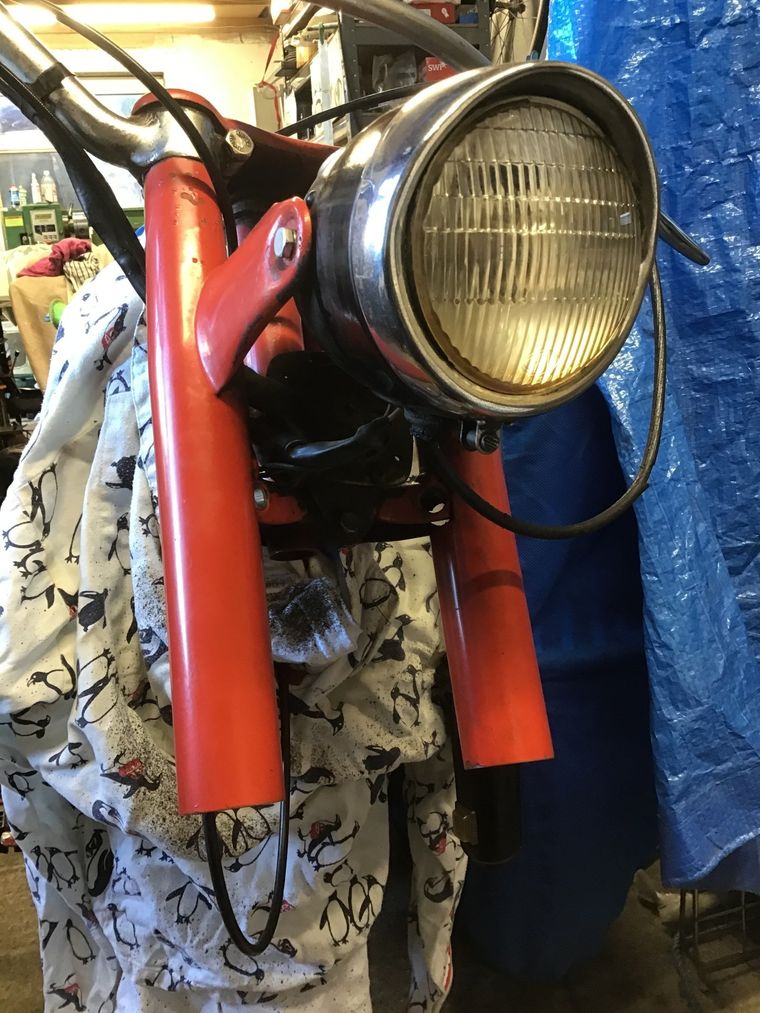
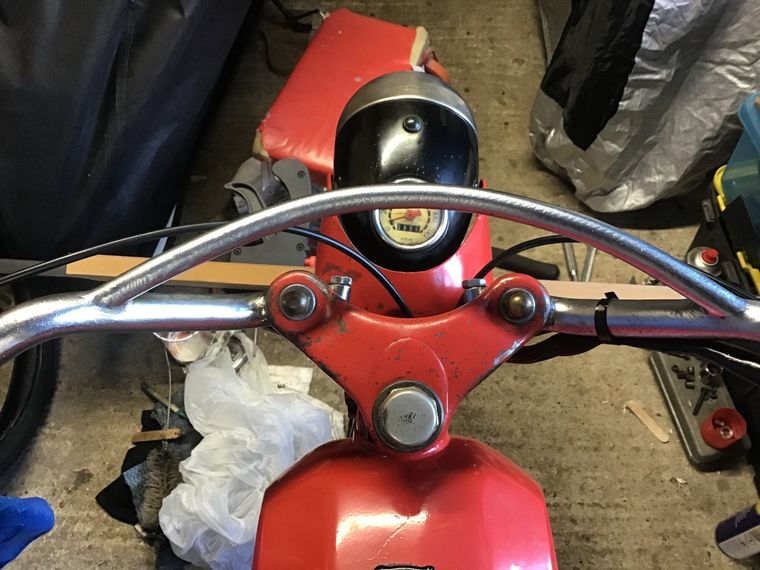
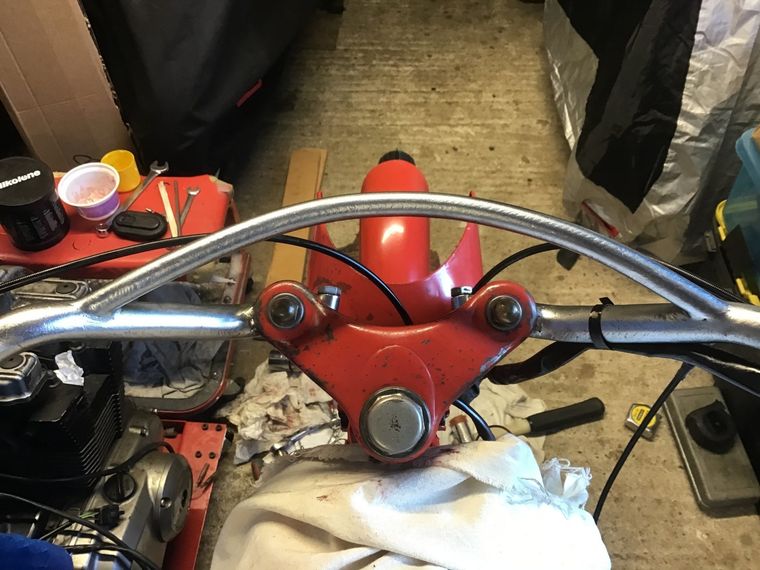
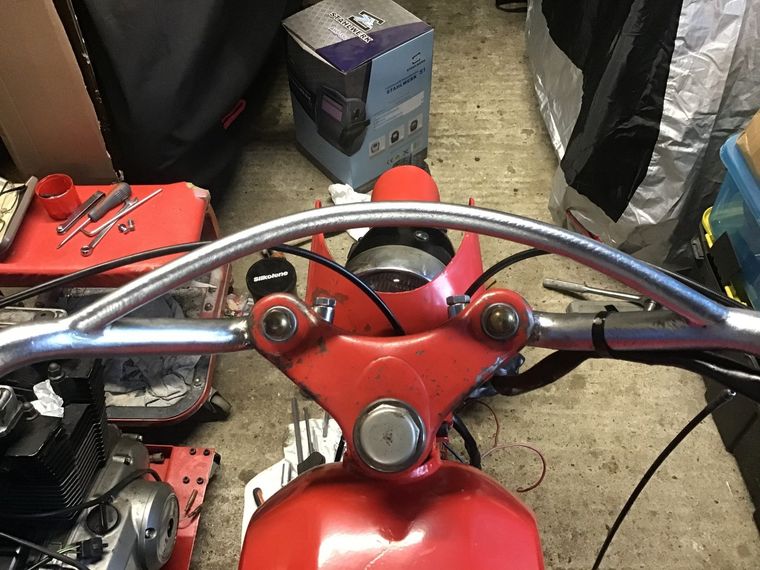
With everything cleaned, checked, adjusted and replaced as required, all that was required was to bolt everything back together. Well, that was what I hoped was going to happen. Sadly, it turned out that the handlebars and front wheel didn't want to point in the same direction. You can see that from the picture below. The wood below the handlebars is resting on the front of the fork legs, it really ought to be parallel with the handlebars, not going off at an angle!
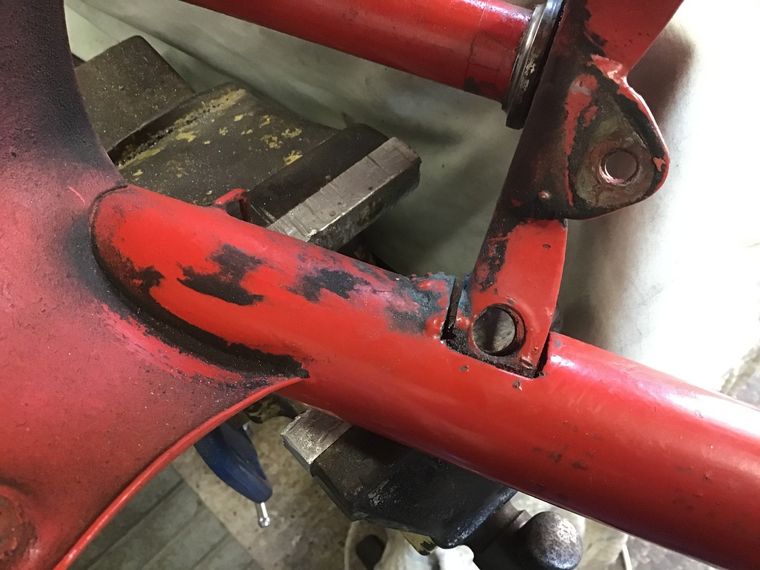
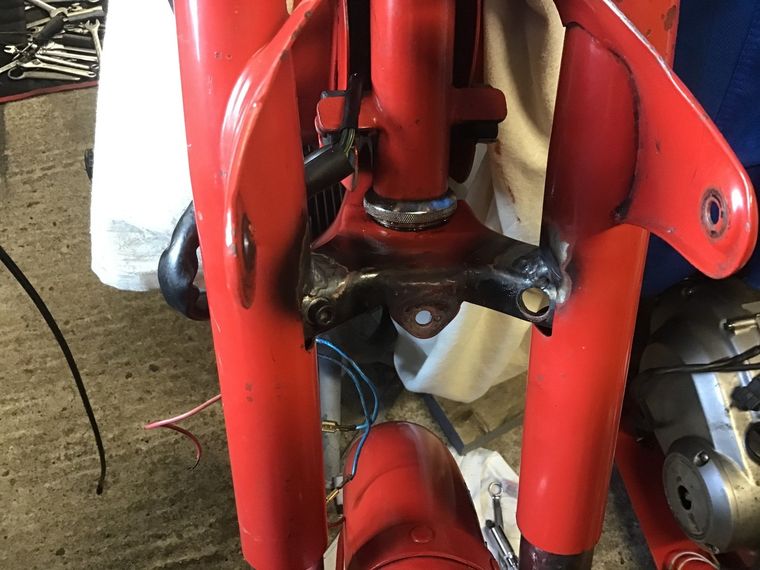
After much head scratching, it seems that the lower triple clamp, fork shroud assembly is the problem. It looks as if it's already had a repair sometime in its life. The rest of the factory made welds are very neat, much neater and tidier than this one, so I think that the fork has been damaged and repaired. It probably also accounts for why one of the fork legs was bent. It's all got to come apart again...
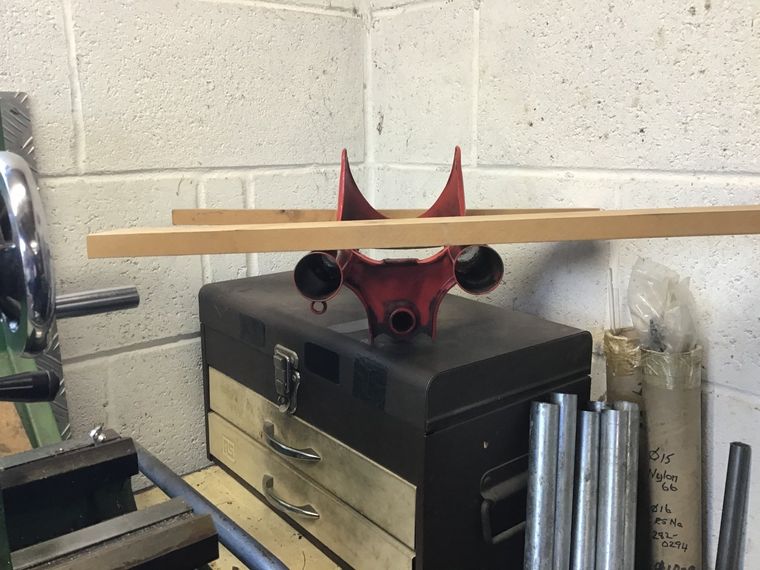
With the lower fork clamp removed from the bike, the two bits of wood highlight that something isn't quite right.
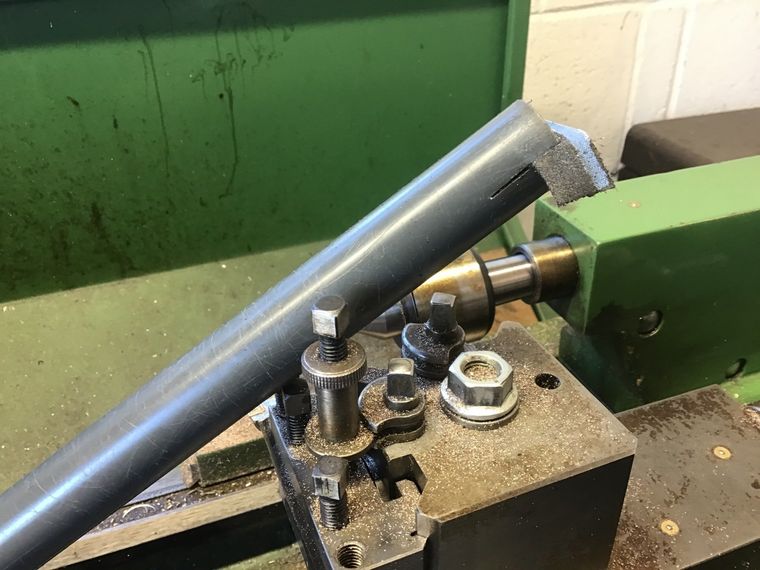
To correct this, the weld between fork shrouds and yoke needs to be cut and rewelded. The weld is awkward to get to and the only cutting tool I have that will fit is a bare hacksaw blade.
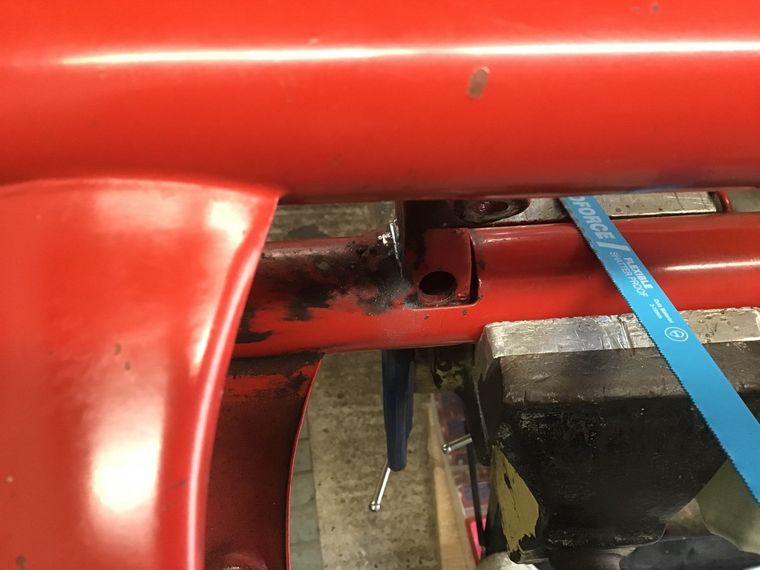
It took a while, but eventually the welds were cut both sides.
After tidying up the cut welds, the front end could go back together.
Some aluminium sheet was used at the bottom of the shrouds, to space them around the fork leg.
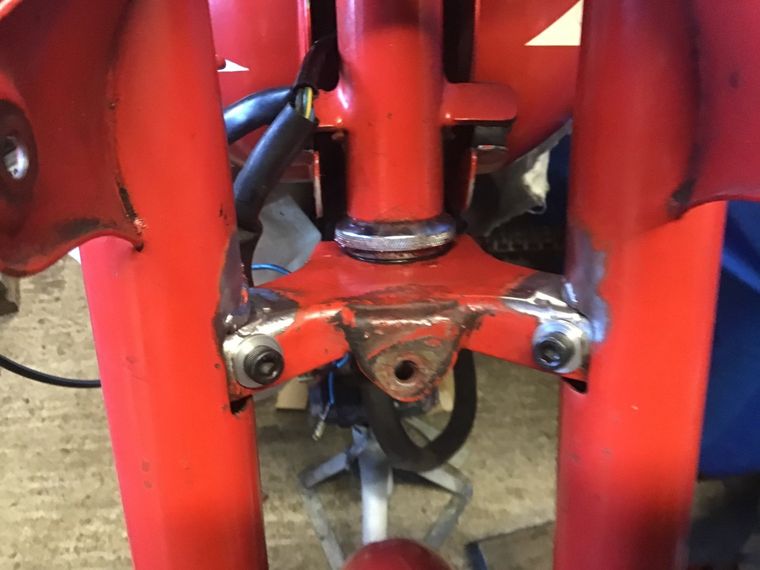
Now everything can be made to line up, with the front wheel pointing forward. Next up will be getting the shrouds and yoke welded back together again. Hopefully, the wheel will still be pointing in the right direction...
Yoke and shrouds joined together again. Not my finest welding, but it'll do for now.
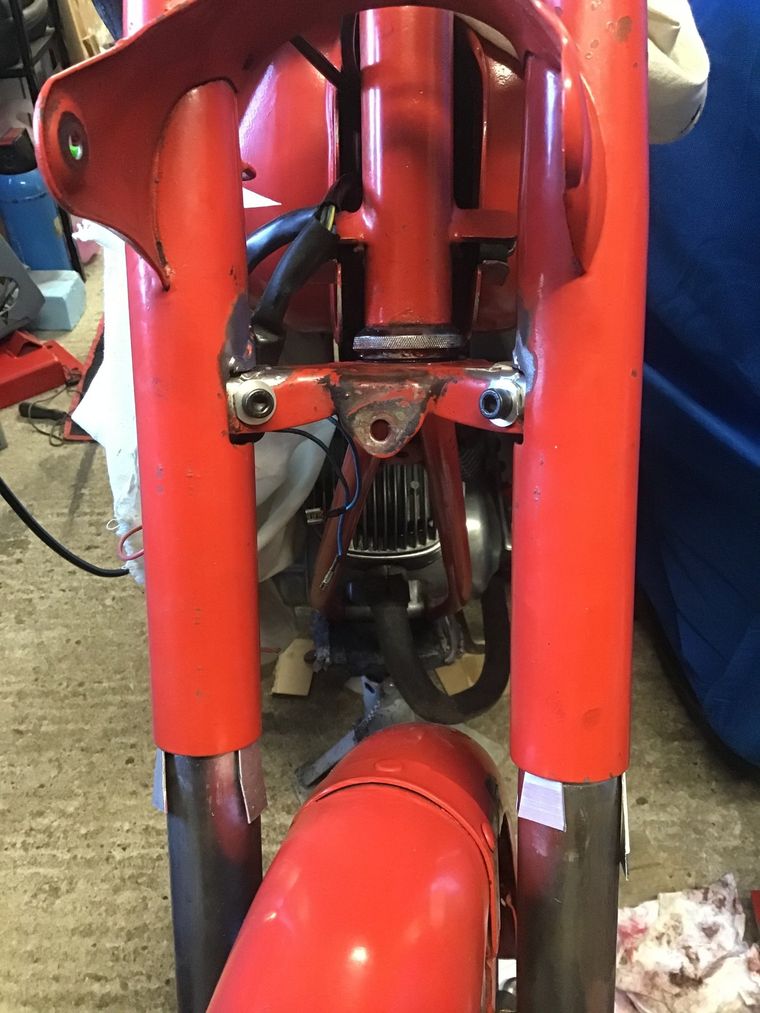
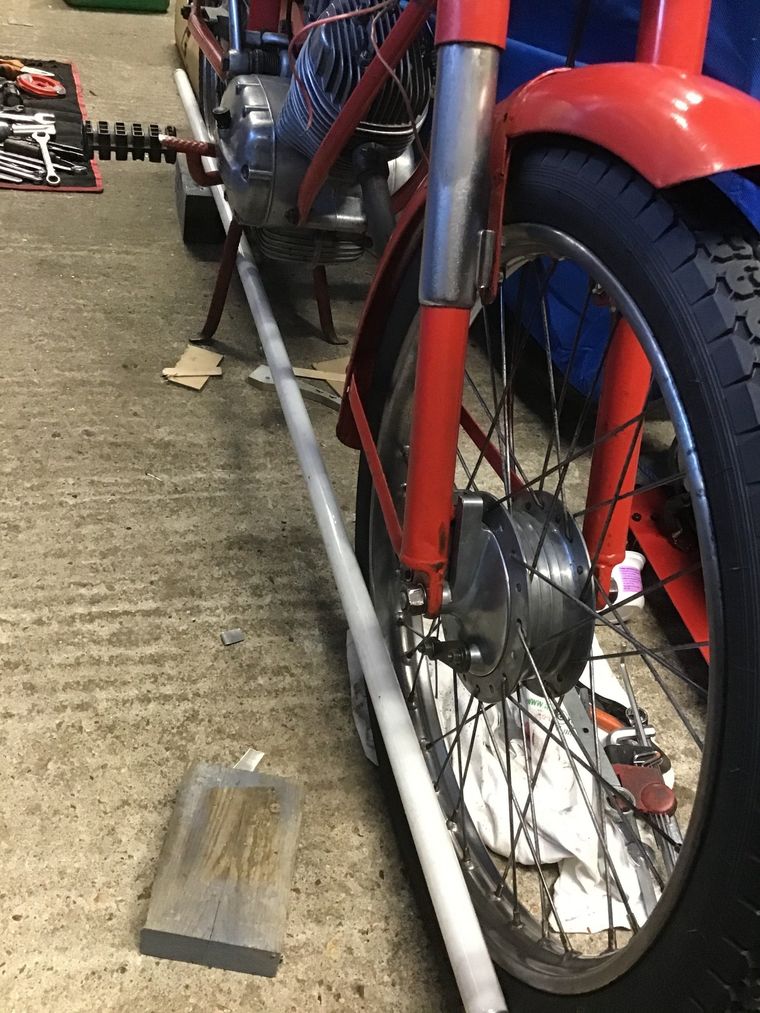
Wheel and handlebars still point in the same direction - which is good!
The fluorescent tube of straightness also says that the wheels are in line - which is also good!
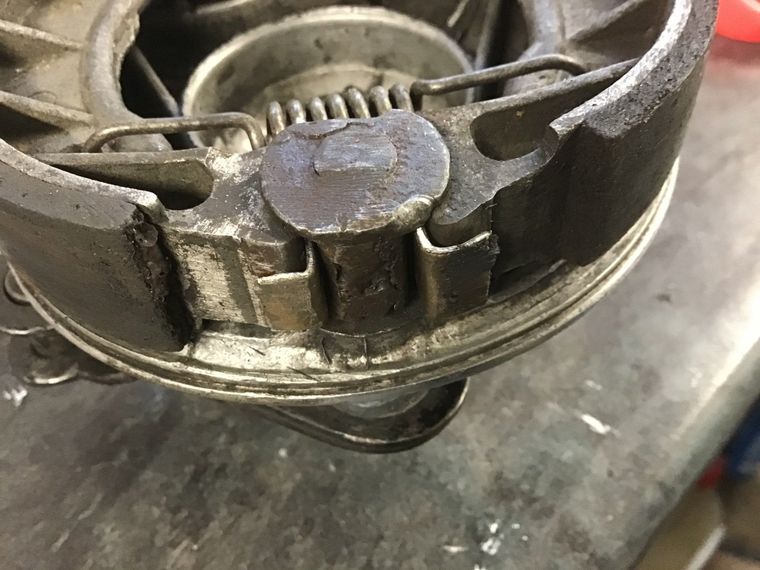
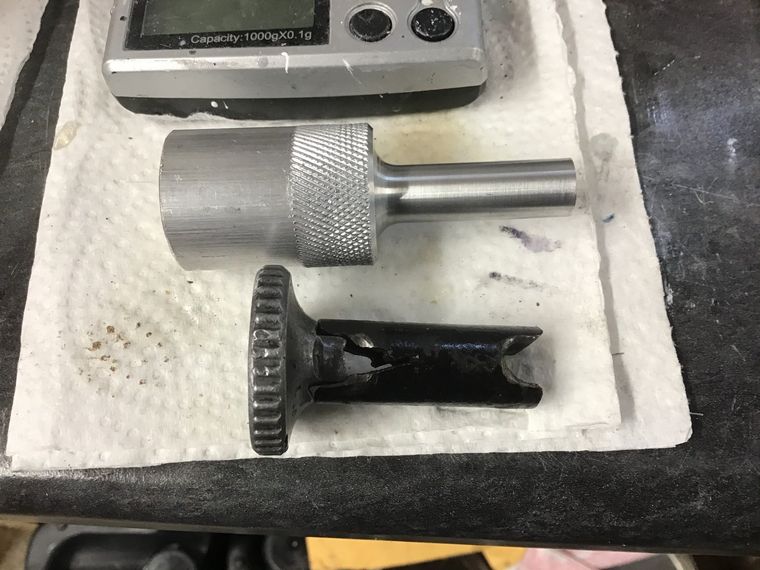
But the state of the front brake's actuating cam is not good.
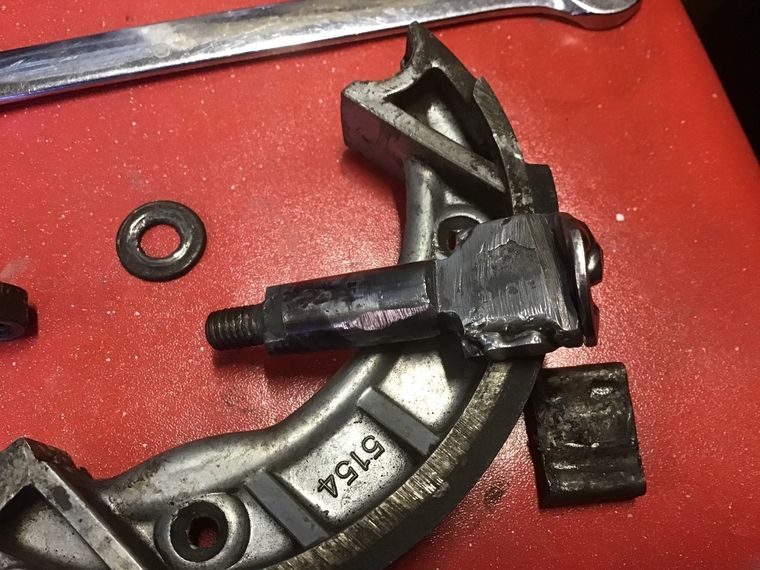
Manufacture of a replacement is underway...
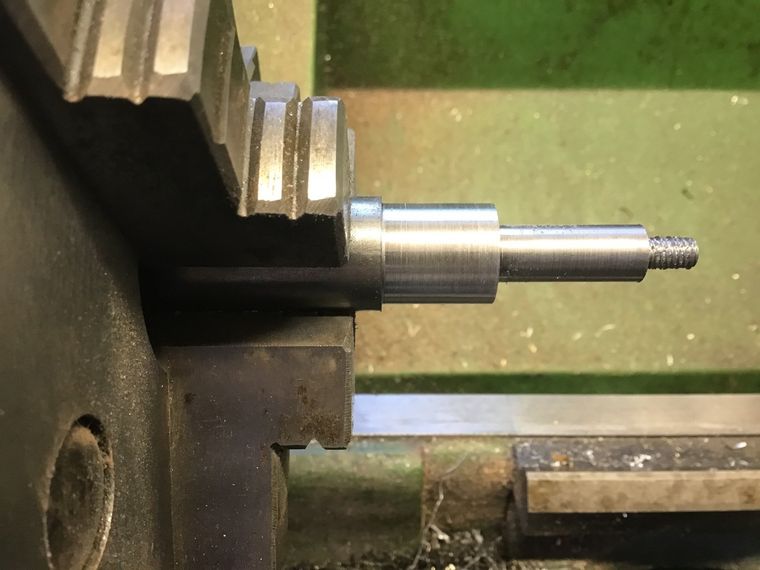
Drum brake cam fresh off the milling machine after having the flats machined.
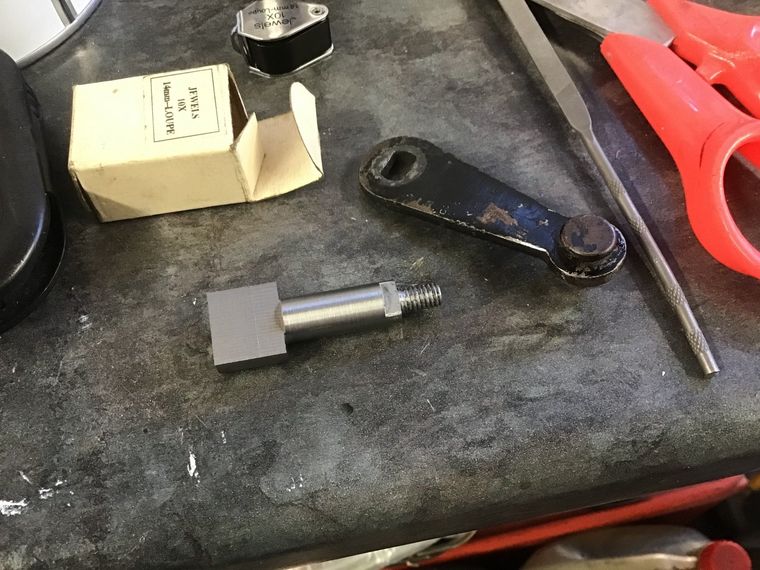
Finished off with a thick washer welded to the top.
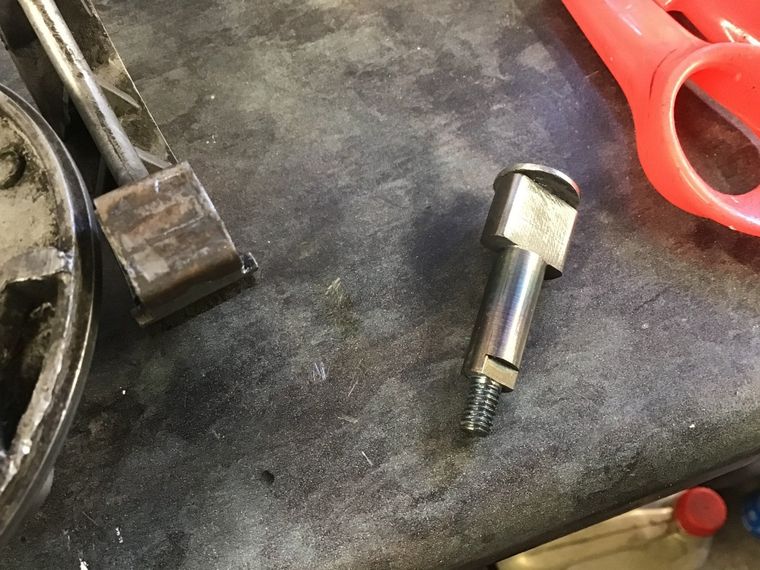
... and it fits!
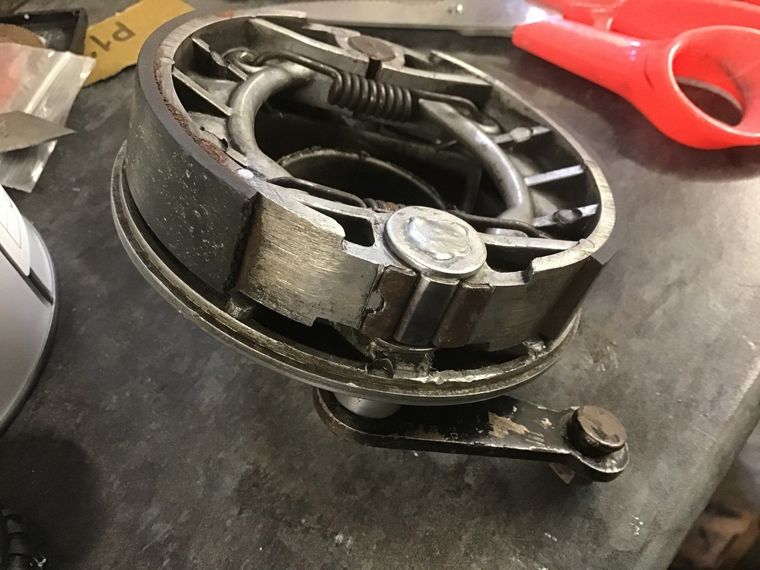
With the new brake cam fitted, the front end can finally be bolted back together and it's time to look at the back end of the bike.
Unsurprisingly, the rear brake was in a similar state to the front one. Time to make another new cam.
Unsurprisingly, the rear brake was in a similar state to the front one. Time to make another new cam.
New brake cam made and new brake shoes for good measure.
Rear wheel also was subject to the same cleaning, rust treatment and new tyre and tube, just like the front wheel.
Rear wheel also was subject to the same cleaning, rust treatment and new tyre and tube, just like the front wheel.

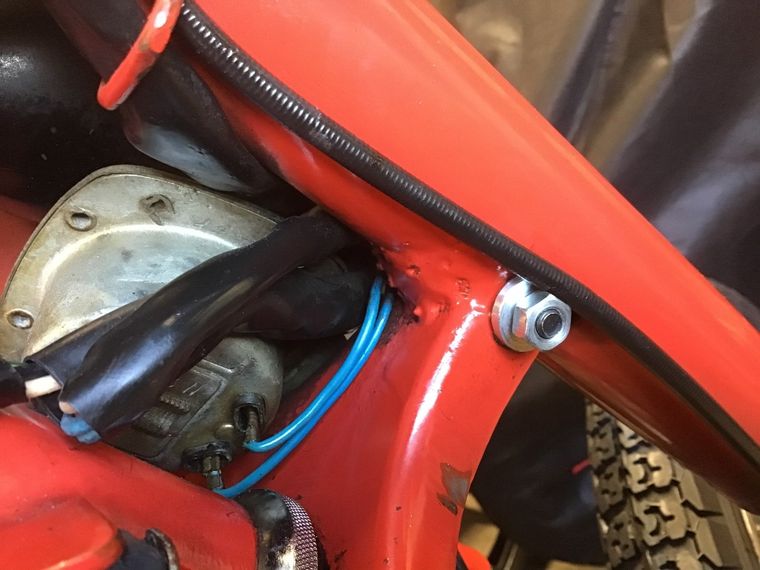
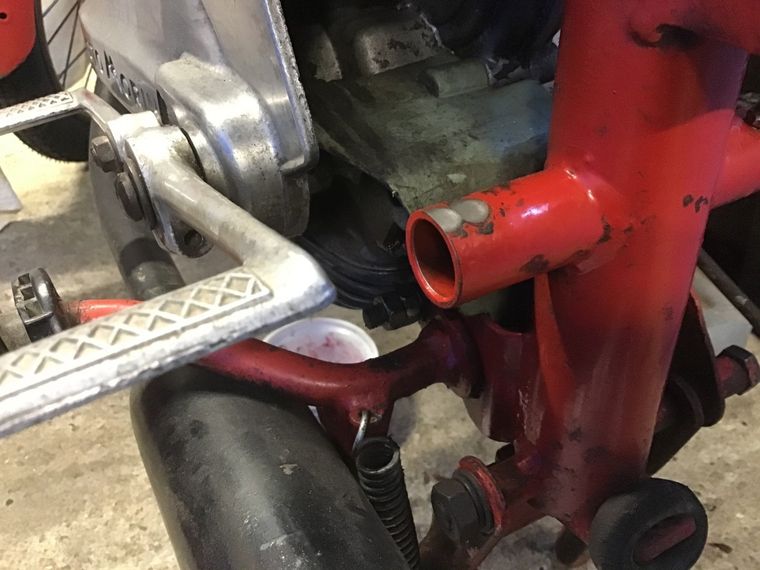
With the swingarm removed fro cleaning and reagreasing, wear marks from the chain were visible on the frame. To prevent this from happening in the future, some acetal sleeves were machined and fitted.
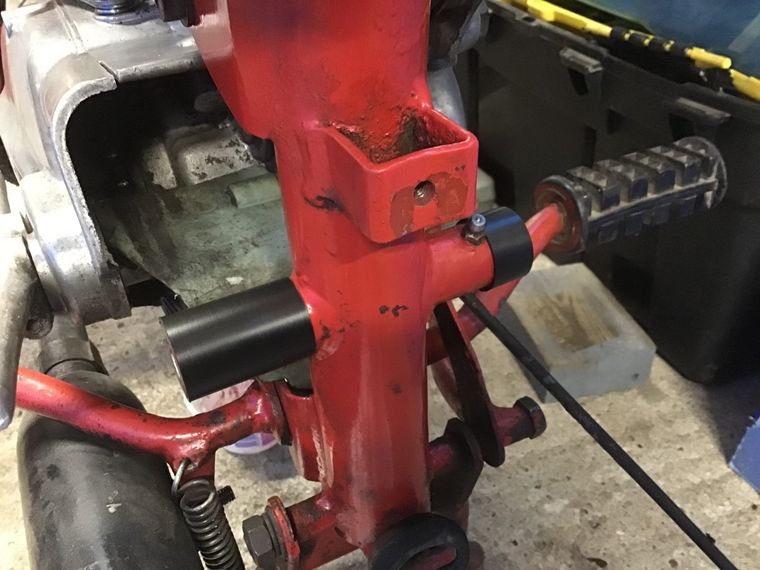
Here they are, one to protect the frame from the chain, and one to protect the frame from the rear brake lever.
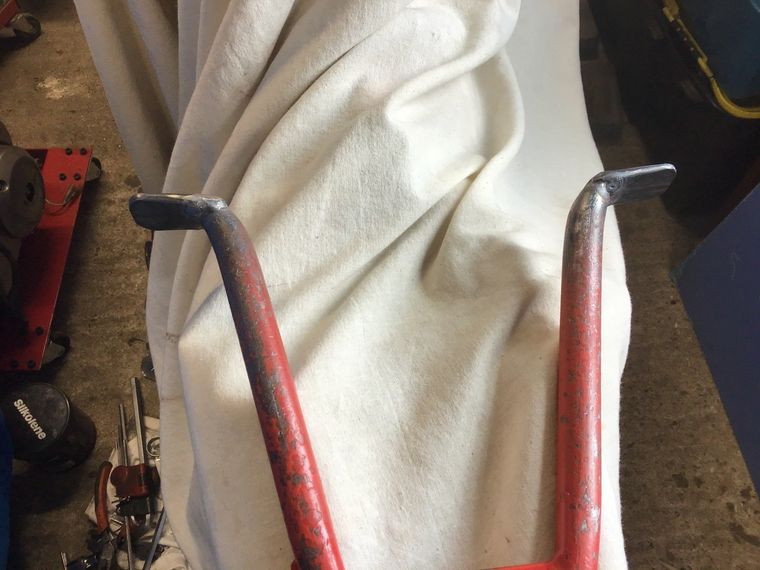
Centre stand feet were badly worn away, so some replacements were made and welded on. These are slightly bigger than the standard ones, but I don't think they'll get in the way - unless I get it really laid over when cornering.
Rear brake adjuster wasn't very pretty, so I made a new one of those as well.
With the brake adjuster finished, and a new pair of shocks (temporarily fitted while the originals are refurbished) the bike could go back together. It'll need a new chain and sprockets soon, but the current ones will do for now.
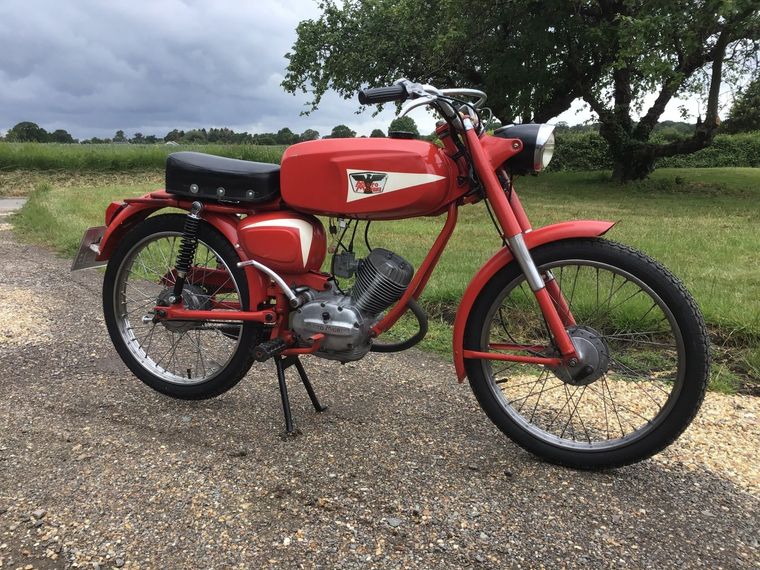
Here it is ready for a test run. Pictures make the paint work look much better than it is, but it'll have to wait until next year for a full cosmetic makeover.
Here it is ready for a test run. Pictures make the paint work look much better than it is, but it'll have to wait until next year for a full cosmetic makeover.
There's a gear here somewhere!
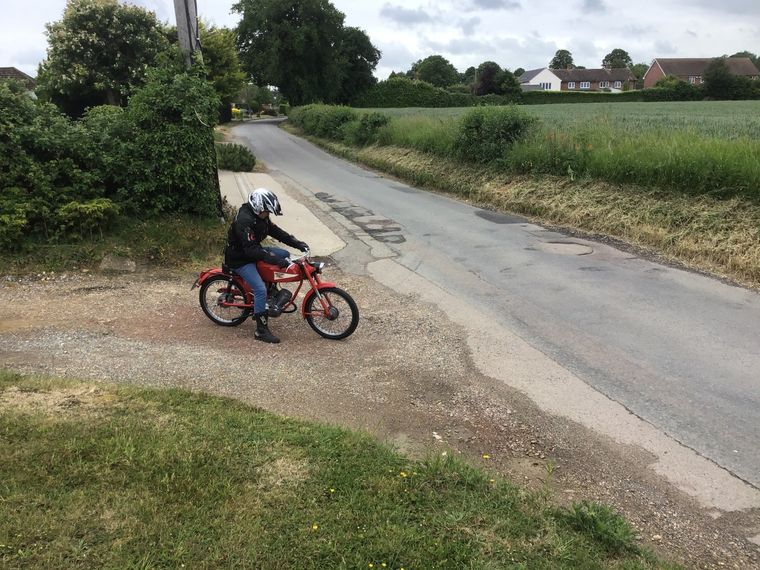
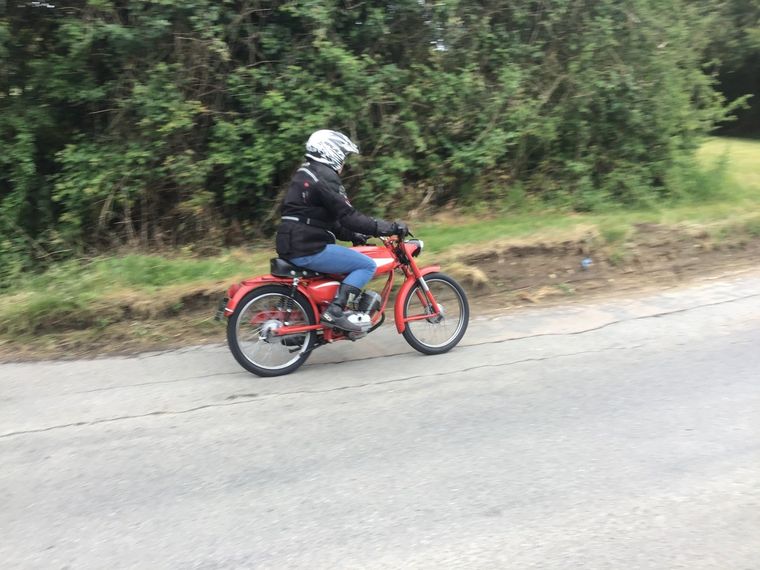
There it is - and we're off!
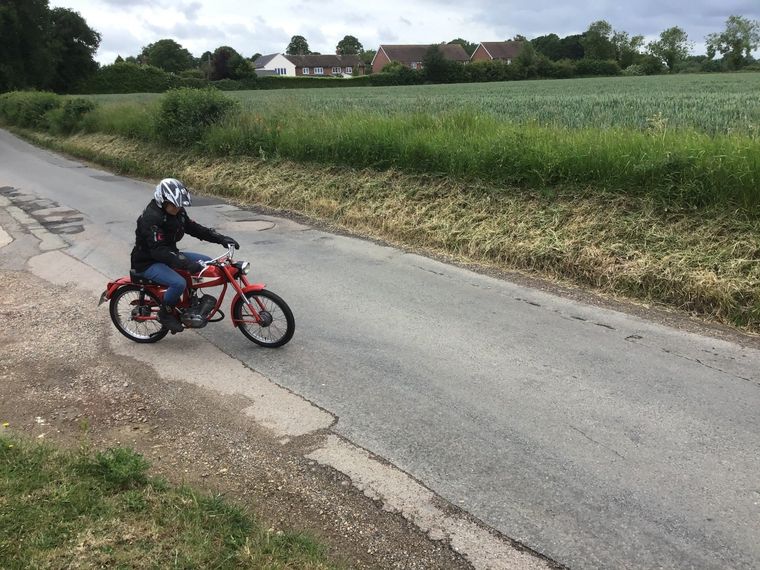
So fast, the scenery is almost blurring! It's entertaining, if slightly scary to ride. The speedo got to an indicated 60km/h, which with those tiny drum brakes felt plenty fast enough.
Snags encountered during the first test ride? Clutch cable needs attention. There's a small oil leak that needs investigation and the exhaust came loose. Apart from that, all seems OK so far.
After fixing the snags identified in its first test run, I gave it another go (and this time got some video as well). It's not that keen to always change gear, although it works better if you don't use the clutch - that may need some investigation. When I first get on it, it feels decidedly bouncy and unstable, but I soon get used to its distinctive handling characteristics. The bike was reluctant to idle when it was hot and so the carb fuel screw was tweaked to improve this. I'm not sure what effect (if any) this will have when it comes to starting it from cold. I'll find out next time I ride it...
Currently I'm 3D printing a new number plate mount. The first one was fine, held the number plate with no problem, but it didn't like it when I accidentally ran into the back of the Corsarino when putting one of my other bikes away. So now I'm making a slightly beefier / stronger version.
Currently I'm 3D printing a new number plate mount. The first one was fine, held the number plate with no problem, but it didn't like it when I accidentally ran into the back of the Corsarino when putting one of my other bikes away. So now I'm making a slightly beefier / stronger version.