
I thought I’d overhaul the toolkit that I take with me on the bike, which, at the moment, consists of absolutely nothing at all. Not even the manufacturer’s basic toolkit graces any of my bikes, which is daft since when I cycle to work I carry a pump, a puncture repair kit, tyre levers, a spare inner tube and a bicycle specific multi-tool - none of which I’ve needed in the 3000 odd miles I’ve cycled. (I’m going to get a puncture tomorrow now, aren’t I!) Yet, I disappear off on the motorised bicycle with no tools, an issue that was highlighted recently when I needed to adjust an incorrectly fitted brake pad.
Let’s not discuss which idiot missed that it wasn’t fitted correctly, but instead marvel at the fact that, armed only with the front door key to the house, the brake pad was reinstated to its proper position. In future, though, I have decided that I should travel better equipped, especially for longer journeys and, after much thought, this is what I picked…
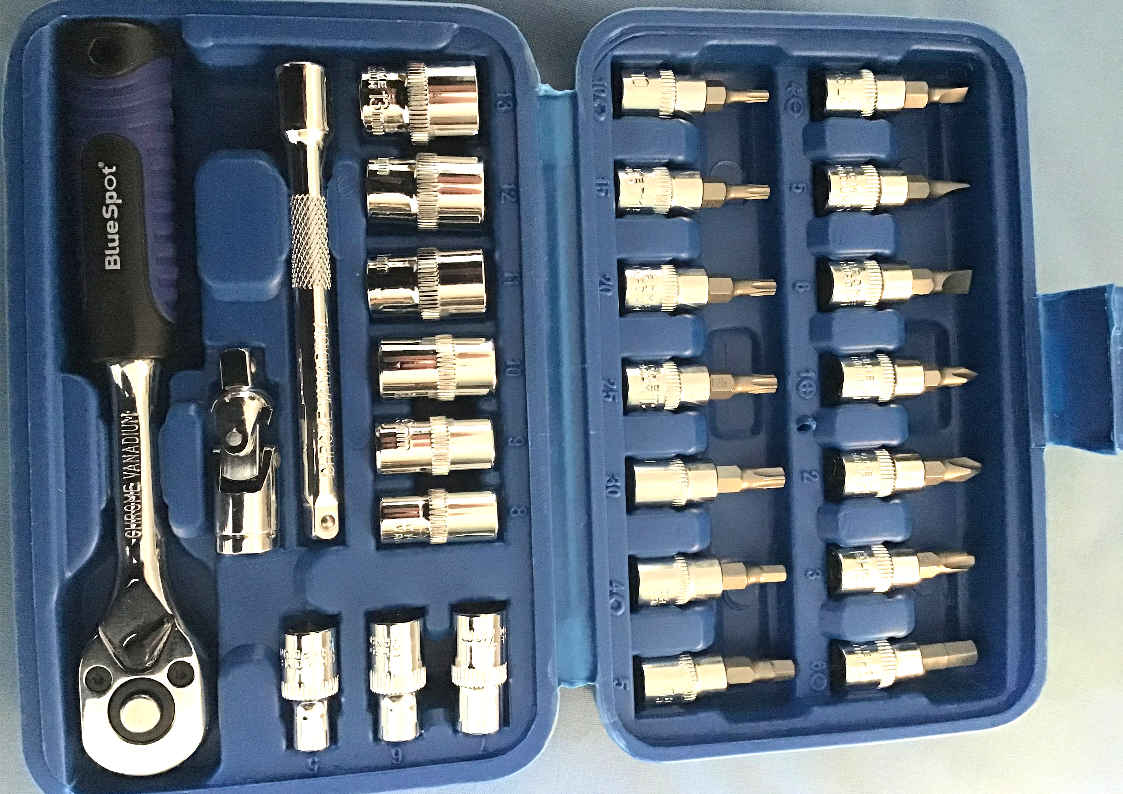
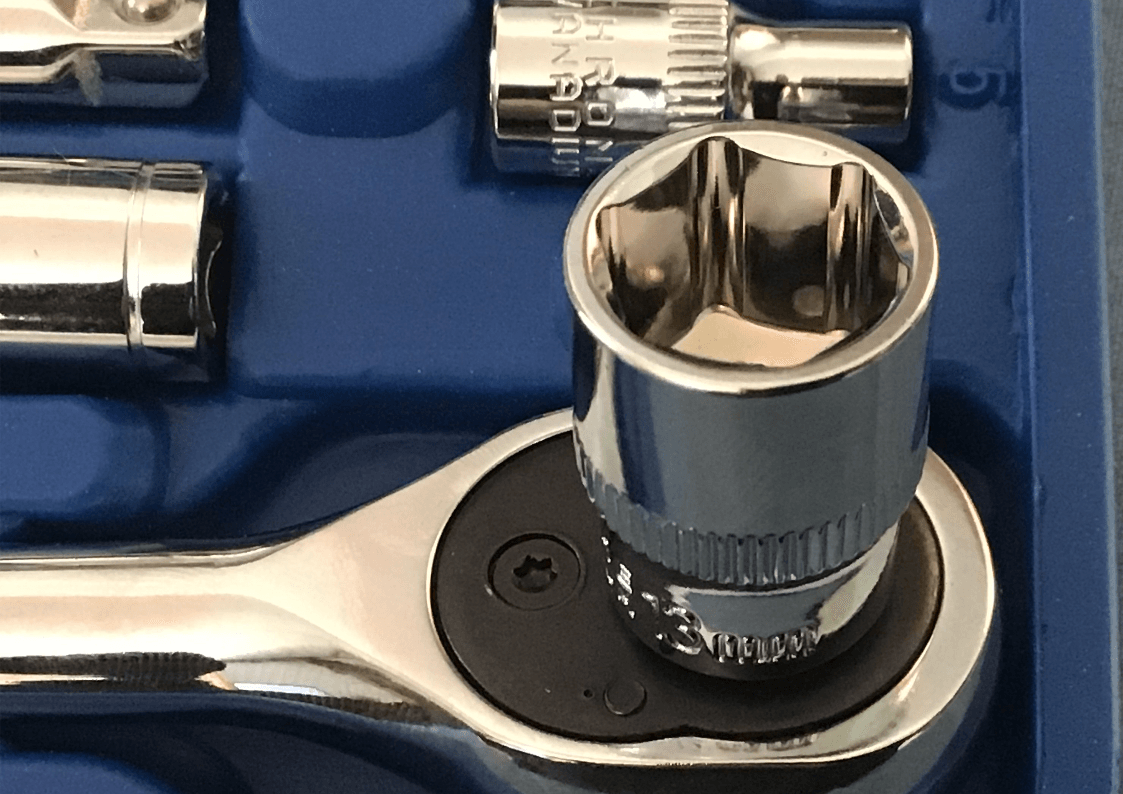
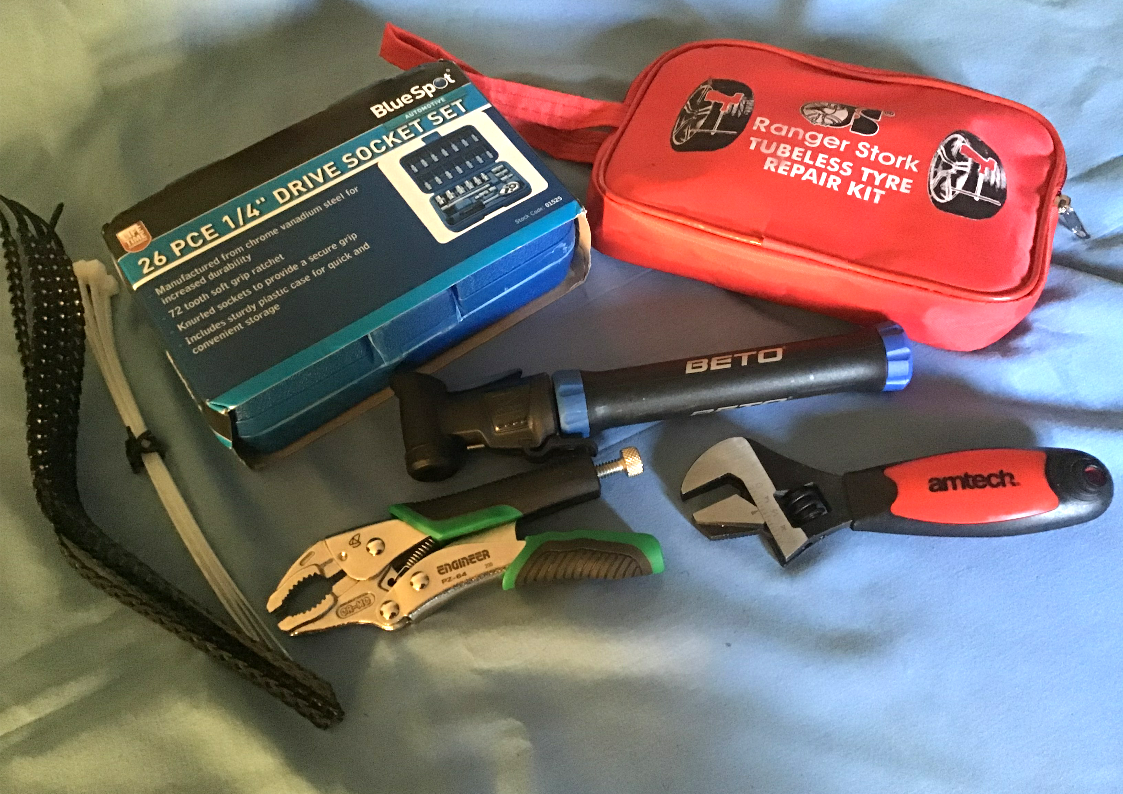
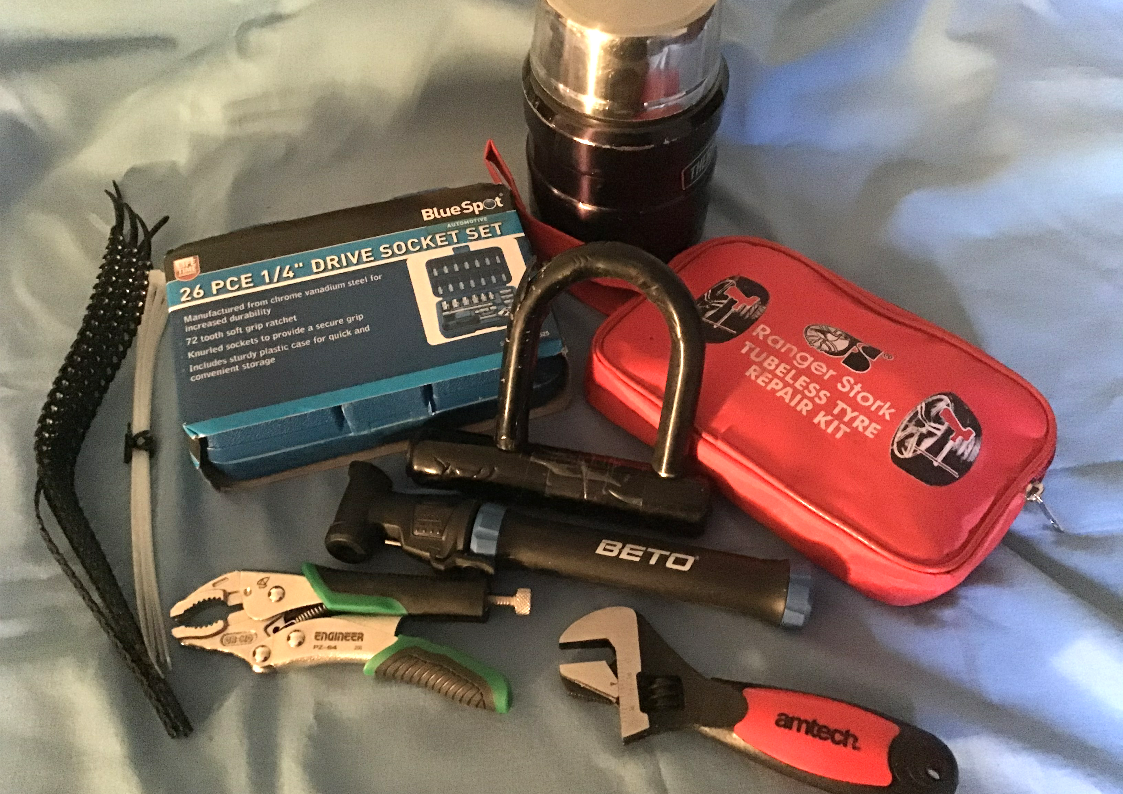
First off, a mini socket set. I like 1/4” drive socket sets. They get used for most jobs in the garage. It’s only when the bolts and torques get bigger that the 1/2” drive set comes out. For an on bike toolkit, the socket set needs to be compact and if it also has a good range of bits with it, it means that I don’t need to carry screwdrivers / hex wrenches etc.
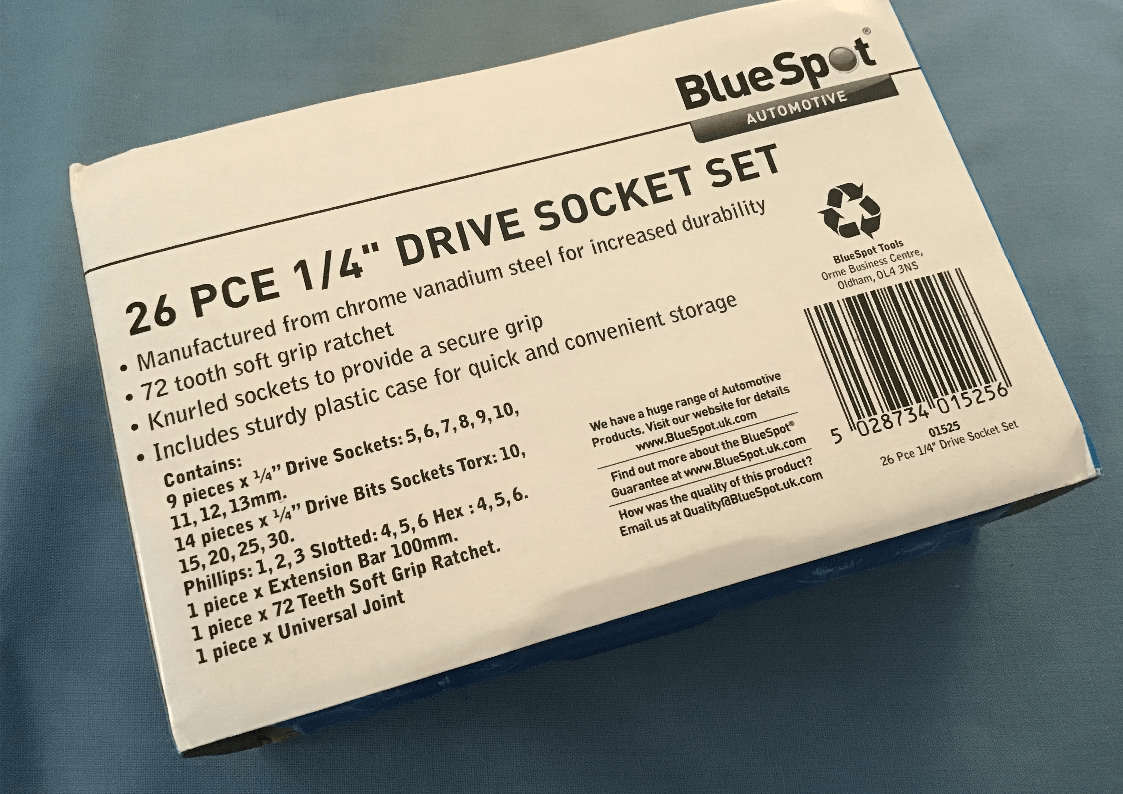
After much perusing of the internet, I chose this set. It’s a Blue Spot branded product which means should you have a problem with it, there is a UK company that you can contact and have a moan to. The tools themselves look good quality, my only gripes are the moulded handle on the ratchet (nothing wrong with it, I just don’t like moulded handles) and the case quality - it’s the usual blow moulded affair, the hinges and catches of which often don’t last long. Apart from that its a good set that packs a range of tools into a 16.5x11x5 cm space. I also like that the bits have a built in 1/4” drive, it makes them physically bigger and thus harder to lose.This set was £15.29 from
AMAZON.


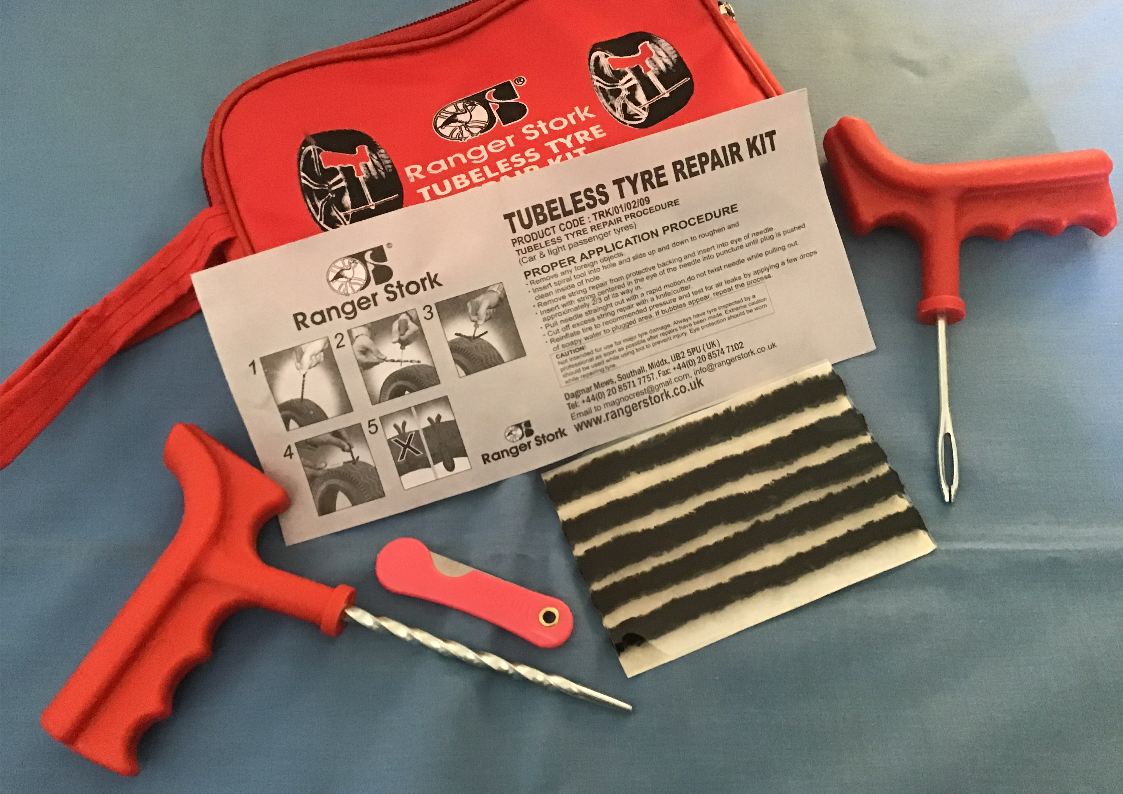
Next up, something to fix a puncture should the need arise. For me, any DIY roadside tyre repair is only a temporary fix; a get you home, or get you to a garage type job. With this in mind I chose one of the cheap ‘dog turd’ type repair kits.
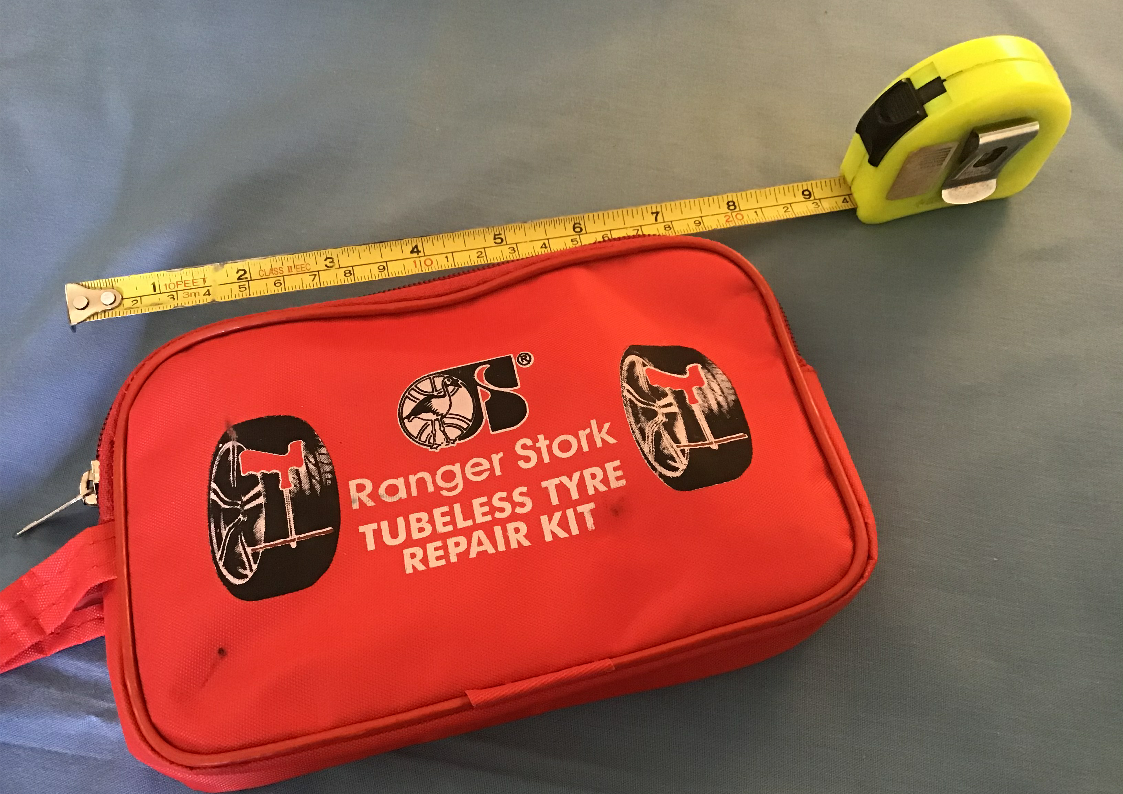
This ‘Ranger Stork’ branded kit ticked the box, it had everything I needed and came in a handy pouch, which was also big enough to accommodate the mole grips and adjustable spanner you’re yet to meet. Some kits also include CO2 cannisters for reinflating the tyre, but they’re more expensive and I’m a cheapskate and anyway, I already had a tiny hand pump that will (after a bit of effort!) inflate a motorcycle tyre. This kit was purchased from
AMAZON for £6.99
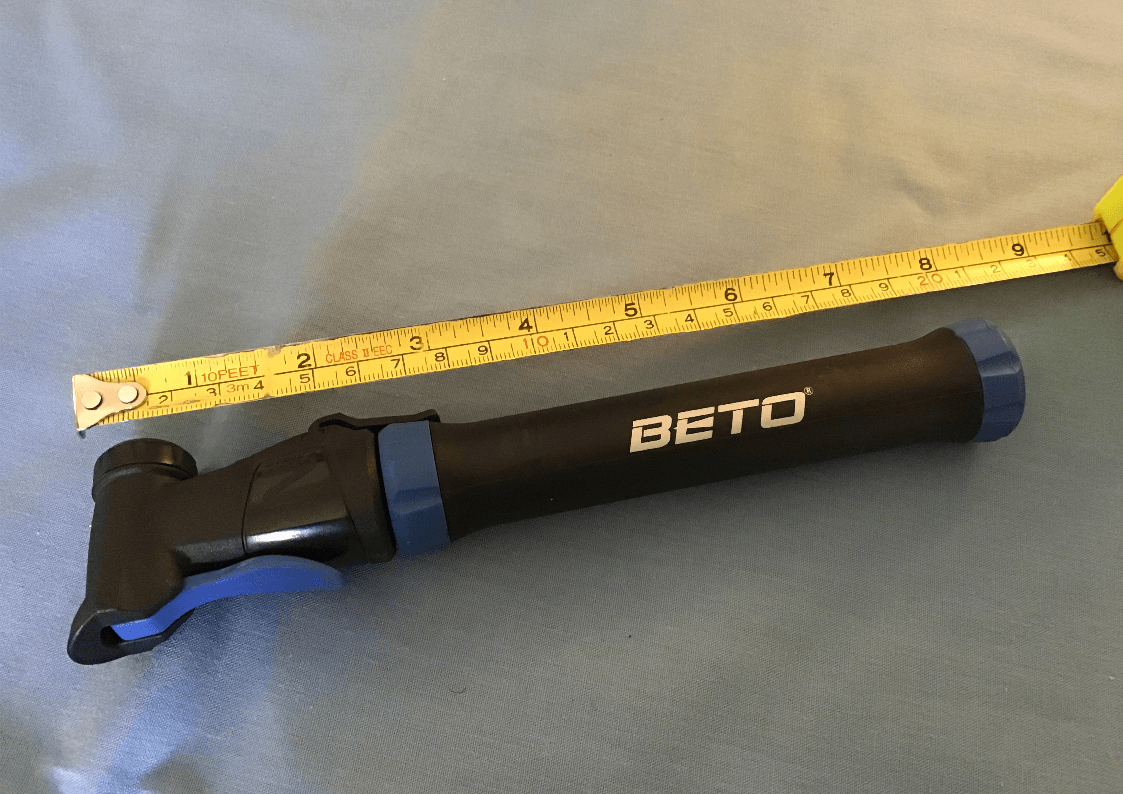
Here’s the mini bicycle pump, it’s just over 20 cm long, is quite nicely made and will eventually inflate a motorcycle tyre. Best of all, I was given it! If I hadn’t already had a pump, I would probably have been tempted by one of the CO2 versions.
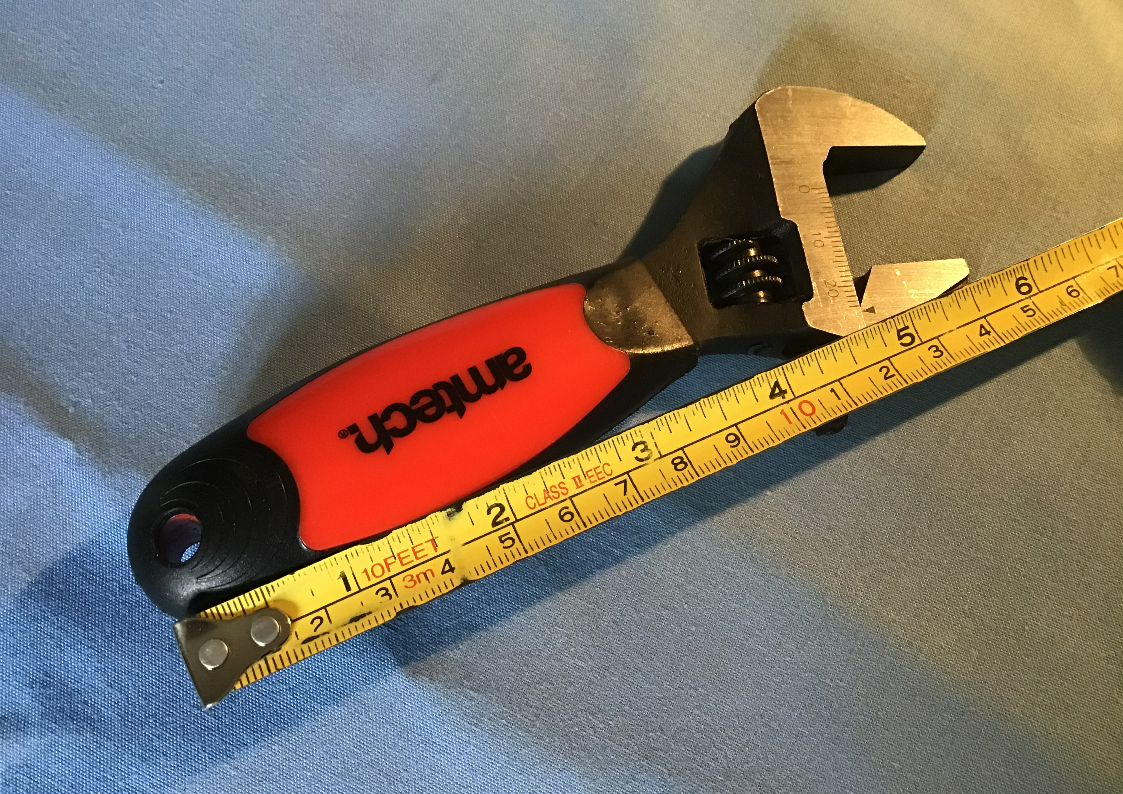
Any nuts or bolts bigger than the 13mm that the socket set can deal with will be attacked with an adjustable wrench.
This version has jaws that open up to 25mm and is a 'stubby', so it’s only around 15cm long. It’s a cheap and cheerful Amtech version with a moulded handle (I don’t like moulded handles on adjustables much either!) Another
AMAZON purchase for £5.29
There’s also a
HILKA branded version for £5.38
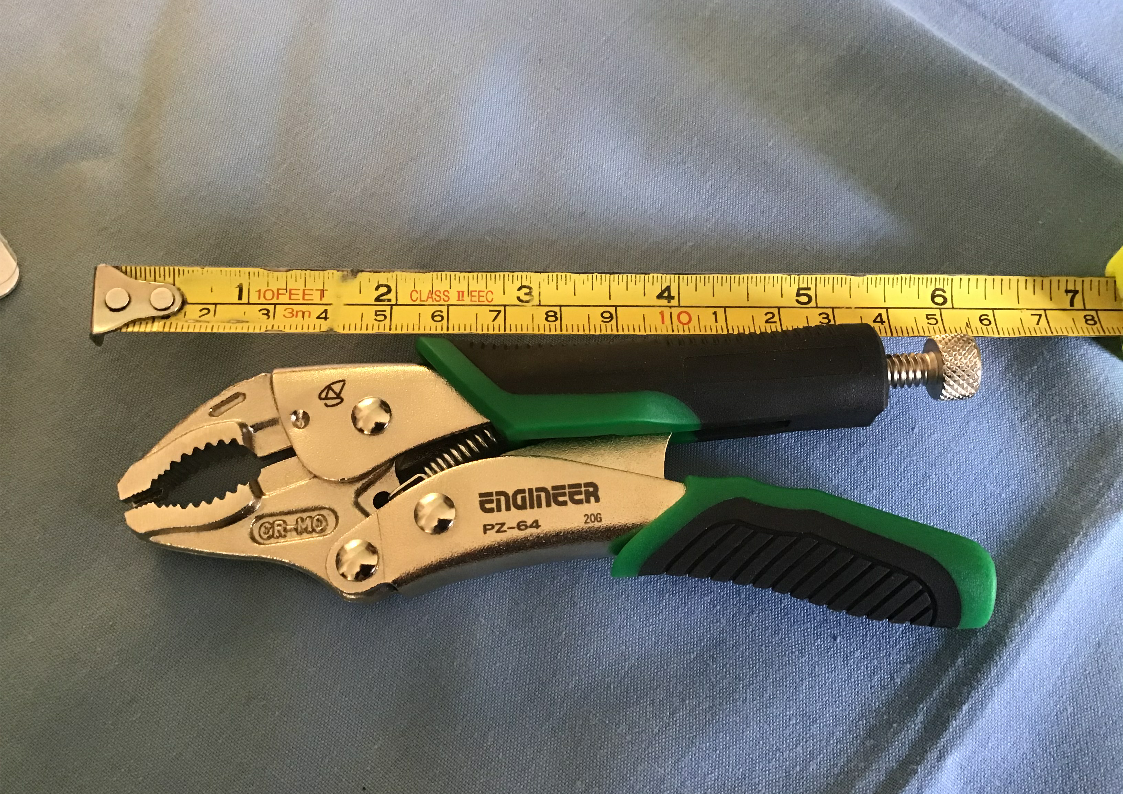
Anything else that requires gripping, pulling, turning, squashing or other brutal treatment will be dealt with by a small set of mole grips (locking pliers).
I bought these Engineer branded version. They were the right size and had good reviews on Amazon, so I though I’d give them a try (even though they’ve got moulded handles!) This set is the PZ64 version from
AMAZON for £14.99
Slightly cheaper (and I’m annoyed because I’ve only just spotted these and I probably would have bought these instead) are these
VISEGRIP branded ones. Around £11 for 4” or 5” versions.
With the addition of some cables ties, my emergency toolkit is complete. Now all I need is something to carry it all in and, as none of my bikes have any under seat storage, it’s going to either have to be tank or tail bag.
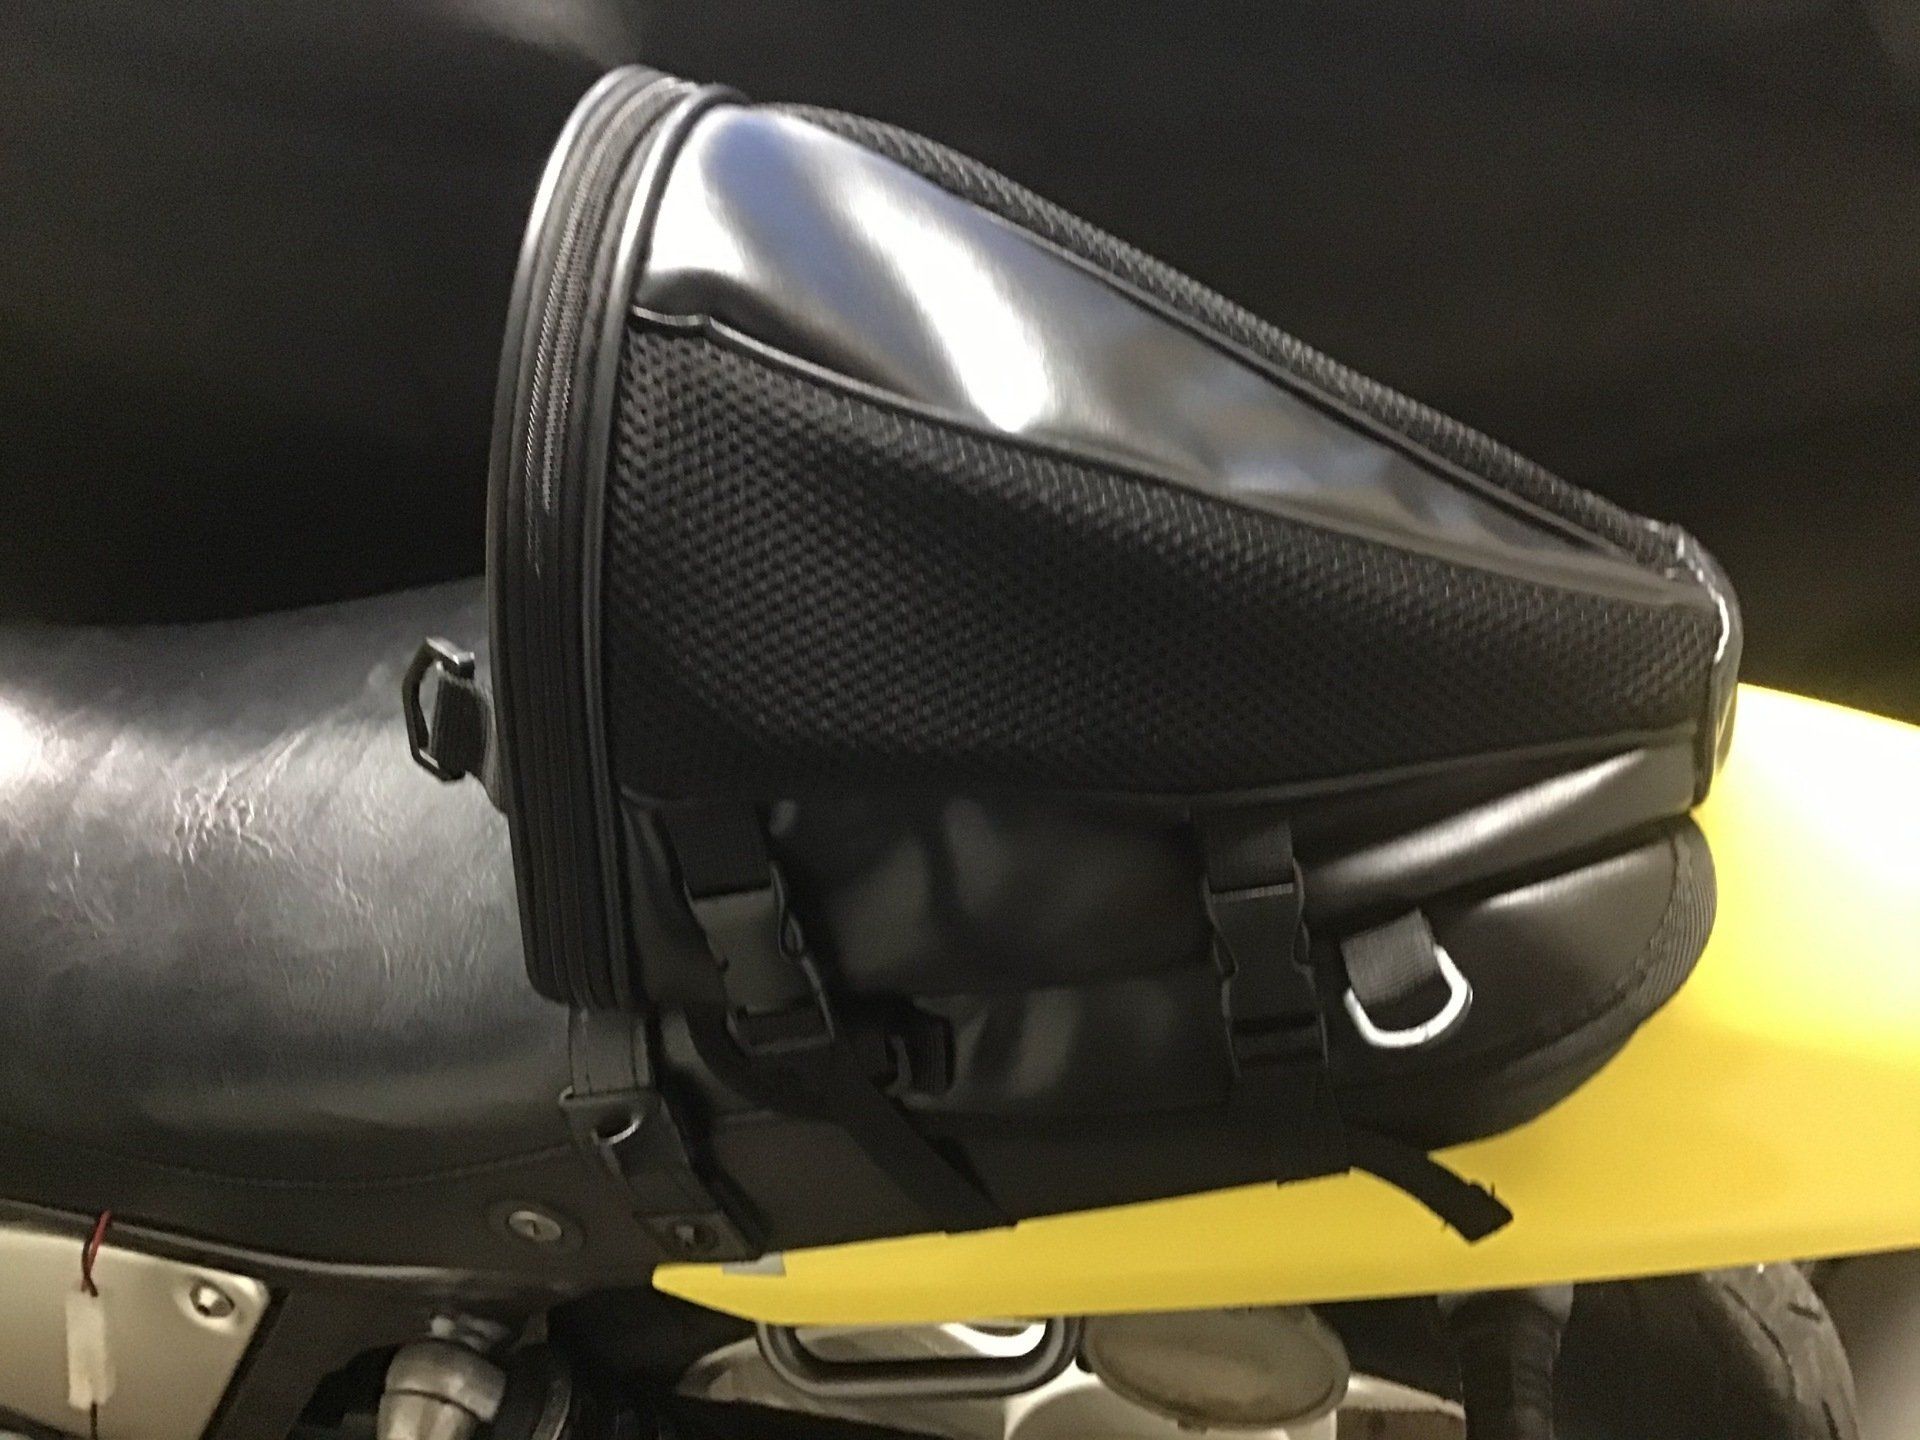
I rather liked the look of the tapered tail bags that look like a cafe racer seat hump, so I searched Amazon for the cheapest version I could find (this is one of those products where there seem to be lots of versions of the same bag. I paid £10.50 for mine).
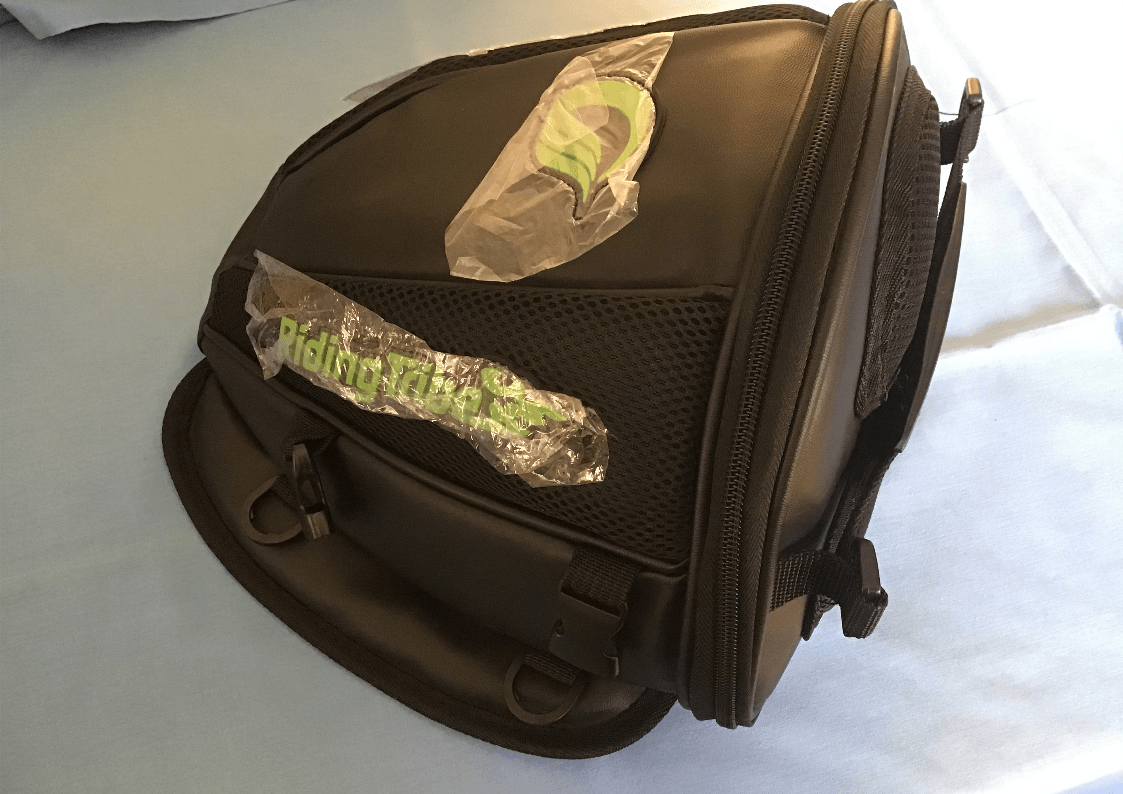
What Amazon actually sent me was a more expensive
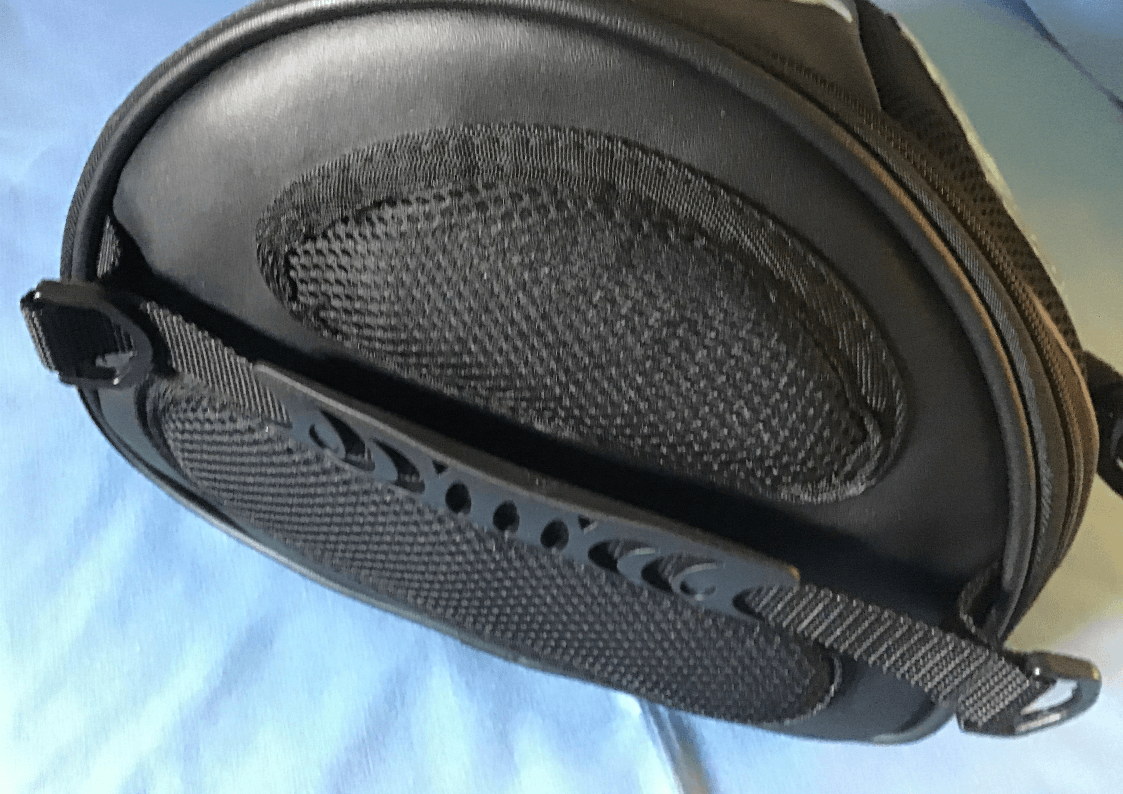
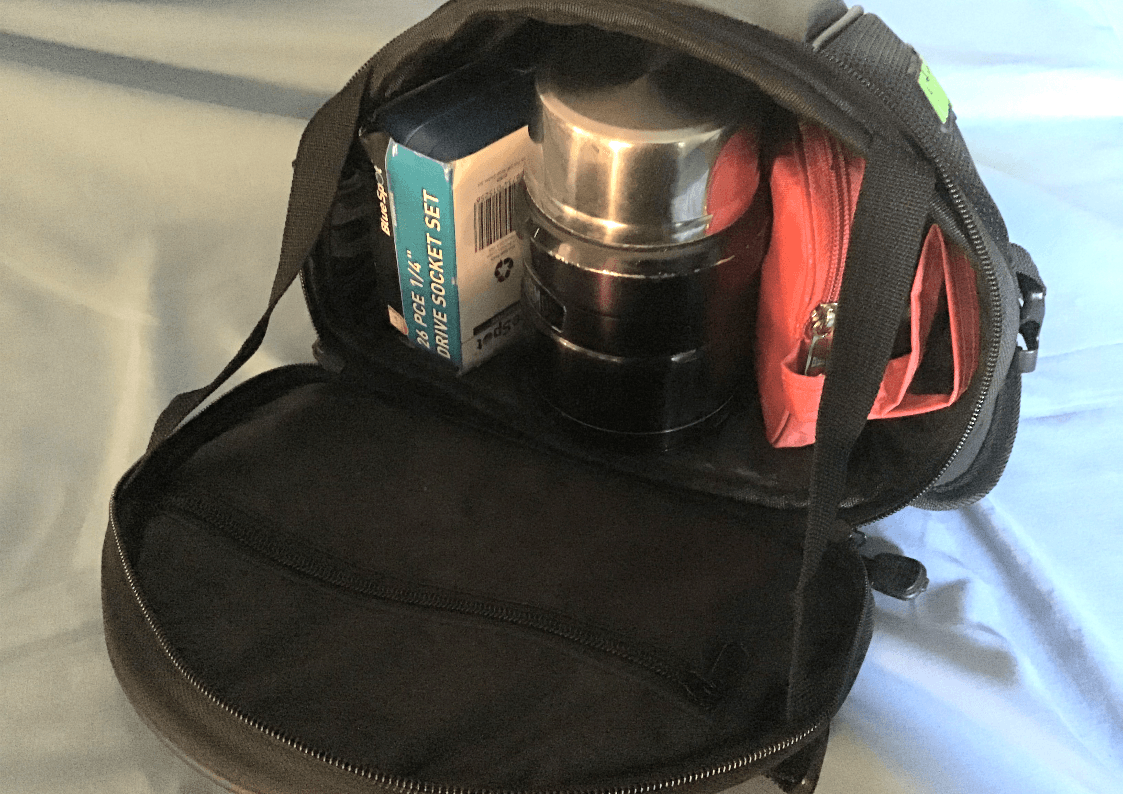
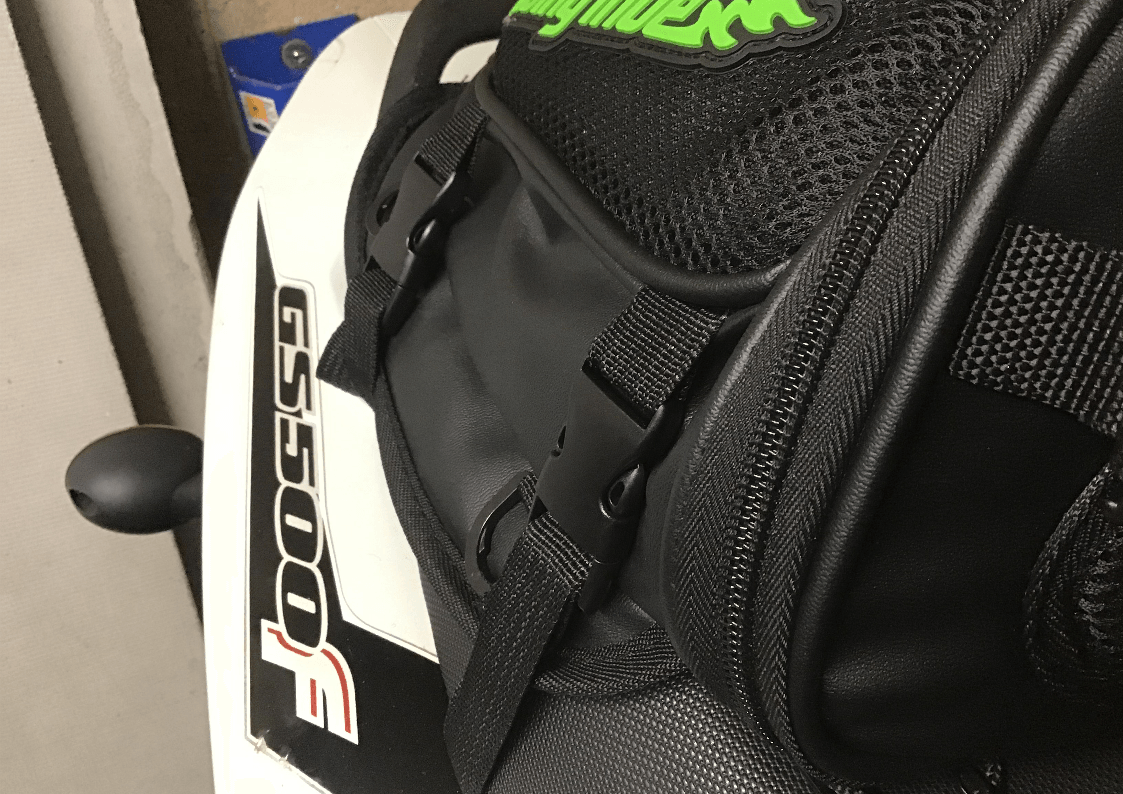
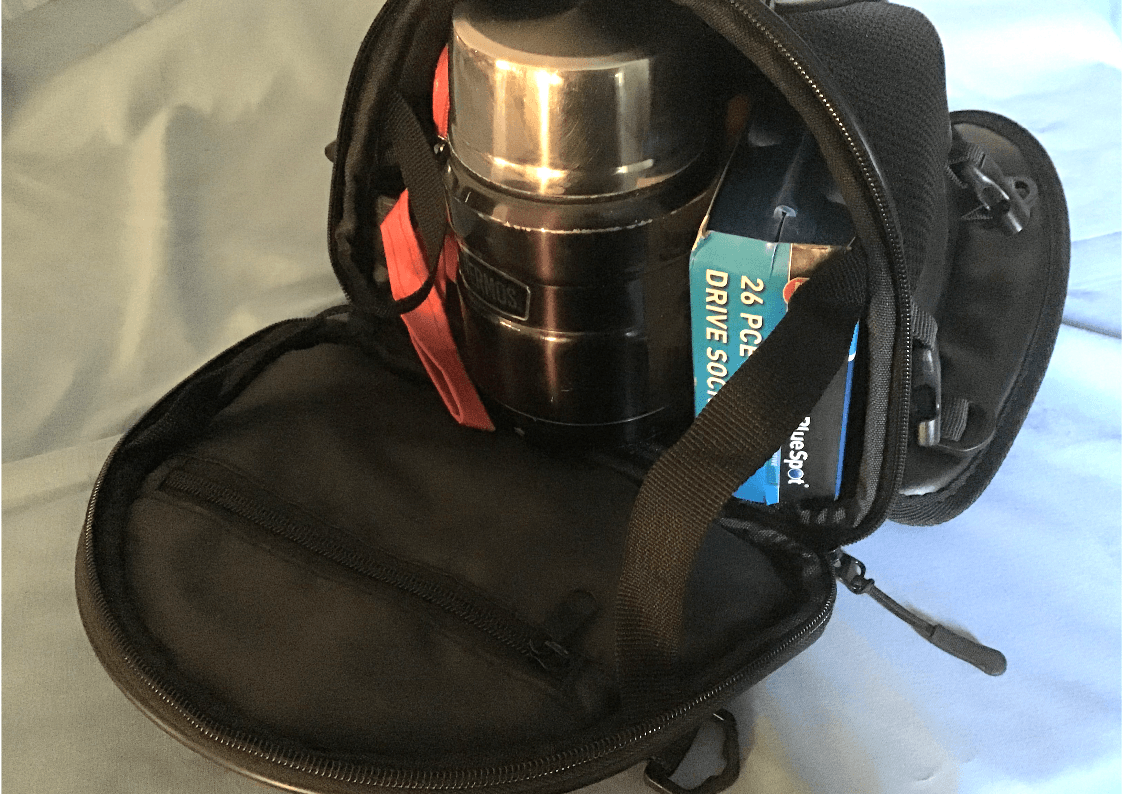
‘Riding Tribe’ branded version which retails at £18.99. It seems to be a sturdy, nicely made little bag. Dimensions are roughly 26 cm wide x 20 cm high x 30 cm long and I can get my tool kit in it, together with a disc lock and my dumpy (15 cm tall x 9 cm dia) flask. I didn’t, however, get on very well with the fixing straps.
With careful packing, the little tail bag manages to hold this lot…
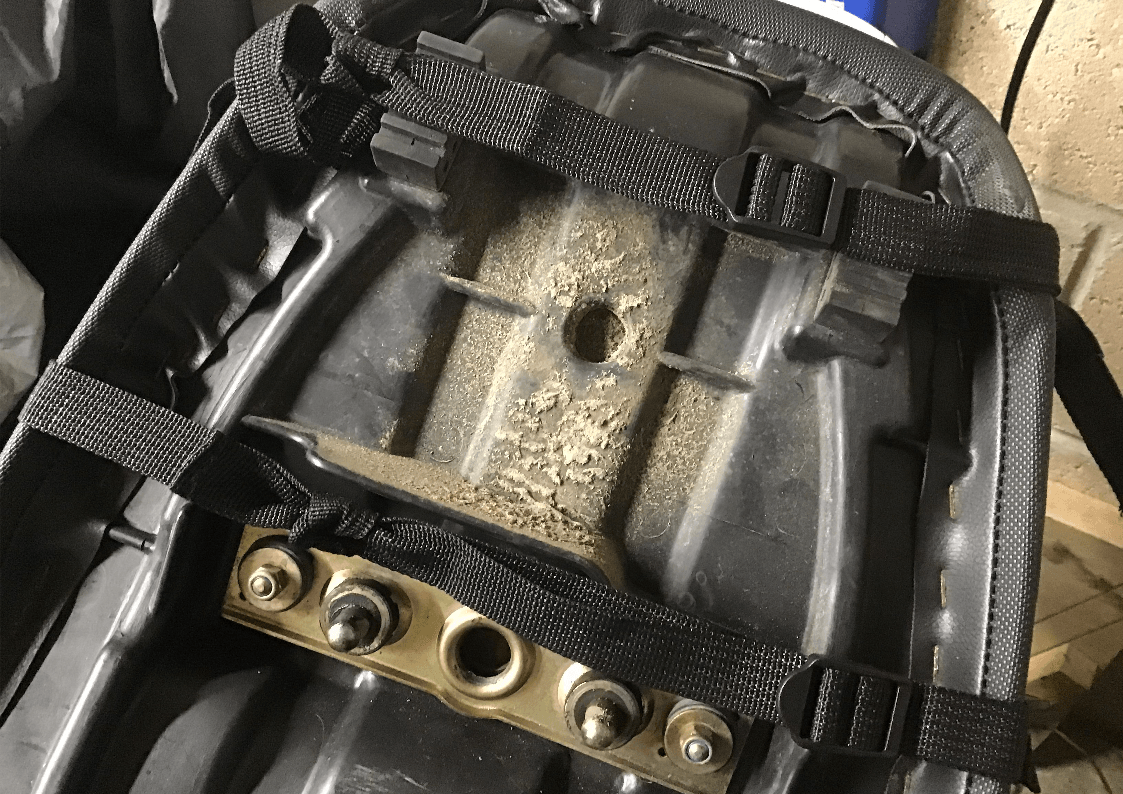
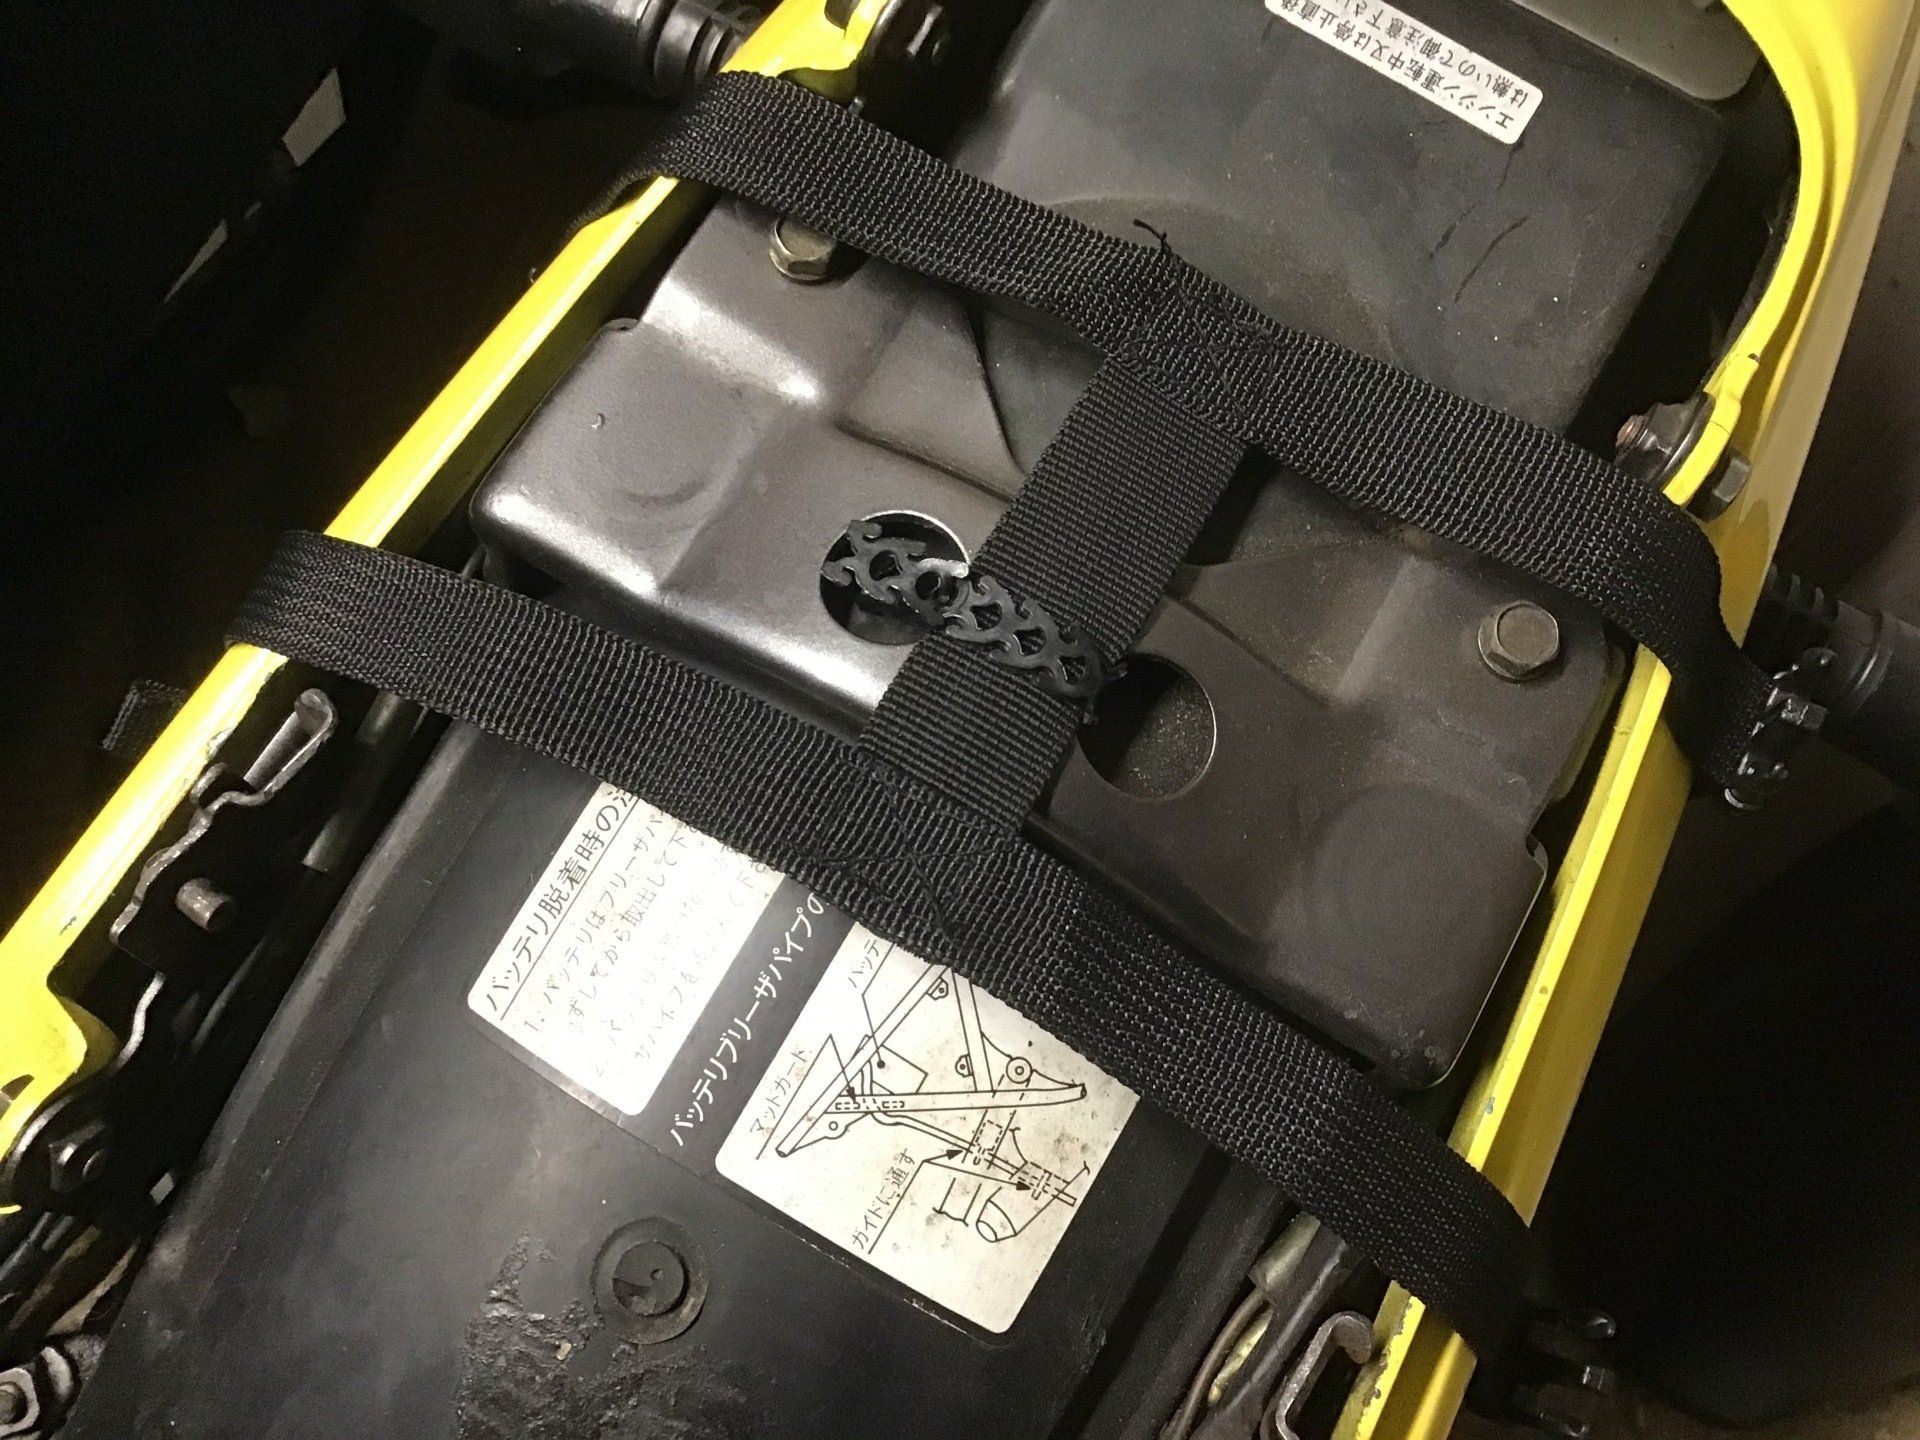
The straps fit around the seat, with the double thickness part over the top of the seat and the adjusting buckles underneath. At least that’s how they are supposed to go. I tried this way and found that where the straps really need to be positioned is very close to the catch at the front and over the rubber seat stops at the rear of my seat, and as my seat tapers towards the rear, it was difficult to pull them tight as they would just want to slide down the seat as you tensioned them.
I persevered and got the bag on, but the angle of the front strap tended to lift up the side flap of the bag and it wasn’t as snugly mounted as I would have liked.
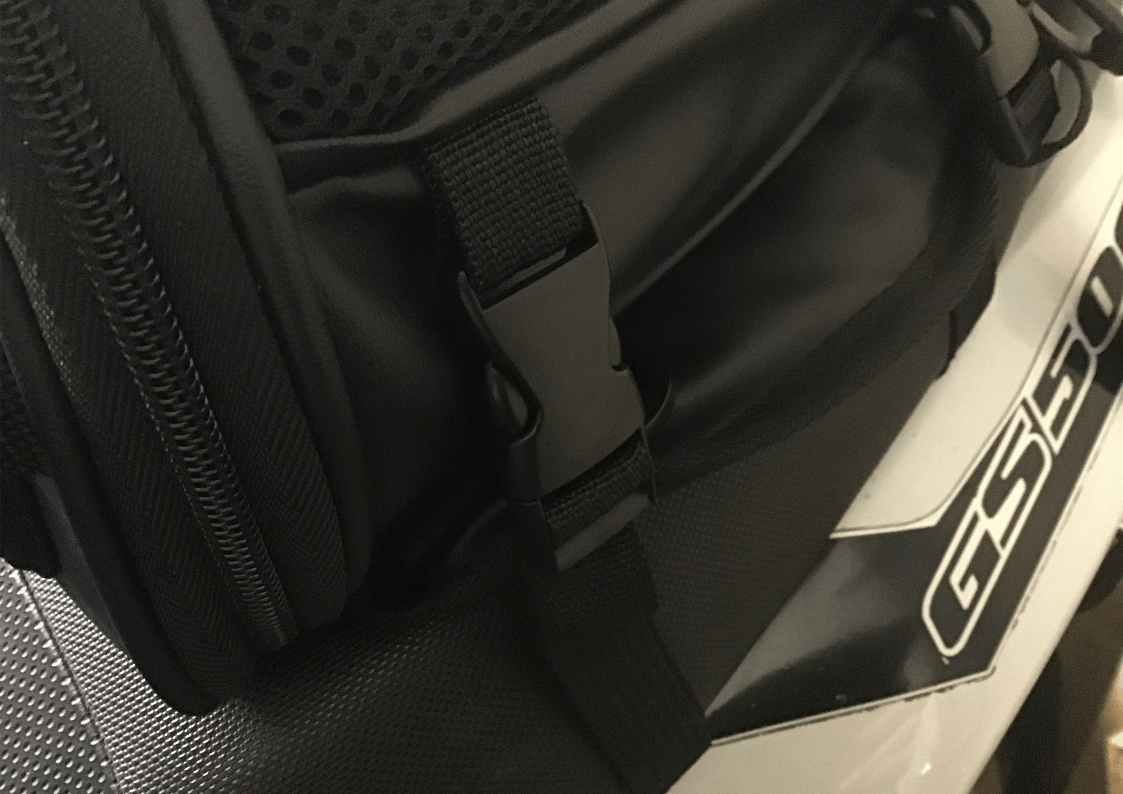
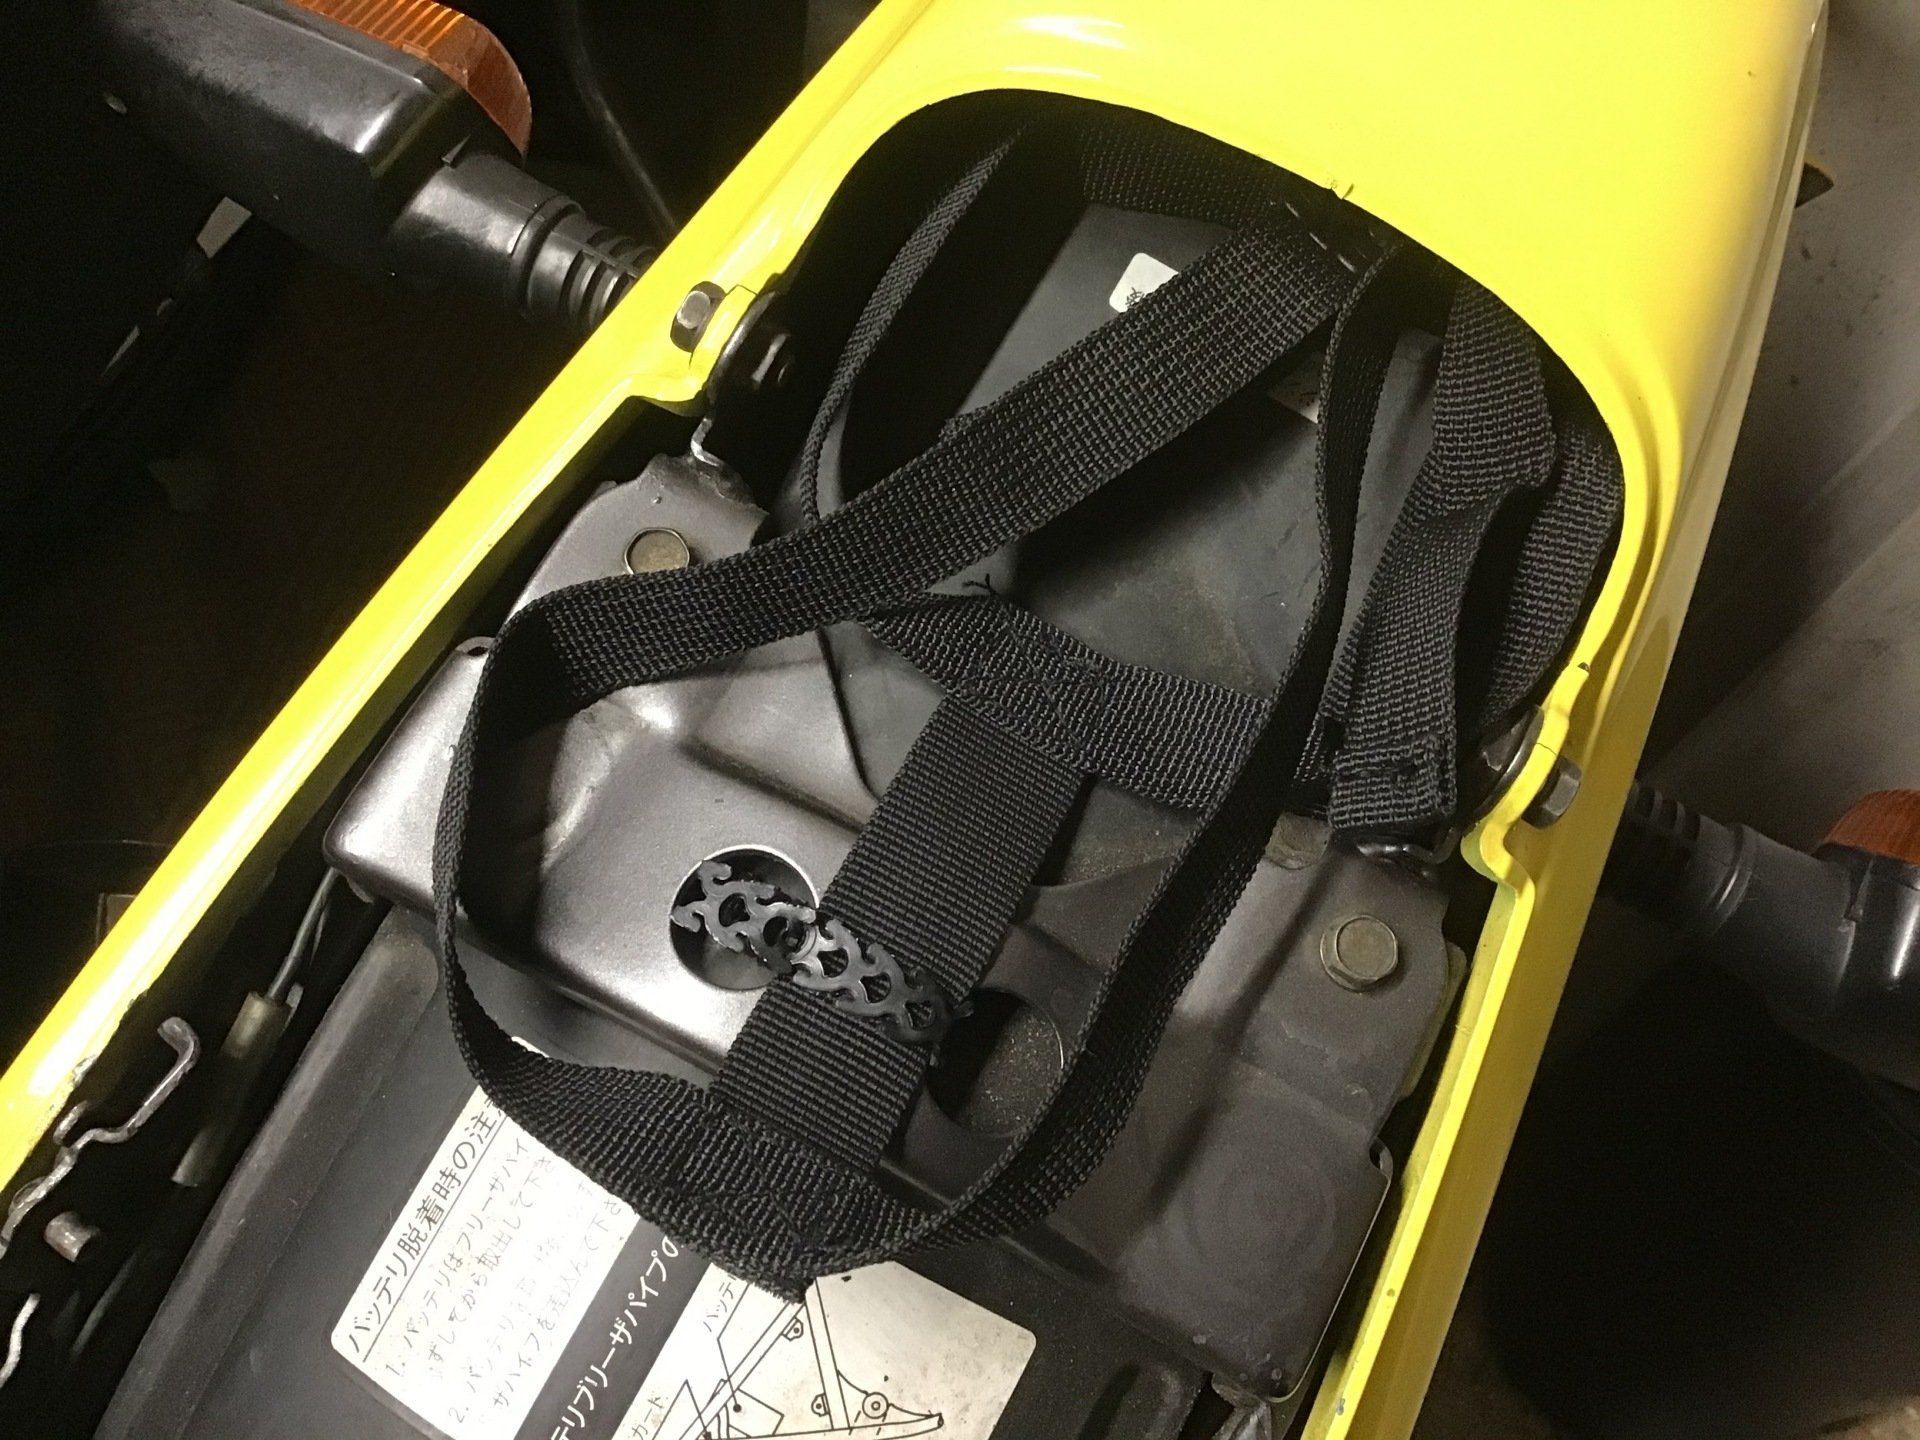
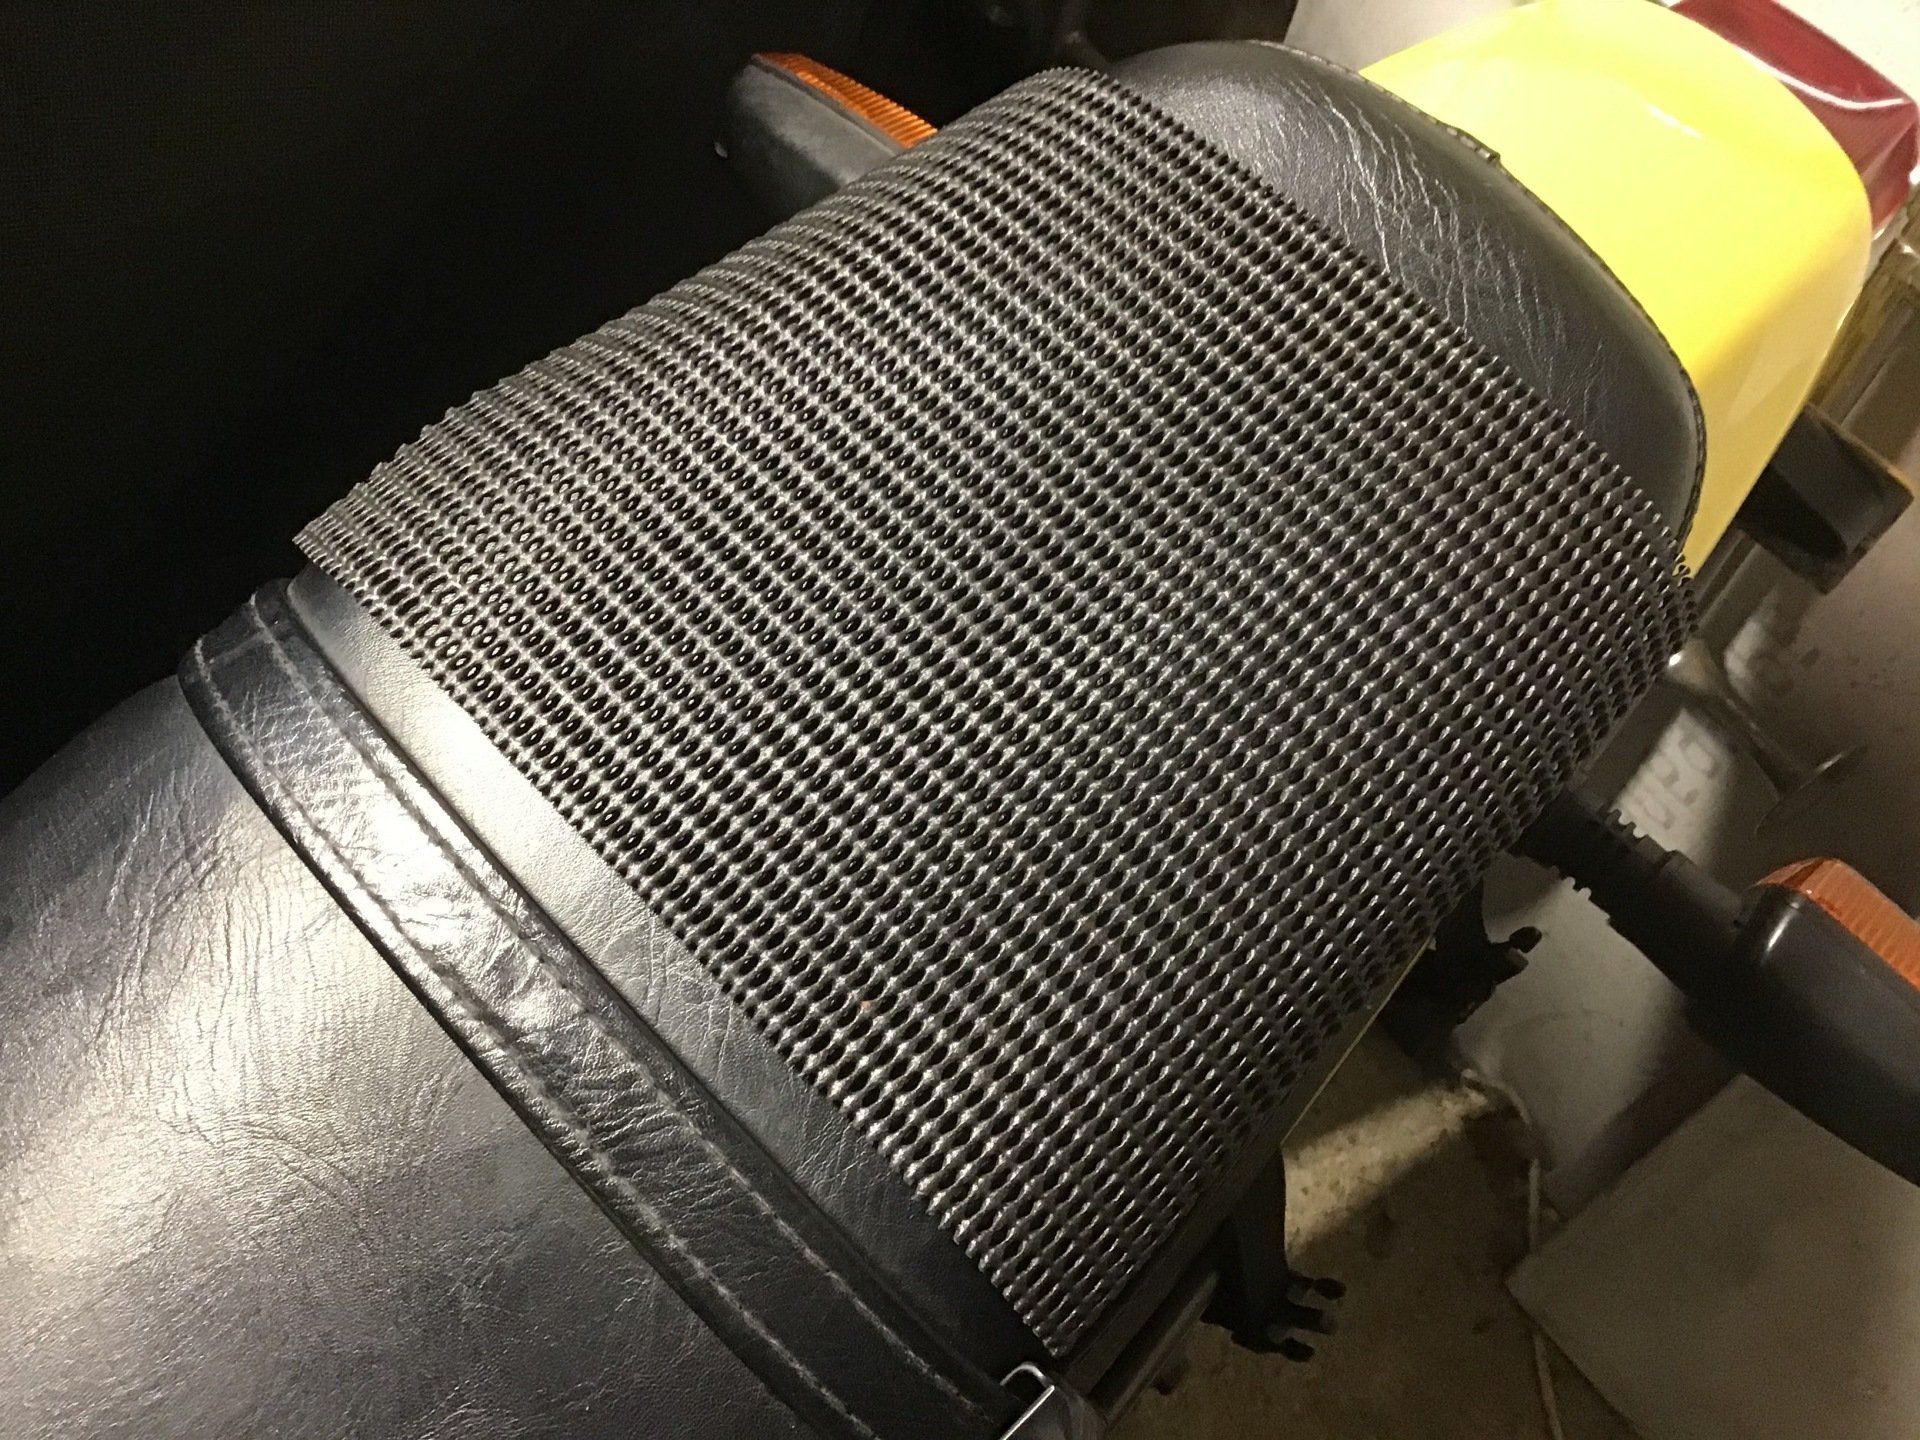
I opted to put the straps on the wrong way up, with some Rolson grip mat underneath (I should have cut a bigger piece to go down the side of the seat as well). This meant that I could tension the straps really tight over the seat.
The bag then clipped on, with the straps over the bag’s side flaps rather than lifting them up as they did when the straps were on the ‘right’ way. The bag also felt more firmly mounted.
With a bag that’s a universal fitment, you’re always likely to need to experiment to find the best way of mounting it on your own bike.
I’ve had a couple of trips now with the bag in place. So far I’m really pleased with it, but I do have to remember to swing my leg over the seat a little higher to accommodate it.
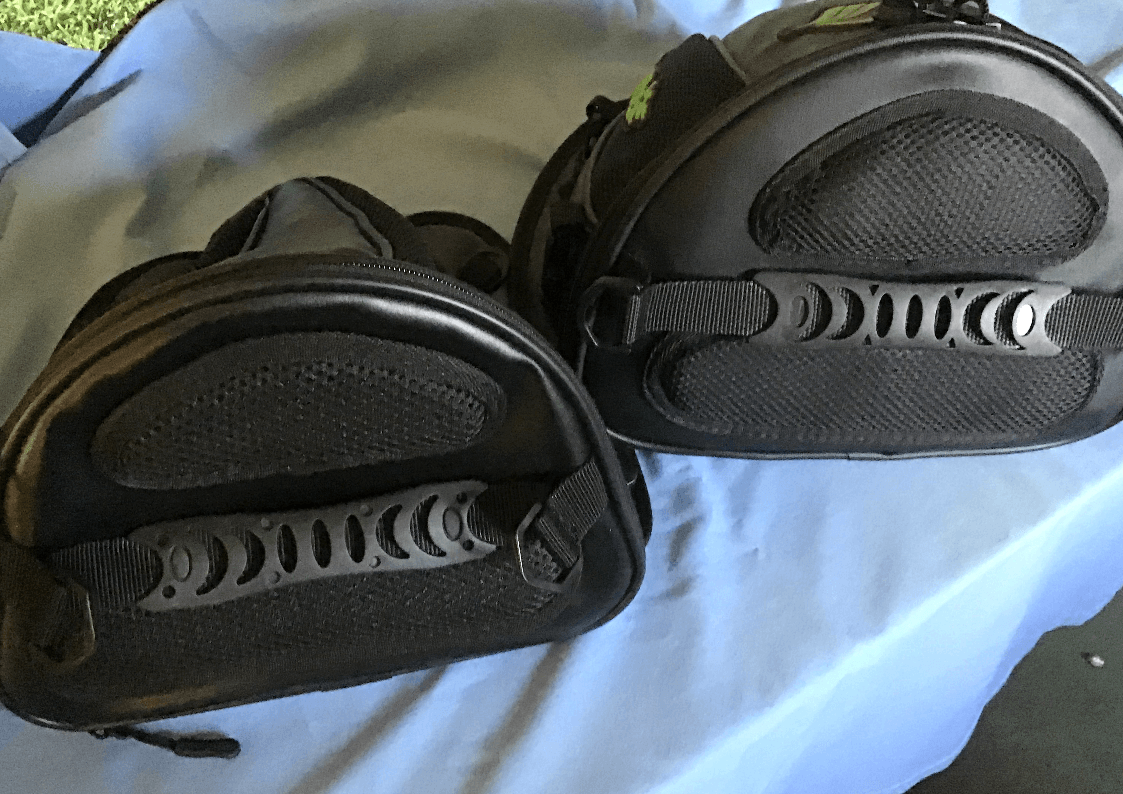
Intrigued as to whether all of these bags really are all the same, I bought a second one for another bike. Once again I purchased the cheapest version I could find, this time it was a little over £11 and came via Ebay.
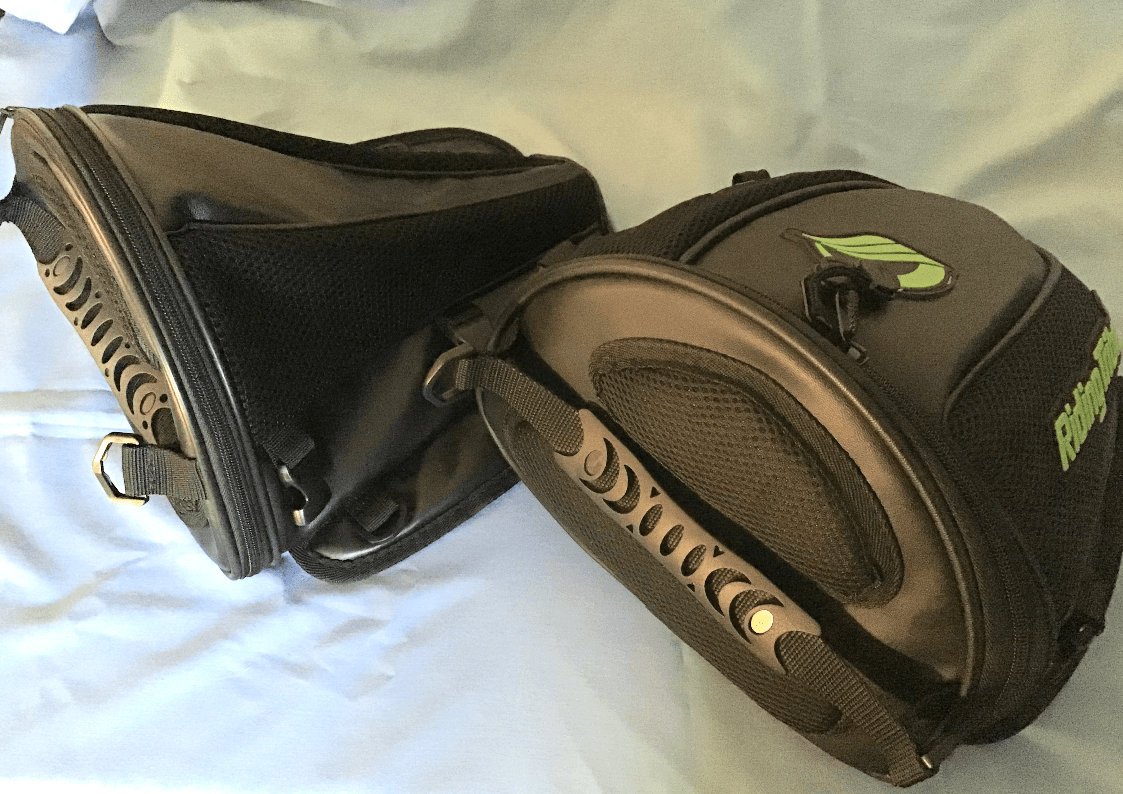
Was it the same as the Riding Tribe version? Well they are very similar, but not identical. The Riding Tribe (RT) version is slightly larger and has a matt(er) finish to the material, which does make it look more expensive. However the cheap version has a stiffener in the hoop which means that the front of the bag holds it shape even when empty. The RT version has no such stiffener. The cheap version has a more basic strap, simply going under the seat and then clipping onto the bag. The seat essentially becomes the filling in the strap / bag sandwich. I haven’t yet tried to fit this bag to the bike, I’ll report back on how secure it feels when I’ve had more time to play with it.
If you want to know if the RT version is worth the extra money, then I can’t actually decide. Certainly I like the look of it better (even with the big green logo down the side) and the fixing straps that fix it to the seat are better (but you might have to use them the ‘wrong’ way) but is it £8 better? Time will tell…
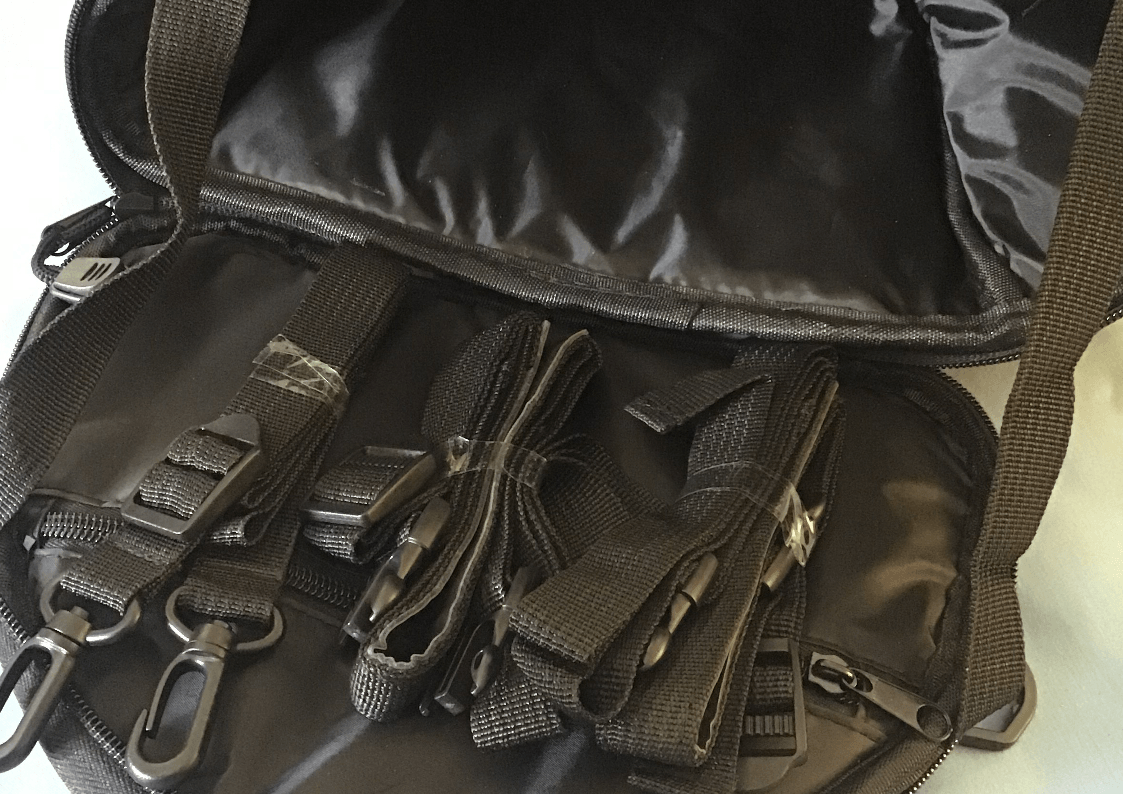
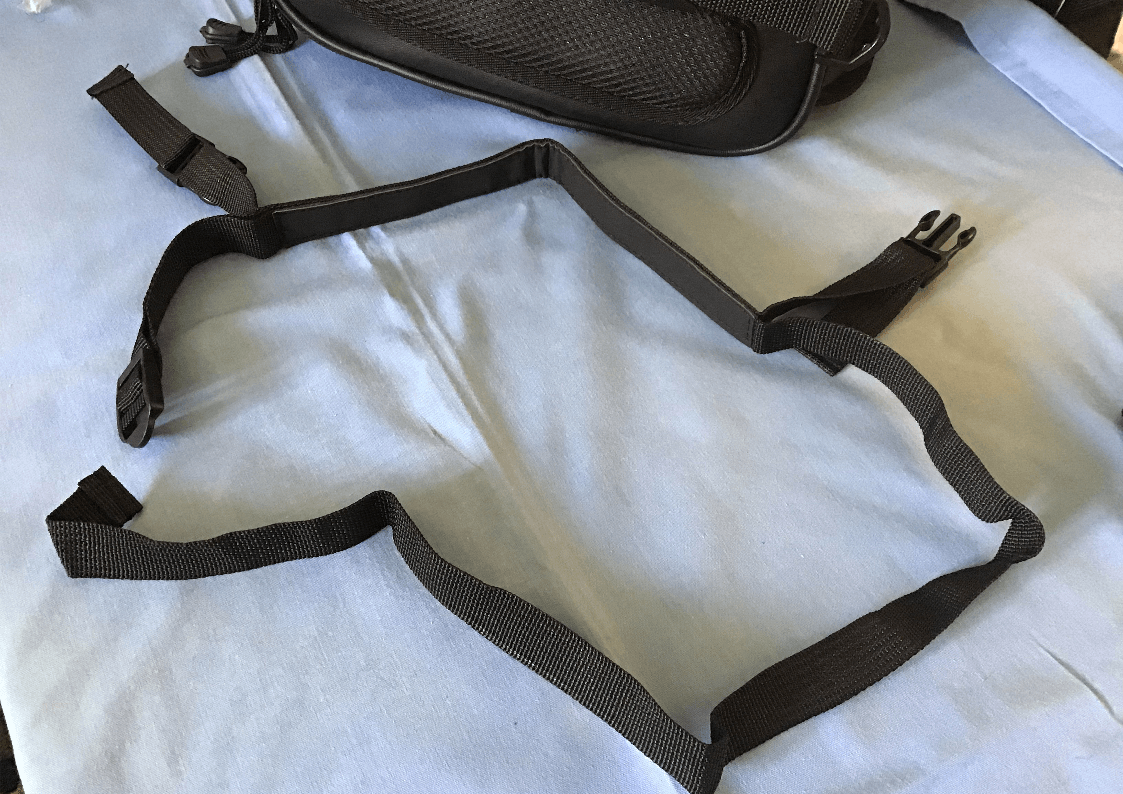
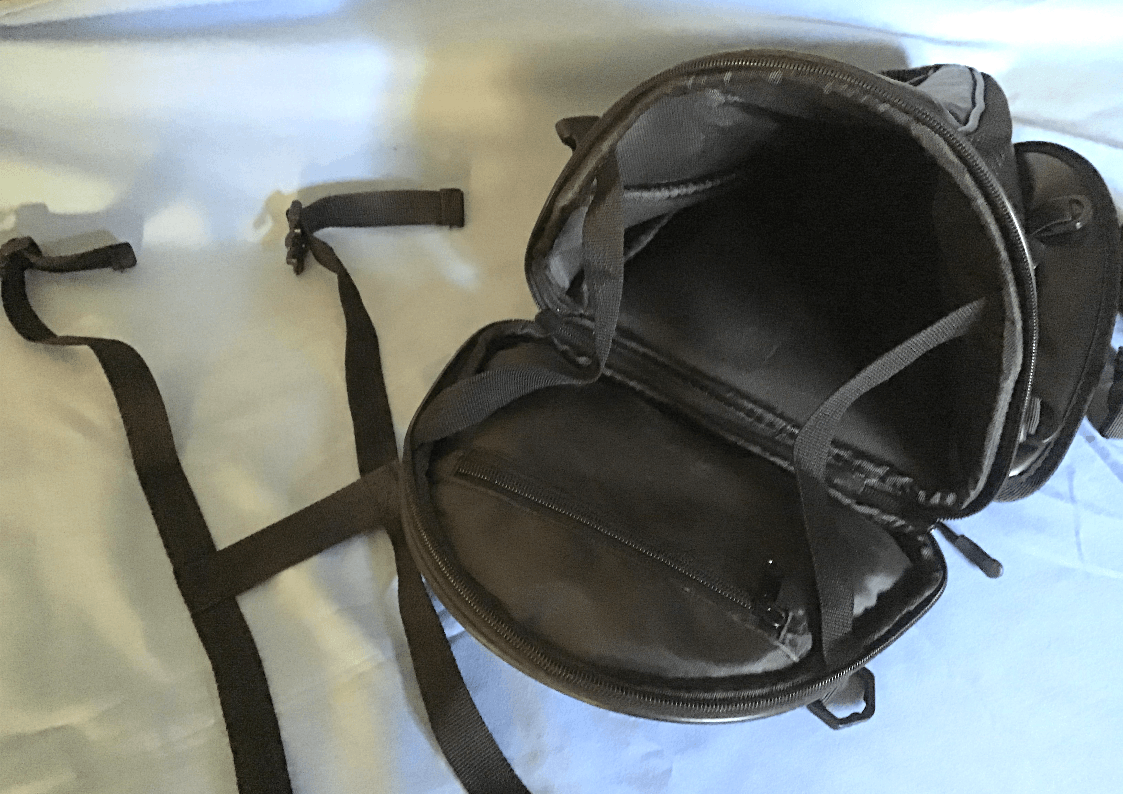
Fixing straps are a much simpler design and you couldn’t safely leave these on the bike if the bag wasn’t there.
All my gear still fits, but it’s a little snugger.
Armed with tail bag and tool kit, I feel better prepared for my trips out, but I'm hoping (as has happened with the bicycle) that I never actually need to use any of it.
I have now got round to trying the second tail bag on my trusty SRX600. The mounting strap just goes under the seat.
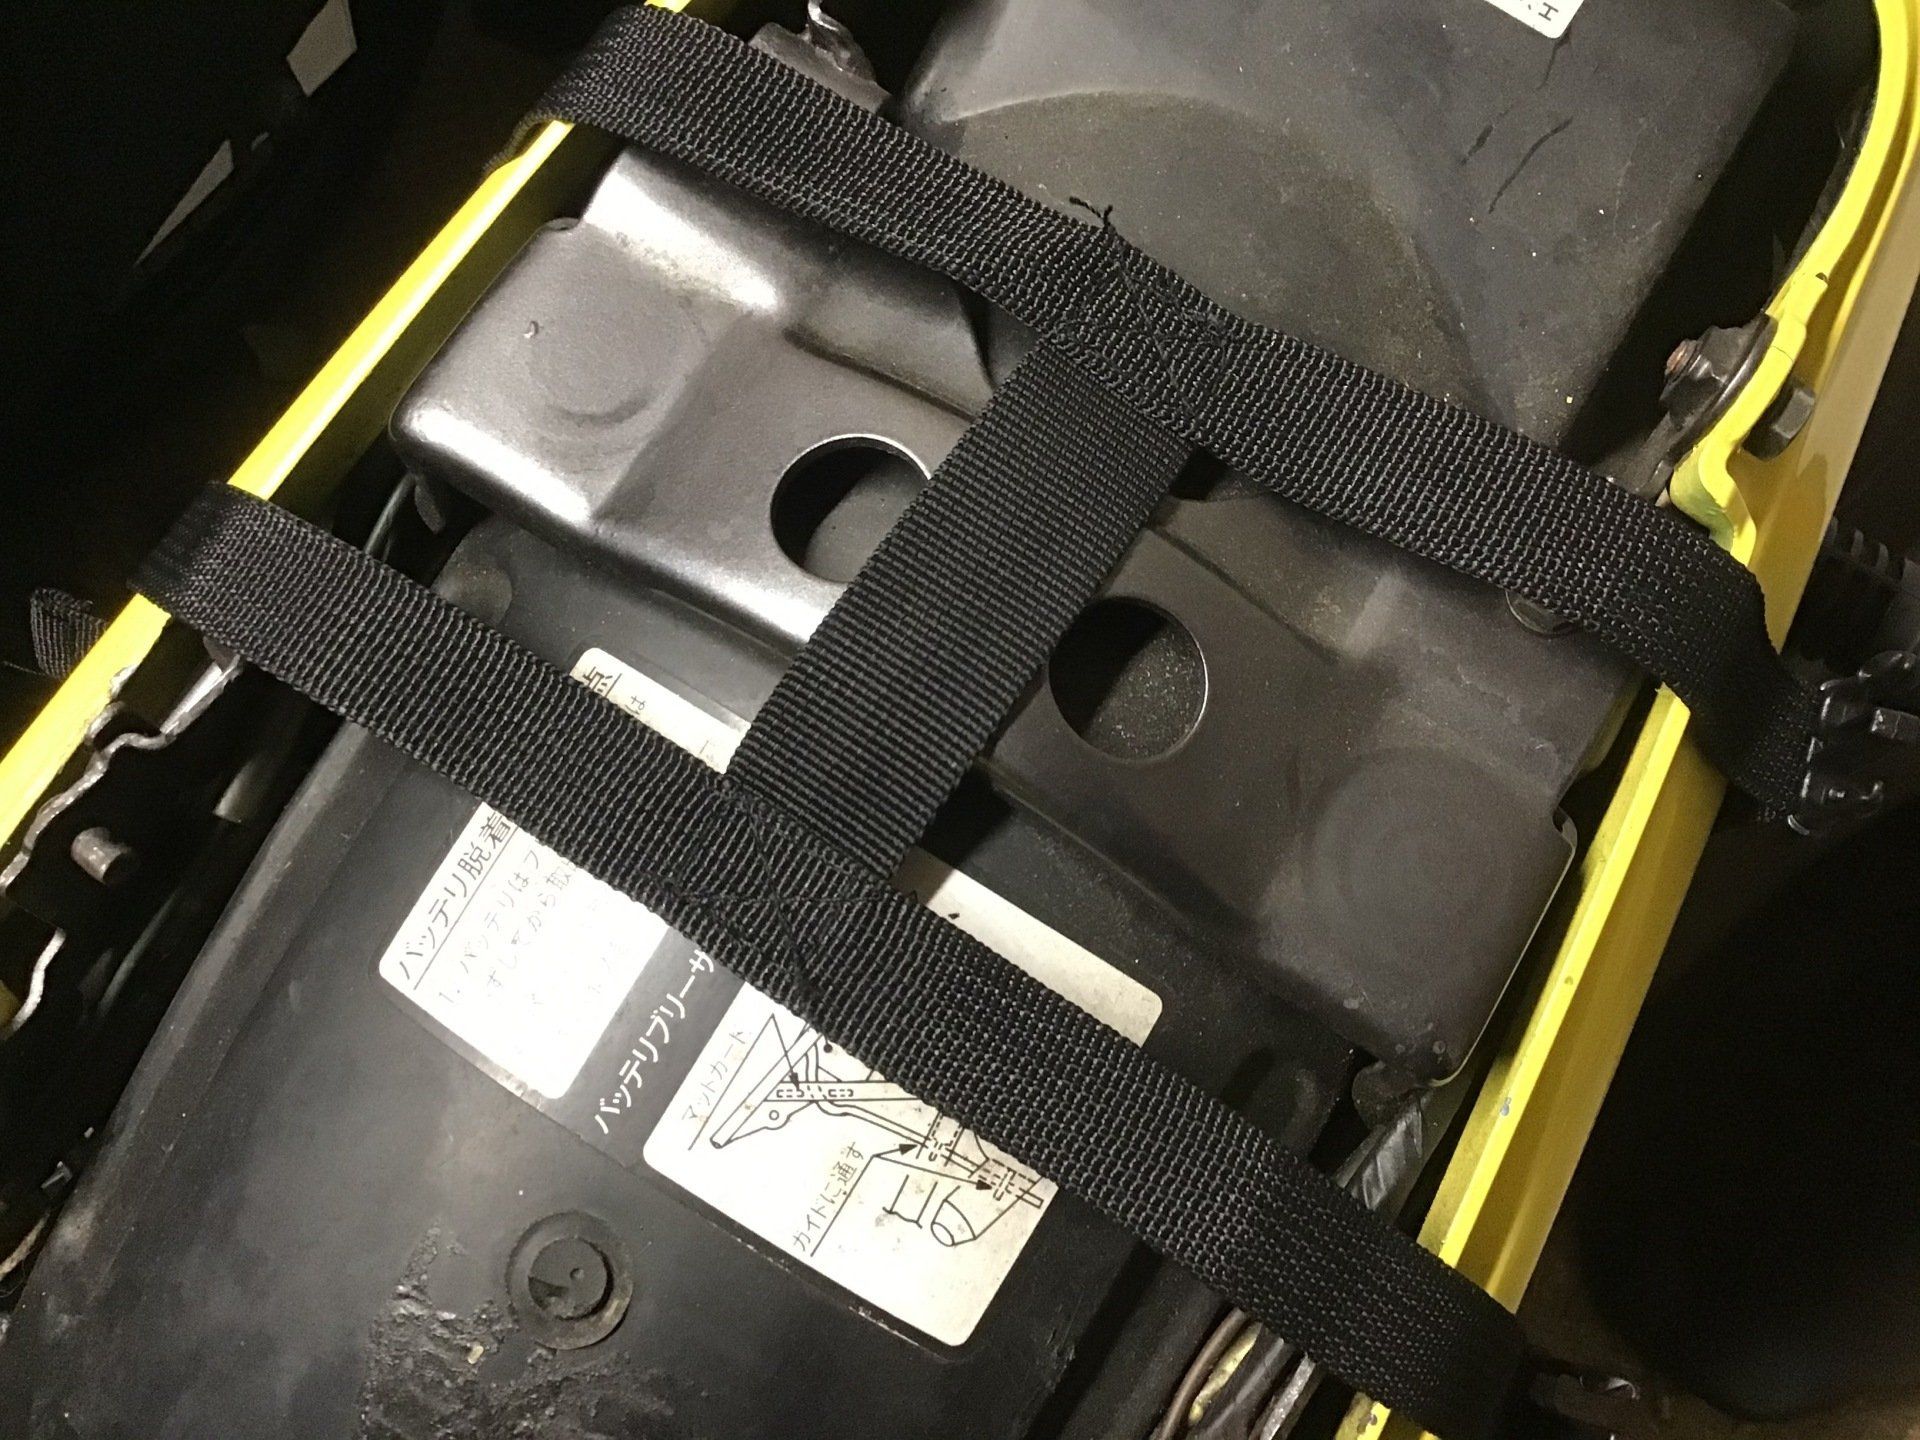
Which means without the bag in place they'll just flop around where they like.
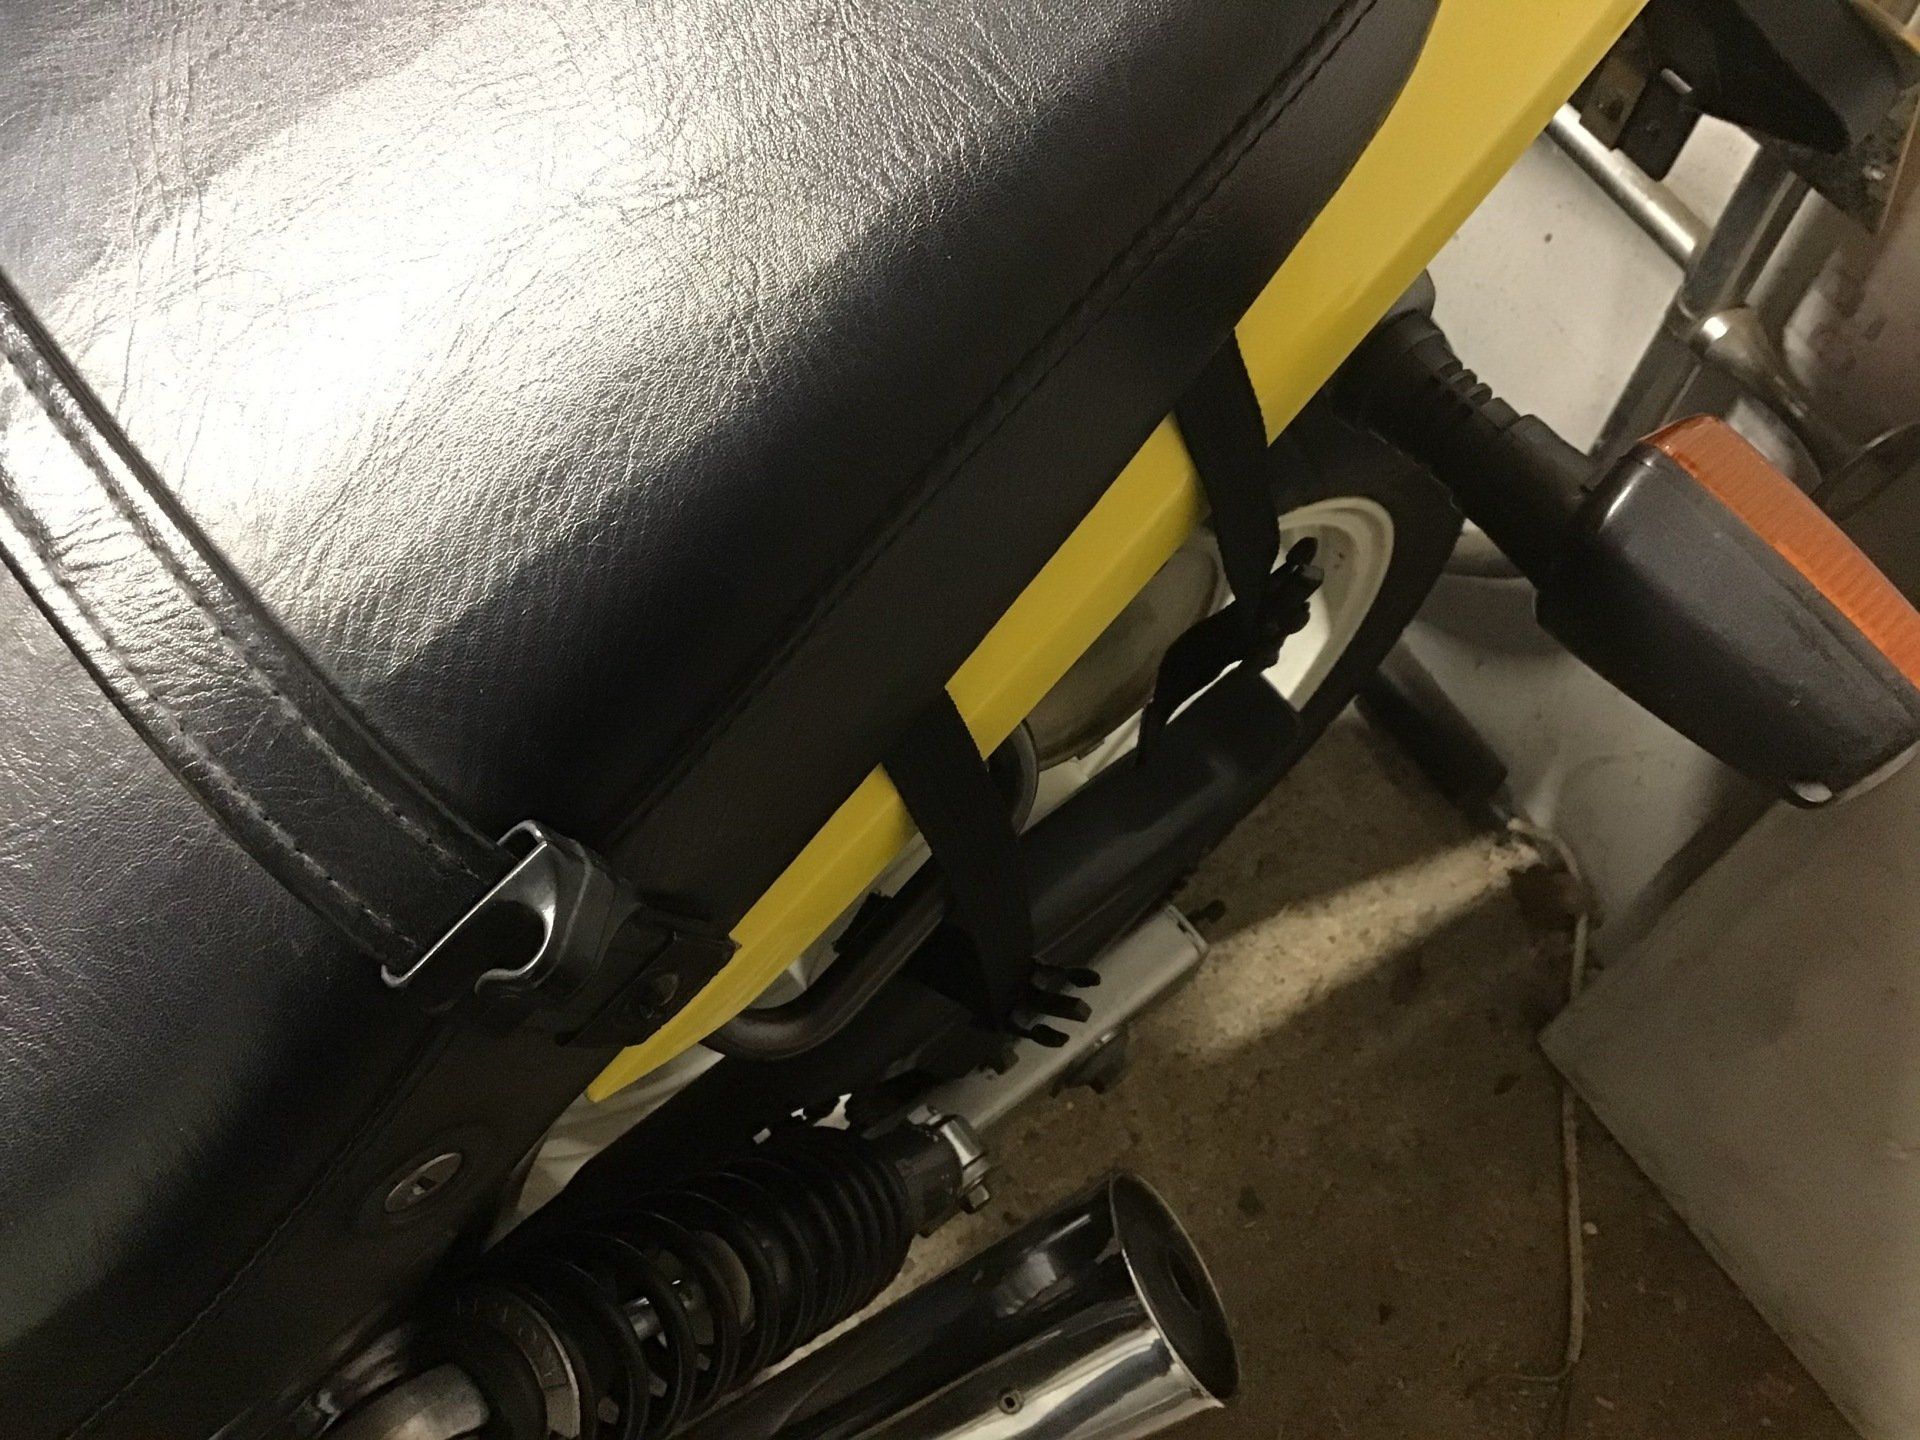
But with the bag on and the straps tensioned it's surprisingly secure, but I was worried that without a rear grab rail to stop it, the bag could work its way back along the seat.
So I used a cable tie to keep the strap anchored in place.
And also realised that should I want to ride without the tail bag on, the straps could be stashed under the seat.
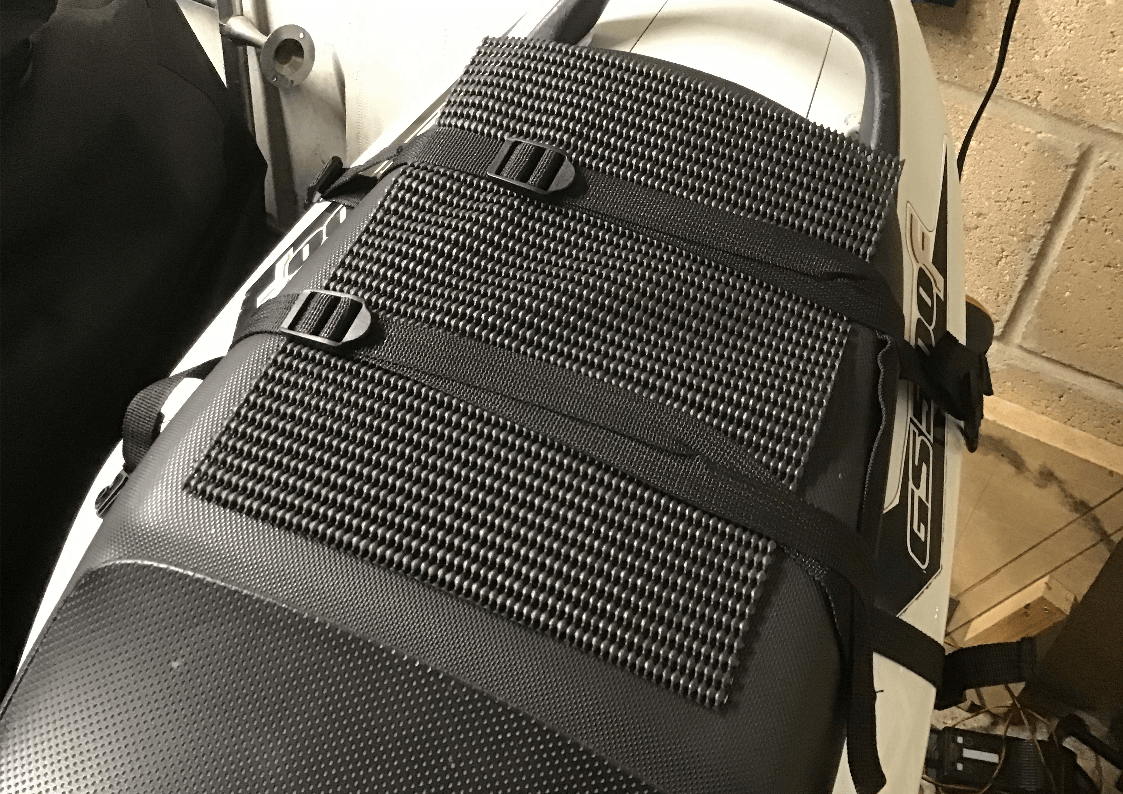
I also added a bit of grip mat, to protect the seat cover and hopefully minimise any sliding to the rear tendencies of the tail bag.
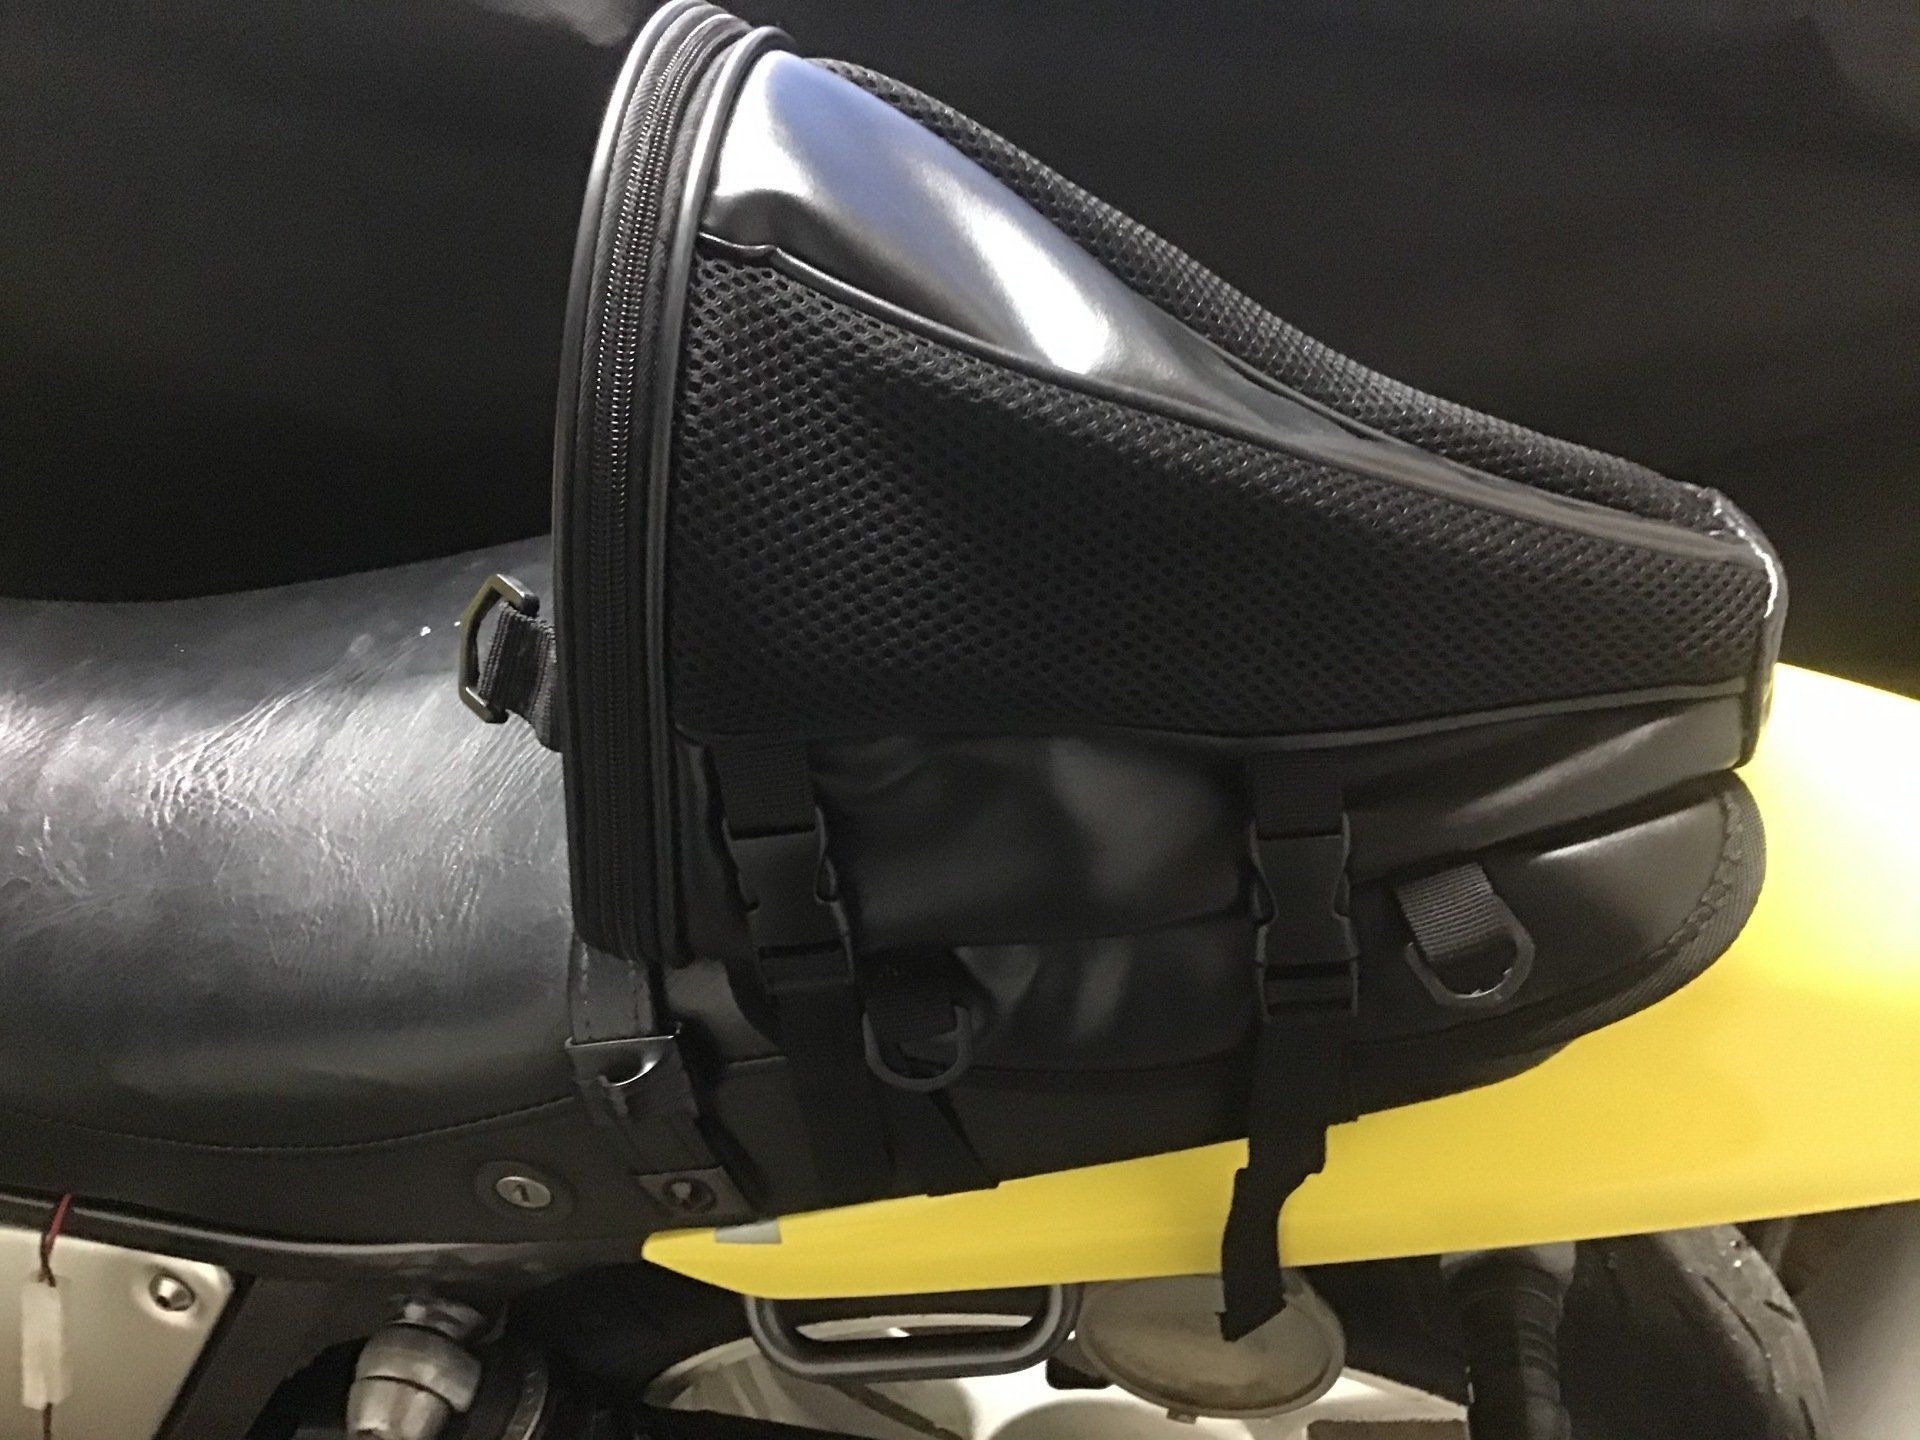
And there it is back on the seat again. I have to say that it fits much more securely than I expected, but I'm yet to try it on the move, mainly because the MOT has run out on the little Yamaha. It's on my to do list...
Of the two, I still like the Riding Tribe one best because the material used makes it looks a little more expensive. But then again, it is! Actually, I don't think you'd be disappointed with either of these two bags. Pick according to your taste and budget.