
PATTERN MAKING
If you're looking to make a fibreglass part, you're going to need some kind of pattern. If it's mostly flat surfaces with some simple curves or radii, then you can often get away with using wood, plastic sheet or even cardboard. You will need to check that whatever you use is compatible with the resin you've chosen, or cover it with something that is. It can be as simple as adding a coat of varnish or paint, and depending on what type of plastic sheet you choose, it may be possible to use it as it is with no further surface preparation. (Polyester resin shouldn't stick to polypropylene, but the pessimist in me would still use some kind of mould release agent.) Some of the parcel tapes also don't react with polyester resins, so you could cover your pattern with that. In all cases, do a test piece first.
However, most motorcycle parts have nasty complex curves which are difficult to reproduce using sheet materials.You end up with four main options:
1) Loads of car body filler, built up and sanded to shape.
2) Moulding wax.
However, most motorcycle parts have nasty complex curves which are difficult to reproduce using sheet materials.You end up with four main options:
1) Loads of car body filler, built up and sanded to shape.
2) Moulding wax.
3) Chavant clay
4) 3D Printing
5) Foam
There are also two different ways to produce your fibreglass component. My preferred method is to make a pattern of the right size and shape, use this to take a fibreglass mould from, and then use the fibreglass mould to make the finished article. It's long winded, but having the mould means that you can make spares should the original get damaged.
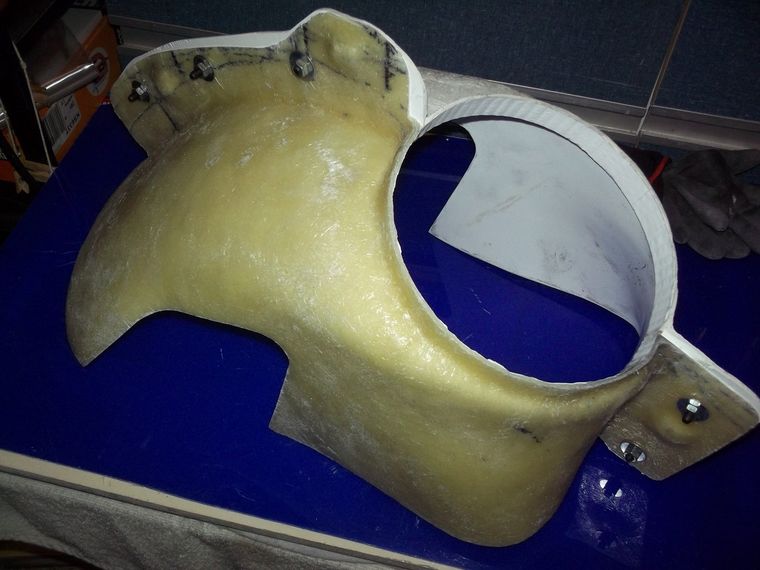
The picture (below) show a fairing mould. It's a two part mould, split down the middle to make it easier to get the moulding out. If your component has any undercuts, you won't be able to remove the pattern unless you split the mould at appropriate points.
4) 3D Printing
5) Foam
There are also two different ways to produce your fibreglass component. My preferred method is to make a pattern of the right size and shape, use this to take a fibreglass mould from, and then use the fibreglass mould to make the finished article. It's long winded, but having the mould means that you can make spares should the original get damaged.
The picture (below) show a fairing mould. It's a two part mould, split down the middle to make it easier to get the moulding out. If your component has any undercuts, you won't be able to remove the pattern unless you split the mould at appropriate points.
The quick and dirty method is to lay up fibreglass over the pattern to make the finished article. Your finished component will be slightly bigger than the pattern, so you may need to take this into consideration. And you may need to do some filling and sanding to get a nice even surface finish.
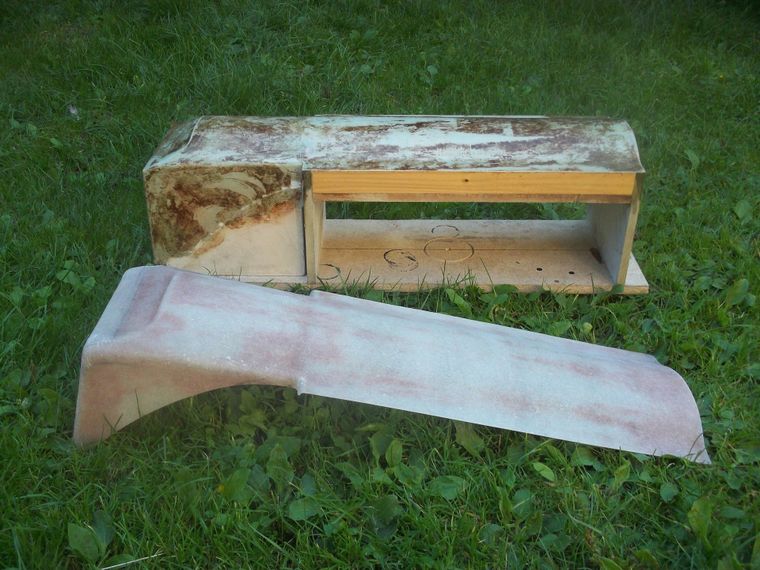
The picture underneath is of the first fibreglass work that I tried. The pattern (at the back of the picture) is made from wood, MDF, foam and body filler. I used wax furniture polish as the mould release agent, that's why it's a horrible brown colour! Three layers of chopped strand mat was laid over the pattern to form the finished component (front of picture). For simple components, this is a quick and easy way to a finished article. If your component has undercuts, you can still use this method, but you'll have to destroy the pattern to remove it.
The picture underneath is of the first fibreglass work that I tried. The pattern (at the back of the picture) is made from wood, MDF, foam and body filler. I used wax furniture polish as the mould release agent, that's why it's a horrible brown colour! Three layers of chopped strand mat was laid over the pattern to form the finished component (front of picture). For simple components, this is a quick and easy way to a finished article. If your component has undercuts, you can still use this method, but you'll have to destroy the pattern to remove it.
Either way, you're going to need a pattern, so let's look at the options.
Number one is fairly cheap, and easily obtained, but a solid body filler pattern would be quite hard work. Lots of sanding. Lots of dust. For small areas or filling holes, it's great. For larger areas it's not so much fun, but it is doable. Numbers two and three are easily worked. It's very easy to add and remove material, but it’s quite difficult to get a really smooth surface finish (at least that's my limited experience!). It would be expensive if you’re making something large - although, only the top layer needs to be wax or clay. You can use anything you like to provide the rough shape underneath.
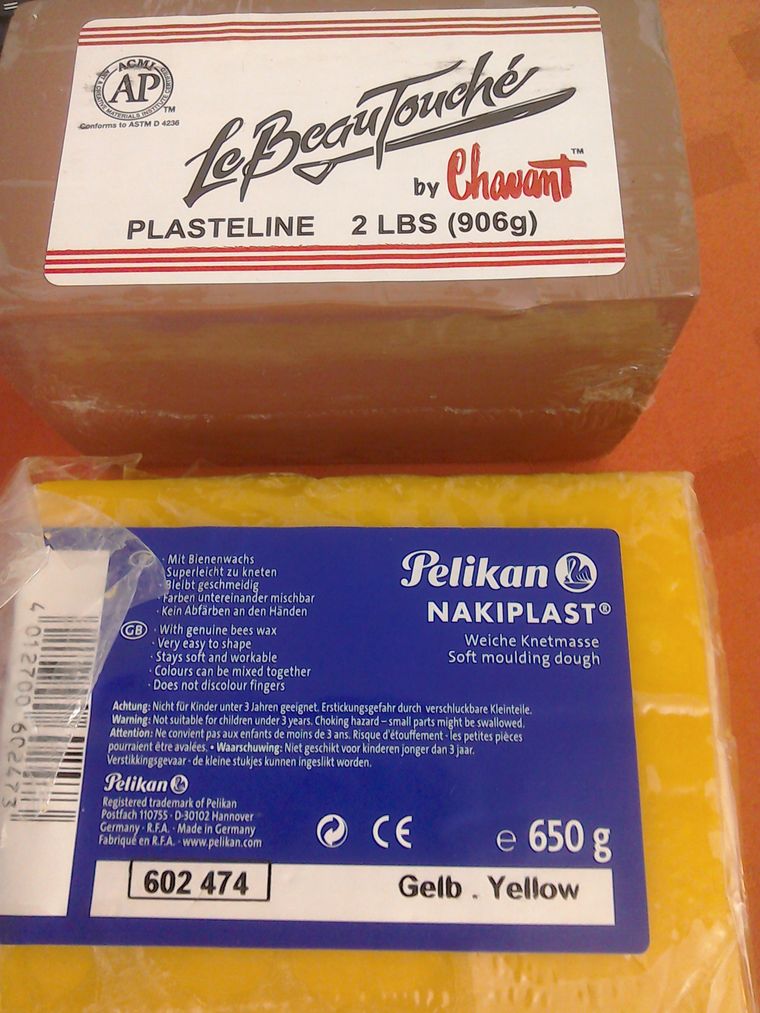
Pictured below (top of pic) is Chavant clay. This is a special type of clay which doesn't dry out. Applying heat softens it and makes it easy to work. At room temperature it's very firm, but it doesn't dry out and is reusable. With more skill and patience than I have, you should be able to get a smooth surface finish.
Moulding wax or (Pelikan Nakiplast in this picture) can be used in a very similar way to the Chavant. It softens with a little heat (the temperature of your hands is enough) but at room temperature is firm and it doesn't dry out. Once again, it is reusable and as an added bonus, being already waxy, it doesn't need any mould release agent. In my limited experience, Chavant can also be used without mould release, it will stick to the mould, but you can clean it off.
This is a fairing pattern made from balled up newspaper taped around the headlight, forks etc - to provide the bulk of the pattern, then a layer of Chavant clay has been added over the top.
Number 4 only works if you have access to a 3D printer and are good at drawing what you want to produce in CAD. If you are copying an original part that you can take measurements from, it's a little easier, but for one-off stuff, I personally have trouble visualizing what I want something to look like on paper or screen. I have to mock it up on the bike, with frequent standing back to see how it looks!
That leaves us with number 5 - foam. Here again you have a choice, the easiest (and cheapest) to obtain is extruded polystyrene (often called Styrofoam). It’s used as insulation in the building trade, so it’s usually easy to find. The other type of foam often used for pattern making is polyurethane. This is less common to find (you’ll probably have to get it from a specialist supplier) and it is much more expensive.
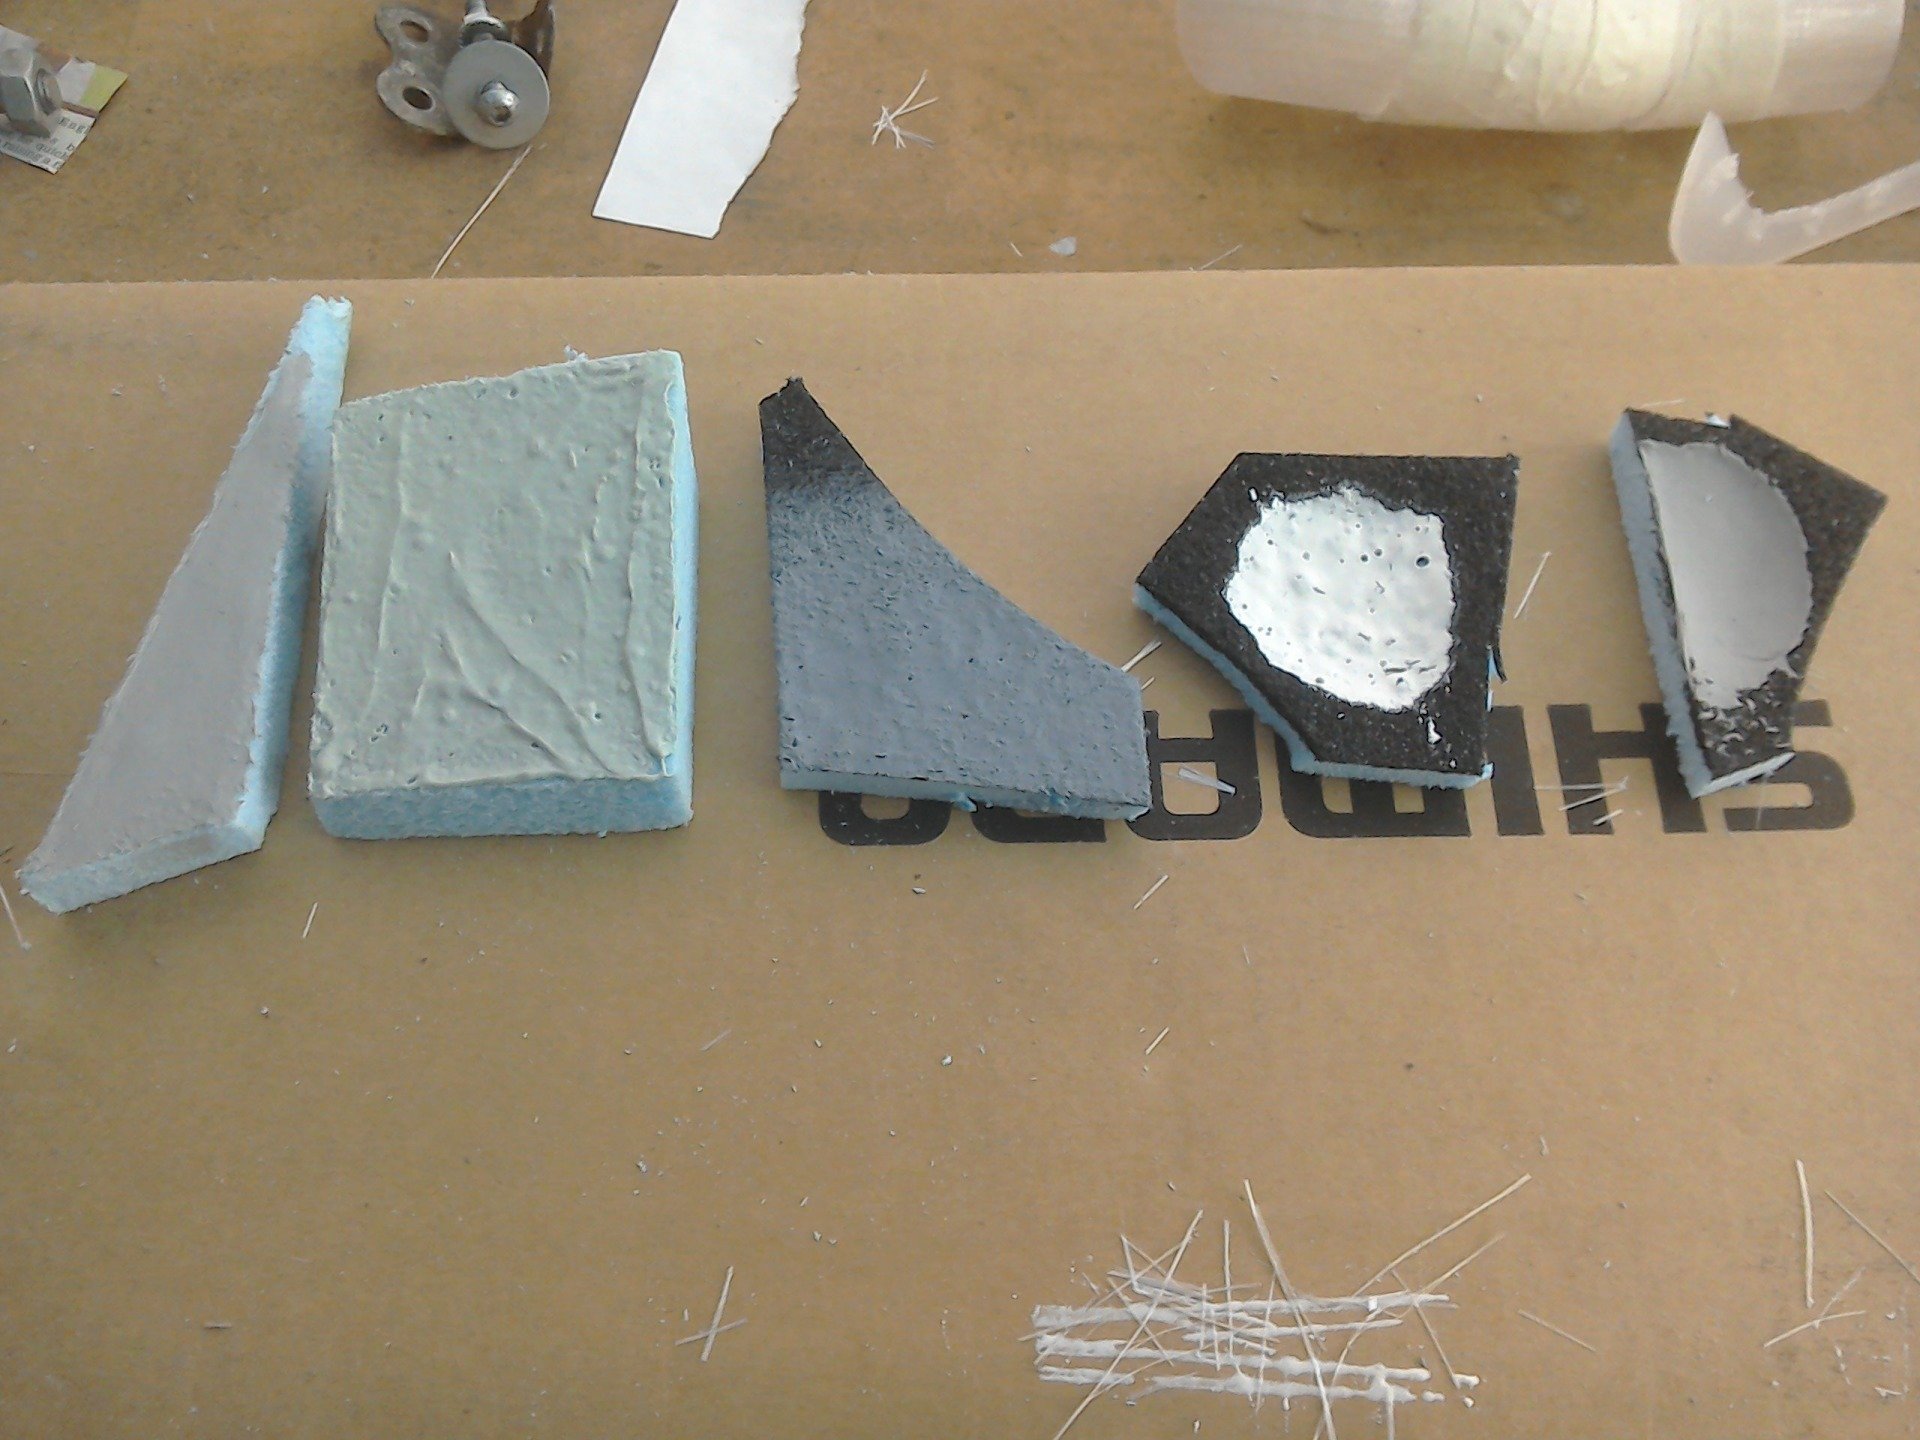
Both types of foam are easy to cut and shape, but in order to make a useable pattern, you will need to apply some kind of top layer that can be sanded to a fine finish. (The foam is also easily damaged, so a top layer is also desirable to make the pattern more robust.) Choices of top layer include car body filler, paint or laminating resin. Here’s where more even problems are encountered. Polystyrene foam is attacked by the solvents in many paints, body filler and polyester laminating resins. (See pic. below).
From left to right:
That leaves us with number 5 - foam. Here again you have a choice, the easiest (and cheapest) to obtain is extruded polystyrene (often called Styrofoam). It’s used as insulation in the building trade, so it’s usually easy to find. The other type of foam often used for pattern making is polyurethane. This is less common to find (you’ll probably have to get it from a specialist supplier) and it is much more expensive.
Both types of foam are easy to cut and shape, but in order to make a useable pattern, you will need to apply some kind of top layer that can be sanded to a fine finish. (The foam is also easily damaged, so a top layer is also desirable to make the pattern more robust.) Choices of top layer include car body filler, paint or laminating resin. Here’s where more even problems are encountered. Polystyrene foam is attacked by the solvents in many paints, body filler and polyester laminating resins. (See pic. below).
From left to right:
Sample one has been coated in PVA glue, and once dried, has then been coated with one-part fine surface filler. The PVA has stopped the filler from attacking the foam. Compare this with sample five (far right) which is the same filler over a sample covered with black acrylic paint. You can see from the dish produced, that acrylic paint doesn't stop this filler from attacking the foam. So, painting the foam with PVA acts a a good barrier, but painting with glue is as messy as it sounds.
Sample two is a standard two-part car body filler. It attacks the foam, but as it sets rapidly, the affect is limited. I used this method to make the patterns for the tank cover and tail piece of my previous project and it works Ok, but trying to lay an even cover of body filler is difficult over large, oddly shaped surfaces, so you end up with lots of filling and sanding. Also the slight reaction between foam and filler means that the filler doesn't always 'stick' well to the foam.
Sample three has been painted with acrylic paint and then sprayed with high build primer. This has attacked the foam a little, but the high build primer doesn't really provide the desirable hard shell to the foam.
Sample four is polystyrene resin over a sample painted with acrylic paint. As you can see, the resin fairly munched its way through the foam. So acrylic paint on its own doesn't offer any protection from attack.
Sample five has already been discussed.
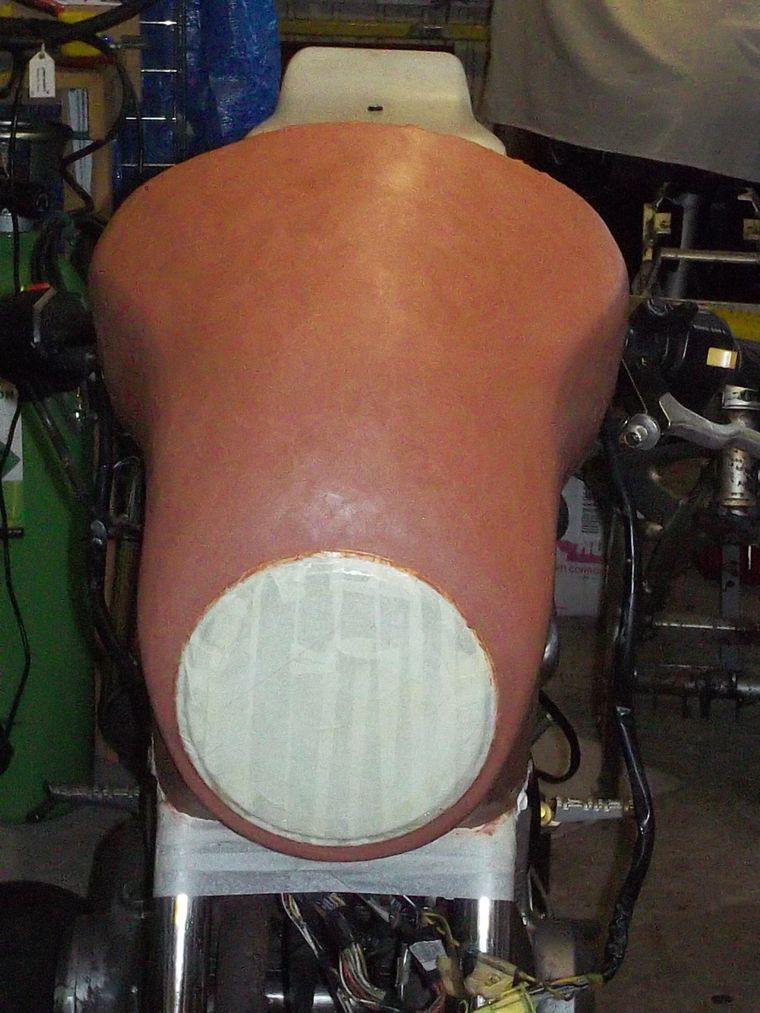
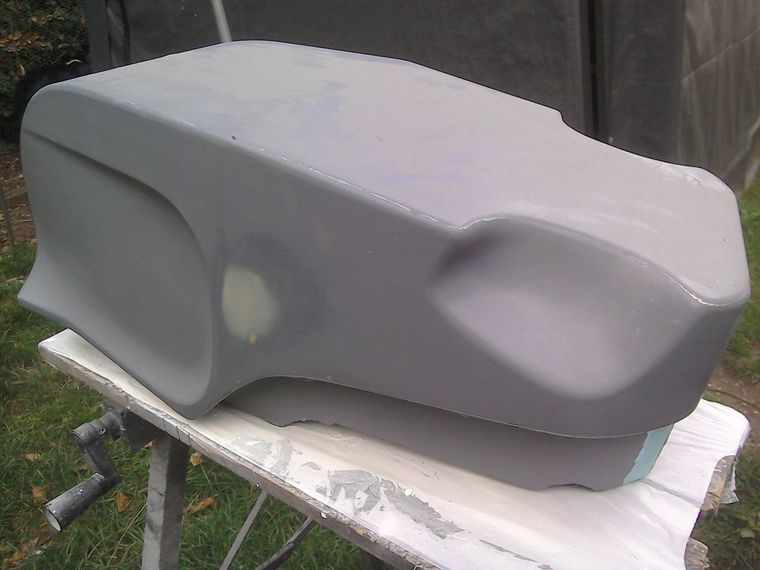
This is the pattern for the tank cover for a previous project. It's body filler over polystyrene foam. It did the job, but you can see a blue area visible at the front, where the body filler has parted company from the foam.
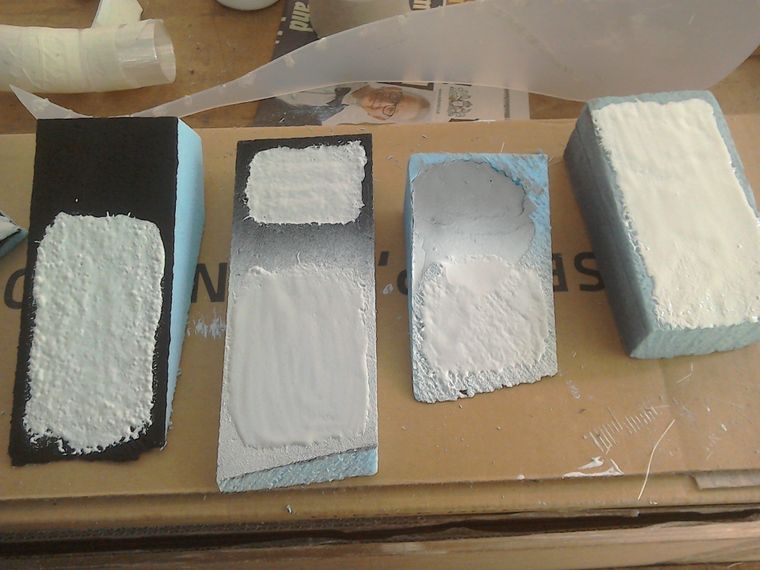
More test specimens. What I really want to be able to do is 'paint' the foam with polyester resin. The resin sets really hard, so it will protect the foam, but is readily sandable and it will be much quicker to apply than body filler. The resin is normally very runny, so to thicken it up (so that it sticks to the curves of the foam better) a filler is required. Various fillers are available, but probably the easiest for a home user to find is talcum powder. I can also tell you that Imperial Leather talcum powder does make the resin smell nicer!
From left to right again:
From left to right again:
Sample one, acrylic paint with resin / talc mix. Attacks the foam as expected.
Sample two, the top section is resin/ talc over acrylic paint again. The bottom section is layers of acrylic paint, white aerosol spray paint and then the resin / talc mix. You can see the difference here, at the top, the foam has been attacked, but at the bottom, success.
Sample three, this is aerosol paint straight over the top of foam. Although not clear from the picture, the spray paint didn't stop the reaction between foam and resin, plus the paint also attacked the foam a little.
Sample four has been painted with PVA glue before the resin / talc mix applied. This is OK, but it's not as good as the result obtained on sample 2.
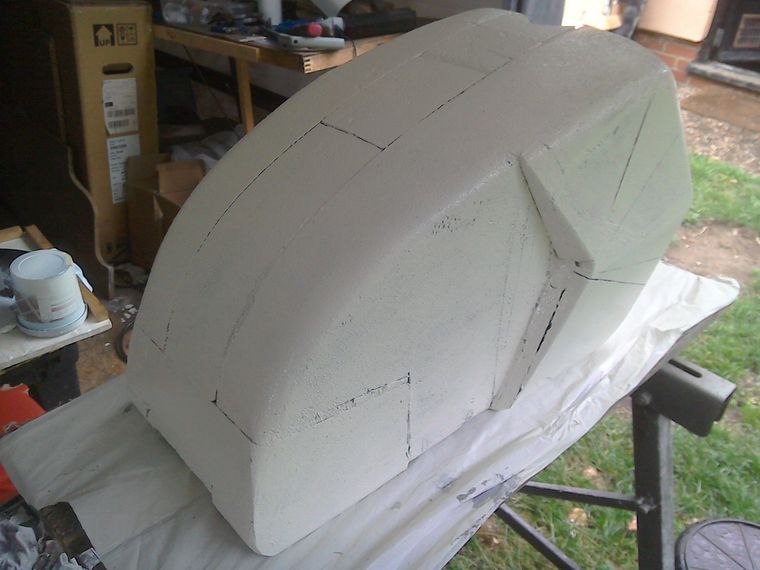
So, there are two options that seem workable. Body filler straight over foam, or a layer of acrylic paint, followed by spray paint, followed by a layer of polyester resin / talc mix. Since I've already tried the former, for the current project I'm going to try the paint / polyester resin method. So that's what I've been doing for the petrol tank pattern.
The rough (very rough) foam pattern has been painted with black acrylic paint.
The rough (very rough) foam pattern has been painted with black acrylic paint.
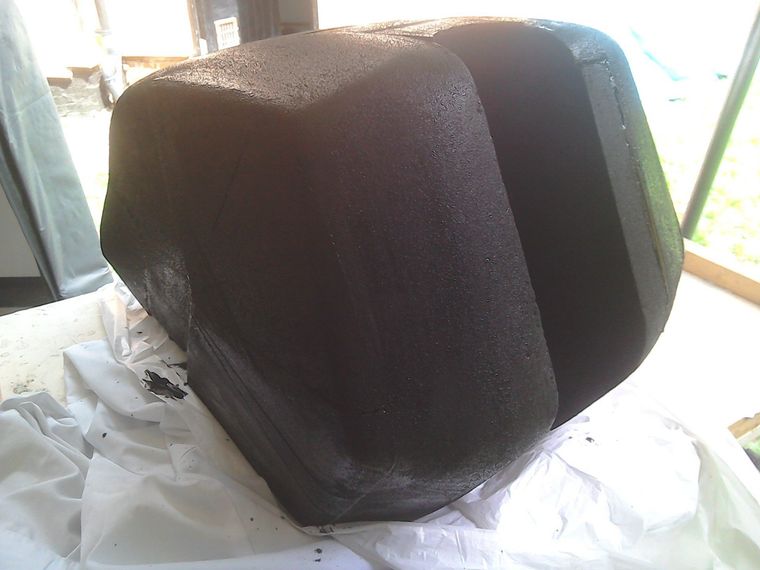
Next, it was time for some spray paint.
Finally, a couple of layers of polyester resin / talcum powder mix.
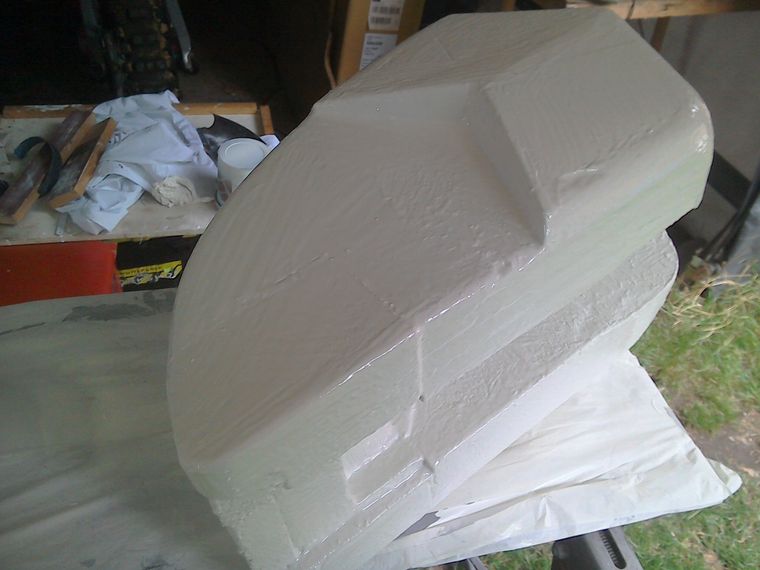
Now for many hours of sanding and filling!!!
The easy ways around this? Use the expensive polyurethane foam - which isn't attacked by polyester resin. Or use epoxy laminating resin - which doesn't attack the polystyrene foam, but is more expensive.
It's a time verses expense conundrum.
There are as many different ways to make patterns as there are things that you could make. So if you're thinking of having a go with GRP, do spend some time researching until you find the method that works best for you.
I have three books on the subject of fibreglass work and one DVD, reviews of which you'll find elsewhere on the website. There are also lots of video clips on youtube, but as always with youtube, some are better than others.
I have three books on the subject of fibreglass work and one DVD, reviews of which you'll find elsewhere on the website. There are also lots of video clips on youtube, but as always with youtube, some are better than others.