

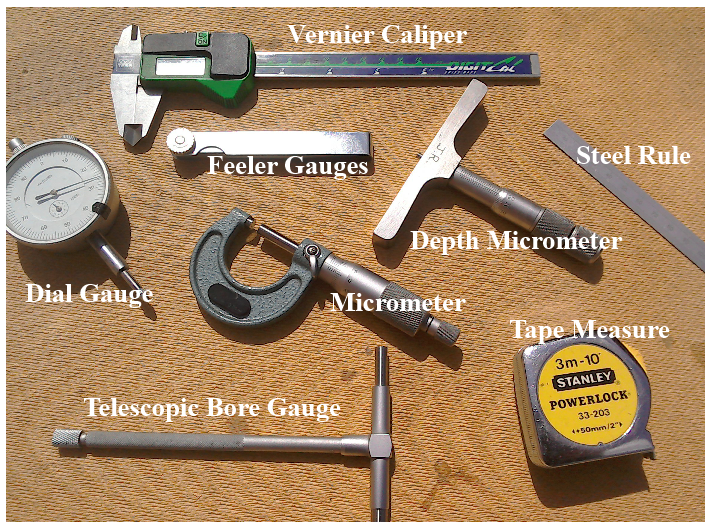
As part of the Monday articles series, we introduced some of the measuring tools that you may find useful in the shed / garage. The Monday articles could only give a brief overview of the multitude of measuring instruments found in engineering workshops. And so, here as promised, is a more in depth look at micrometers and vernier calipers. How to use and read them. (If you missed the original Monday articles, you can find them all
HERE.)
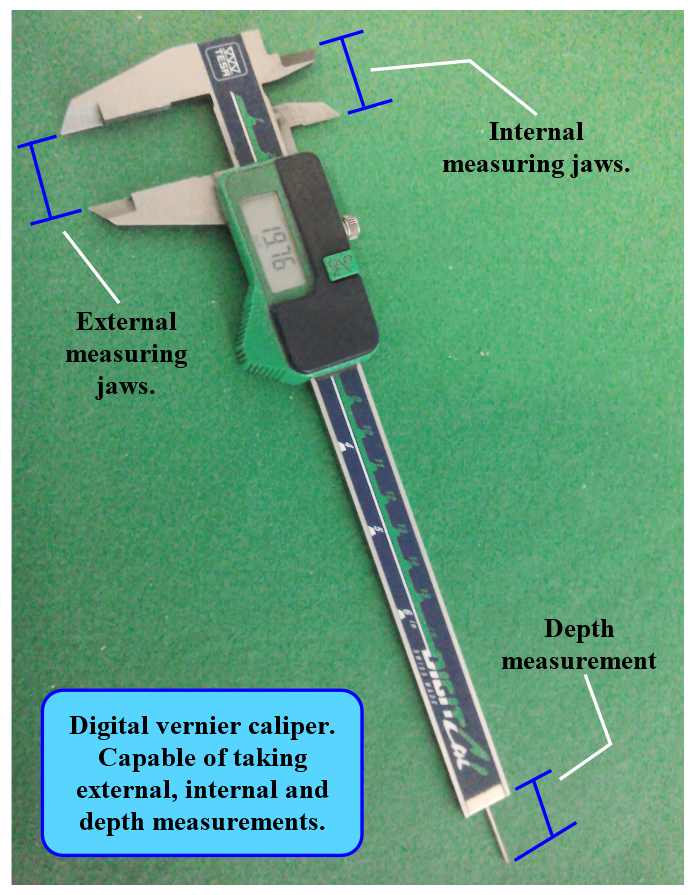
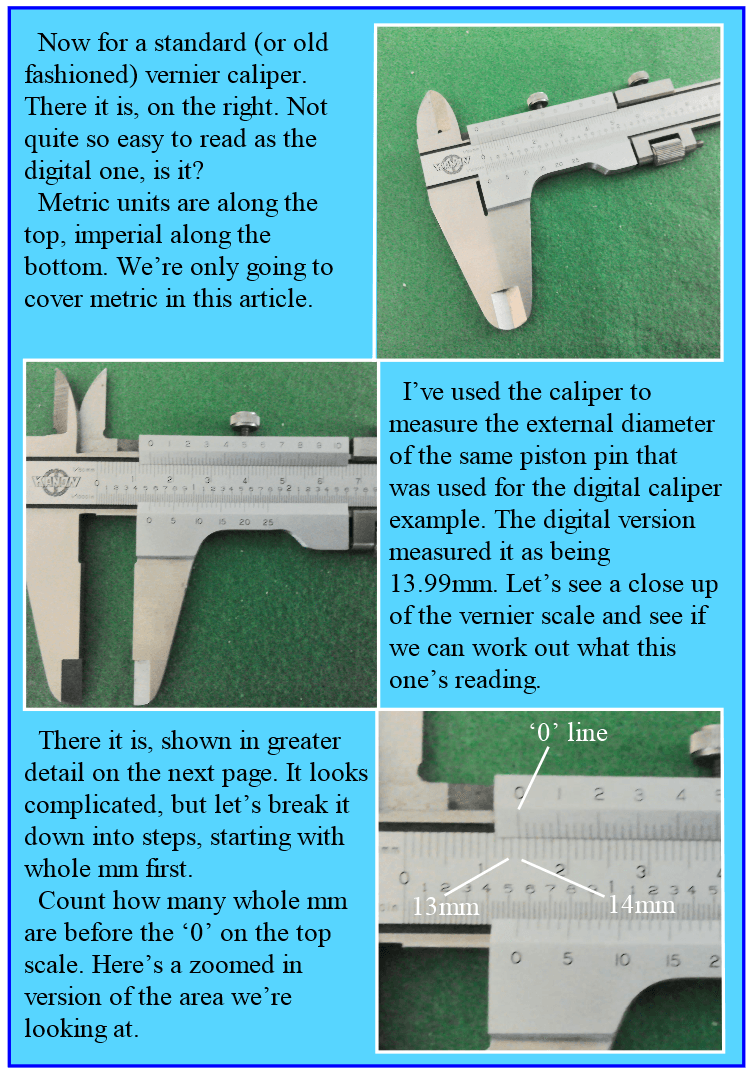
First off, we’ll explore the use of the vernier caliper. Probably the most versatile measuring instrument. It can measure inside, outside and depth dimensions to an accuracy of 0.01mm. Given that they are now relatively inexpensive (and easier to read) most people now use digital verniers. But, we will also cover how to read an ‘old fashioned’ vernier scale as well.
First off, we’ll explore the use of the vernier caliper. Probably the most versatile measuring instrument. It can measure inside, outside and depth dimensions to an accuracy of 0.01mm. Given that they are now relatively inexpensive (and easier to read) most people now use digital verniers. But, we will also cover how to read an ‘old fashioned’ vernier scale as well.
Standard micrometers (like those shown below) have a 25mm measuring range, so if you want to cover a large size range, you need several of them. They are graduated to 0.01mm, which in practice means that you can measure something to the nearest 0.005mm. If you want to measure this accurately, though, you need to make sure that your micrometer is correctly adjusted.
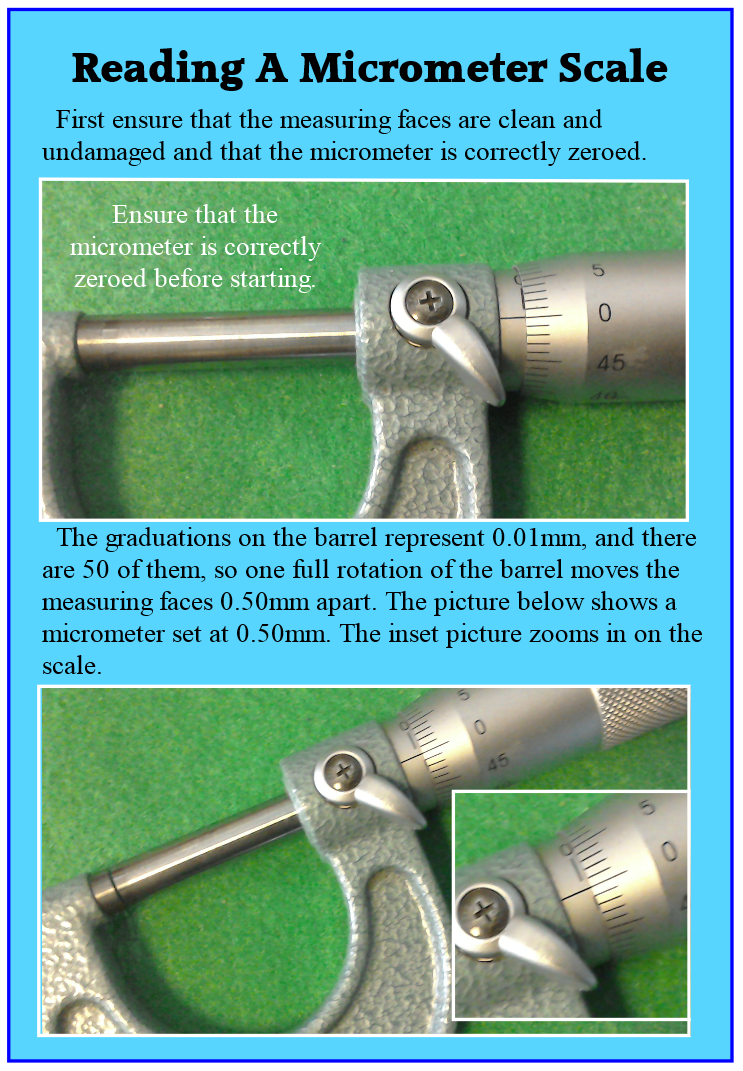
For the 0 - 25mm micrometer, this is fairly easily achieved. Make sure that the measuring faces are clean and undamaged and then close the jaws up. (Most micrometers have a ratchet mechanism so that a consistent force is used when taking measurements.) With the jaws closed, the scale should read zero. If it does, everything’s rosy. If not, all micrometers (when new!) are supplied with an adjustment spanner and instructions on how to zero it.
It’s a bit more complicated with the bigger micrometers as these obviously don’t close down to zero. In this case every micrometer (when new!) is supplied with a precision setting standard of a known length, to check and adjust the micrometer to. If you’re buying secondhand micrometers, these are often missing and as they are expensive to replace, budget for this when deciding how much to pay.
Micrometers like these can only perform external measurements. If you want to perform internal or depth measurements then you need an internal or depth micrometer respectively.
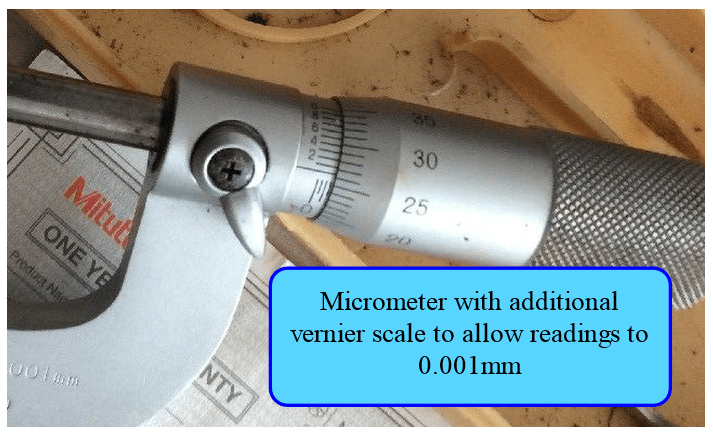
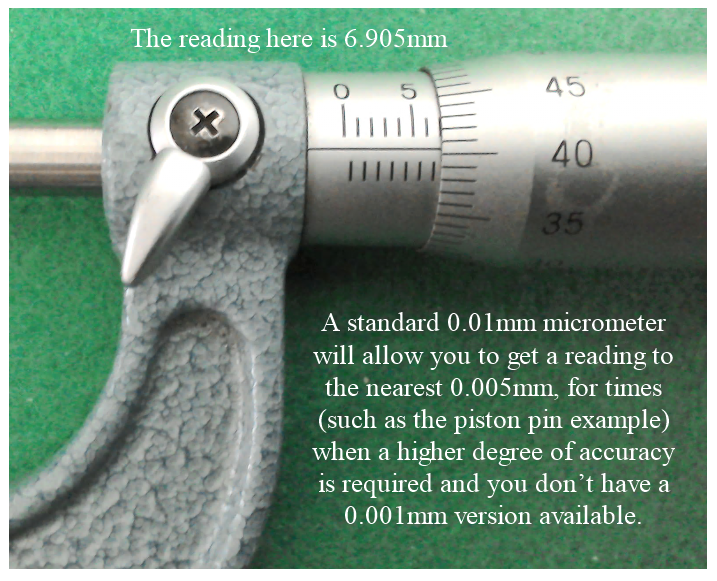
It is also possible to get micrometers that are graduated to 0.001mm. I’ve never seen one - they used to be extremely expensive - but (as ever nowadays) there are cheaper, unbranded versions now available.
For general bike work, you’ll probably only need a digital vernier. If you start doing engine work or machining, then you might want to look a micrometers.
For the 0 - 25mm micrometer, this is fairly easily achieved. Make sure that the measuring faces are clean and undamaged and then close the jaws up. (Most micrometers have a ratchet mechanism so that a consistent force is used when taking measurements.) With the jaws closed, the scale should read zero. If it does, everything’s rosy. If not, all micrometers (when new!) are supplied with an adjustment spanner and instructions on how to zero it.
It’s a bit more complicated with the bigger micrometers as these obviously don’t close down to zero. In this case every micrometer (when new!) is supplied with a precision setting standard of a known length, to check and adjust the micrometer to. If you’re buying secondhand micrometers, these are often missing and as they are expensive to replace, budget for this when deciding how much to pay.
Micrometers like these can only perform external measurements. If you want to perform internal or depth measurements then you need an internal or depth micrometer respectively.
It is also possible to get micrometers that are graduated to 0.001mm. I’ve never seen one - they used to be extremely expensive - but (as ever nowadays) there are cheaper, unbranded versions now available.
For general bike work, you’ll probably only need a digital vernier. If you start doing engine work or machining, then you might want to look a micrometers.

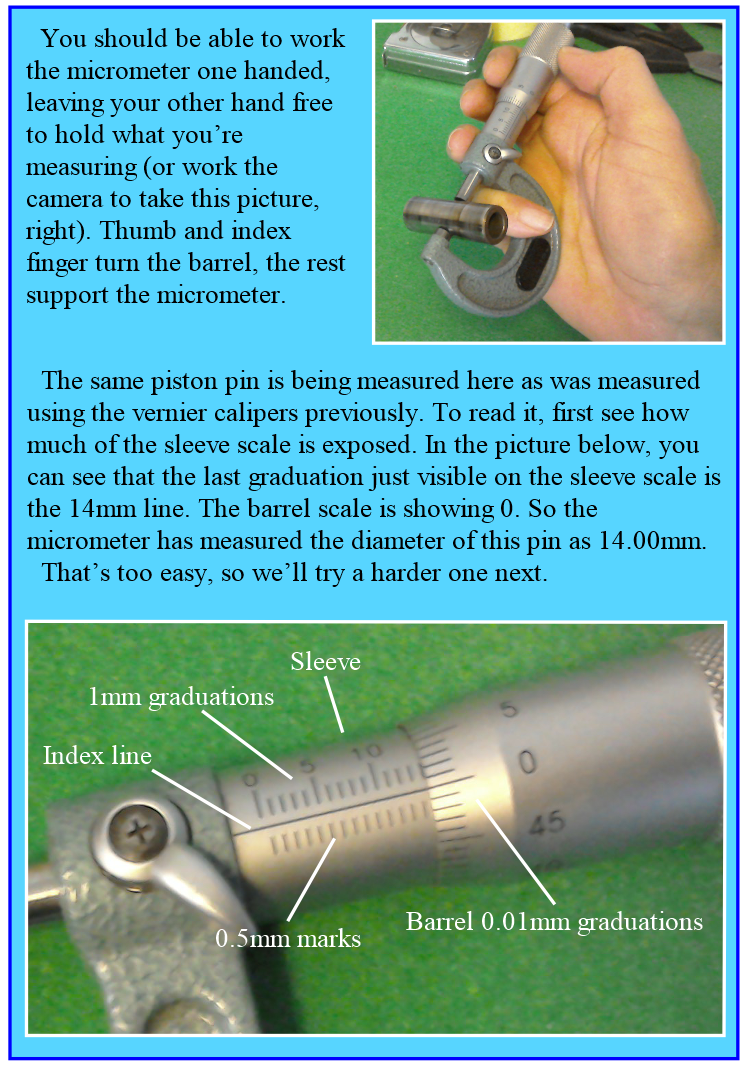
If you have read the whole article, you’ll have noticed that the same piston pin was measured three times. The standard vernier measured it as 13.98. The digital vernier recorded 13.99 and finally the micrometer read 14.00mm. So which one was correct?
Well, on the face of it two hundredths of a mm (0.02) is a very small amount - about half the thickness of a human hair. This piston pin is from a YZ80. As standard, when new, it would have measured between 13.996 and 14.000mm. Service limit is reached at 13.975mm. So these very small numbers are important. Measuring this kind of thing is really a job for a 0.001mm micrometer, but in the absence of one of these, I’d go with the standard micrometer reading every time - providing it had been accurately zeroed.
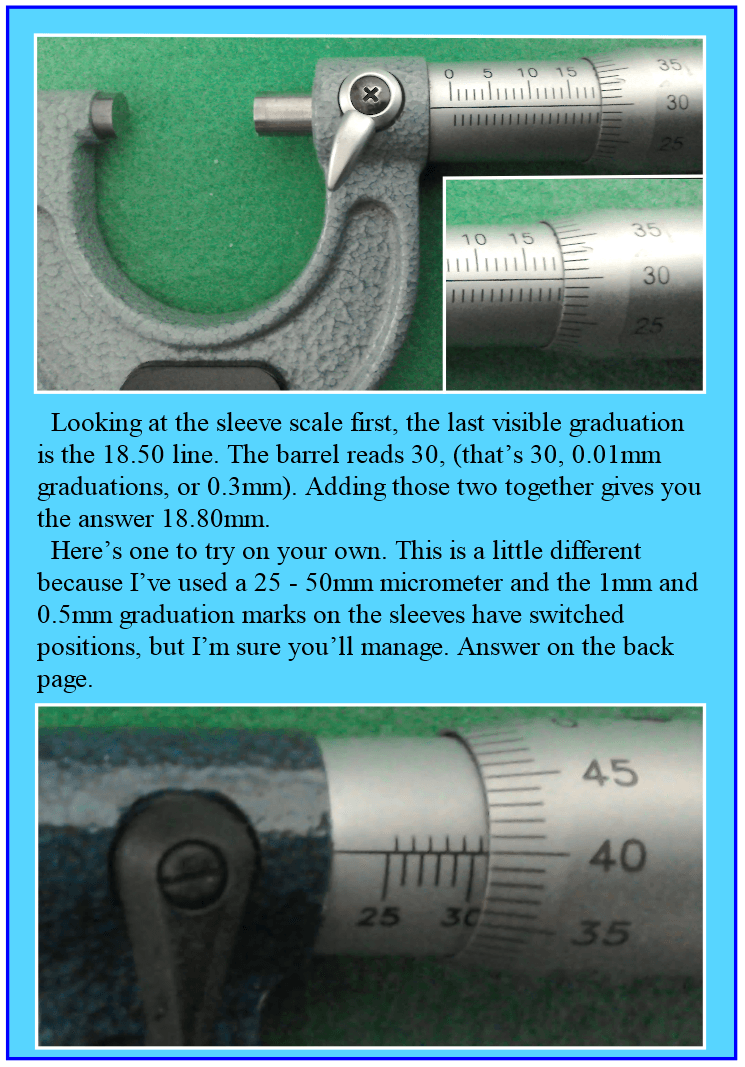
Answers: The reading on the vernier is 37.50mm and for the micrometer 30.90mm.