Workshop Blog January 2024
Christmas holidays and the need to use up annual leave from work has actually meant that some progress has been made in the garage. The rear rack and indicators are mounted on the dirt bike (although once again these maybe subject to change!) and the Royal Enfield Hunter has gained a front cowl.
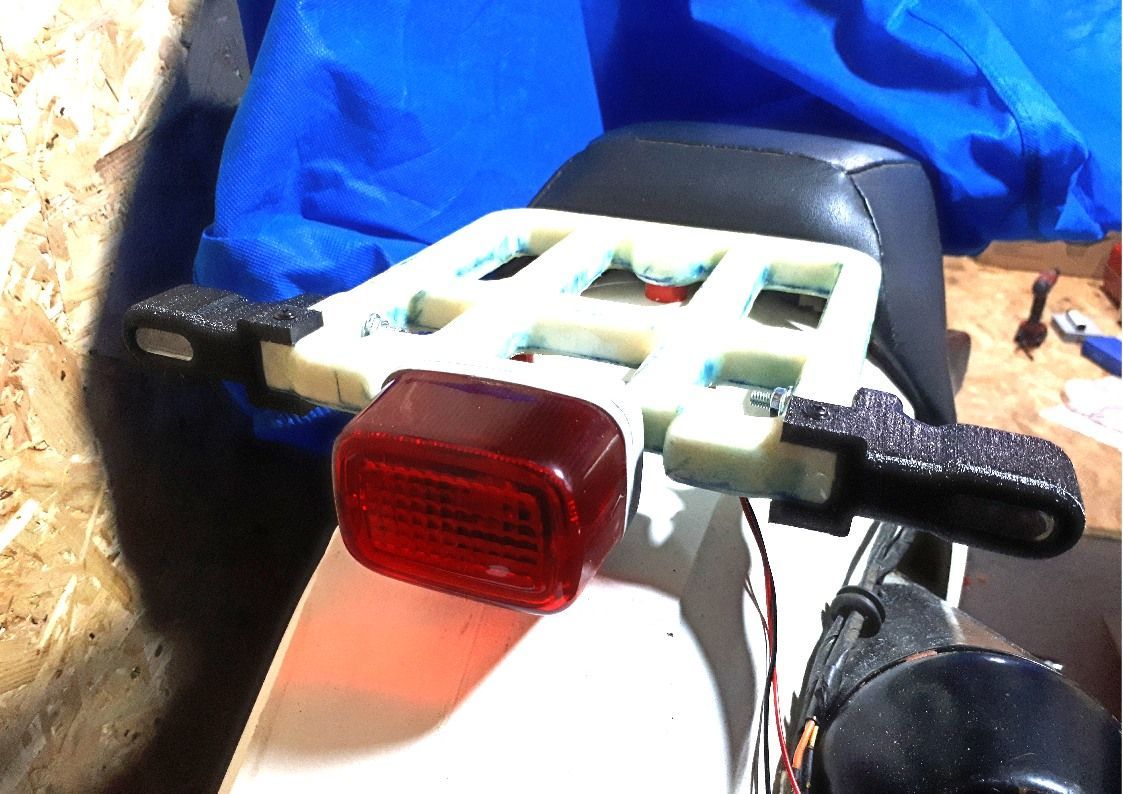
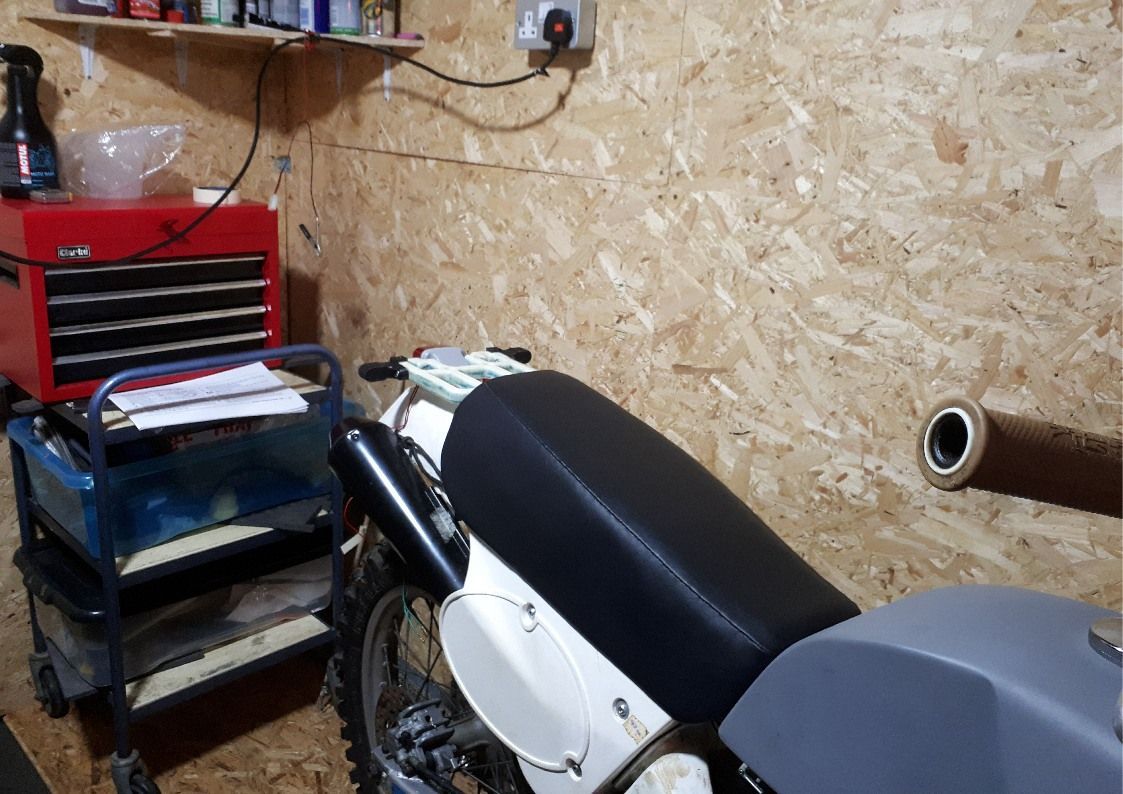
The dirt bike’s rack is spaced up from the rear mudguard and (I think) I’m happy with where it is. Again I really need to drag the bike out of the garage and stand it on it’s wheels to check that it sits at the correct angle. The spacers are just 3D printed at this stage. Final versions will probably be made in aluminium, but not until I’m happy that I have the correct dimensions.
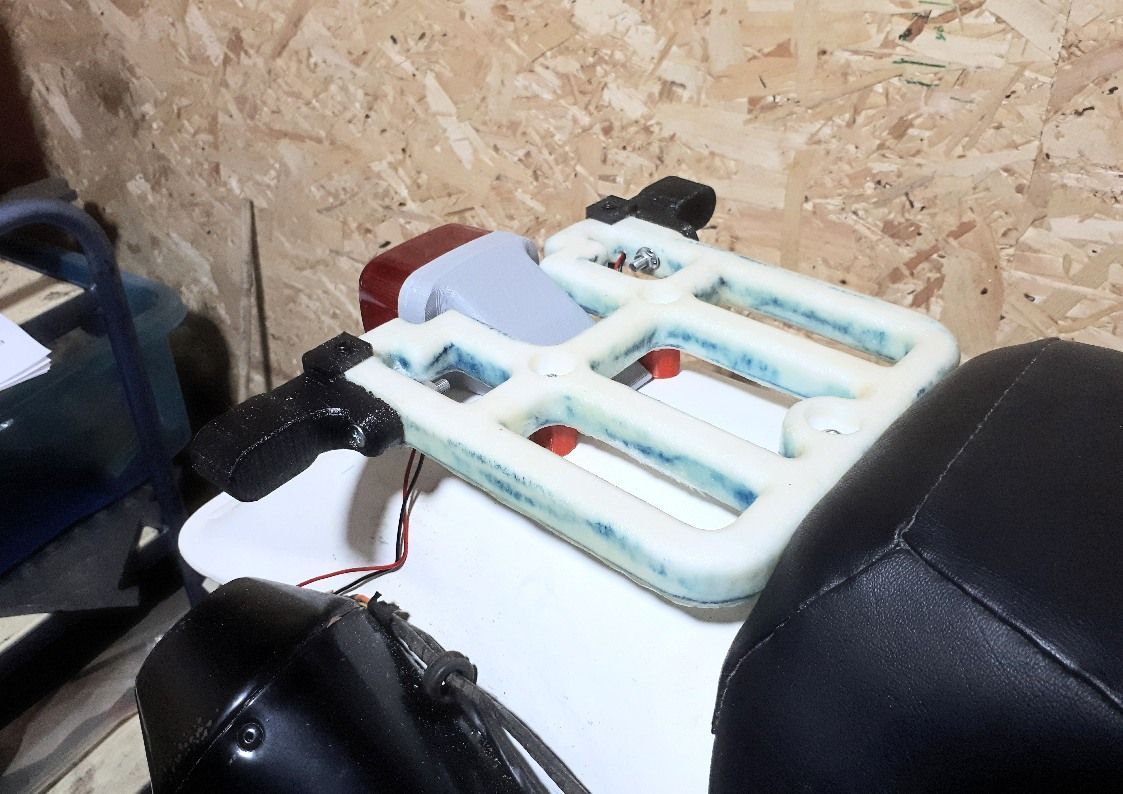
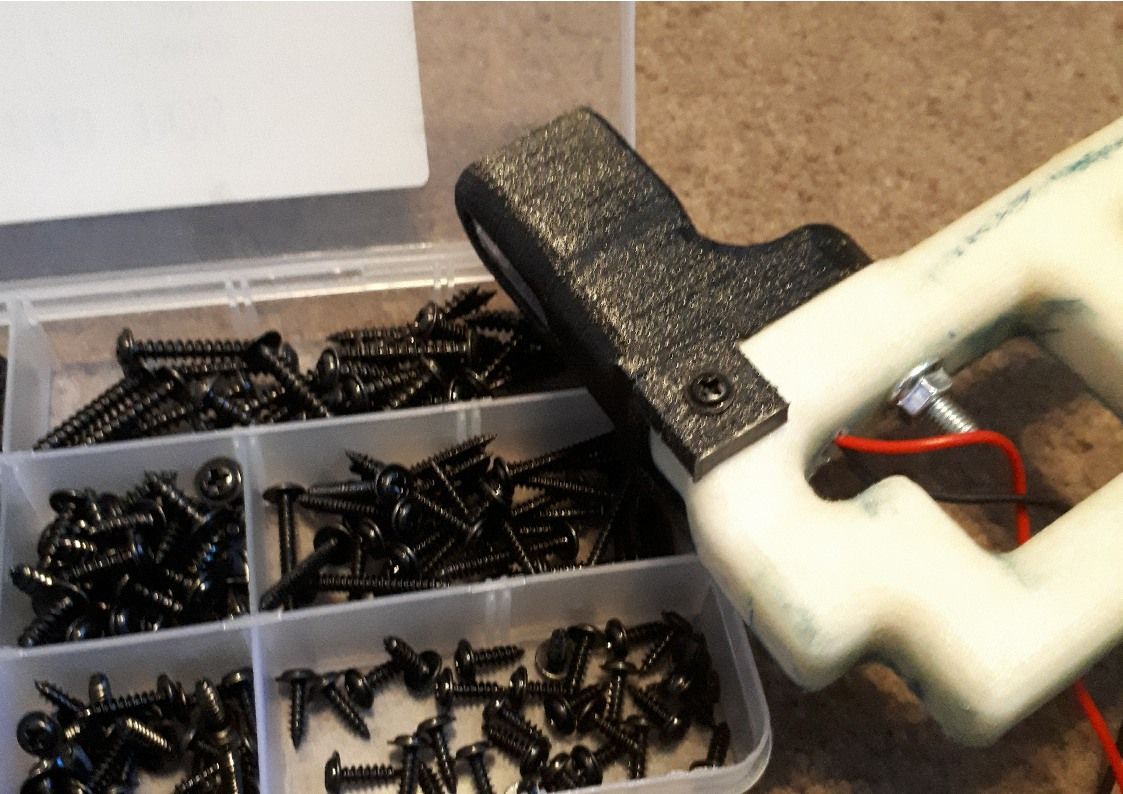
The 3D printer has also been busy printing the indicators. I still can’t get them to print as nicely as I would like but at least I do now have designs that I can live with. The picture below shows (from the top) front indicator, original indicator design and rear indicator. To get the indicators sitting snugly, the extra ‘ears’ were added to the design through which tiny self-tapping screws can be inserted.

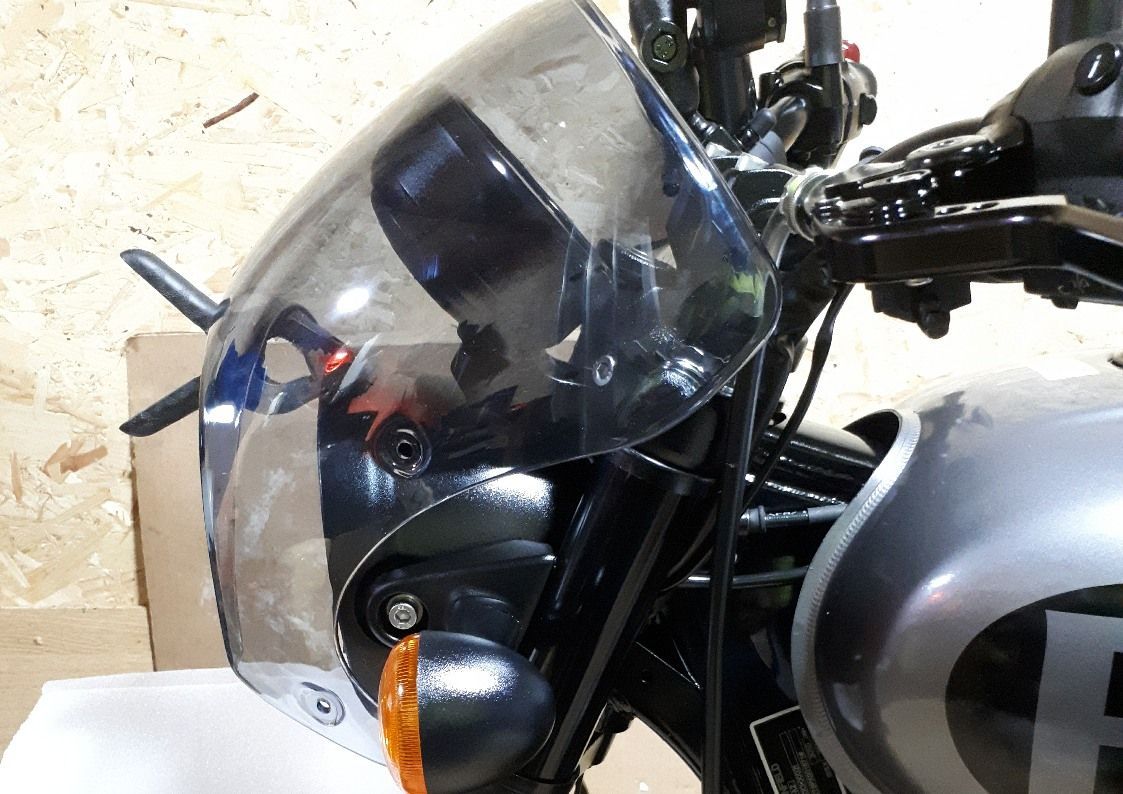
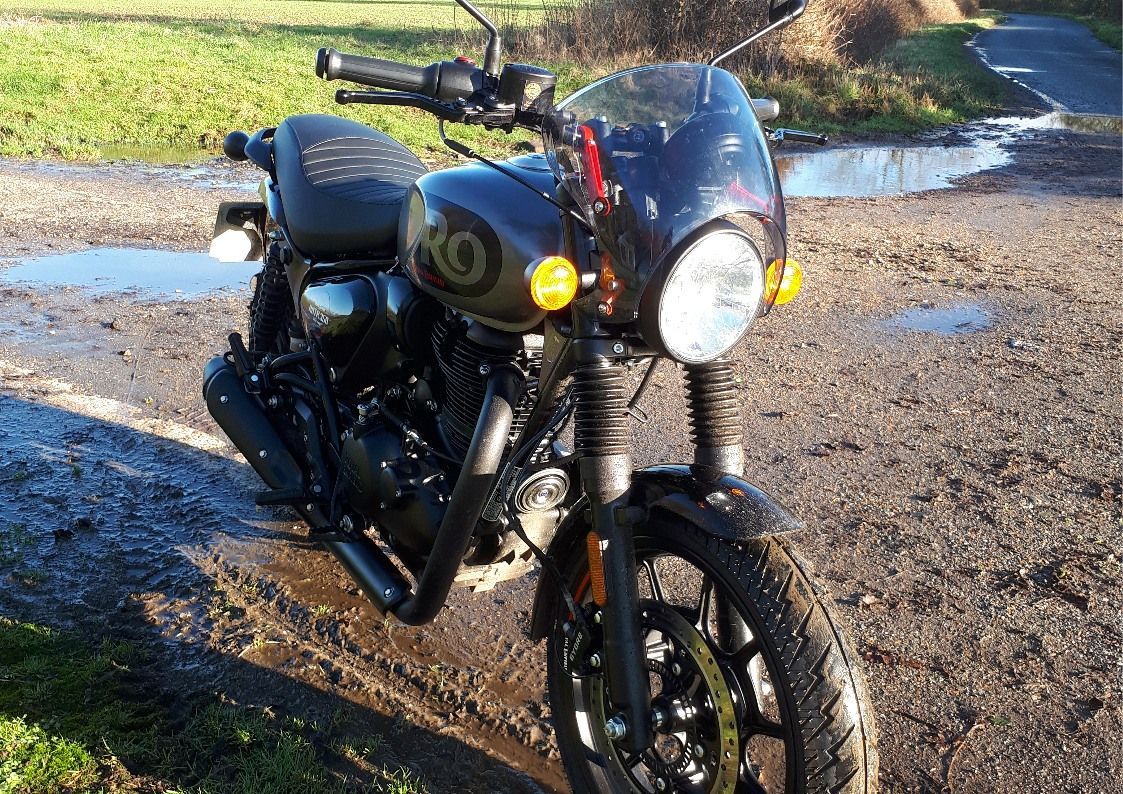
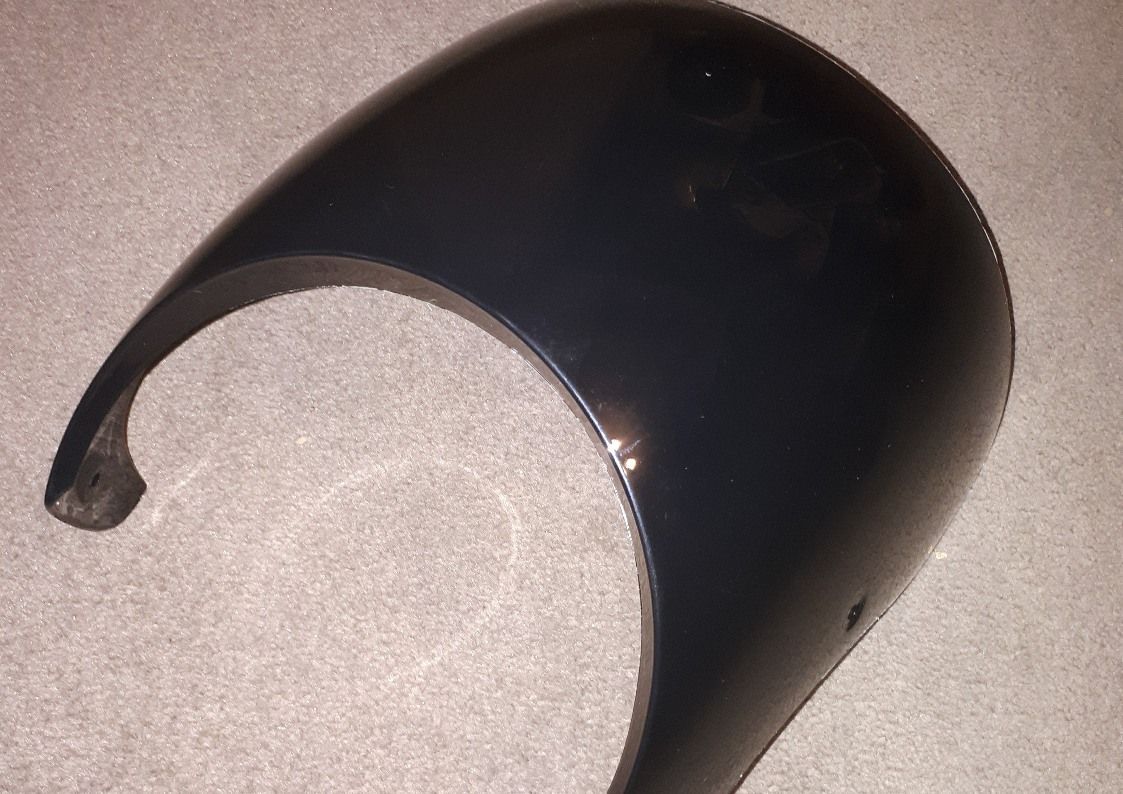
I’ve wanted a front cowl on the Hunter for some time and while I quite liked the little official Royal Enfield one, it’s no fun at all having one that you can just go out and buy and is made to fit. It’s much more fun to enjoy the challenge of mounting one that was never designed for this bike. The one in question was originally designed to fit a Kawasaki Z900RS and is of Chinese origin. It’s available online for around £40 from your favourite purveyor of such goods in a light or dark smoke configuration. I plumped for the light version and it comes with fixings which are very little use when it comes to mounting it on the Hunter…

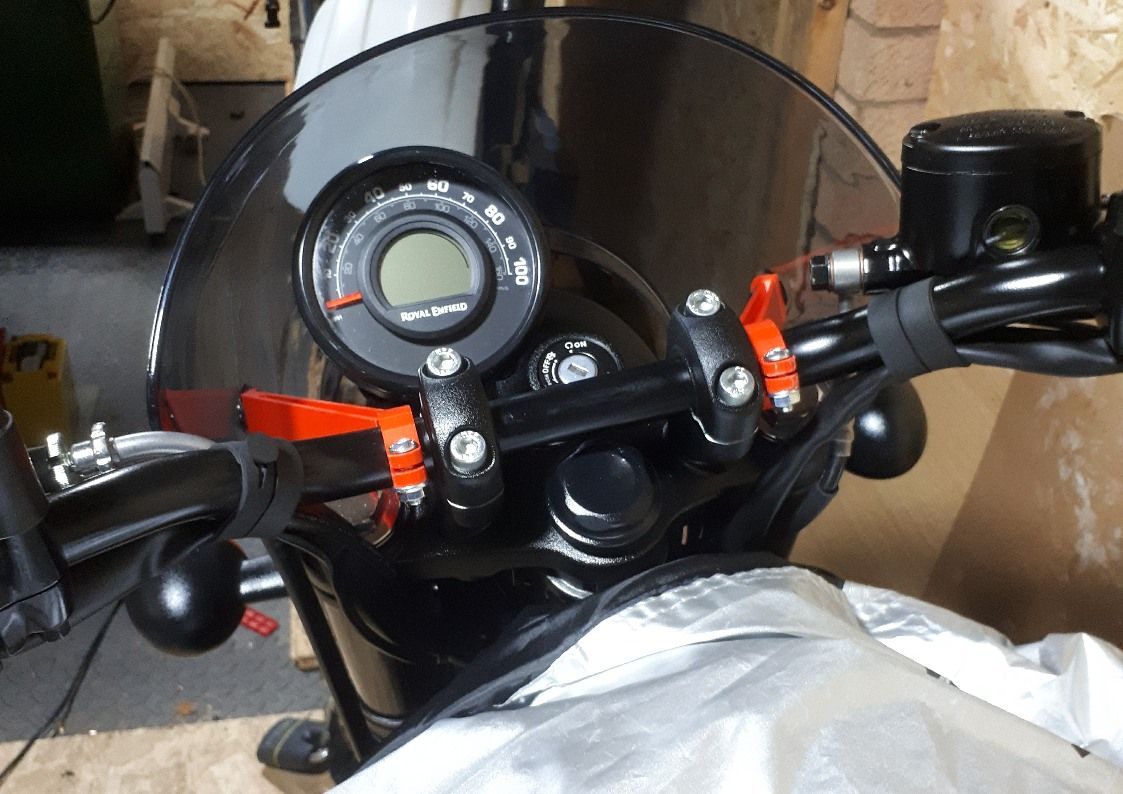
Royal Enfield’s own cowl is designed to mount using headlight and indicator mount bolts, so that’s where I started…and very quickly stopped! From what I could see, the indicator bolts are only accessible once the headlight’s out of the way and it looked like I’d end up disturbing a lot of wires to do that and that’s something that I’m always keen to avoid.
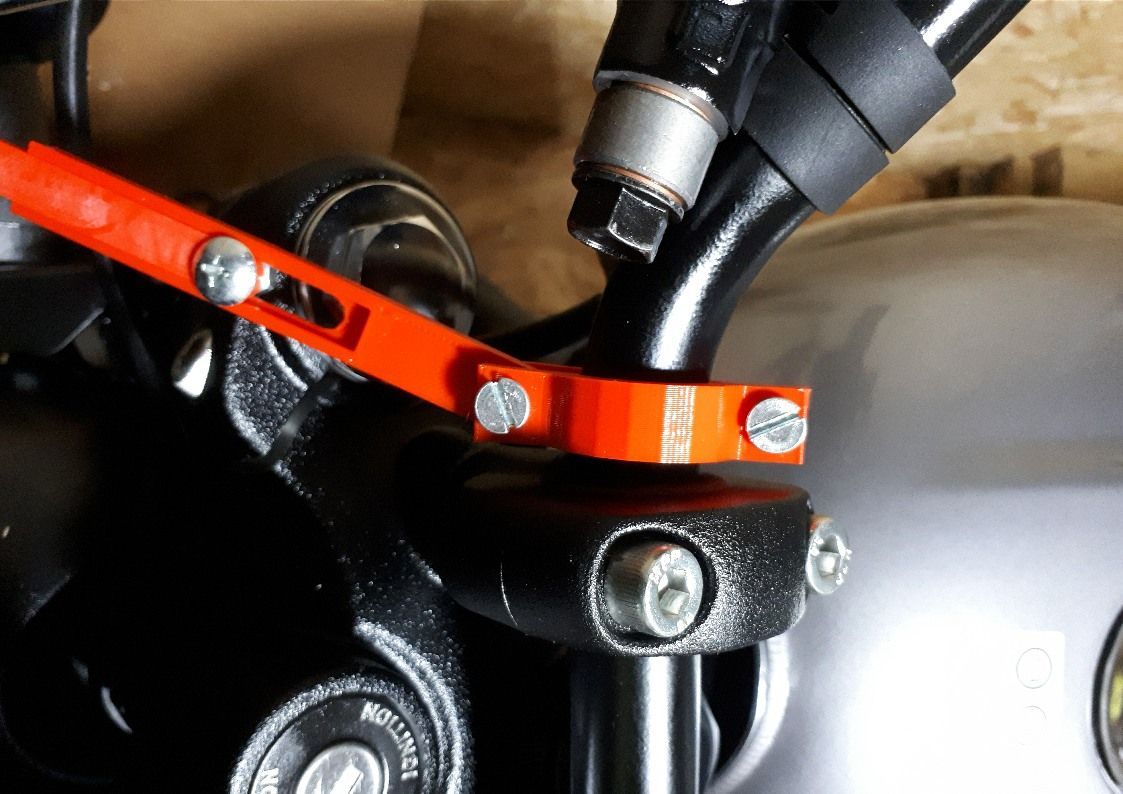
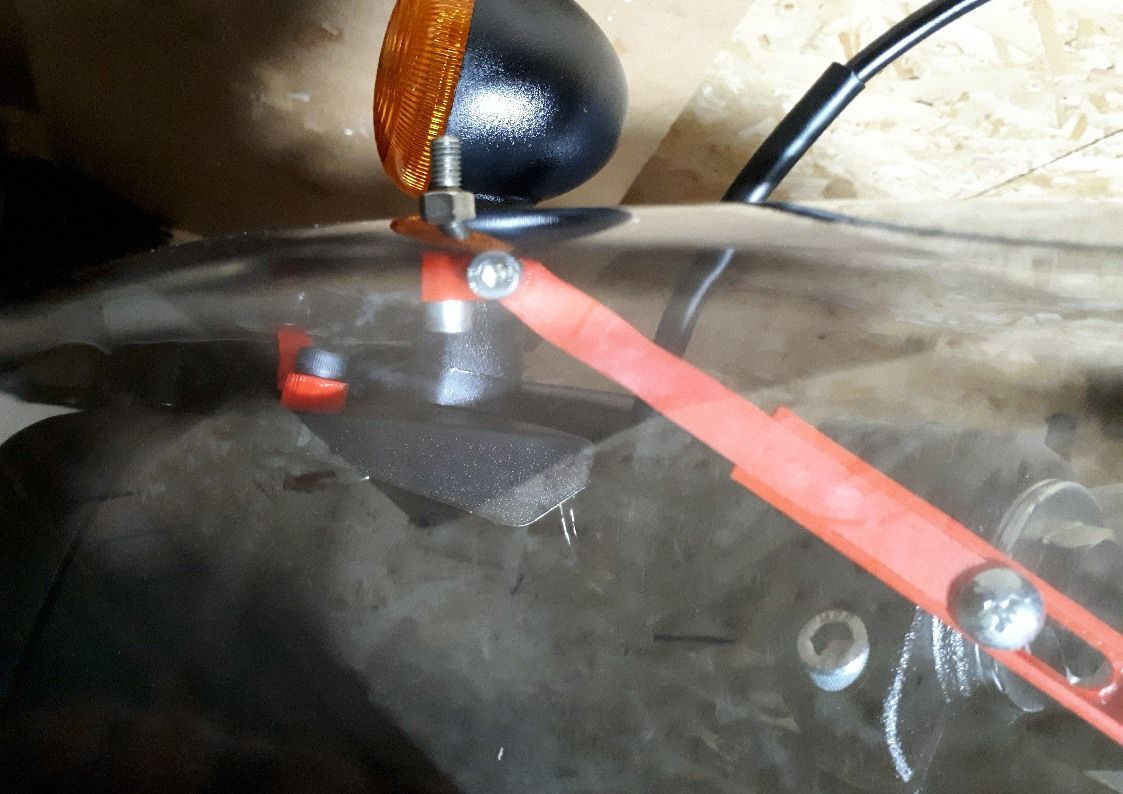
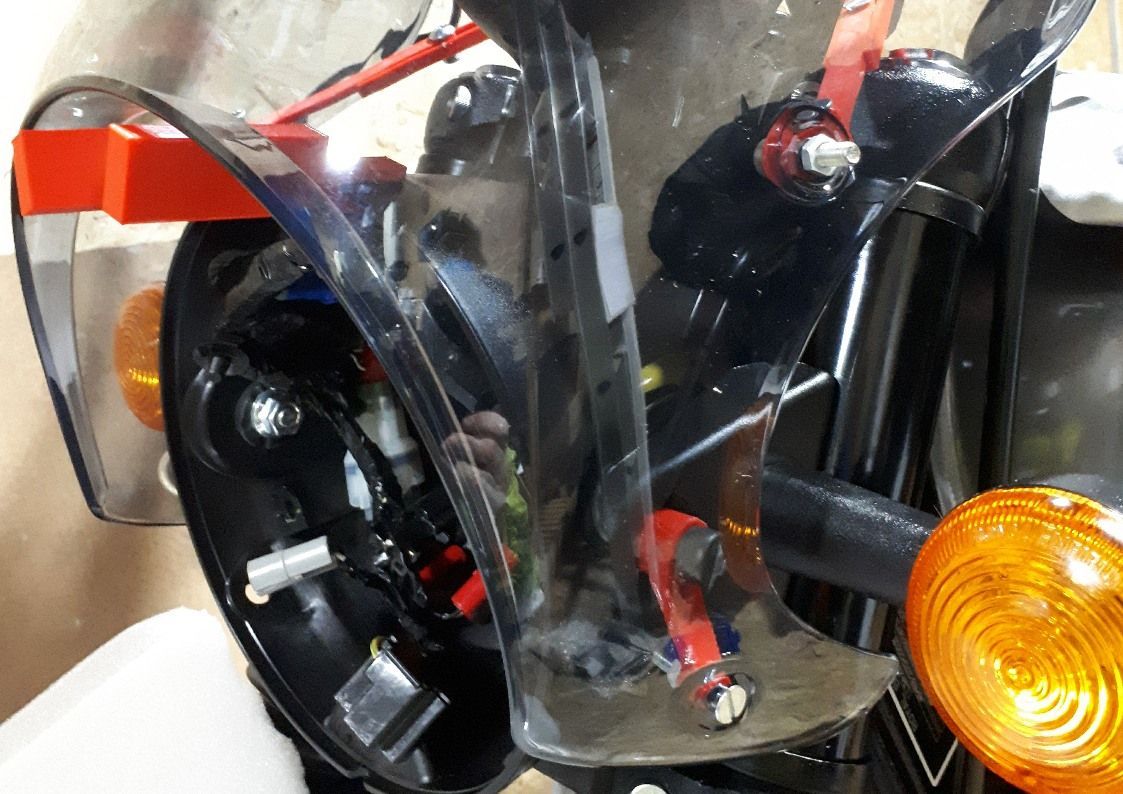
Removing the headlight glass and nacelle is easy enough, just two screws. Then three plastic clips (they look like screws, but are just clips) remove a plastic shield behind which all of the wiring sits. I baulked at disturbing this, so chose plan B and decided to try mounting the cowl using the headlight mounting points and the handlebar, having first had a quick mock up to check that the fairing would actually fit.
3D printer was then out again to produce some adjustable in many directions brackets and a couple of spacers to hold the cowl the correct distance from the headlight while they were all tightened up. Once happy with the positioning, measurements were taken from these brackets and some more physically robust fixed length items printed. These were strong enough to allow the bike to be test ridden to see how I got on with the cowl. Okay is the short answer to that, so I’ll persevere with making more permanent bracketry.
Then (of course!) I gave myself more work by deciding that I’d also like to mount the Sat Nav alongside the speedo - if I could make it fit. Well the lardy Tom Tom would just fit. It obscures the upper reaches of the speedo but that’s not a place where the Hunter is often likely to find itself so shouldn’t be a problem!
3D printer (again) made a bracket and everything looked good to go until I realised that there wasn’t enough space for the key to turn. That was quickly solved by taking a hacksaw to the spare key. Not the most elegant solution, but I can at least now test ride the bike in this configuration when a suitable weather window occurs.
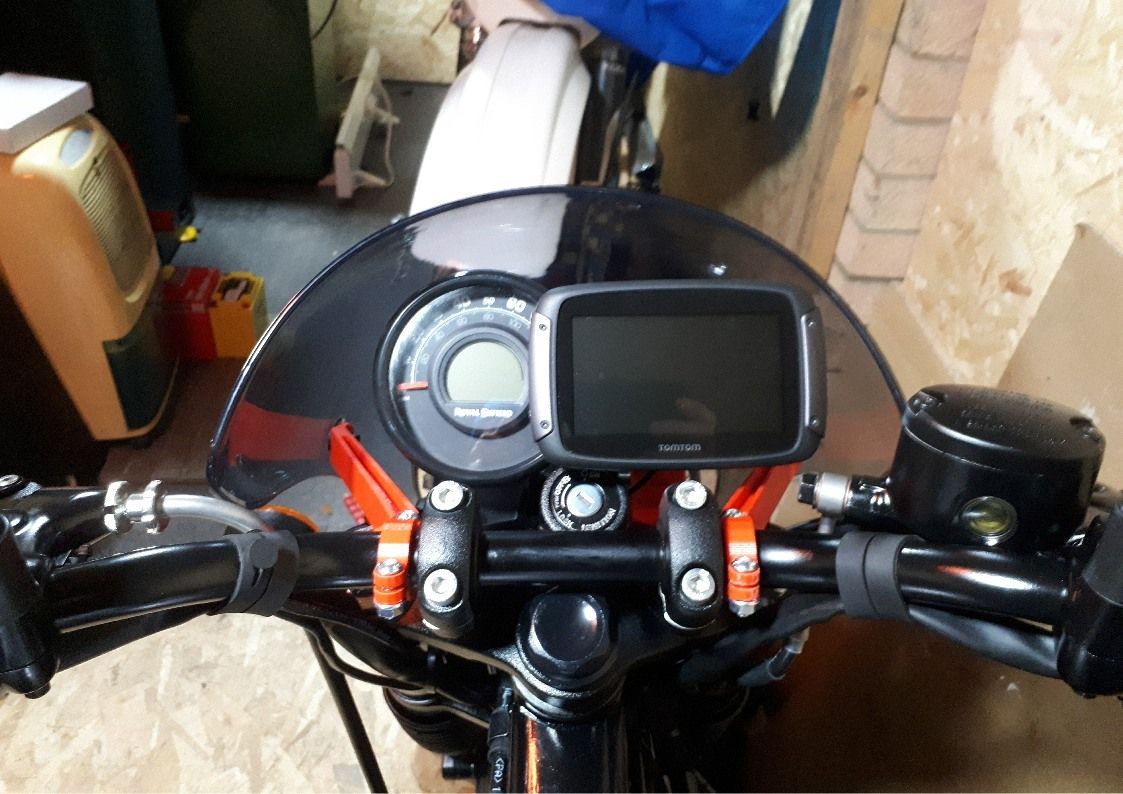
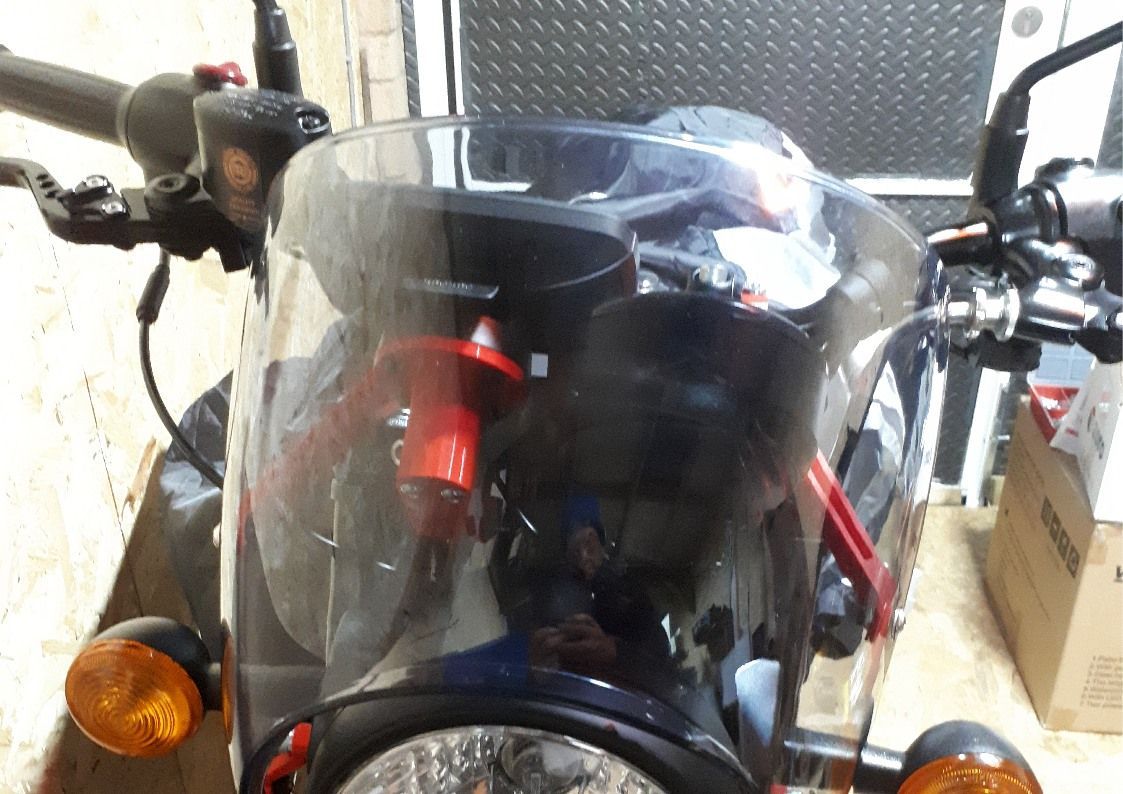
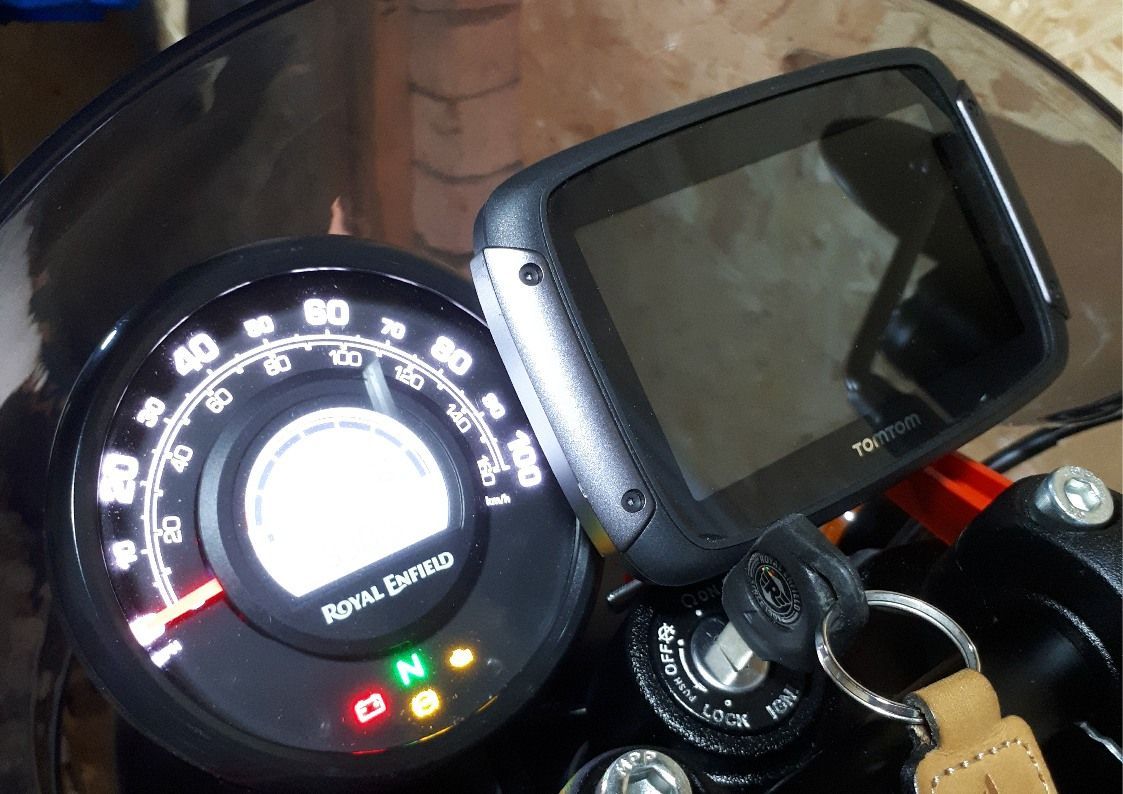
From the other side, the bracket is fairly bulky and I will redesign it, but I’ve also made another purchase and bought the dark smoke version to try. That could help to hide the ugly brackets…
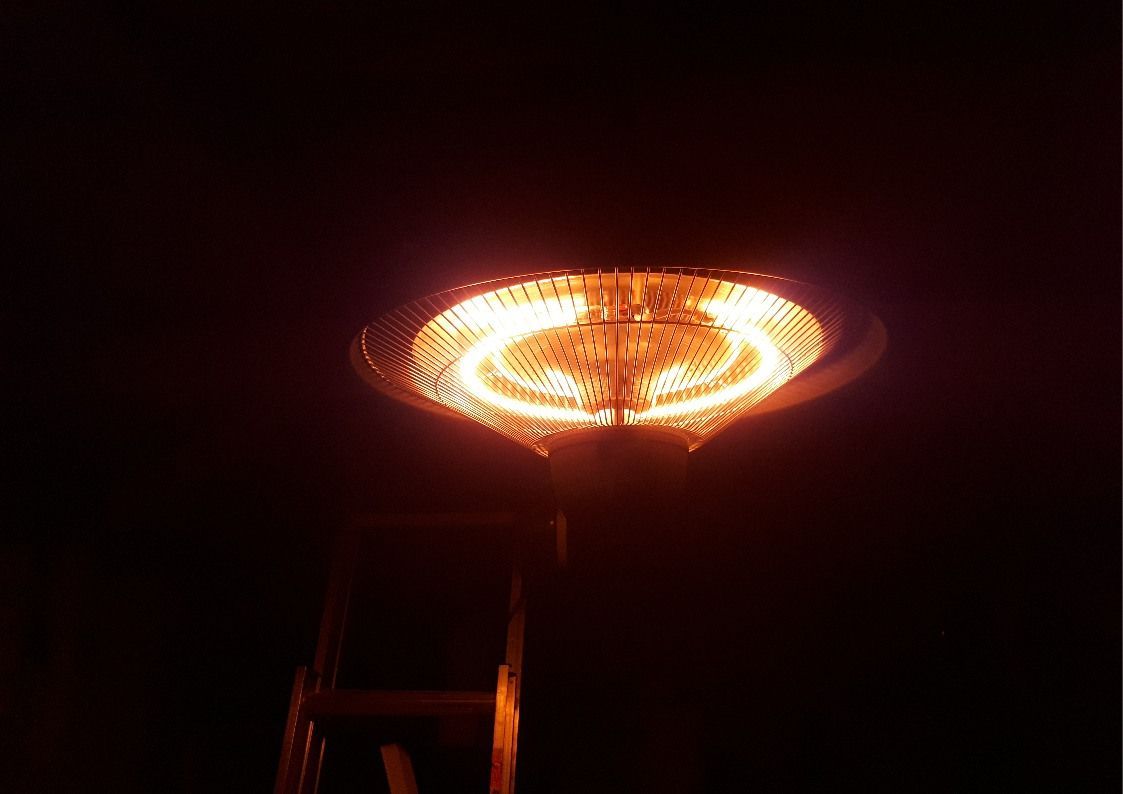
Work in the garage has been facilitated by the purchase of the WarmieHomy heater. Or in this case the WarmieGaragie heater. I’m a big fan of infra-red heaters. They work by heating objects rather than the air around them. This one comes with a hanging chain, so with the addition of a few hooks in suitable places, it can be positioned above wherever I happen to be working and does enough to make the chilly garage a nicer place to spend some time. Switchable between 750W and 1.5kW, the lowest setting has been enough to stop me from shivering whilst also not causing me to shake too much when I receive the electricity bill! Shop around, this one only cost me £25 from Amazon.