October 2018
So, one project is finished. Should I take a break? Should I relax, admire my new bike, fix the bits I could have done better? No! I need a new project.
Since I would like to minimise expenditure, I need to try and use the parts that I already have lying around. This basically means building something from the remains of an engineless 1996, YZ125 and a 2012, supermoto of Chinese origin. So I guess it’s going to have an off-road bias, which is good, because I like dirt-bikes, especially the ones that I remember from my youth.
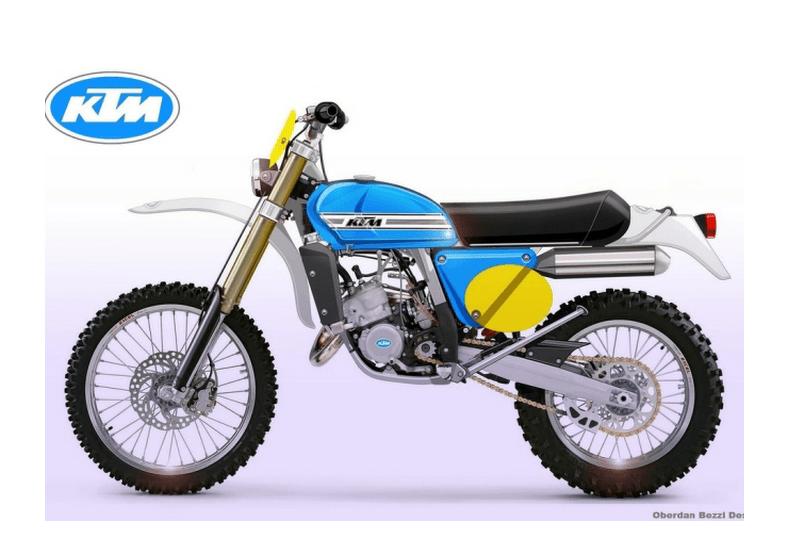
For my inspiration, I turned to Google and up popped this KTM (shown below). This is a drawing by Oberdan Bezzi and is a modern take on a KTM from the 1970s. I like it very much. It has the look of a classic dirtbike, but with modern suspension. This will (hopefully) work well with the bits I have, as I envisage that the YZ will provide most of the chassis / suspension, and the Chinky bike will donate engine etc.
Oberdan has done a whole series of bike designs, many of which are modern takes of bikes from previous eras, and there are many, many gorgeous looking bikes. His drawing skills are far in excess of anything I could ever hope to achieve. If you want to have a look at more of his designs, just Google his name.
The main thing that I need to watch when building my own interpretation of the bike is the seat height, as I’m short in the leg. That’s why the YZ is minus its original engine. It was stolen to go in a big wheel 80 chassis!
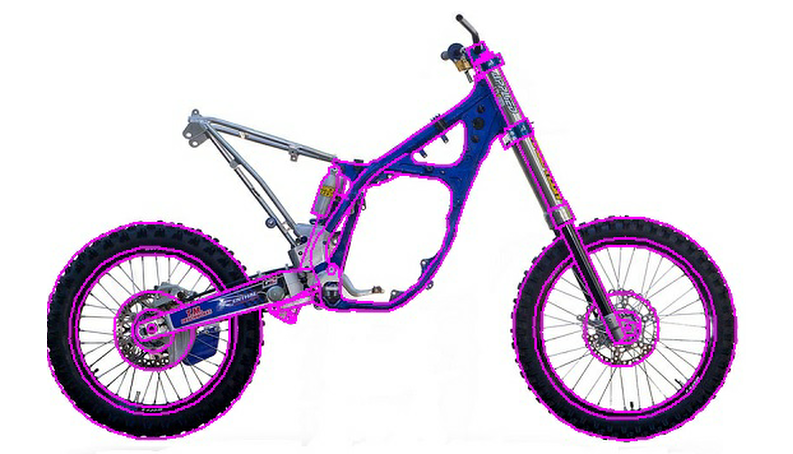
Time to start the new project. In last week’s post, I showed a picture of a bike that was acting as inspiration for my next bike. Now, it’s time to start designing something that I can build with the bits and pieces that I have available. I like to get some designs on paper before I actually start with the spanners, but I have a problem here, my artistic skills are extremely limited. I have to cheat a bit. I know that I’m going to use the YZ chassis, so I turn to Google to see if I can find a picture of a YZ to use. Luckily Google turns up this picture (below), which I can import into CAD and then trace around to produce a drawing of a YZ chassis that I can work from. (The lines drawn in CAD are shown in pink, overlaying the original picture.)
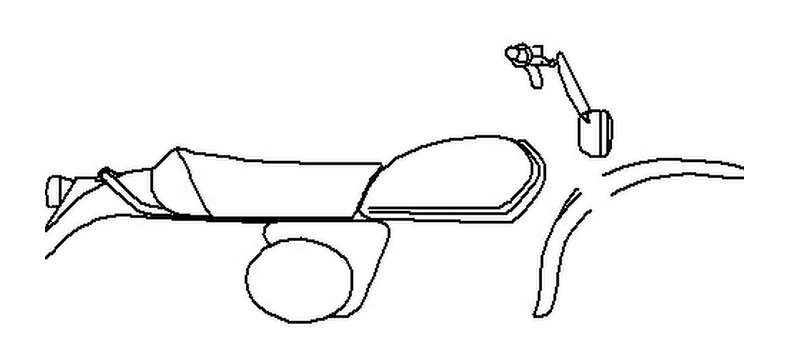
I did a similar thing with a picture the bike that provided the initial inspiration, to produce a drawing of the bodywork.
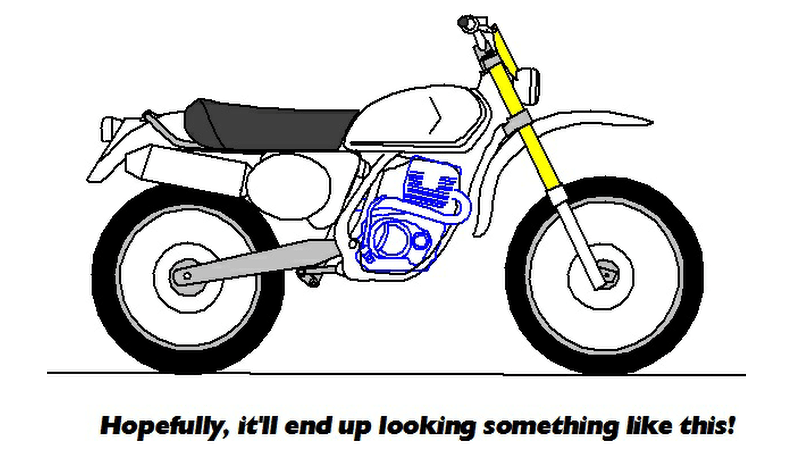
Google also managed to find a picture of a bike using the same engine as I intend to use. Using CAD again to trace a rough outline of this, I can then amalgamate all three drawings; chassis, bodywork and engine, to produce an ‘artist’s impression’ of the finished bike. I’ve also used CAD to lower the design by 3 inches (75mm), so that my little legs stand some chance of reaching the ground!
Next stage is to work out how to actually lower the YZ’s suspension the required 75mm.
Having had a stab at producing a drawing to work from, next task was to rescue the YZ’s chassis, which had spent the last 14 years stuffed in the roof of the garage. After fighting through the mountains of dust and forest of cobwebs that cover the roof space, parts of Yamaha were gradually lowered back into daylight once more.

The first job was to see if I could successfully lower the suspension 75mm, because if I couldn’t, then my plans may be scuppered as if I didn’t lower it, I’d end up building a bike that was too tall for me to ride. There is quite a bit of information on the ‘net regarding lowering suspension (both for short legged people like me, and for modifying MX bike suspension for flat-track racing) but most of this is for newer models than my 1996 YZ. Thankfully after much research I was able to ascertain where spacers needed to be added. (For anyone working on suspension from the late 90s - early 00s, Racetech suspension have some very useful tech videos on their Youtube channel.)
Front forks have been successfully lowered, although it’s only a temporary measure so far. The forks really need an overhaul - new seals etc.- but I’m not doing this until later on in the build, in case I end up needing to adjust the actual amount of lowering. Rear shock was a little more complicated to disassemble, but it’s all apart now and waiting for me to fabricate and fit a suitable spacer to the damper rod.


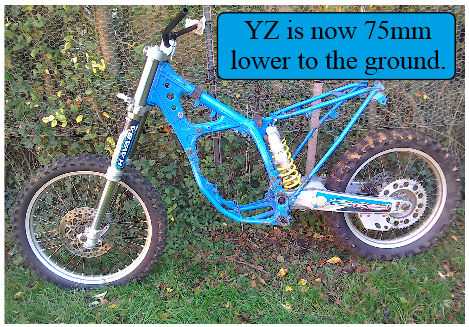
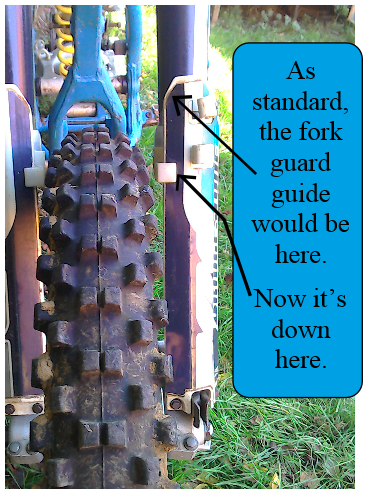
So, last time I was in the process of fabricating a spacer for the rear shock to lower it to my requirements. This is now done (temporarily, as with the forks, seals etc. will eventually need changing, so for the moment it has no oil or gas) and there was just enough adjustment on the pre-load collars to allow me to get the standard spring back on. (The forks required the springs to be shortened.) And so, for the first time in many, many years, the YZ is back on its wheels. From a side view, it’s not immediately noticeable that the bike is nearly 3 inches lower than standard. (Perhaps I should have taken before and after photographs.) But when you put the fork guards on and view from the front, the drop is more noticeable.
The project can now move on to the next step. If only I could decide what that is!