November 2018
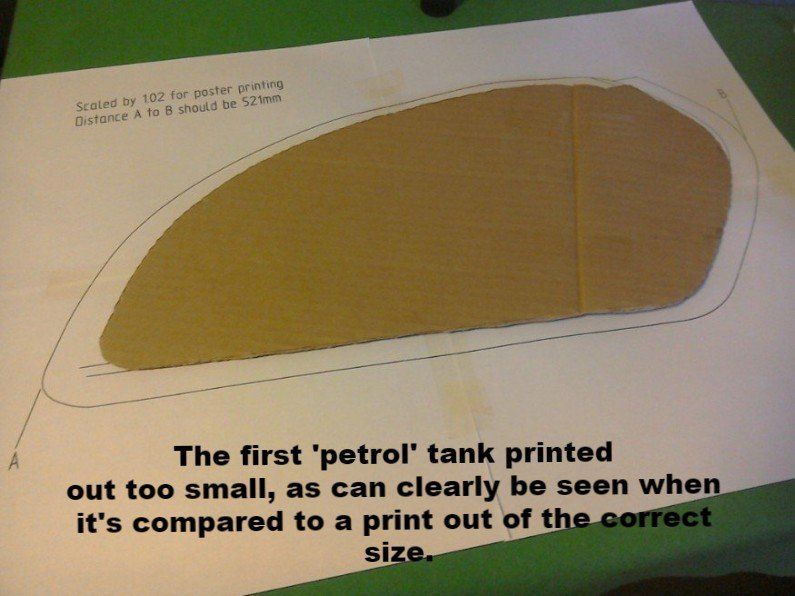
Now the bike is on it’s wheels, I wanted to try and see how my (badly drawn) artist’s impression might look like when scaled to full-size. The quickest way to achieve this was with the aid of a printer and some old cardboard boxes. The bits that I wanted to print were way bigger than A4, so I set the printer to the multi-page poster setting. Unfortunately, it still didn’t print out on a 1 : 1 scale. Everything was coming out too small when compared with the original drawing. After fiddling with printer settings for a while, I gave up and scaled the original drawing up by 1.02. This then printed out to the size that I wanted, so we got there in the end!
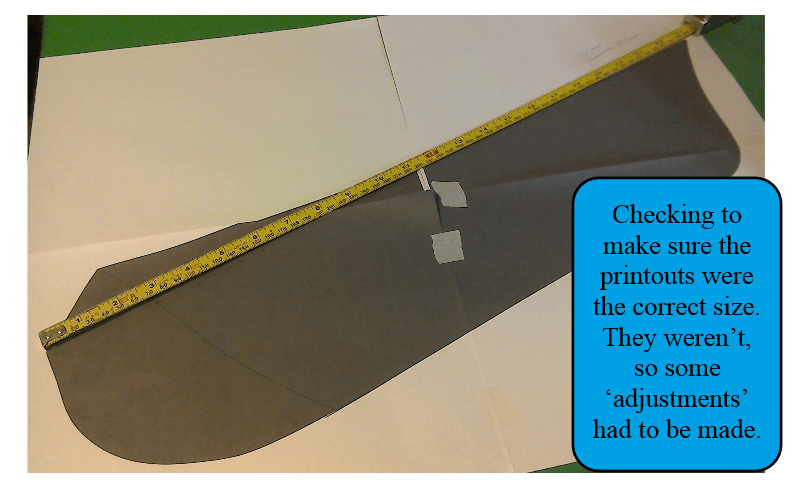
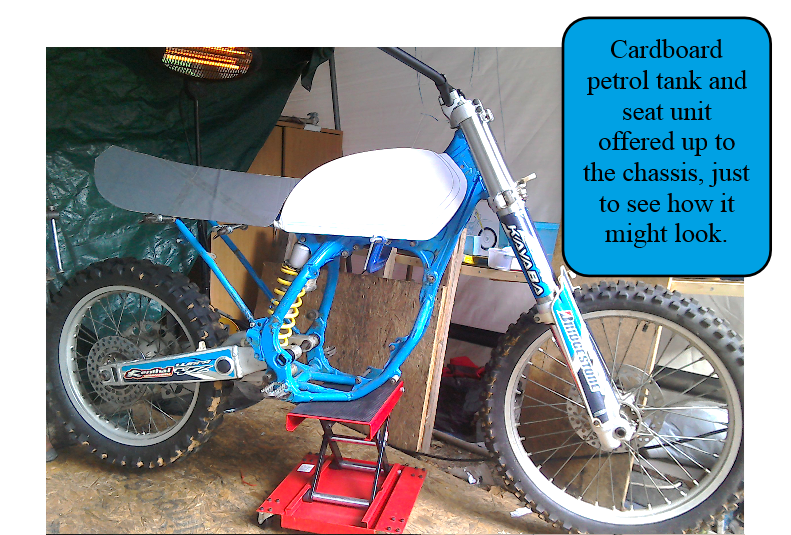
After attacking printouts and cardboard with scissors and sticky tape, I eventually ended up with 2D cardboard versions of the petrol tank and seat. Time to offer them up to the bike then.
With the aid of some strategically placed clamps and some tape, the tank and seat are balanced in place. It also allowed me to measure what the seat height might be. Currently it measures 93cm. I was aiming for 90cm, so still a little taller than I would like, but that is measured with the suspension topped out. Under normal circumstances, with the weight of the bike on its wheels, there would be some sag in the suspension, which would lower the seat height somewhat. Anyway, there's plenty more to be done before I need to worry about final seat height!
With the aid of some strategically placed clamps and some tape, the tank and seat are balanced in place. It also allowed me to measure what the seat height might be. Currently it measures 93cm. I was aiming for 90cm, so still a little taller than I would like, but that is measured with the suspension topped out. Under normal circumstances, with the weight of the bike on its wheels, there would be some sag in the suspension, which would lower the seat height somewhat. Anyway, there's plenty more to be done before I need to worry about final seat height!
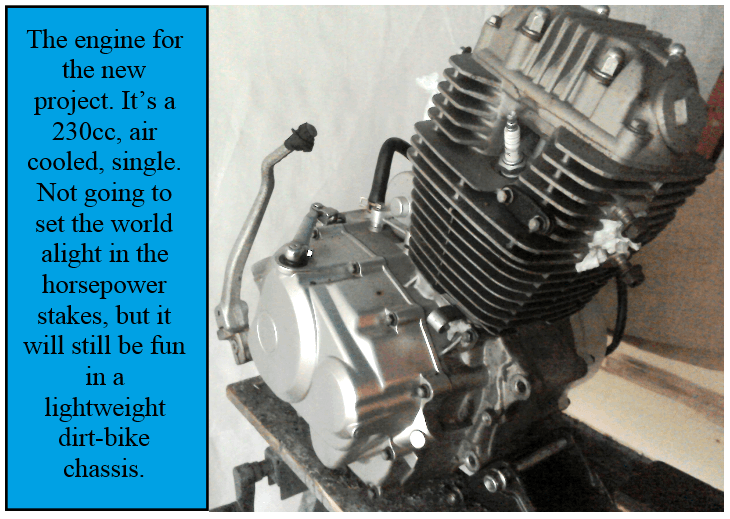
I’ve finally managed to extract the engine out of the donor bike. It was a much quicker job than I expected (all the fasteners came undone without a fight!) and man-handling (or should that be woman-handling?) the little 230cc, single cylinder engine is much, much easier than shifting the GS500 lump used in the previous project.
Now, I’m sure some of you watched American Chopper in years gone by. One thing that stuck in my mind was the rows between Paul Sr and Jr over lack of progress with a build. Paul Sr could never understand that sometimes you need thinking time. Often you just need to stand and stare at something. Run through the options. Hope that inspiration strikes etc.
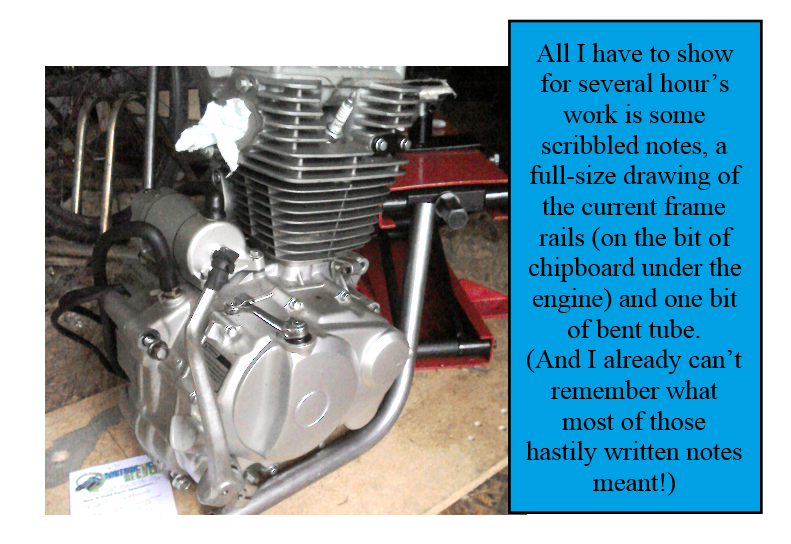
Today has been one of those days for me, and yes, sometimes I get just as frustrated as Paul Sr because although I’ve spent several hours working on this project, I haven’t physically made anything. I’ve still got the frame and the engine that I started with this morning, and they are not yet united. Not even remotely close to being united. But, progress has been made, if only in my head.
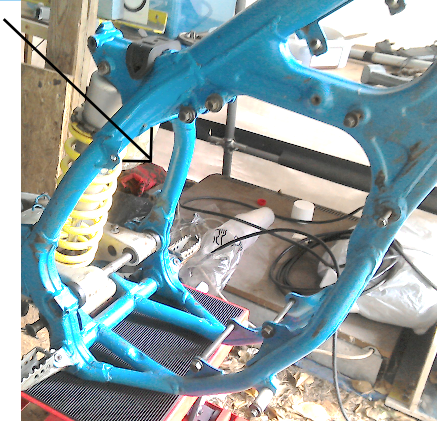
This is a three dimensional puzzle. There are many variables to consider. For a start, the sprockets need to line up. This affects the engine’s position across the frame (unless you want to start spacing out sprockets). I also need to consider the height of the front sprocket, especially in relation to the swingarm pivot point. This affects how high or low in the frame the engine is mounted.
Much time has been spent with a tape measure today. A clear plan has not yet evolved, but it’s already obvious that the bottom frame rails will have to be altered. But how? Time to do some more thinking!
Still mulling over plans on how to get the engine mounted in the frame…
So much so, that when I first offered it up, I actually thought that I might be better off buying an late 90s model YZF400 frame from ebay. I even had a look to see how much one might cost, before deciding that that would be cheating. I have decreed that the engine must be made to fit in this chassis, and fit it will, although it may be a bit tight!
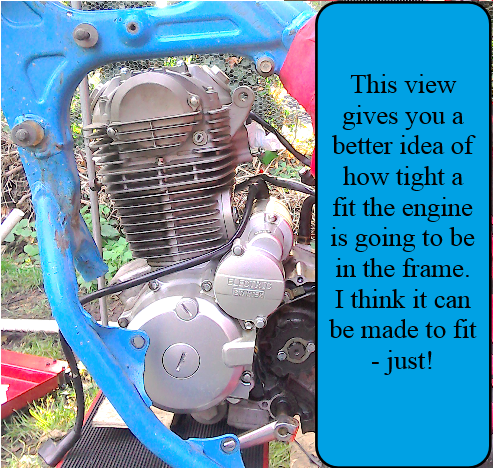
The upshot of all that thinking about fitting the engine is that I think it will go in, but the bottom frame rails will have to be replaced, and one of them may have to be detachable to allow the engine to be inserted.
With that decided, a plan of action needs to be put in place. I’m reluctant to just cut out both the frame rails at once - a welded structure, like a frame, can often have considerable inbuilt stresses, once you start cutting bits out, the whole thing can spring out of alignment. The ideal solution would be to put the frame in a jig before the frame rails are cut out. That way, everything should be held in alignment, both when the original rails are removed, and when the new ones are welded in place. But, I don’t have a suitable frame jig. (The GS frame was built on a jig that held the frame upside-down. It made the jig smaller and simpler, but it’s really difficult to visualise how something is going to look when it’s upside-down, and it’s totally impossible to trial fit the engine for size! For this project, the ability to try the engine for size would be extremely beneficial, so an upside-down jig is not going to be helpful.)
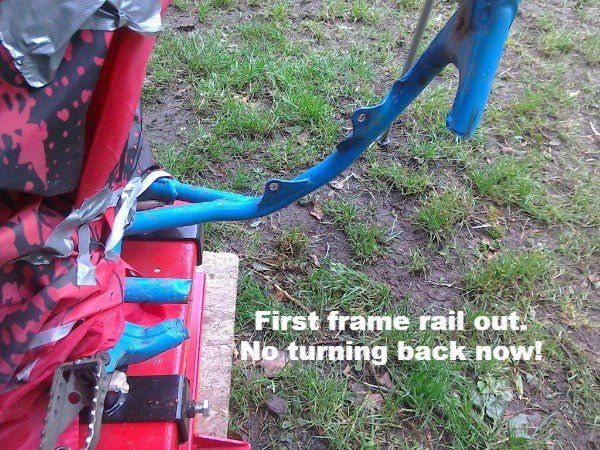
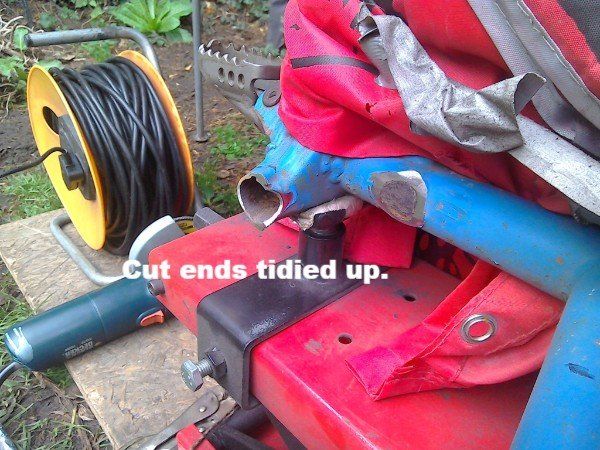
In the end, I decided to remove and replace the frame rails one at a time, and hope that the one remaining rail held everything in check. I’d just have to deal with any alignment problems when, or if, they occurred…
In the end, I decided to remove and replace the frame rails one at a time, and hope that the one remaining rail held everything in check. I’d just have to deal with any alignment problems when, or if, they occurred…