Offbeat Bikes Magazine
Testing regulator / rectifiers.
Electrical testing - warning

 We continue our look at using multi-meters to help test bike electrical equipment. This time, we look at regulators and rectifiers. Specifically, what are they, how do they work, and how can we test them?

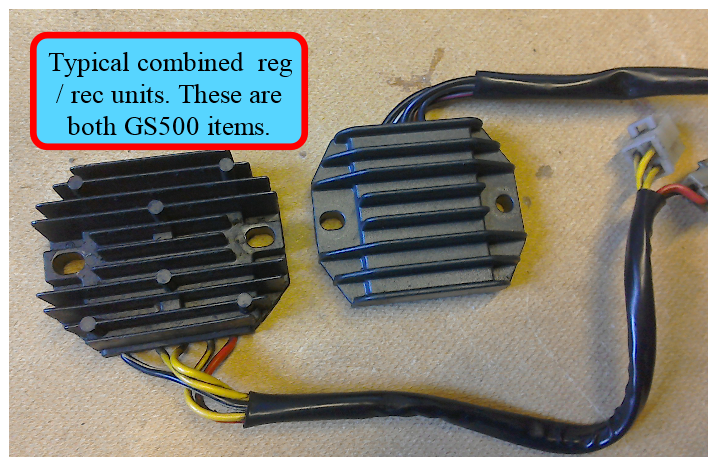
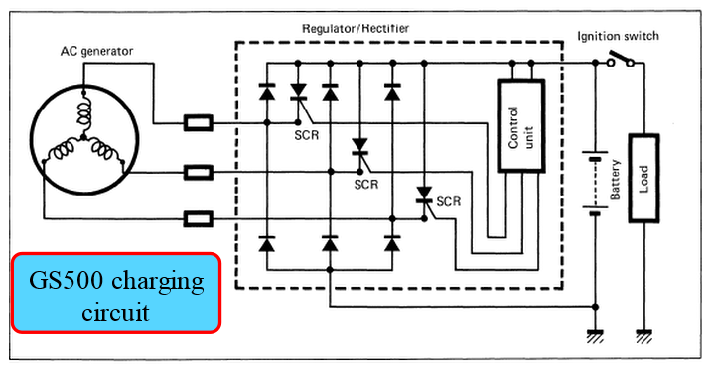
  The regulator / rectifier is an important part of the charging circuit. It broad terms, it takes the ac output from the alternator and converts it into dc voltage suitable for charging the battery. Some early bikes have separate rectifiers and regulators, most (since the mid 80s) have a combined rectifier and regulator unit.


Typical motorcycle regulator / rectifier units
Ac or DC - what is the difference.
GS500 charging circuite
  The diagram above shows a GS500 charging system. It’s typical of lots of nineties and noughties Japanese bikes. The items in the dashed box are what’s inside your regulator / rectifier.
   The rectification part converts the alternating current from the alternator into direct current. This is performed by the six diodes shown in the diagram above. Diodes are indicated by symbols that look like this: 
  The regulation part ensures that the voltage supplied to the battery (and the rest of the electrical system) is of the correct magnitude. This is achieved using the control unit box (the exact contents of which, the diagram doesn’t divulge) and the three ‘diodes’ with extra legs labelled SCR. Diodes only allow current to flow in one direction (in the direction of the arrow of its symbol). SCRs, or silicon controlled rectifiers are similar to diodes, in that they only allow current flow in one direction, but they only operate when an appropriate ‘signal’ is applied to that extra ‘leg’. When the control unit senses that the voltage being supplied to the battery is too high, it will turn on the appropriate SCR and dumps the excess current back to the alternator.
  The genuine Suzuki manual for the GS500 is very informative about how the charging system works (and what’s actually inside that aluminium finned box that forms the reg /rec unit). Not all manuals are quite so good.
   One further thing to note is that this is a three phase alternator / regulator / rectifier system. There are three coils in the alternator, each generating its own ac wave.
  Most bikes are now of this type, but on smaller (or older) bikes, you may come across a single phase system. Below is an extract from the charging system for a Yamaha SRX600.
Diode symbol
Yamaha SRX600 charging circuit.

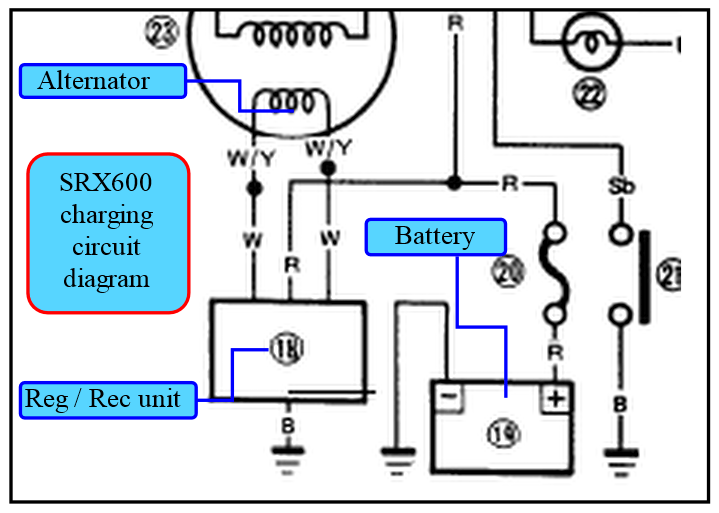
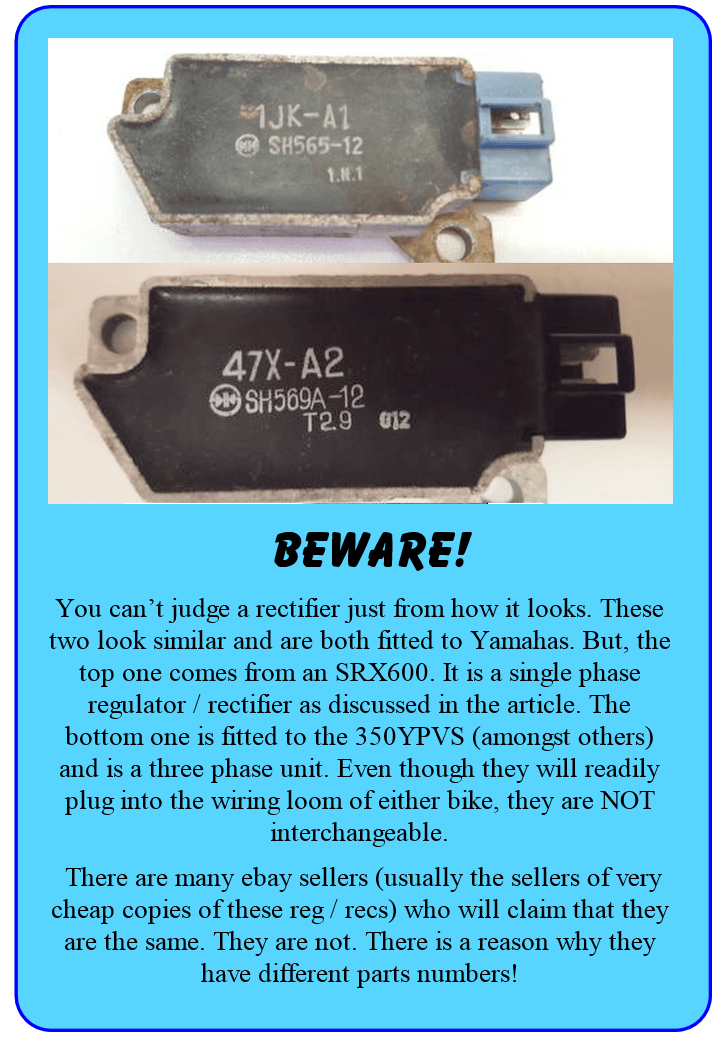
 Yamaha are not so forthcoming with what’s in their reg / rec, and the diagram is not so easy to understand.
 The Yamaha diagram has been included as an example of a single phase system. There is only one coil in the alternator feeding an ac voltage into the regulator / rectifier unit.
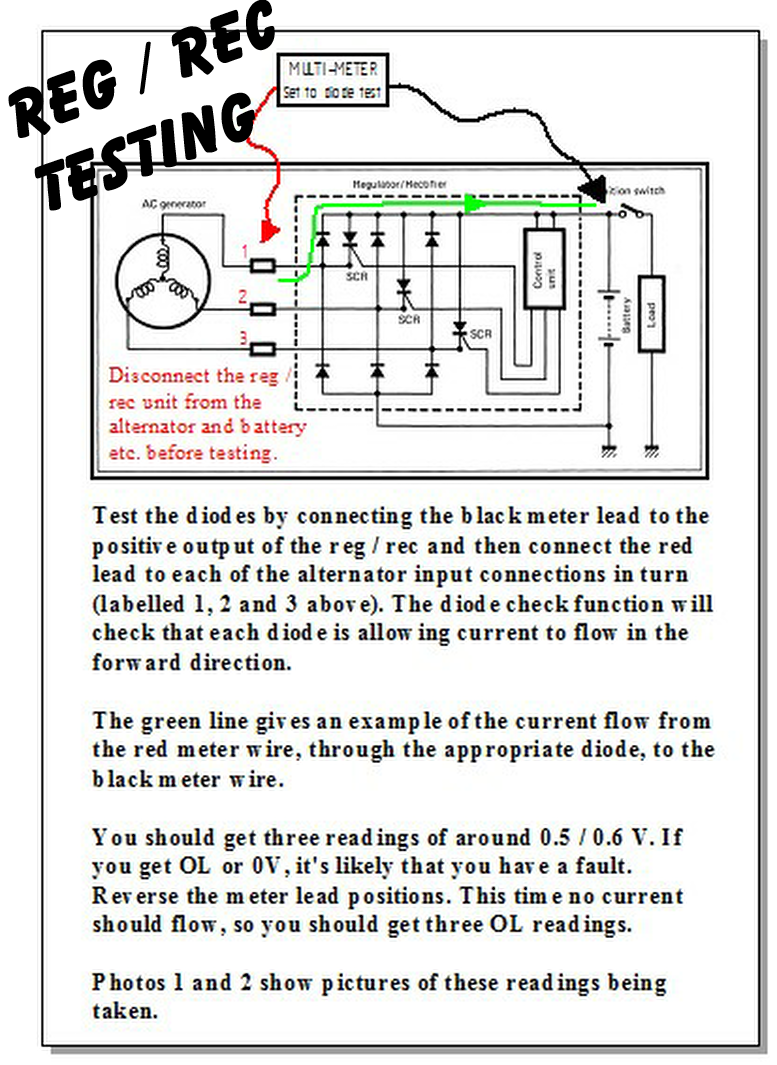
 They don’t show any internal diagram for the reg / rec, but it’s likely to be something like that shown on the below. This is from the Shindengen website, and the standard SRX regulator is a Shindengen one.


Typical single phase rectifier.

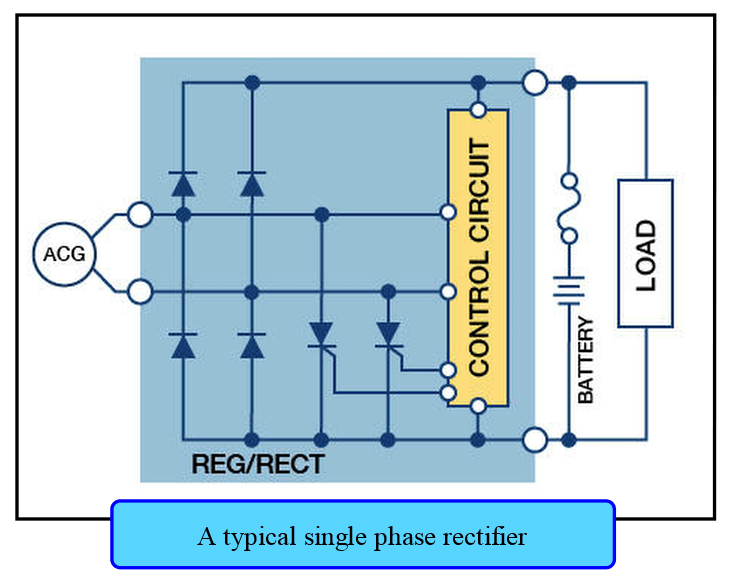
 If you follow this link HERE to the Shindegen website, they give a good overview of the different types of regulator / rectifier commonly used on motorcycles. 

Check carefully before buying a reg / rec unit.

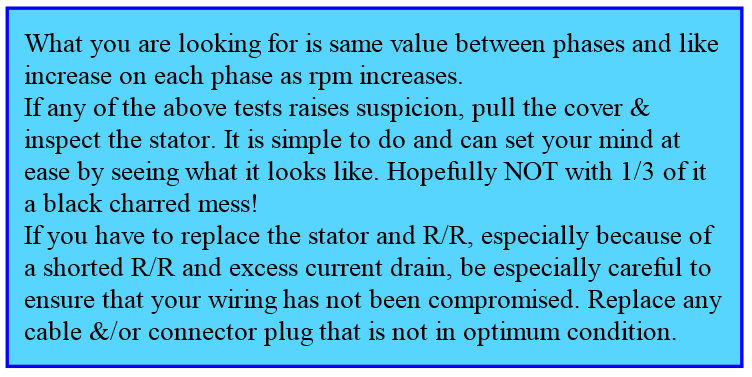
 Enough of talking about what regulator/ rectifiers do, and how they do it. More important is how you can check if your own charging system is working. The following is an extract from a forum post on www.triumphrat.net. Apparently the reg / rec units on some of the Trumpets weren’t too great, and this thread deals with fitting more reliable replacements. It also has some good general information on diagnosing charging system issues. So, I’ve used some of it here and added some extra detail where I thought it might be useful. But, I do encourage you to read the full post, which can be found HERE.

Charging system test - part 1
Charging system test - part 2
Charging system testing - part 3
Charging system testing -part 4
Charging system testing - part 5
Testing motorcycle reg / rec part 1
Motorcycle reg / rec testing part 2
Motorcycle reg / rec testing part 3
Share by: