
April 2019
Part 21A? The new build has been sidelined a little this week as the old one is now fully legal and needed a test run…
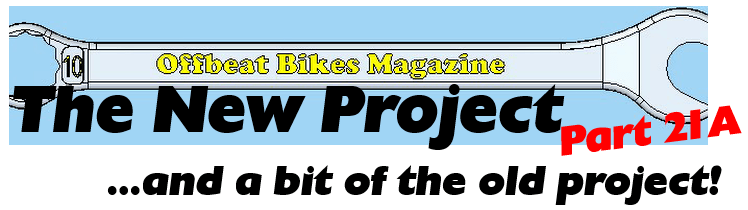
So, not much done on the new project this week, but cardboard silencer and prototype exhaust have now finally met and purchase of the metal to make the real thing is in hand.
So, not much done on the new project this week, but cardboard silencer and prototype exhaust have now finally met and purchase of the metal to make the real thing is in hand.
.
Instead the sight of some sun and slightly warmer, drier, much less windy weather has returned me to the previous project bike, which is now taxed and insured. With the number plate attached, it’s time to actually ride the thing.
(If you’ve not seen pictures of the previous project, you can find them
HERE.)
I have to admit to being very nervous about riding it. Despite the fact that it’s satisfied the MOT tester and the MSVA man, the bike didn’t actually have to move far under its own steam to pass these tests, so there is some nagging uncertainty about how it will ride and plenty of double checking that everything’s ok before I set off. Being a pessimist, I limit myself to several passes up and down the road to start with. (Don’t want to venture too far in case I have to push it home!)
I have to admit to being very nervous about riding it. Despite the fact that it’s satisfied the MOT tester and the MSVA man, the bike didn’t actually have to move far under its own steam to pass these tests, so there is some nagging uncertainty about how it will ride and plenty of double checking that everything’s ok before I set off. Being a pessimist, I limit myself to several passes up and down the road to start with. (Don’t want to venture too far in case I have to push it home!)
To minimise potential trouble, I’d designed the bike to use the standard airbox and exhaust, and so it ran fairly well, but the short test ride did show up a few snags…
Lever positions that seemed ok when sitting on the bike in the garage turn out to be uncomfortable when riding, and even with the span adjustable brake lever at its closest setting, it is still too far away for comfort for my dainty digits. And (for the comfort of my spine) I need to alter the setting of the rear shock.
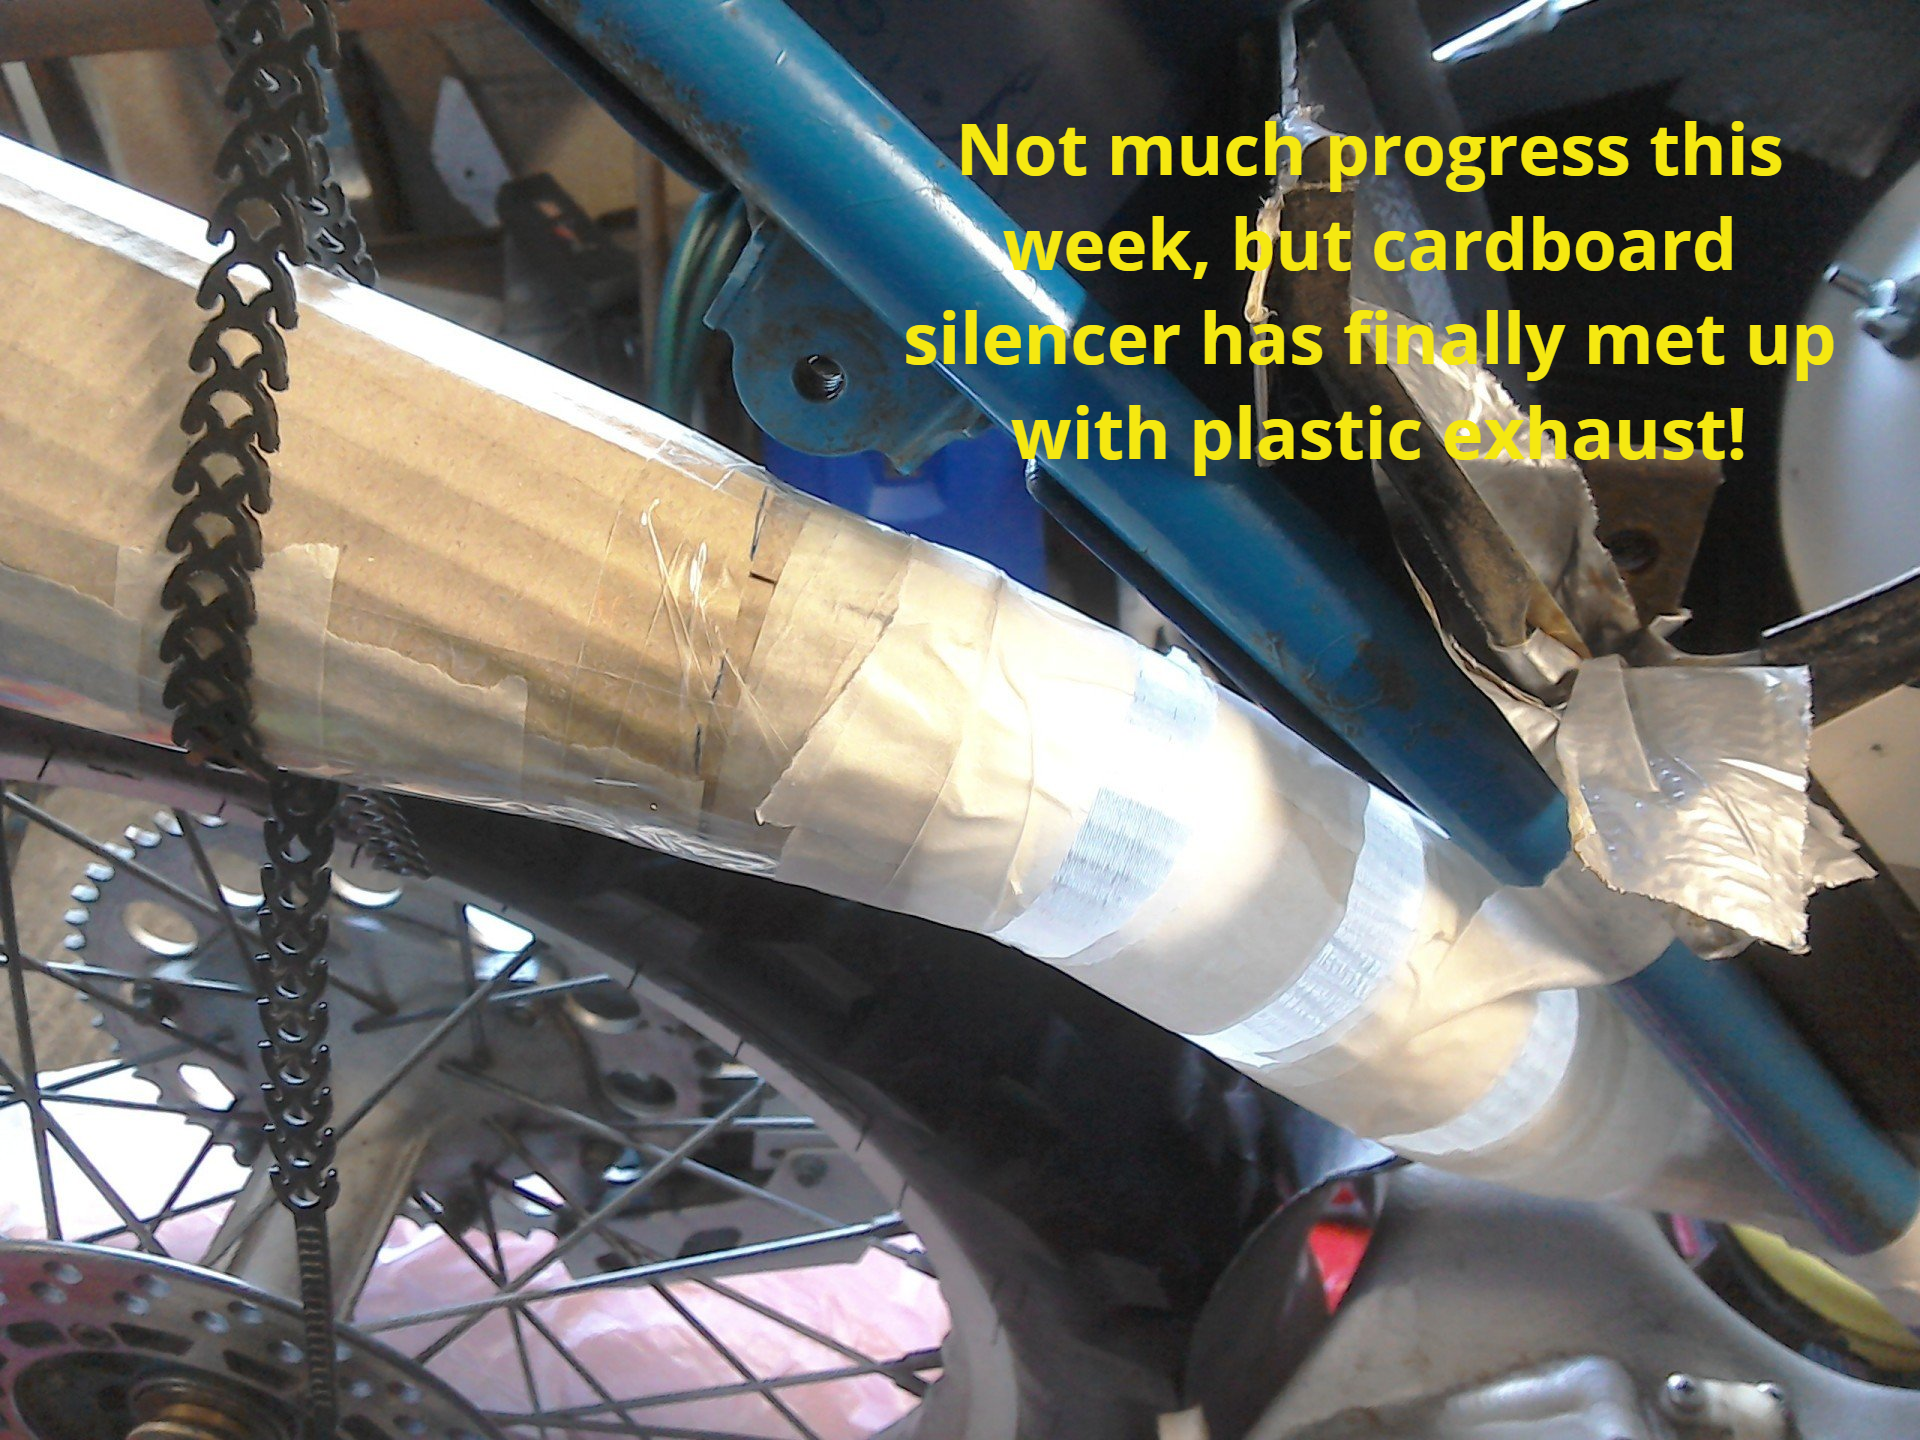
Stopping after four trips past the house, I also notice some oil leakage, which was much more concerning. There was a little seepage from the sump plate and rather more seepage that appeared to be coming from the cam chain tensioner. Sump plate bolts have been re-torqued, hopefully that will stop the seepage here. A quick Google highlighted that leakage from the cam chain tensioner on these engines is not unusual, so I’ve stumped up for (and fitted) a new gasket and rubber bung thingy, to try and stem the flow.
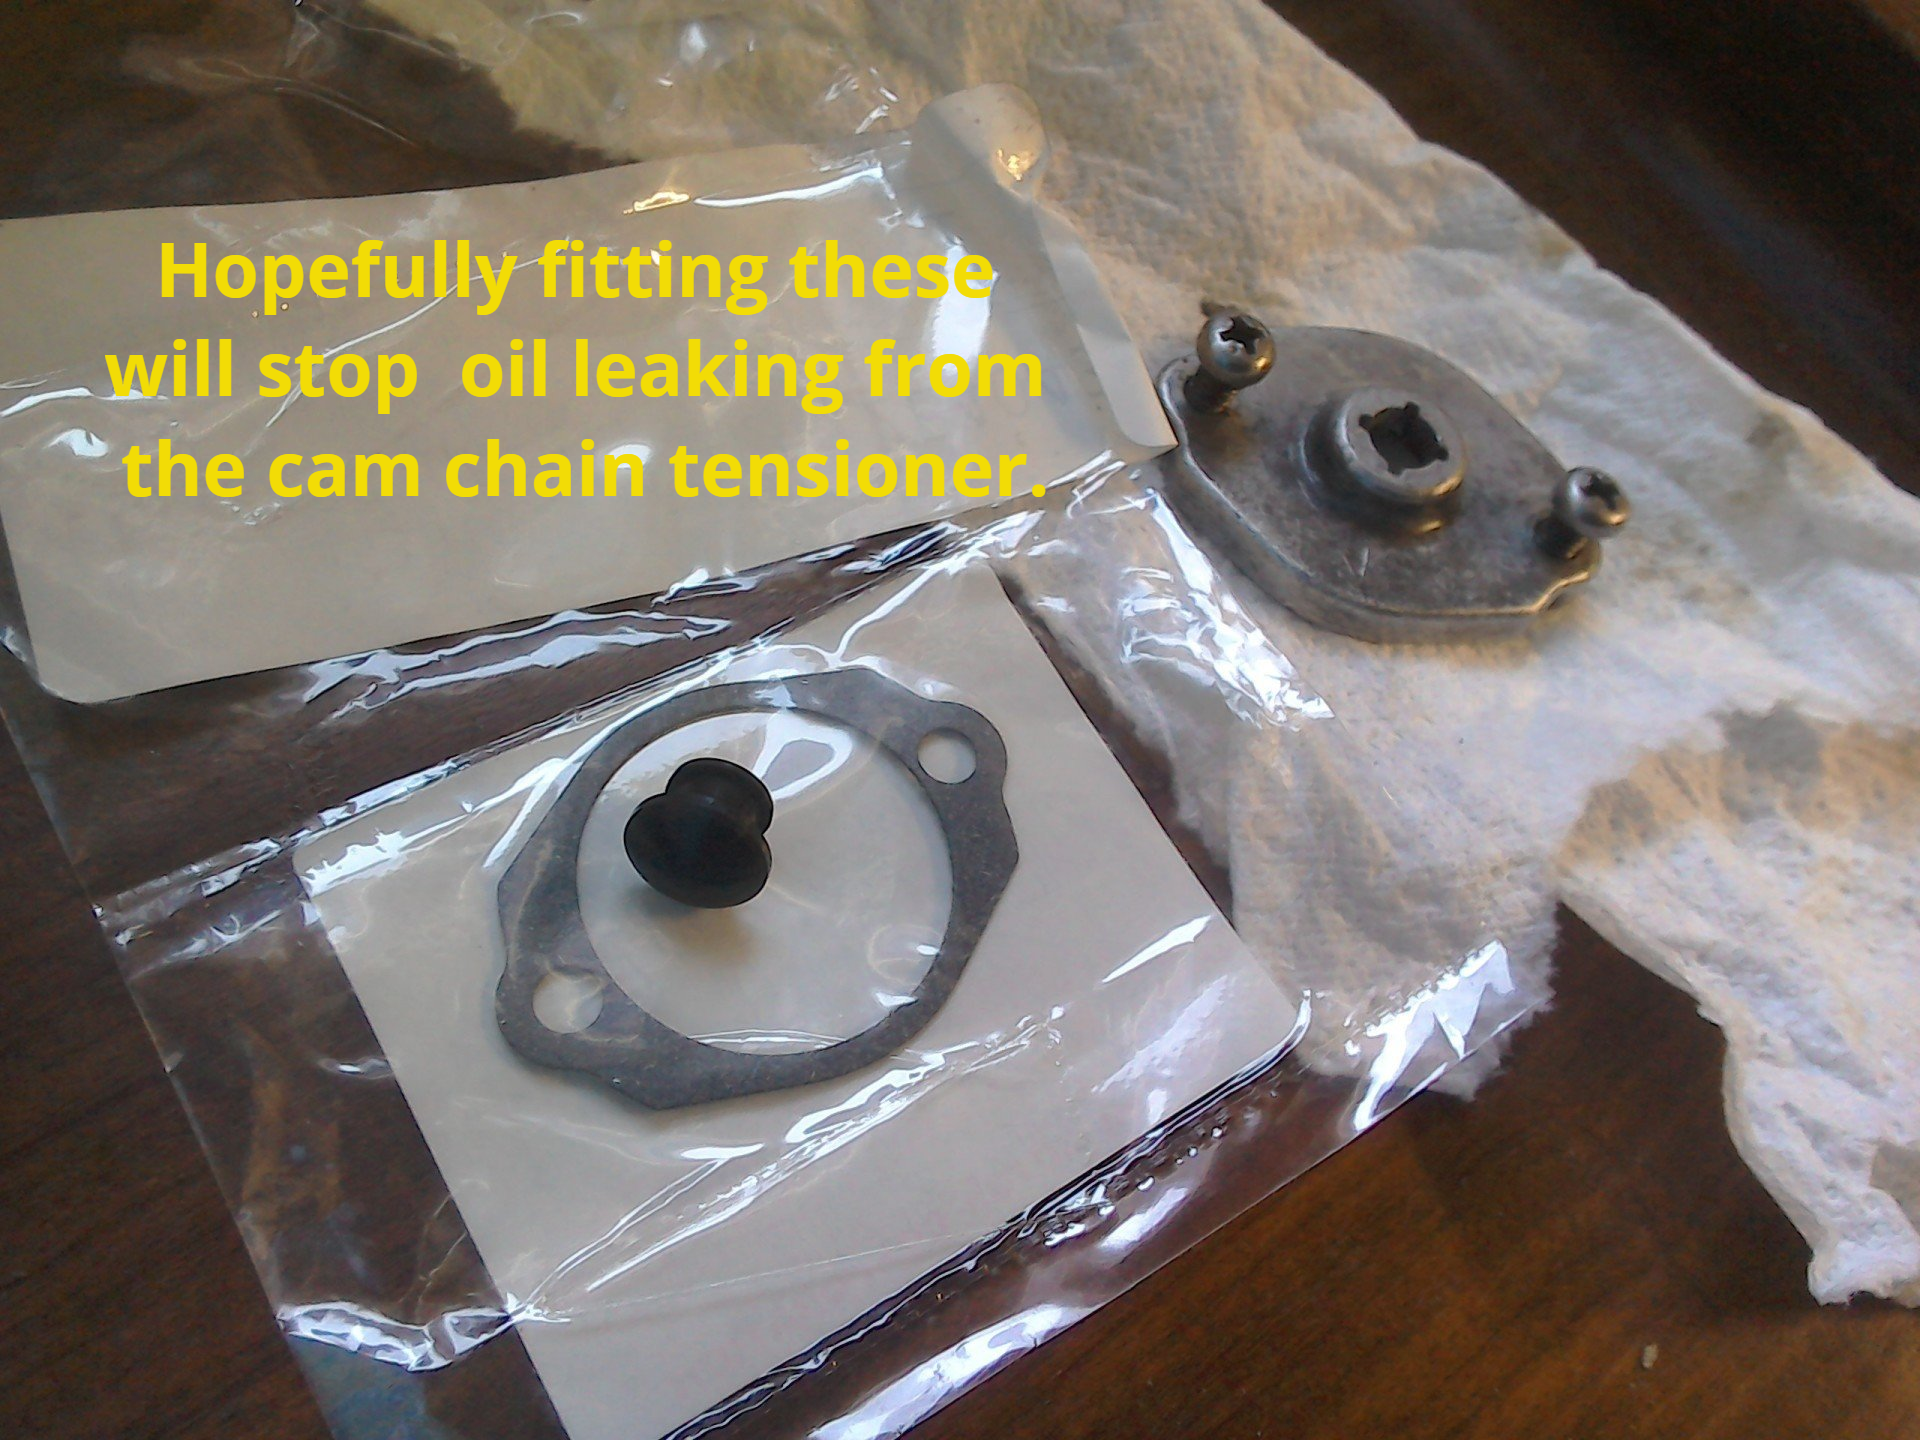
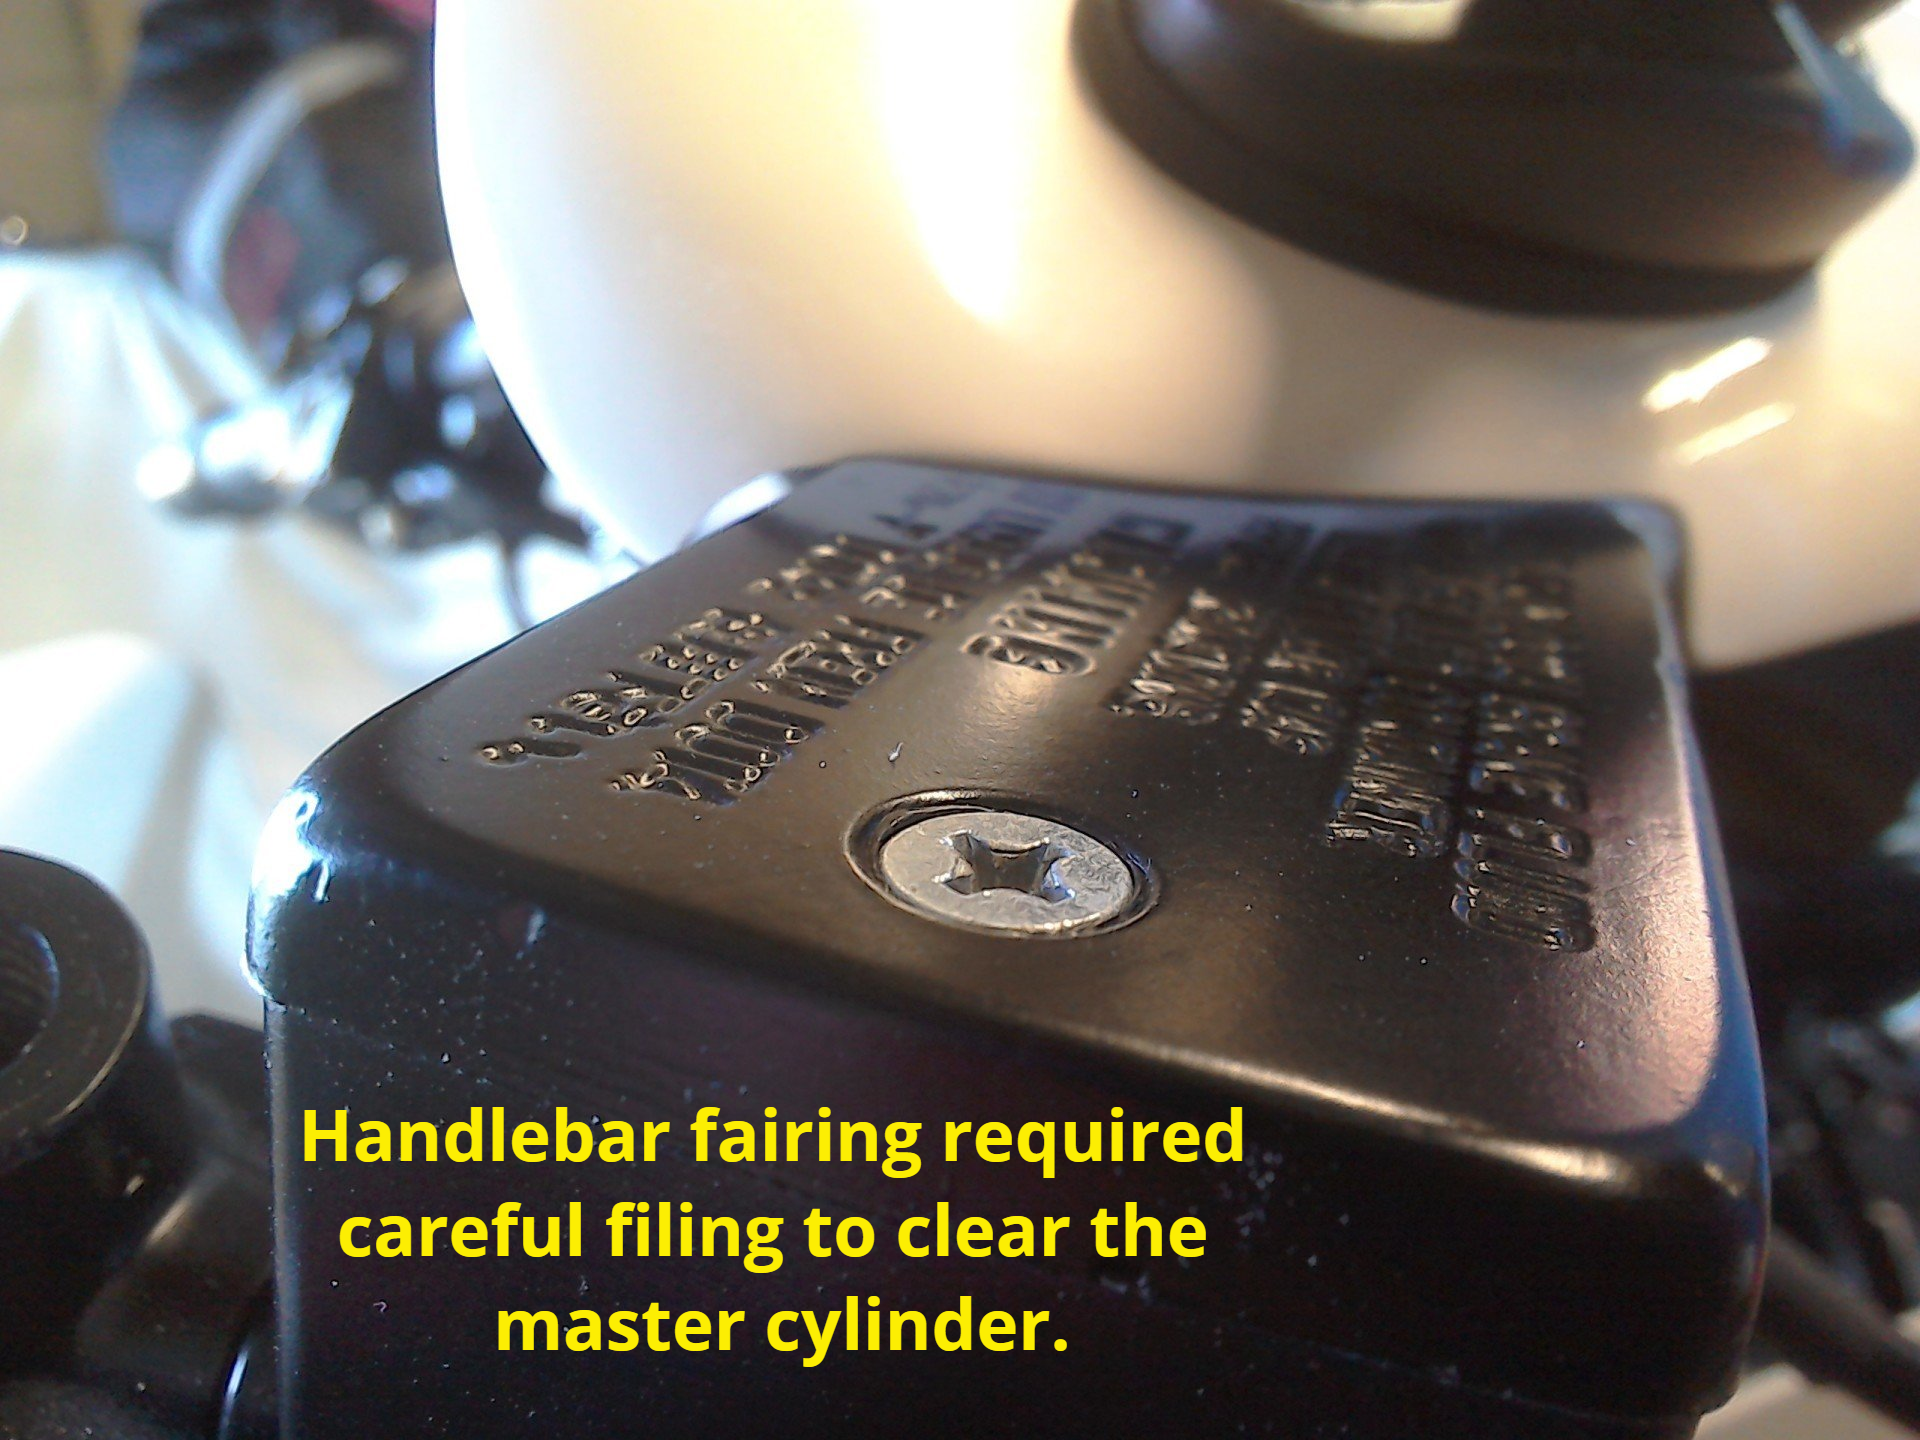
Adjusting the levers to a more comfortable position was just a case of rotating them up a little. Easy enough on the clutch side, but the brake side requir ed some careful filing of the handlebar fairing to clear the master cylinder. Eventually, the job was done without damage to finished paintwork.
Lever span adjuster was also subjected to a little filing and with the new gaskets fitted, bolts tightened and the pre-load on the rear shock fine-tuned to give a suitable amount of sag, the bike is ready for it’s next test run. Just got to pluck up enough courage to do it…
Another week where more time has been spent on the old project than on the new project.
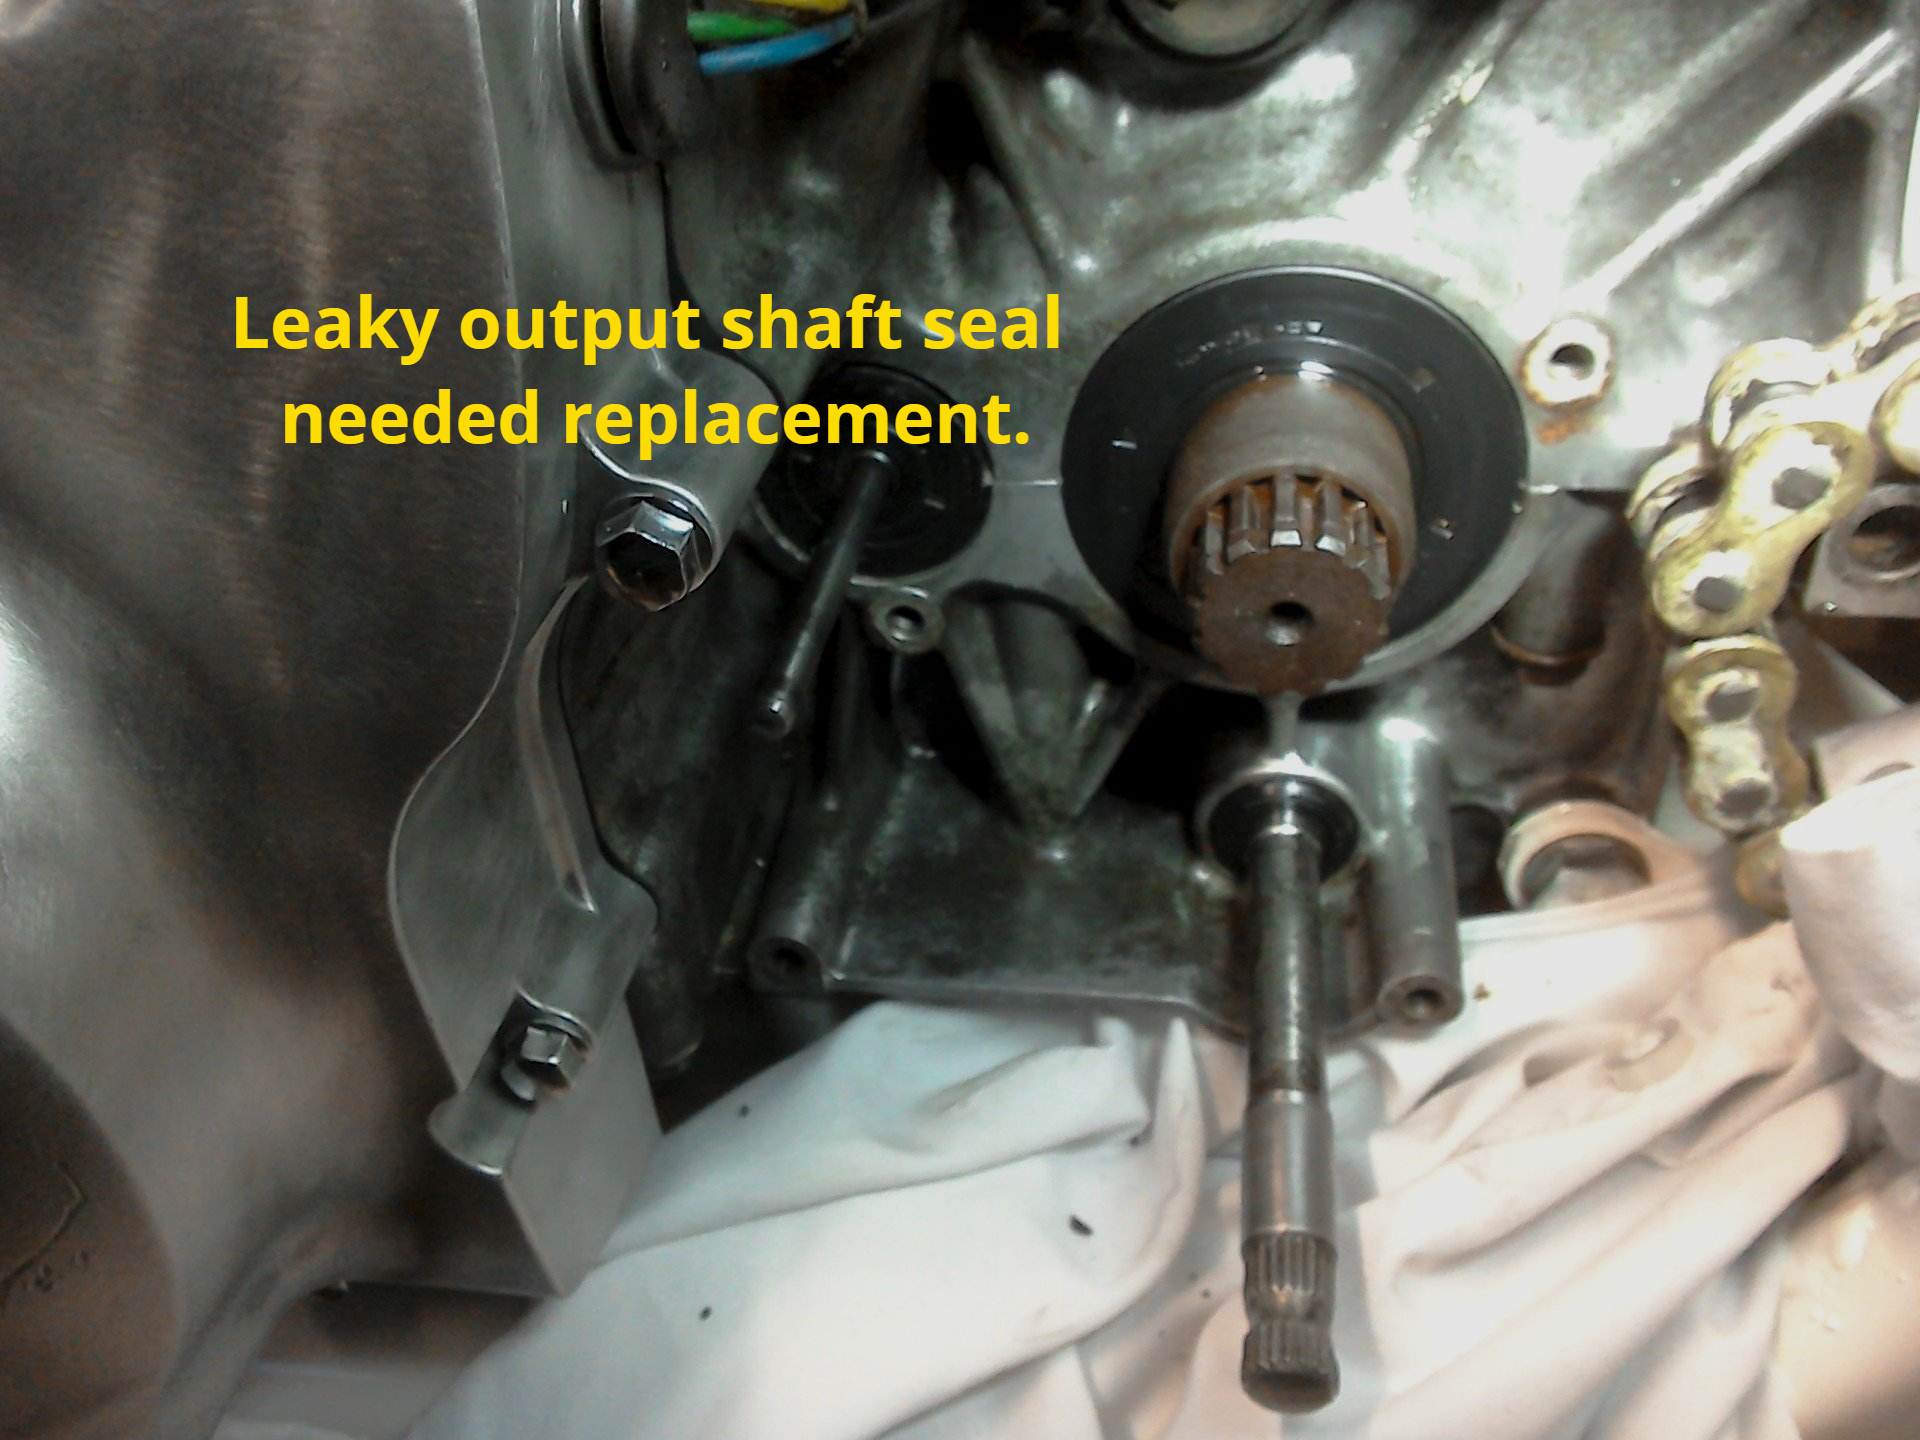
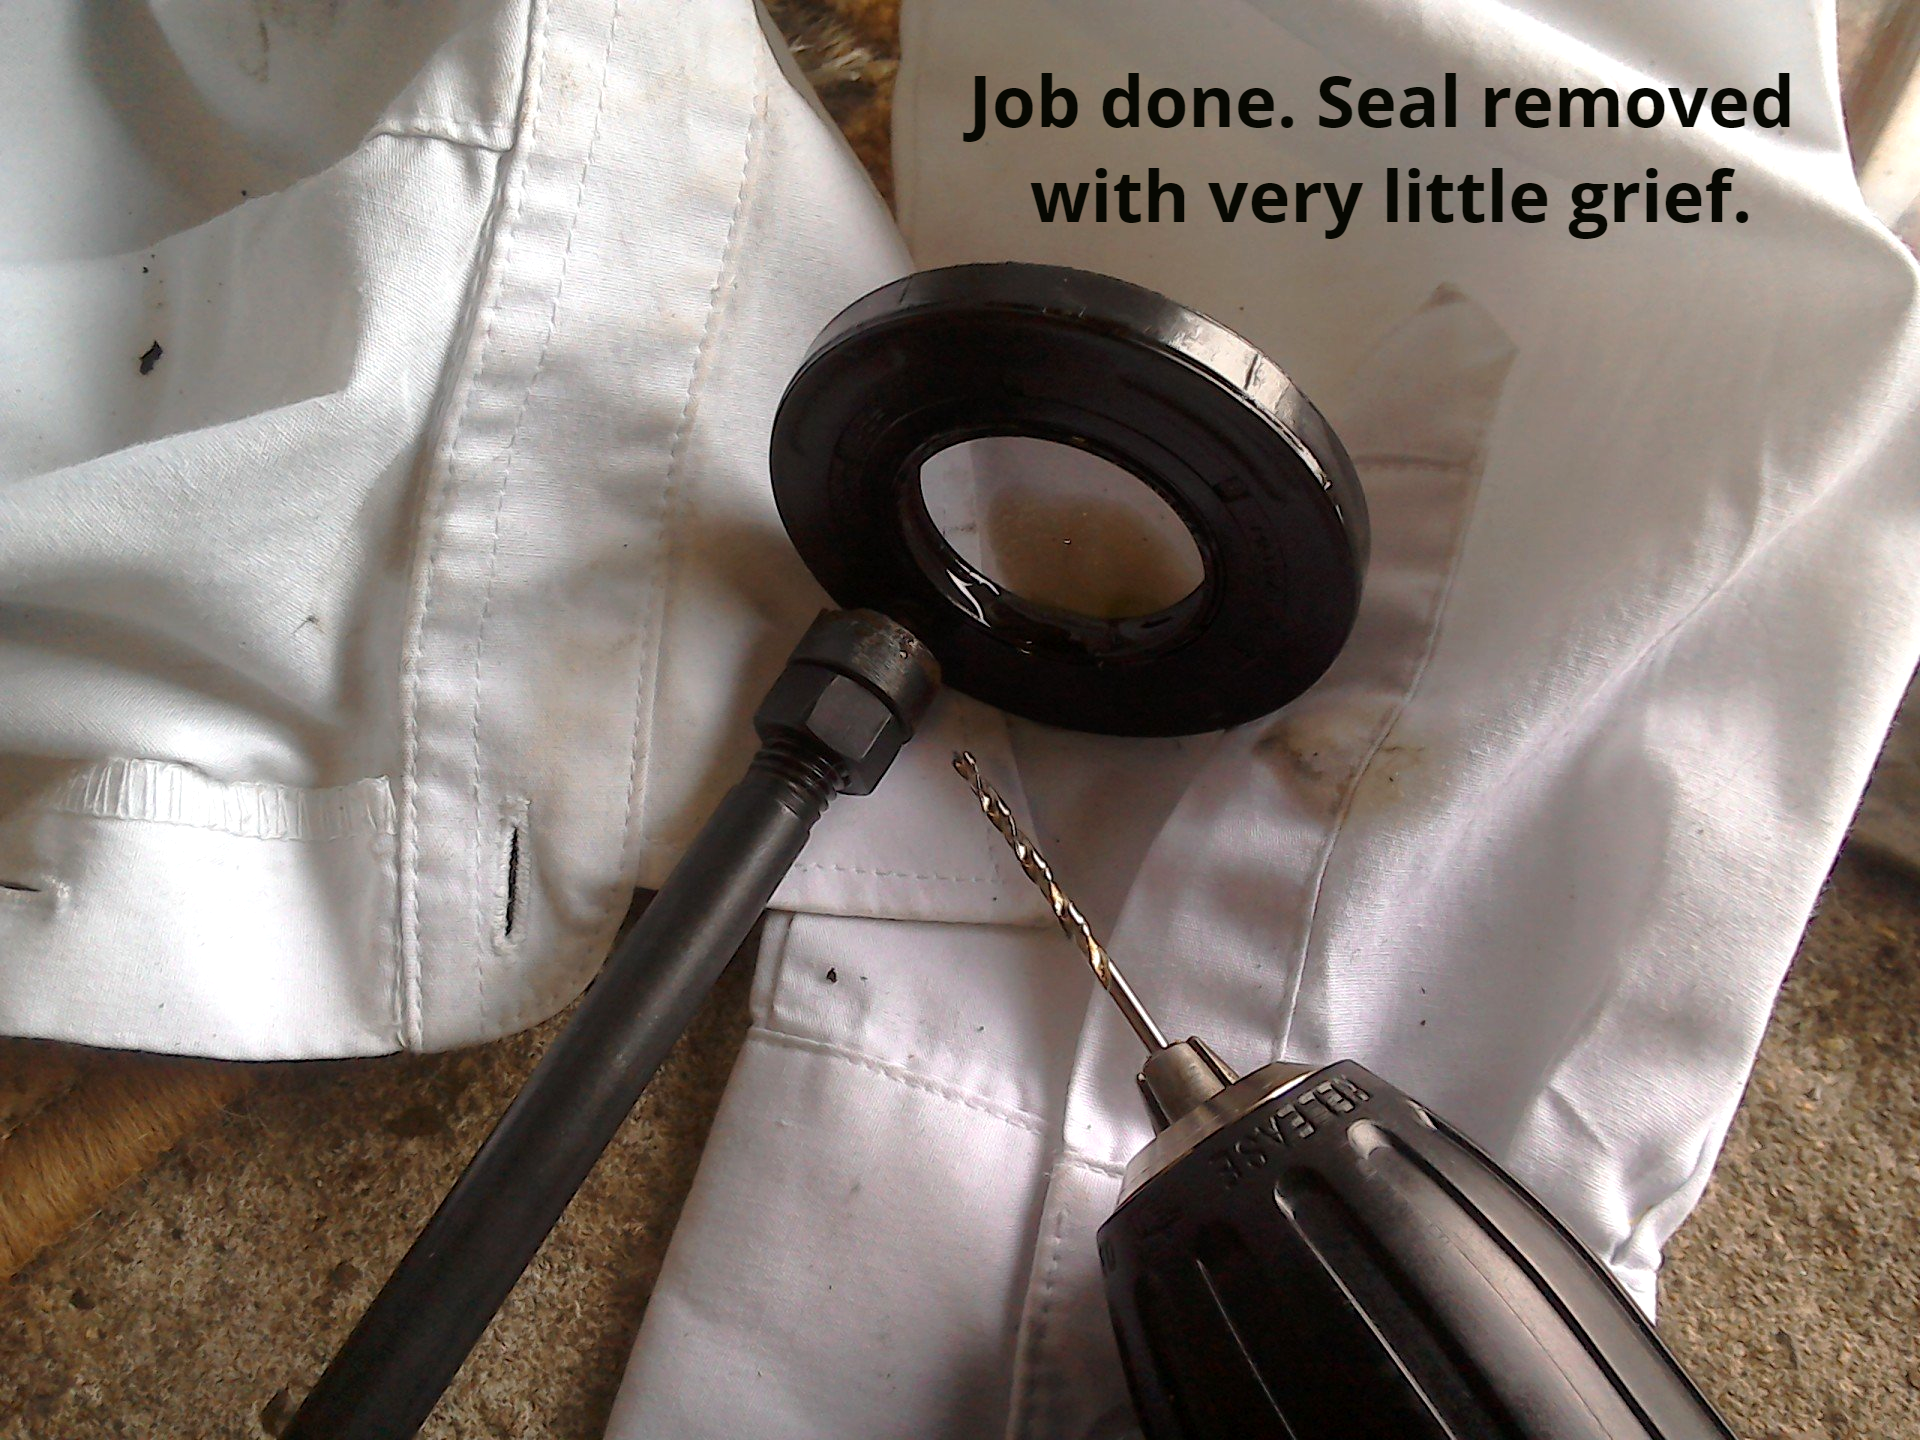
Test riding the old project proved that the leak from the cam chain tensioner had been cured but there was still the occasional drip from the sump plate. Further investigation revealed that the culprit was actually the gearbox output shaft seal, with the oil then making its way (under gravity) to drip from the sump. Time for a new seal then.
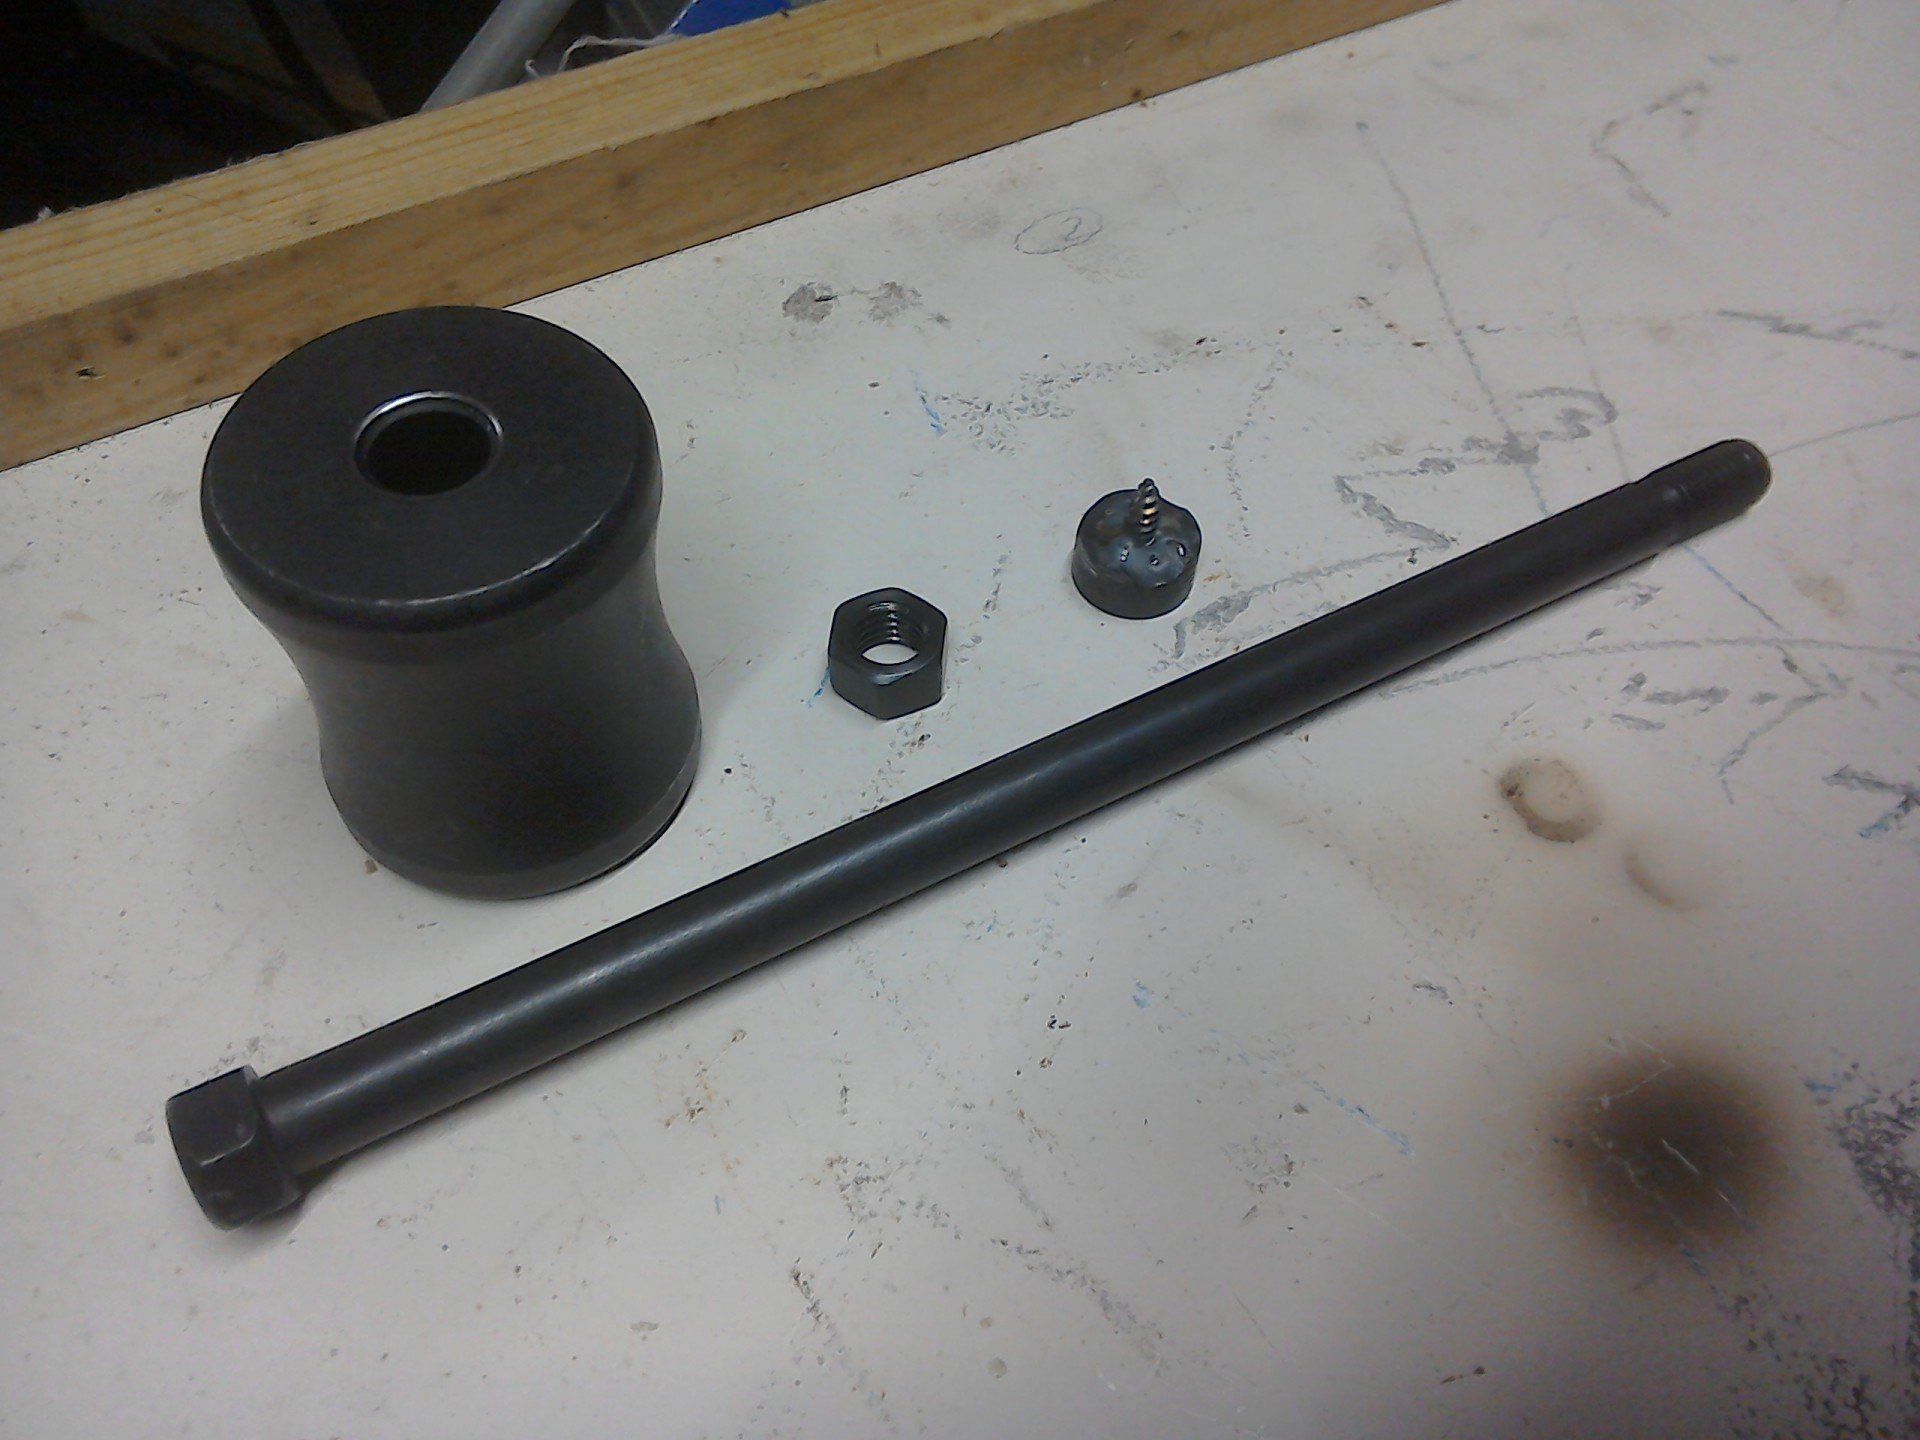
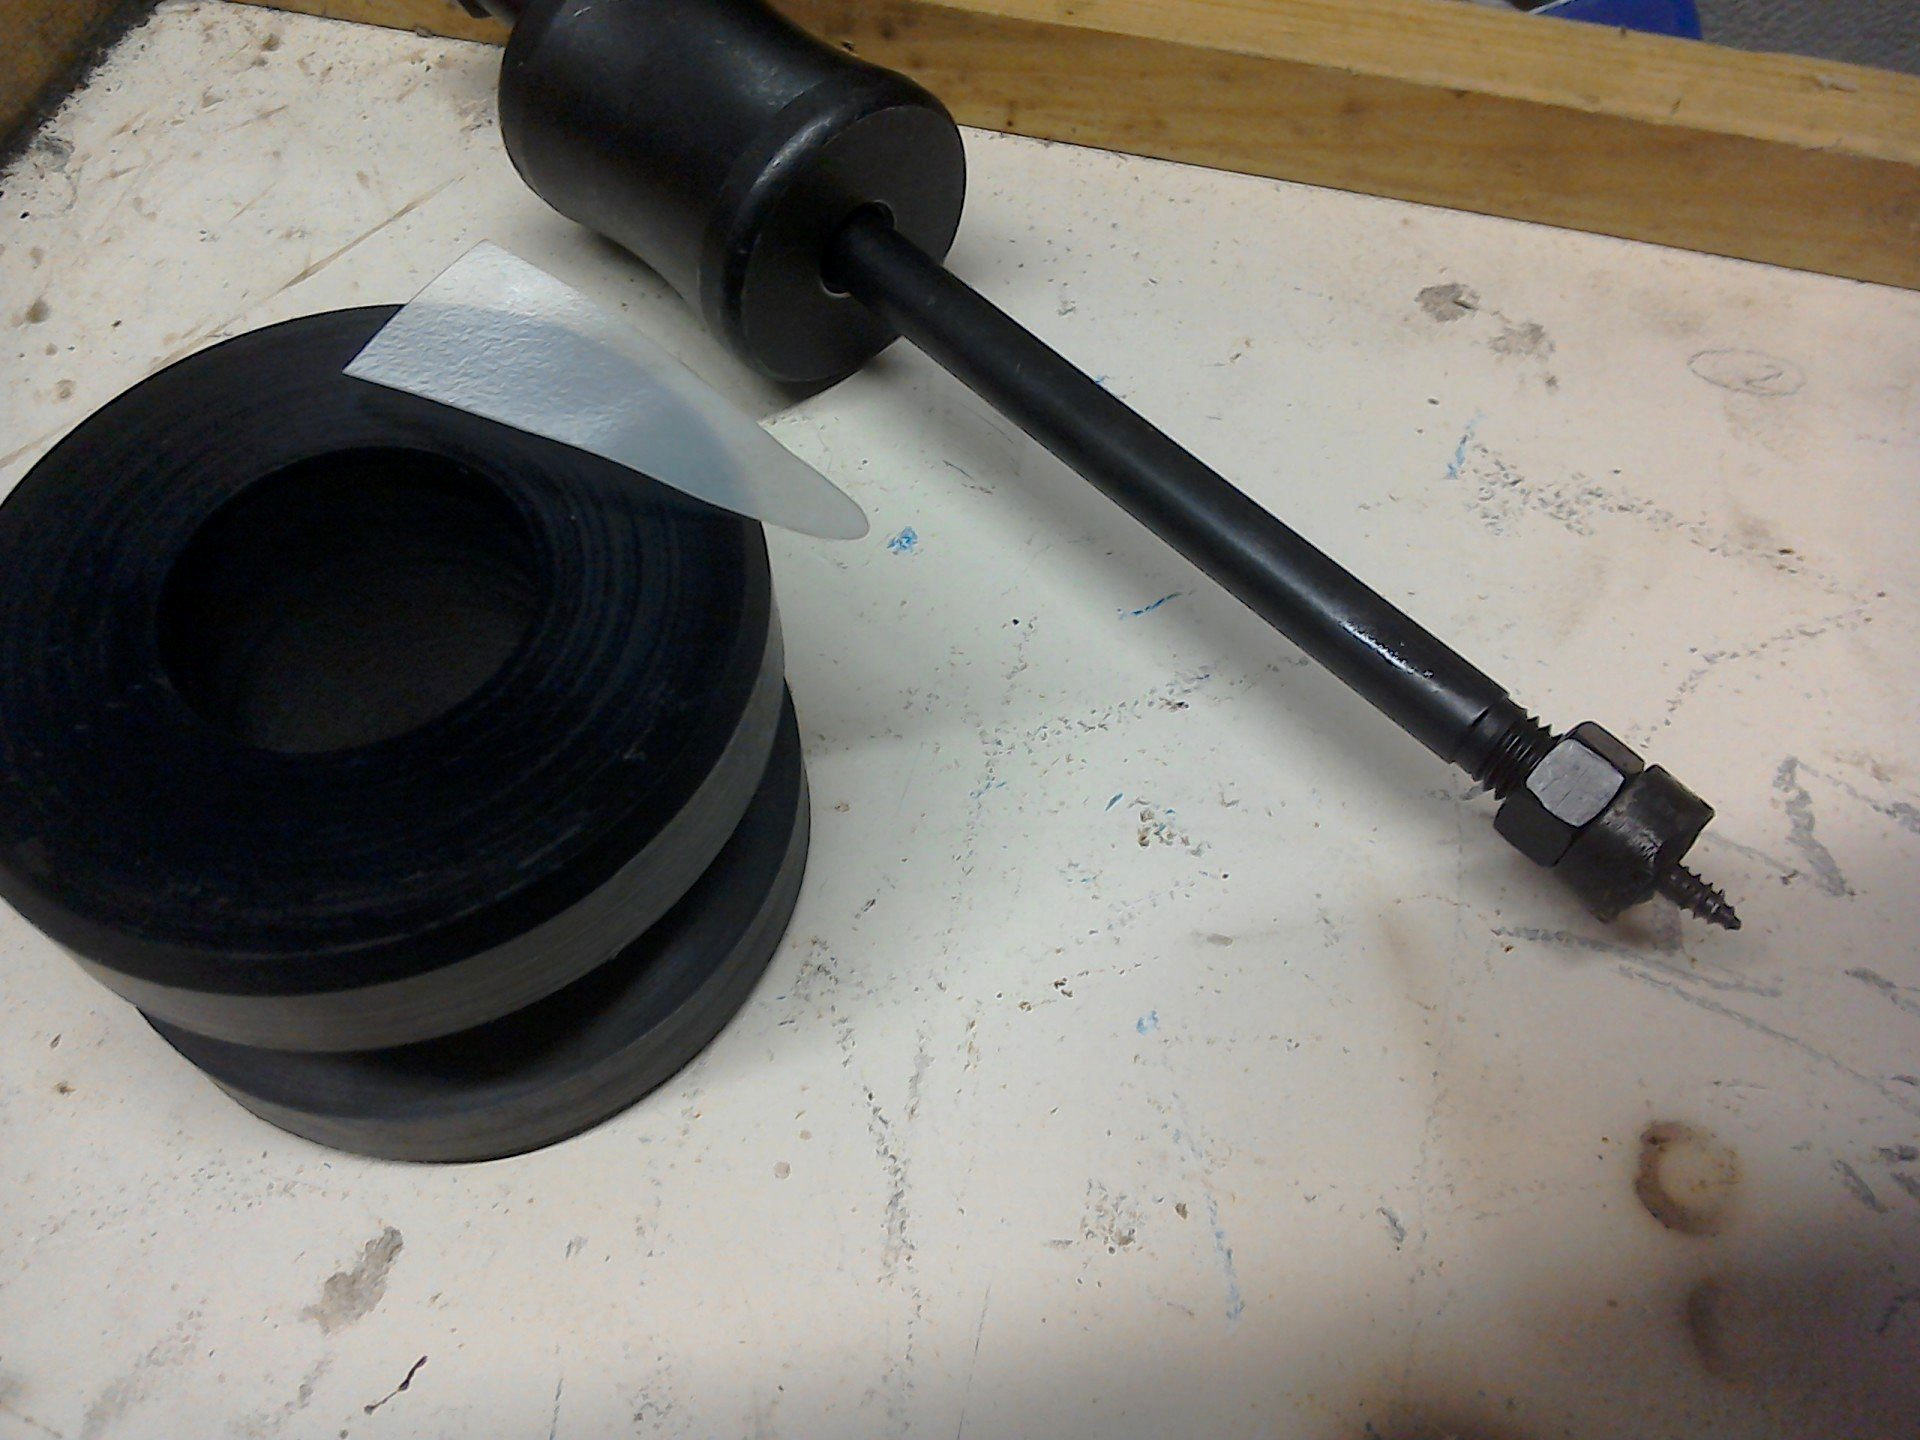
I’d recently seen a video of a seal removal tool which consisted of a slide hammer with a screw on the end. The idea being that you hammered on the end of the slide hammer until the screw had punched a pilot hole, screwed it firmly into the seal and then slide hammered it out. It seemed to work really well. All I needed to do was fashion my own version.
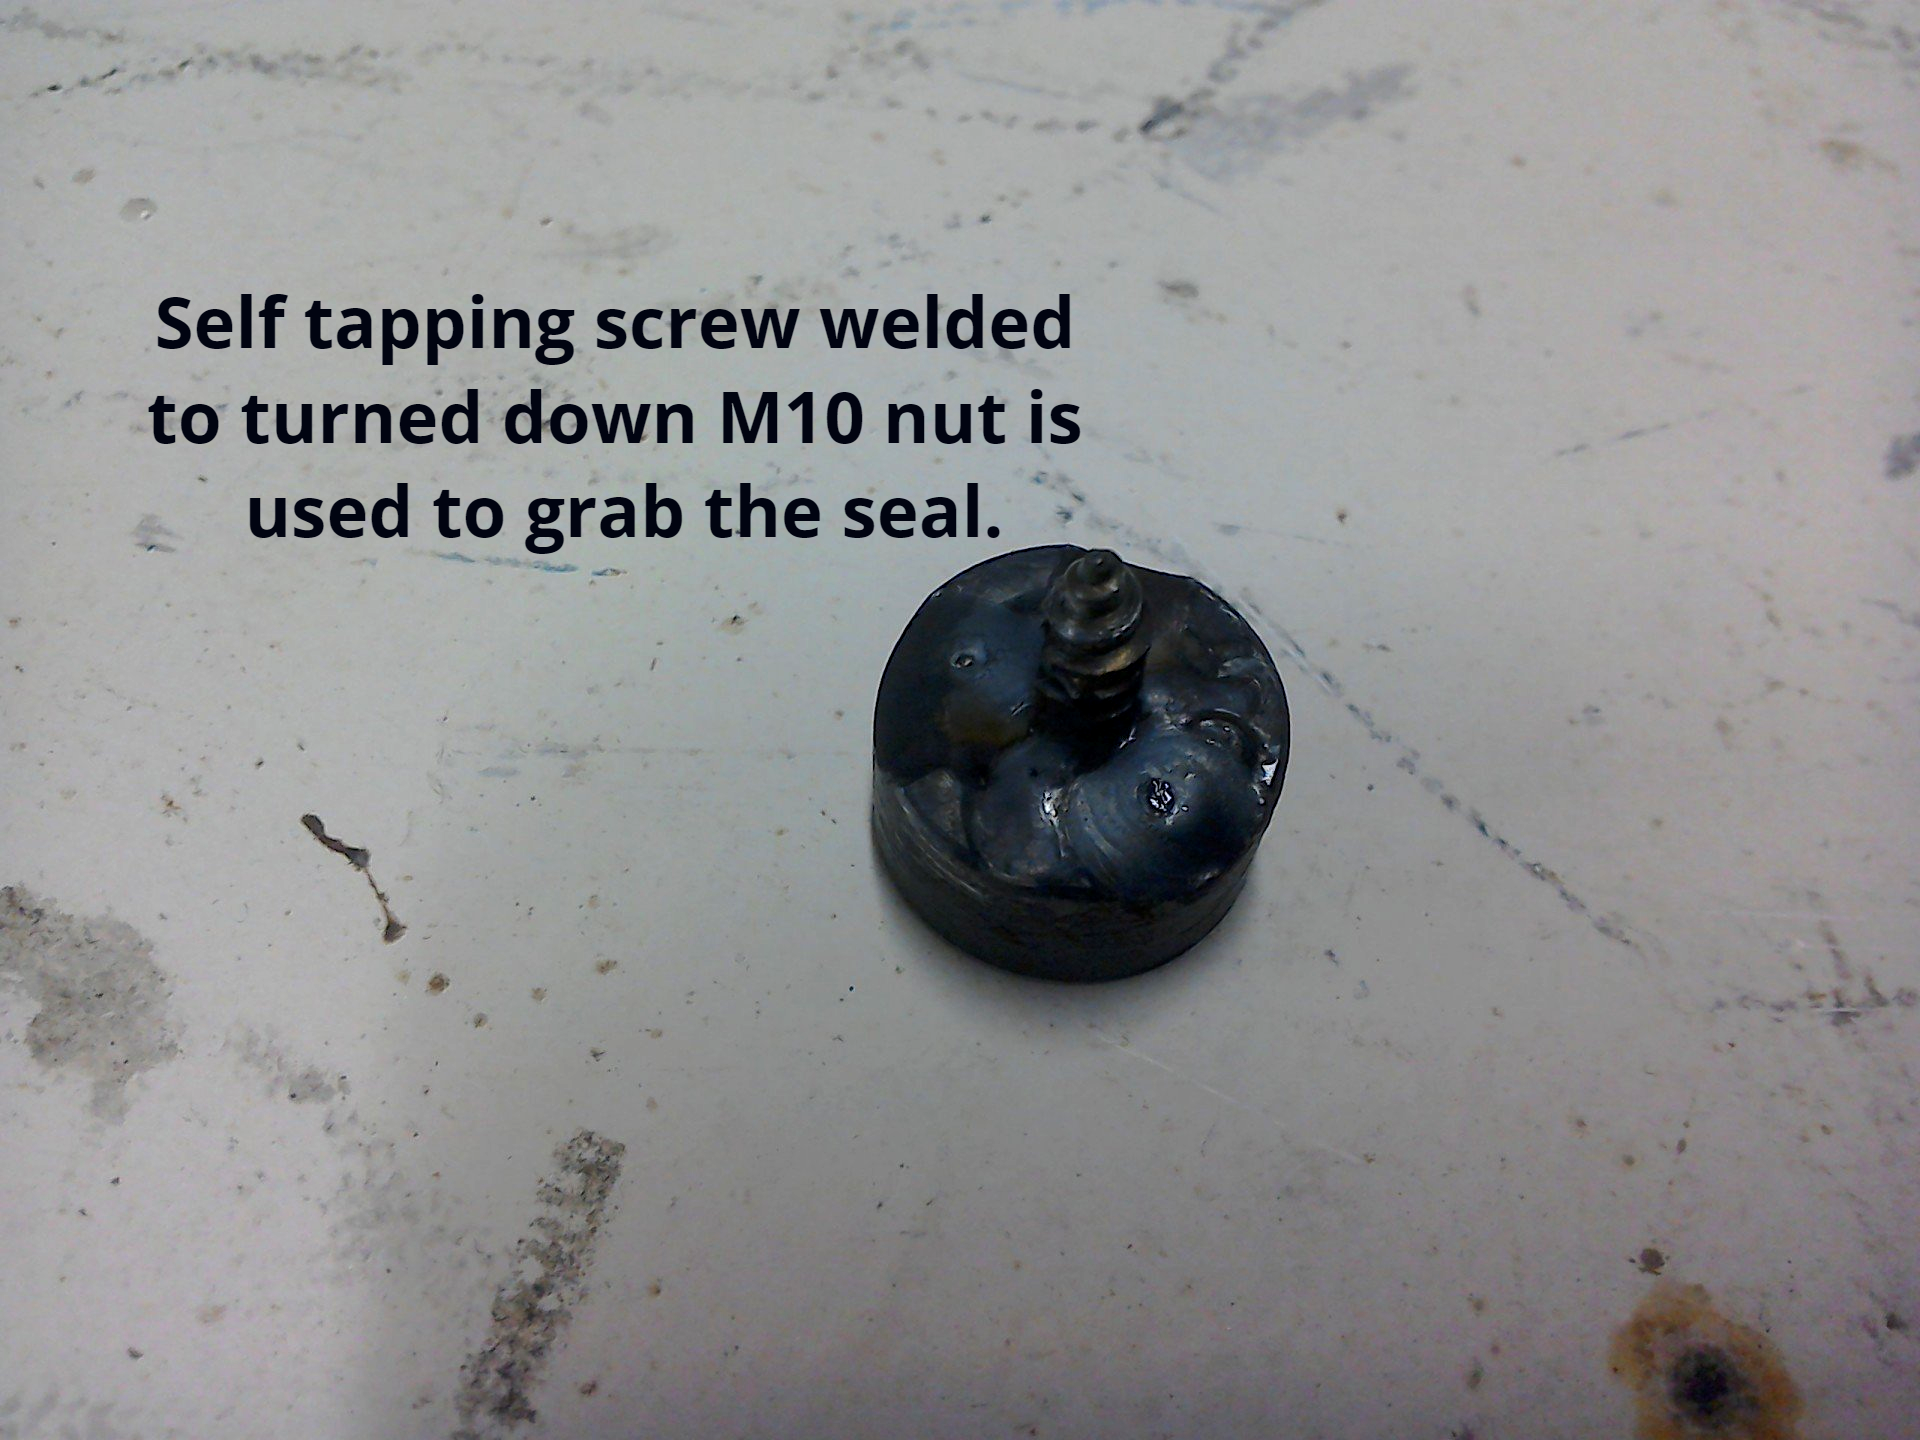
I already had a slide hammer as part of a brake piston removal set, so I just needed to make a screwy bit to fit on the end. The hi-tech solution was a self tapper welded to a (turned down for clearance purposes) M10 nut.
Test riding the old project proved that the leak from the cam chain tensioner had been cured but there was still the occasional drip from the sump plate. Further investigation revealed that the culprit was actually the gearbox output shaft seal, with the oil then making its way (under gravity) to drip from the sump. Time for a new seal then.
I’d recently seen a video of a seal removal tool which consisted of a slide hammer with a screw on the end. The idea being that you hammered on the end of the slide hammer until the screw had punched a pilot hole, screwed it firmly into the seal and then slide hammered it out. It seemed to work really well. All I needed to do was fashion my own version.
I already had a slide hammer as part of a brake piston removal set, so I just needed to make a screwy bit to fit on the end. The hi-tech solution was a self tapper welded to a (turned down for clearance purposes) M10 nut.
This is a shop bought slide hammer, but you could easily make one, you just need a long bolt and a lump of steel with a suitable hole through the middle.
The fully assembled seal removal tool together with a large chunk of black acetal (plastic) which will be used to drive the new seal into place. Sometimes leaks from seals can be fixed by inserting a thin piece of plastic between seal and shaft. Running this around the inside of the seal is often enough to dislodge any small bits of dust and dirt that may be causing the leak. It's easy and quick to do and is worth a try before investing time and money in replacing a seal. You can buy special tools to do this (Google 'Seal Mate') or you can do what I've done here and cut a triangular section from the thinnest part of a plastic milk carton. Make sure any sharp edges are smooth before using it - you don't want to make the problem worse.
Time to try it out, and it actually worked quite well. I chose to drill the pilot hole, rather than to punch it through, but after that, the self tapper got a firm grip and the slide hammer removed the seal with ease.
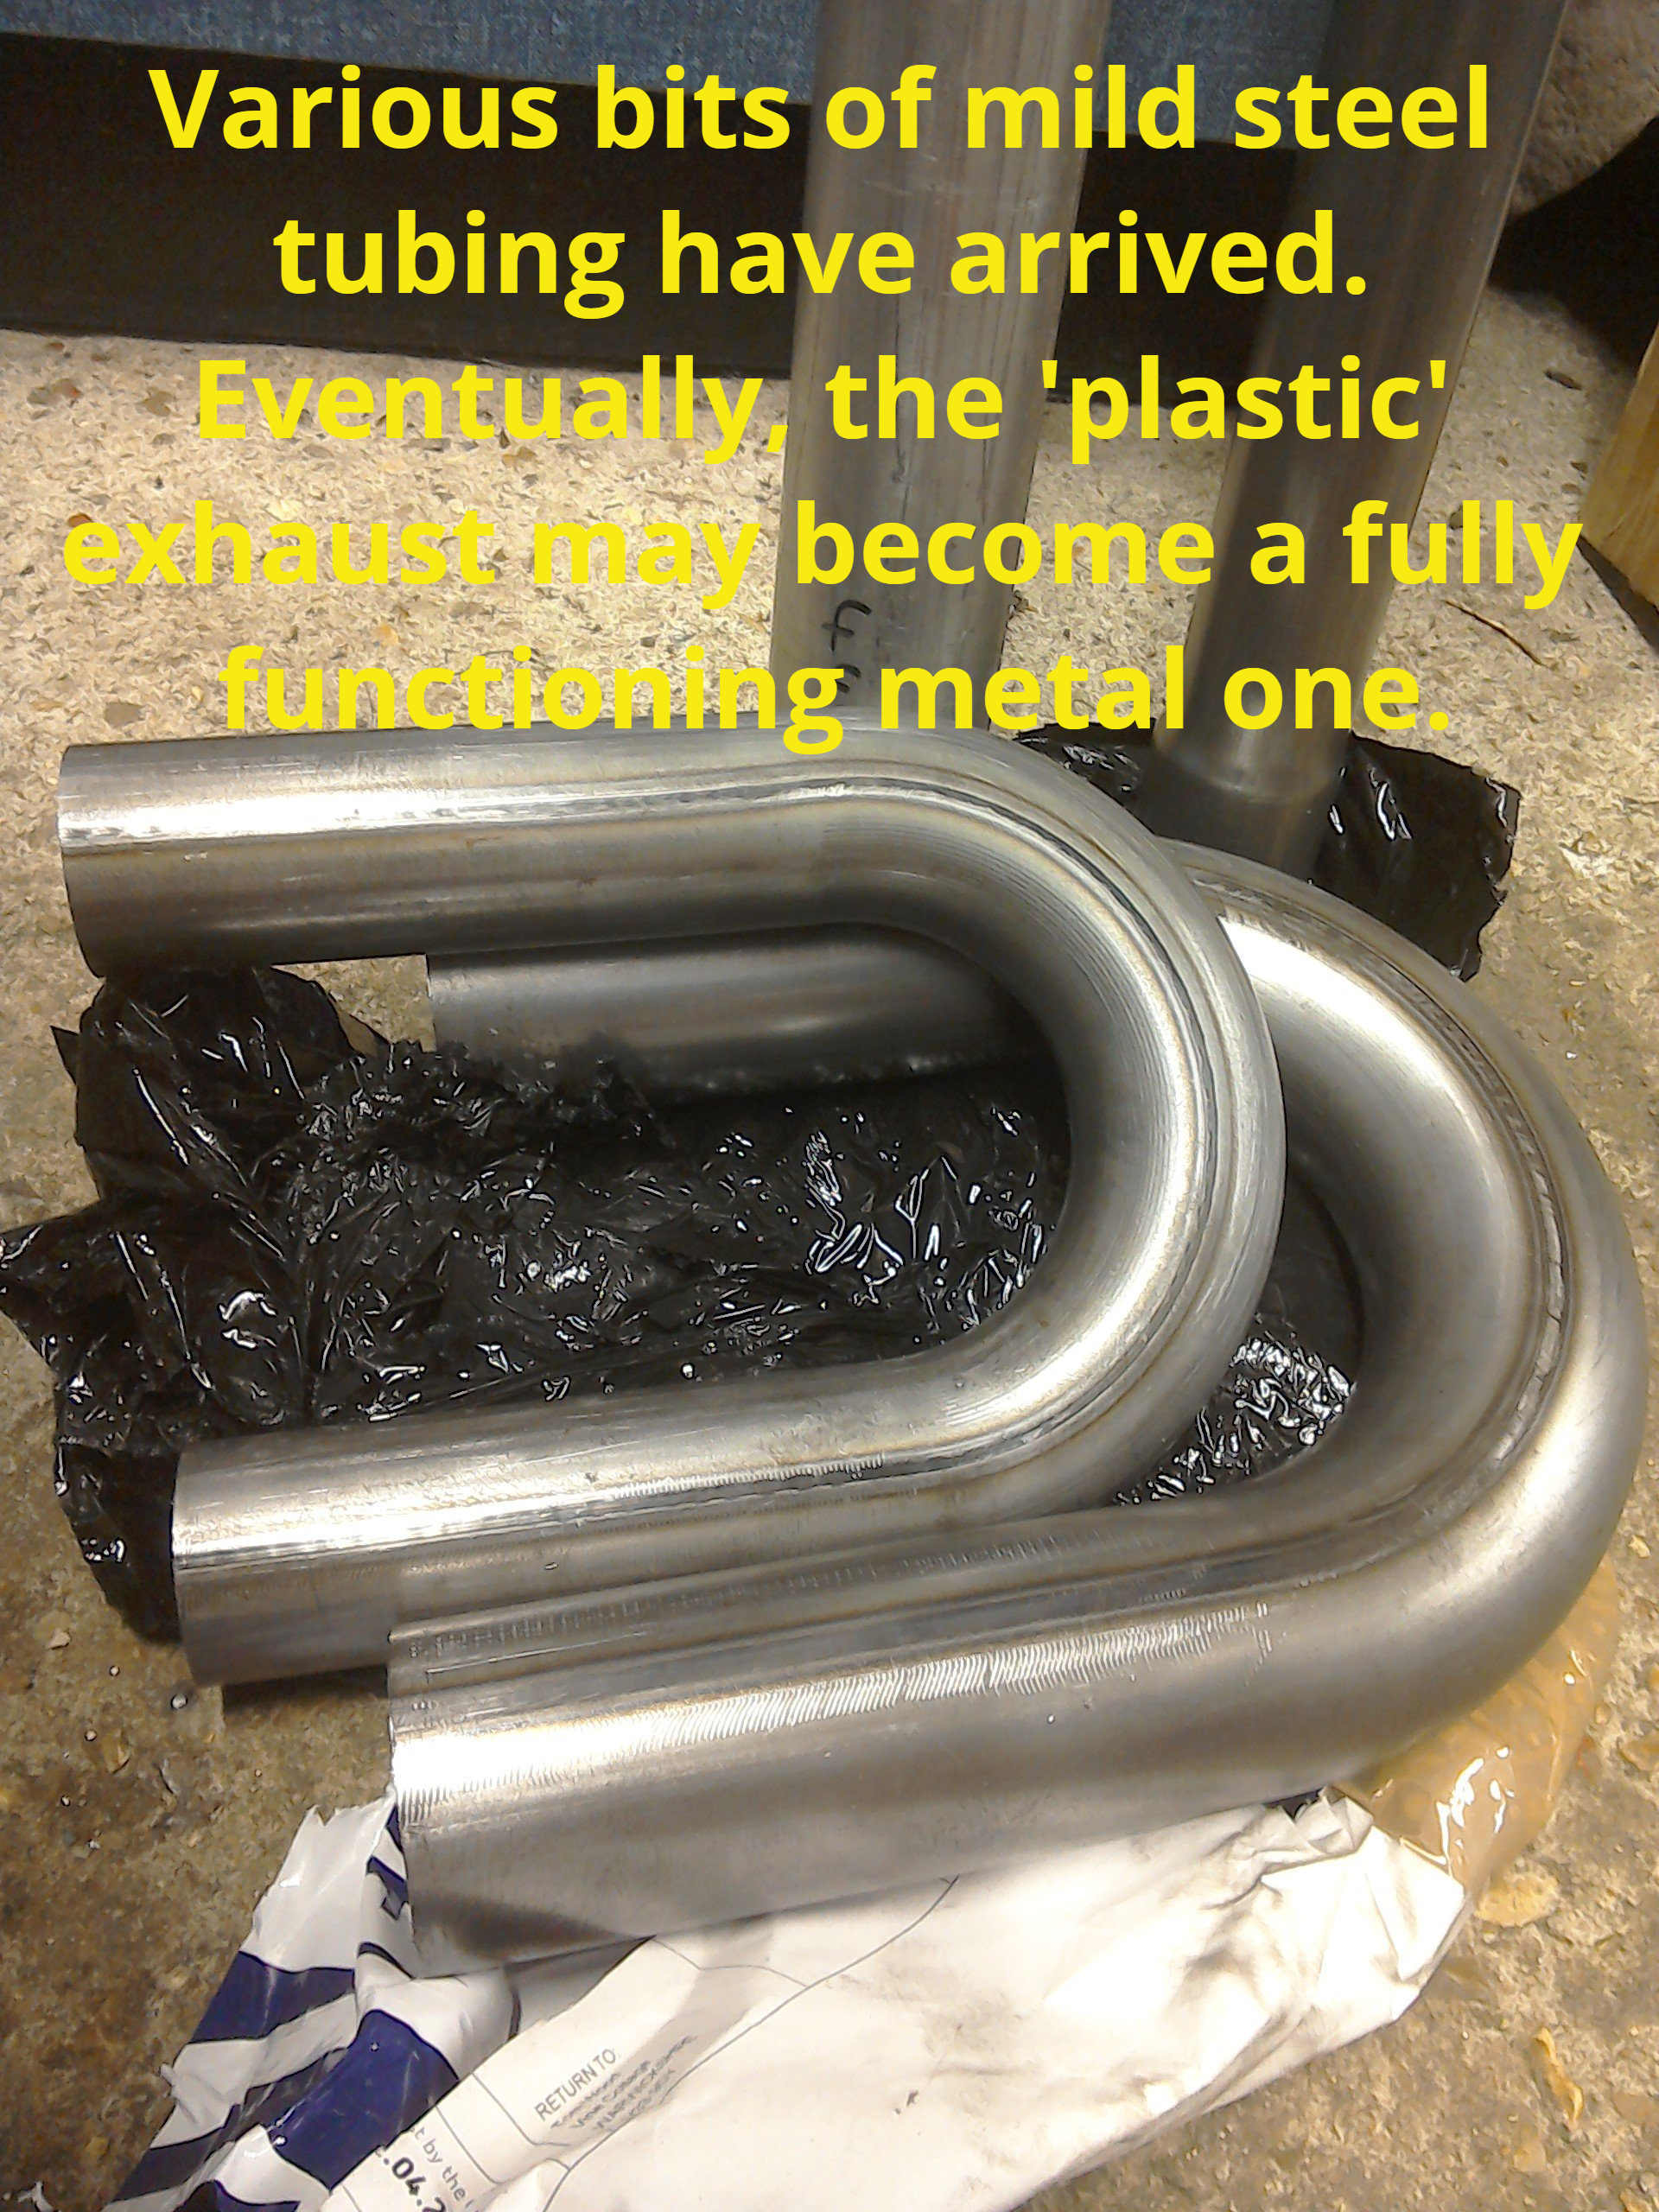
With the snags from the previous project (hopefully) sorted, it’s time to return to the new project. The postman has brought me several packages containing various bits of mild steel tube, from which, I need to turn my ‘plastic’ exhaust design into a fully functioning metal one. It’s going to be made from a combination of purchased bends and pie-cuts (because I’ve never tried making pie-cut bends before and I want to give it a try. Mind you, I’ve never made an exhaust before, so it’s all a bit of an experiment!).
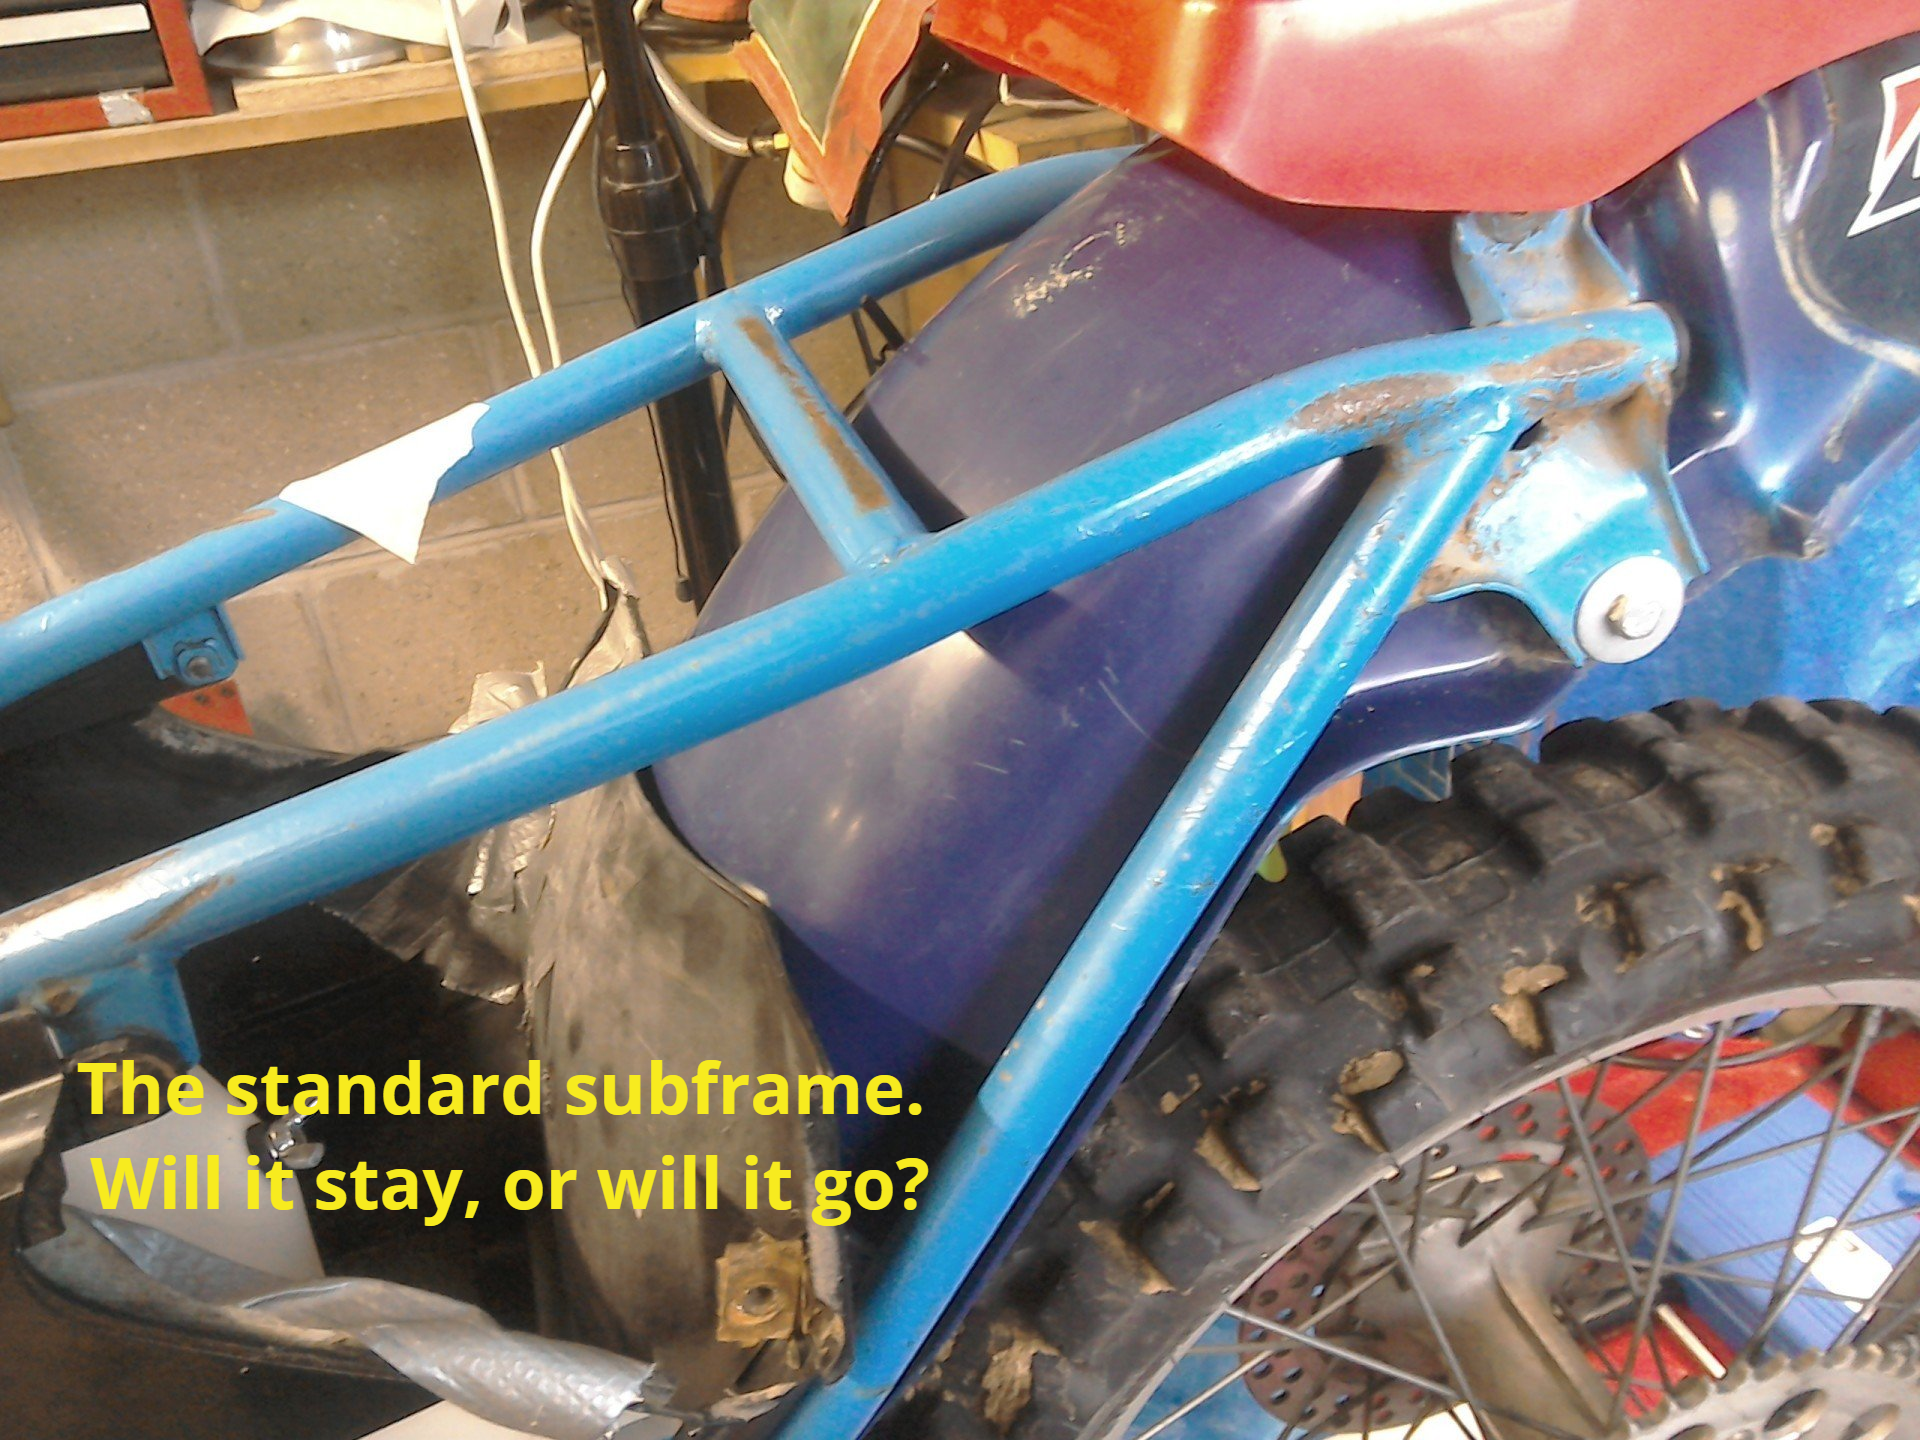
But, before all of that, I need to decide if the existing sub-frame is staying, being modified, or being replaced altogether, because this will have an effect on where the silencer will be mounted, which will, in turn, affect the final design of the exhaust system. But that’s not all, because before I can decide on the final sub-frame design, I also need to have some idea of the rear mudguard that I want to fit and the shape, size and width of the seat. And given that the front of the seat will have to blend in with the petrol tank, it’d be really good if I could decide on the final size and shape of that as well. Lots to think about then…
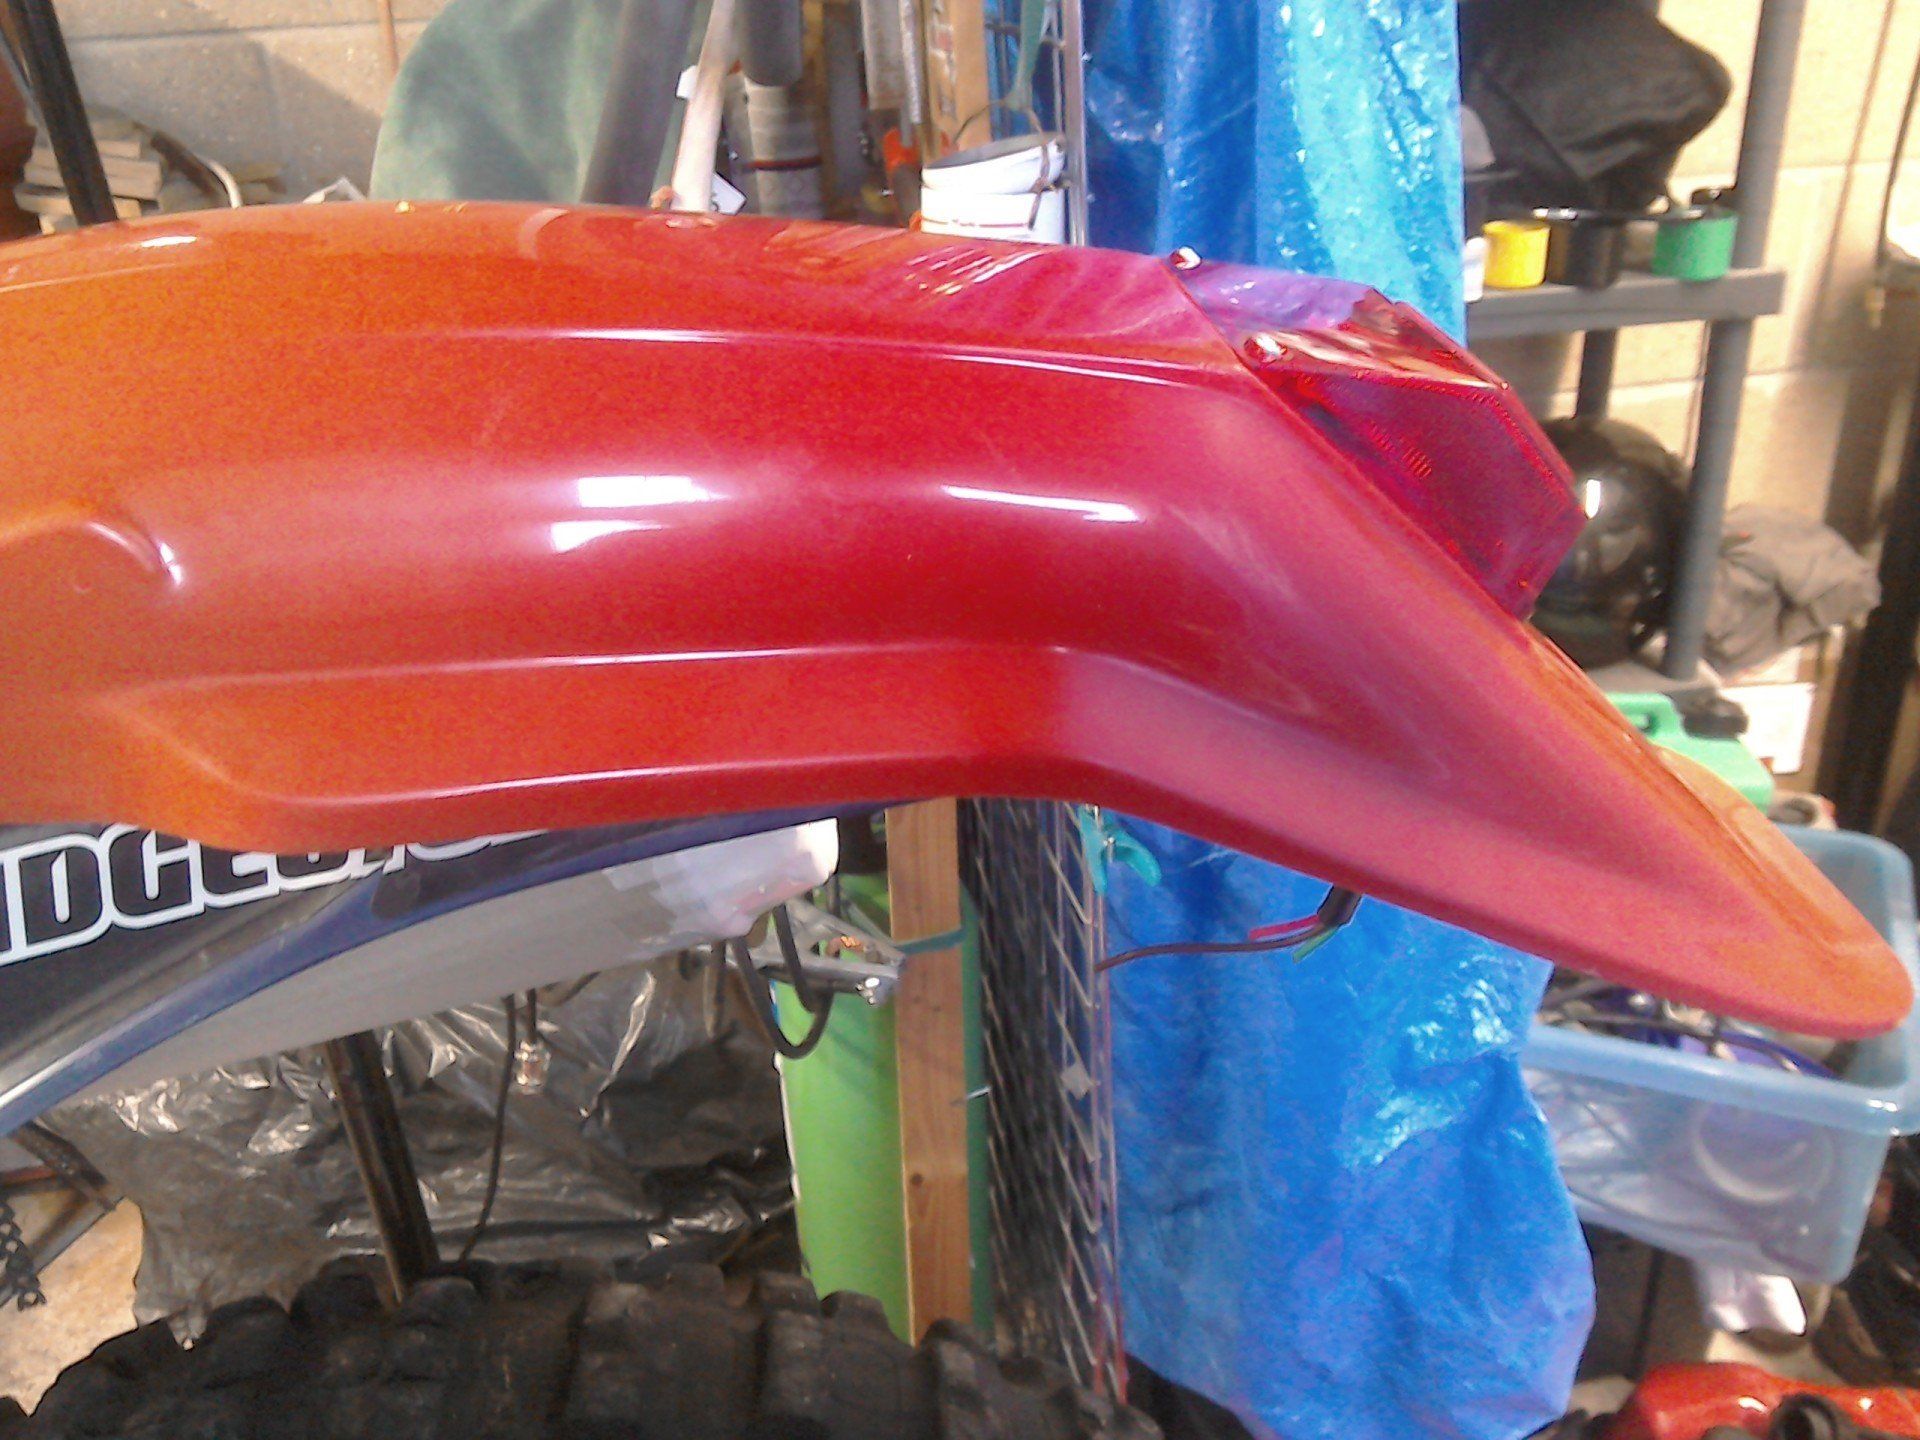
I also intend to have an airbox of some sort, and I'd like to retain the shape of the front part of the rear mudguard as shown above, but the other end needs to look more like the one in the photo below.
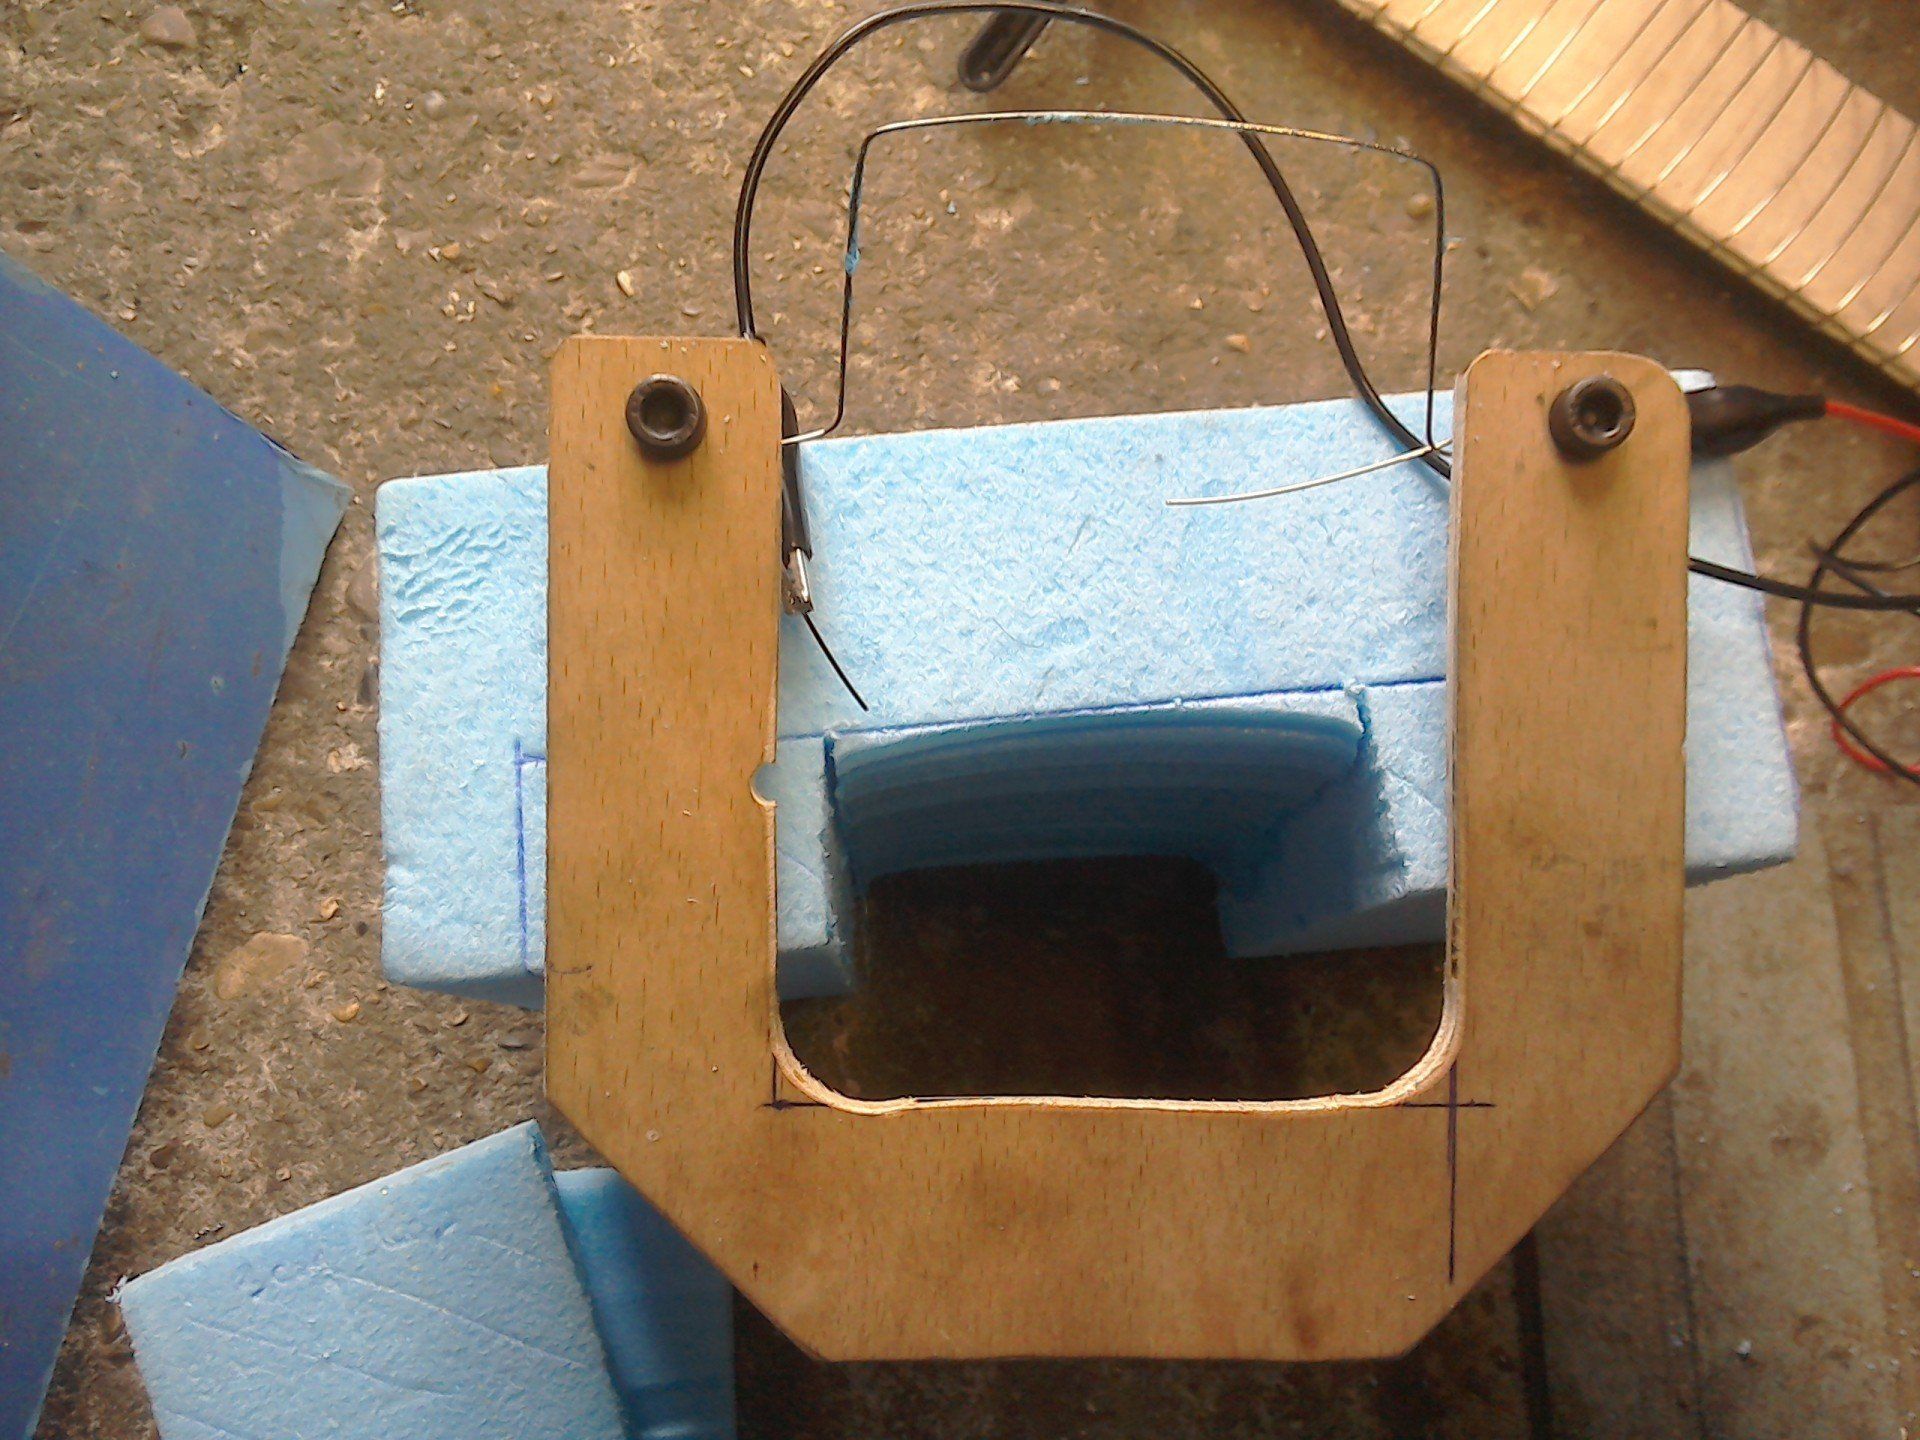
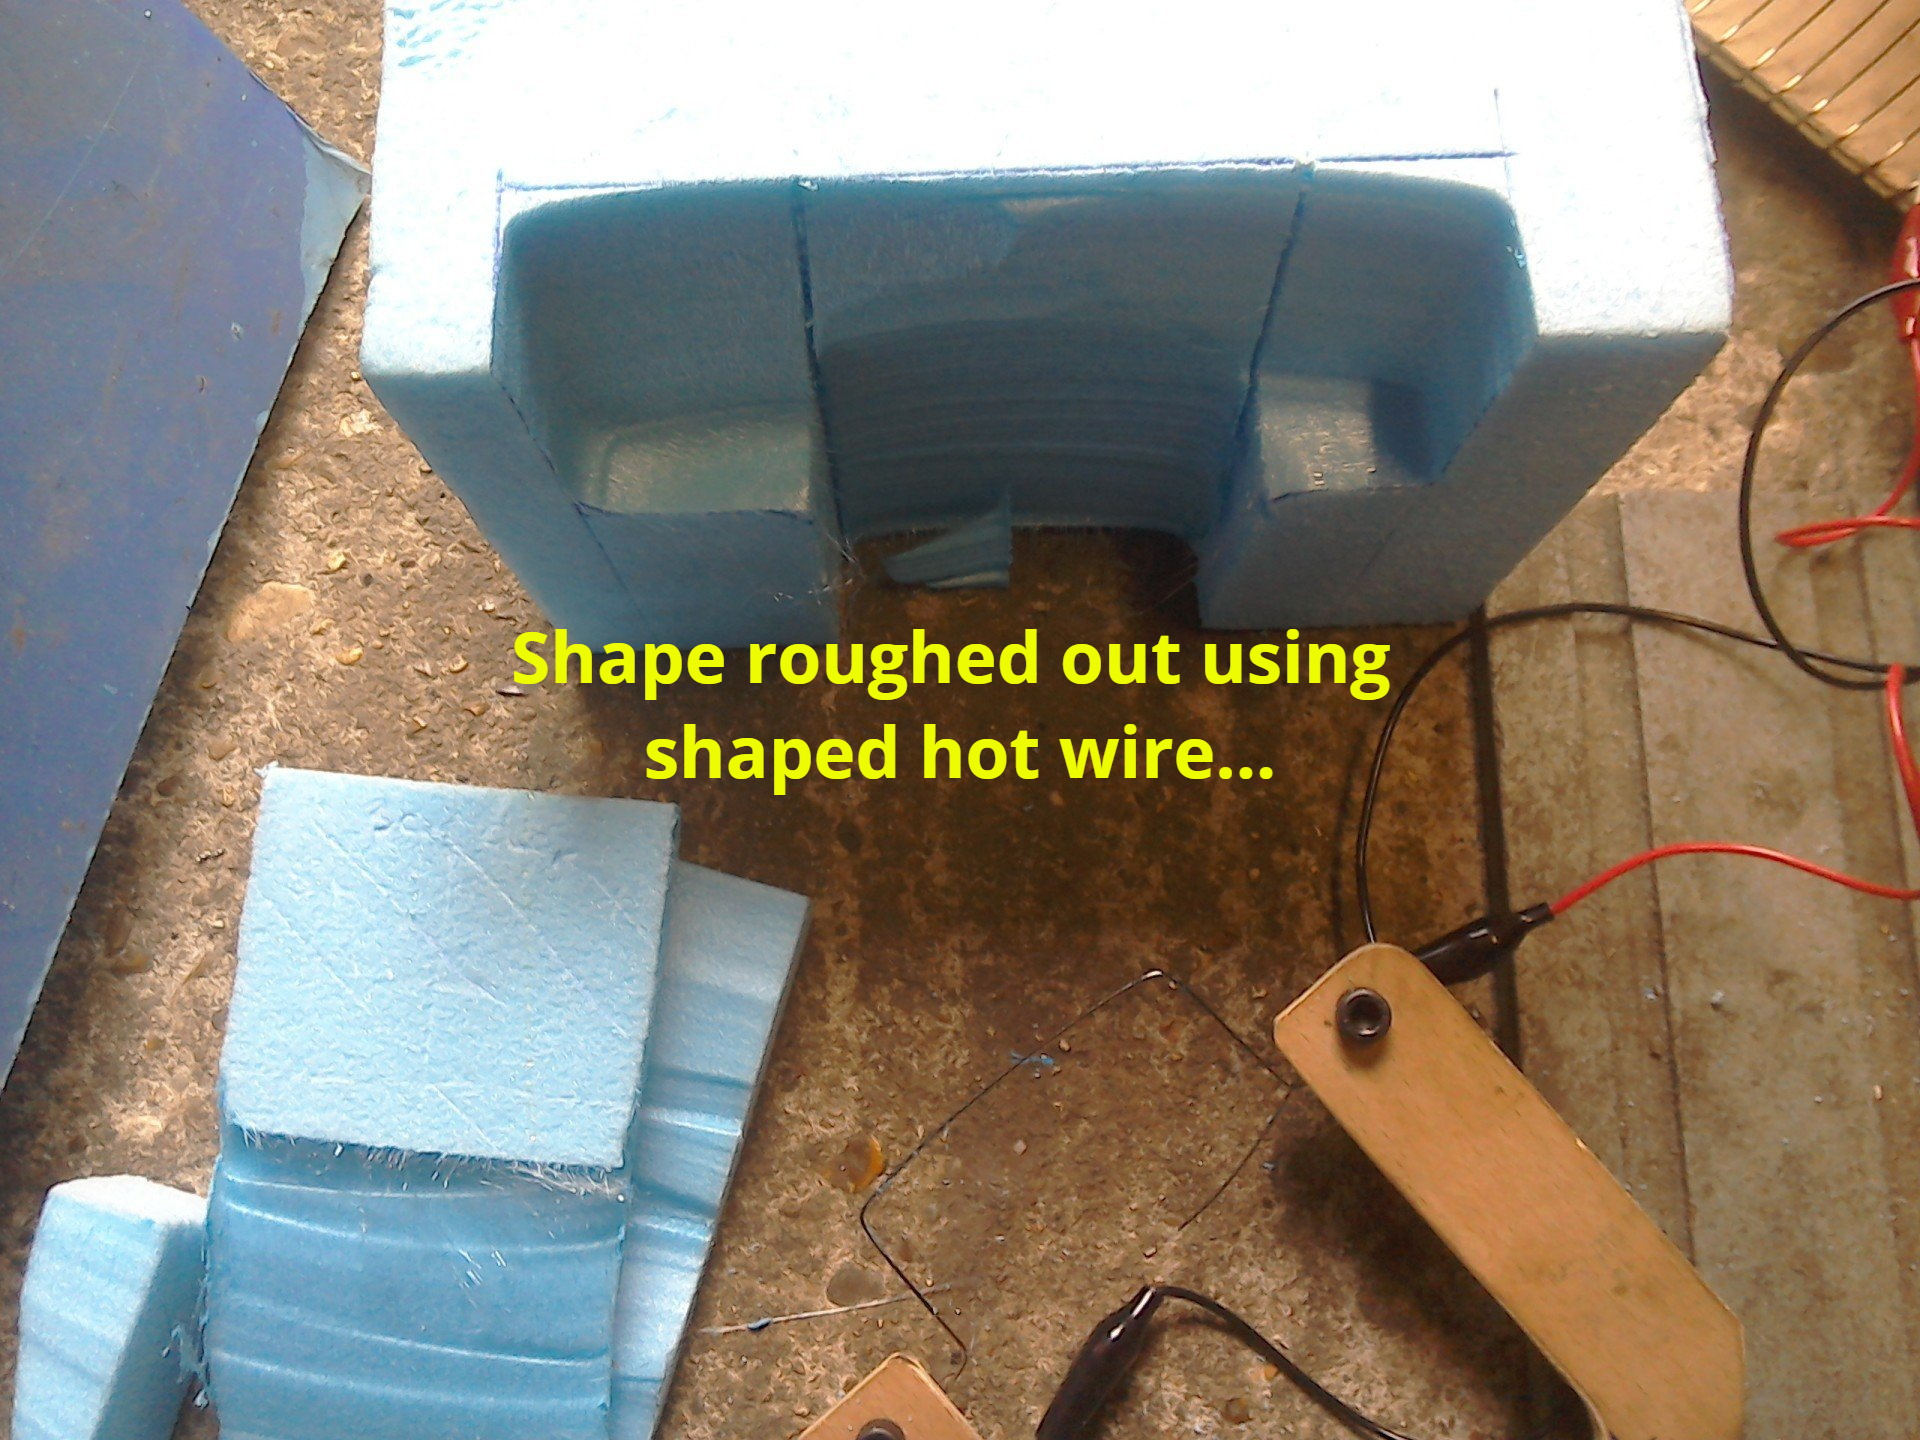
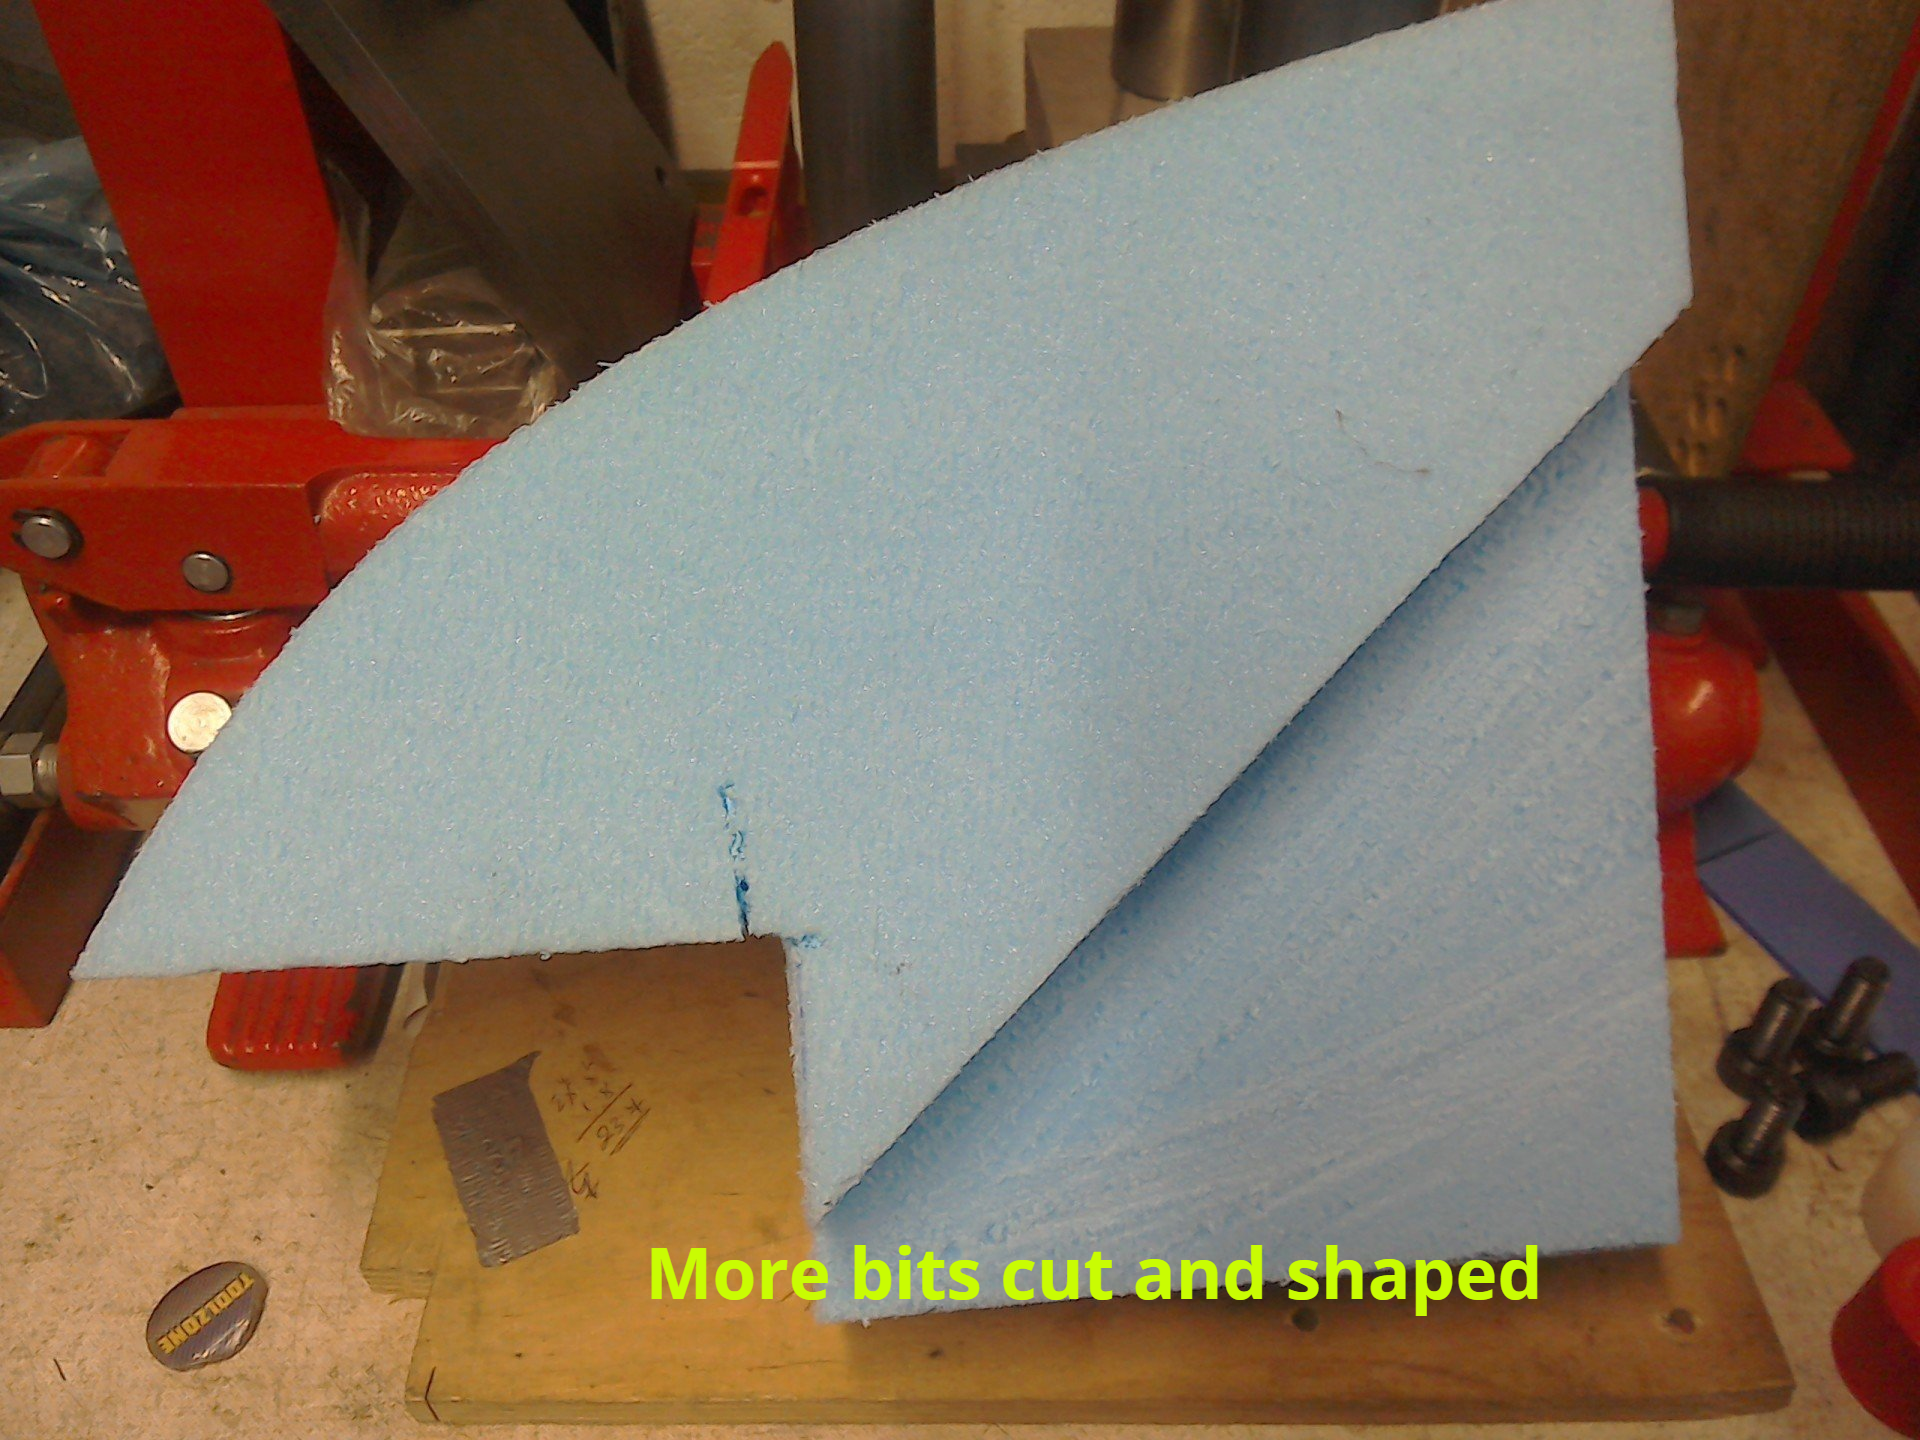
With all that in mind, I really need to see what things are going to look like, and not just as 2D drawings, I need to see full-size 3D. It’s time to get out the blocks of styrofoam and start cutting, sanding and shaping. Last time I cut the foam blocks using a saw, which was fine, but it did create a lot of mess. This time, I’m going to try a hot wire cutter, and that’s what I’ve been experimenting with recently.
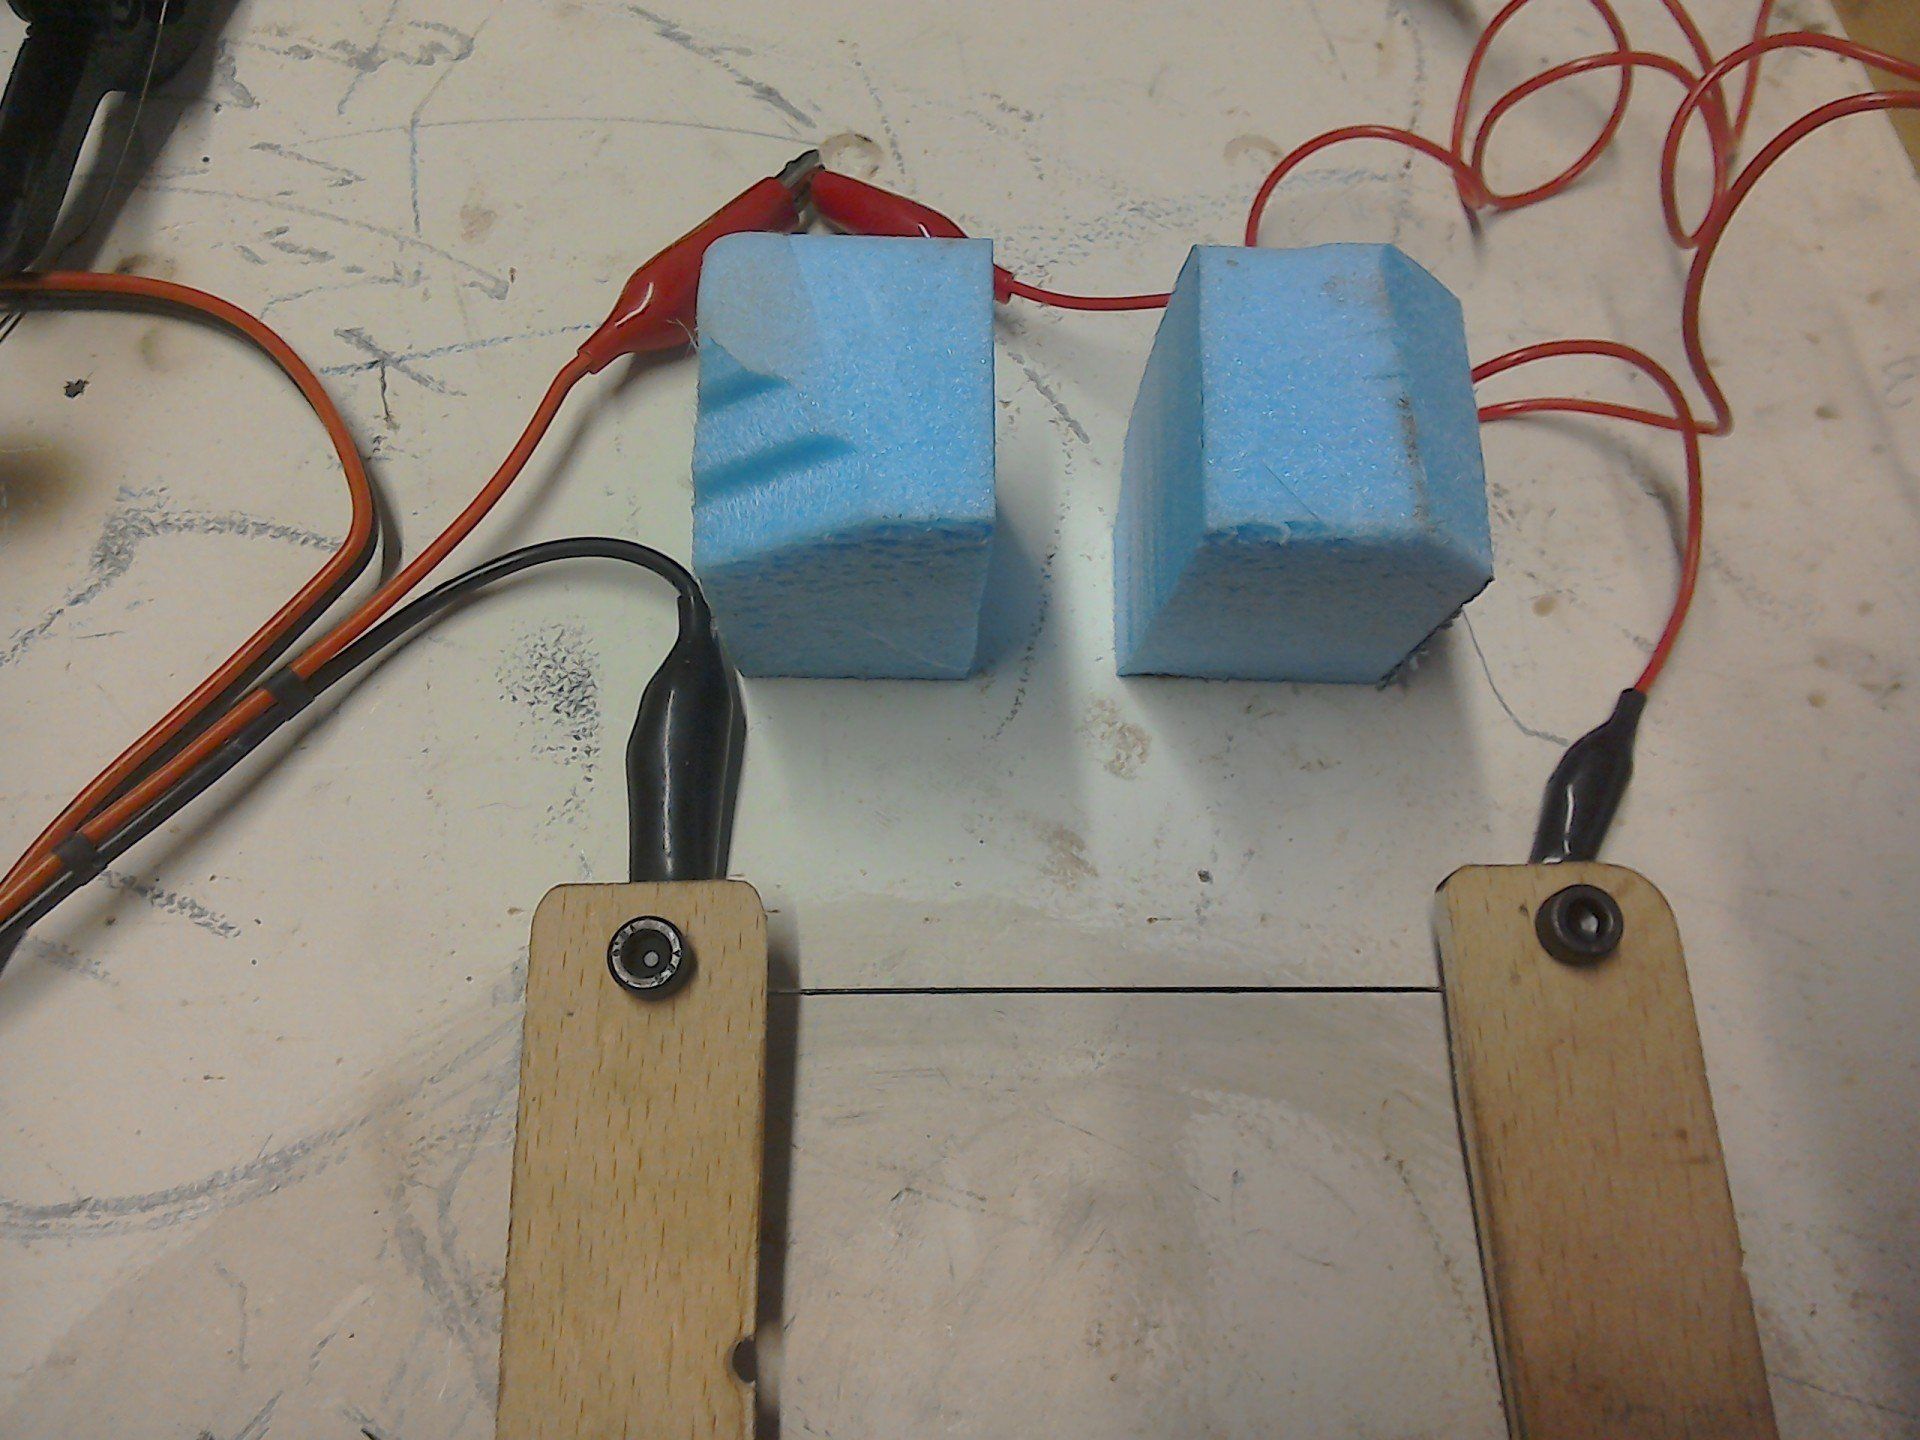
Ever someone who tries to avoid spending money unnecessarily, I’ve been trying to cobble something together from stuff that I already have. So instead of fancy Nichrome wire, I've used some left over stainless mig wire. To control the current flow I’ve wound more stainless wire around a plywood former to make a crude rheostat. It all works Ok, but the power supply I have can’t provide much current, and I think a bit more would be useful. Next step will be to try it with an old 12V bike battery that I have lying around. That should provide a bit more juice.
Ever someone who tries to avoid spending money unnecessarily, I’ve been trying to cobble something together from stuff that I already have. So instead of fancy Nichrome wire, I've used some left over stainless mig wire. To control the current flow I’ve wound more stainless wire around a plywood former to make a crude rheostat. It all works Ok, but the power supply I have can’t provide much current, and I think a bit more would be useful. Next step will be to try it with an old 12V bike battery that I have lying around. That should provide a bit more juice.
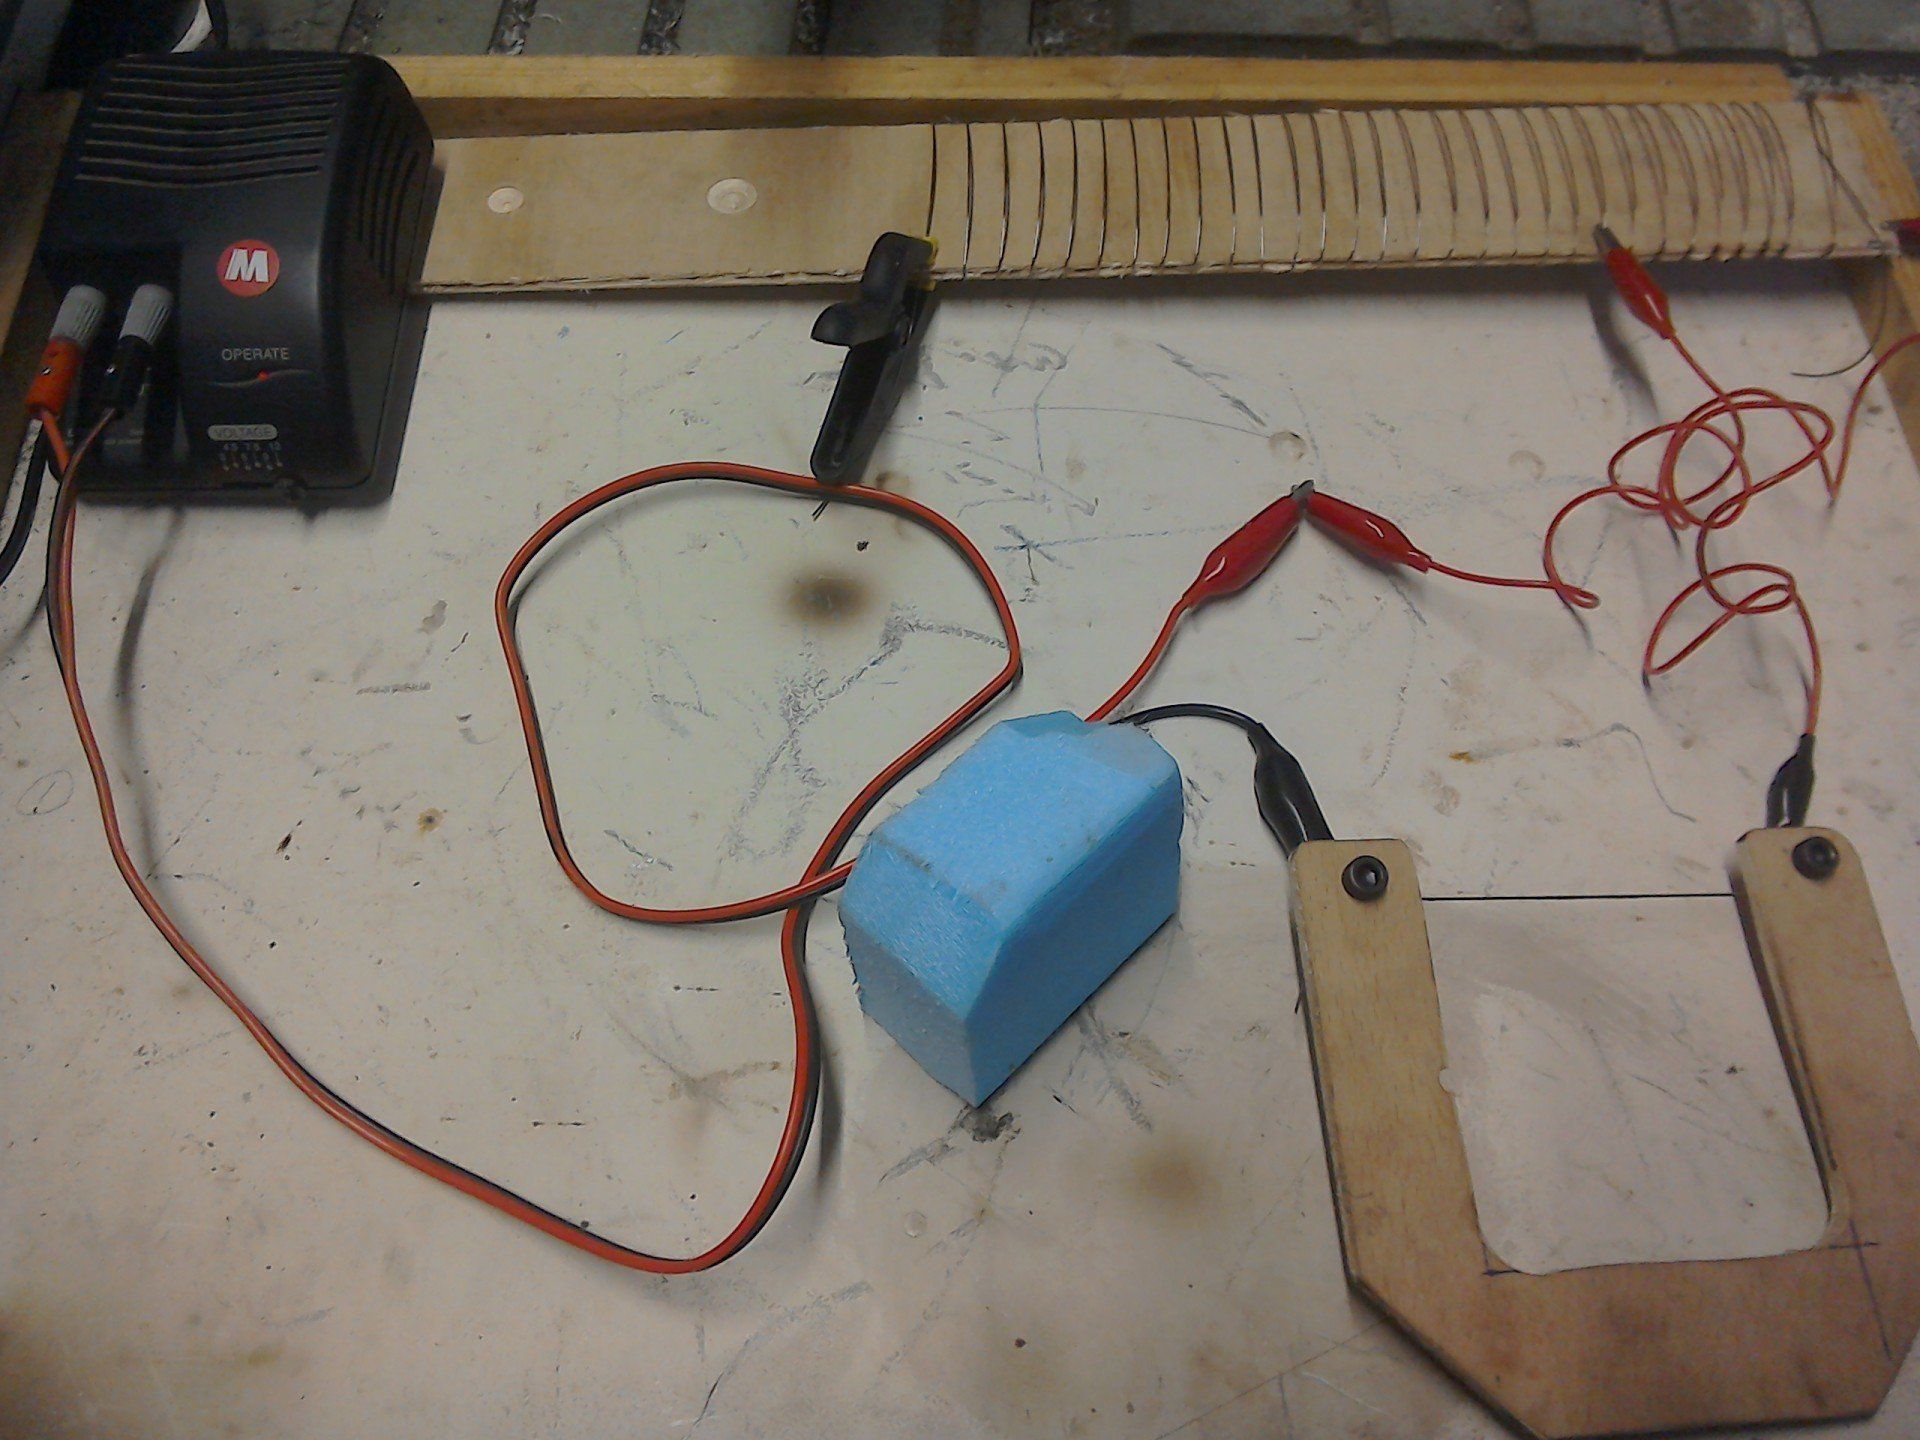
There are lots and lots of DIY hot wire cutter designs on the internet, so have a Google if you’re interested.
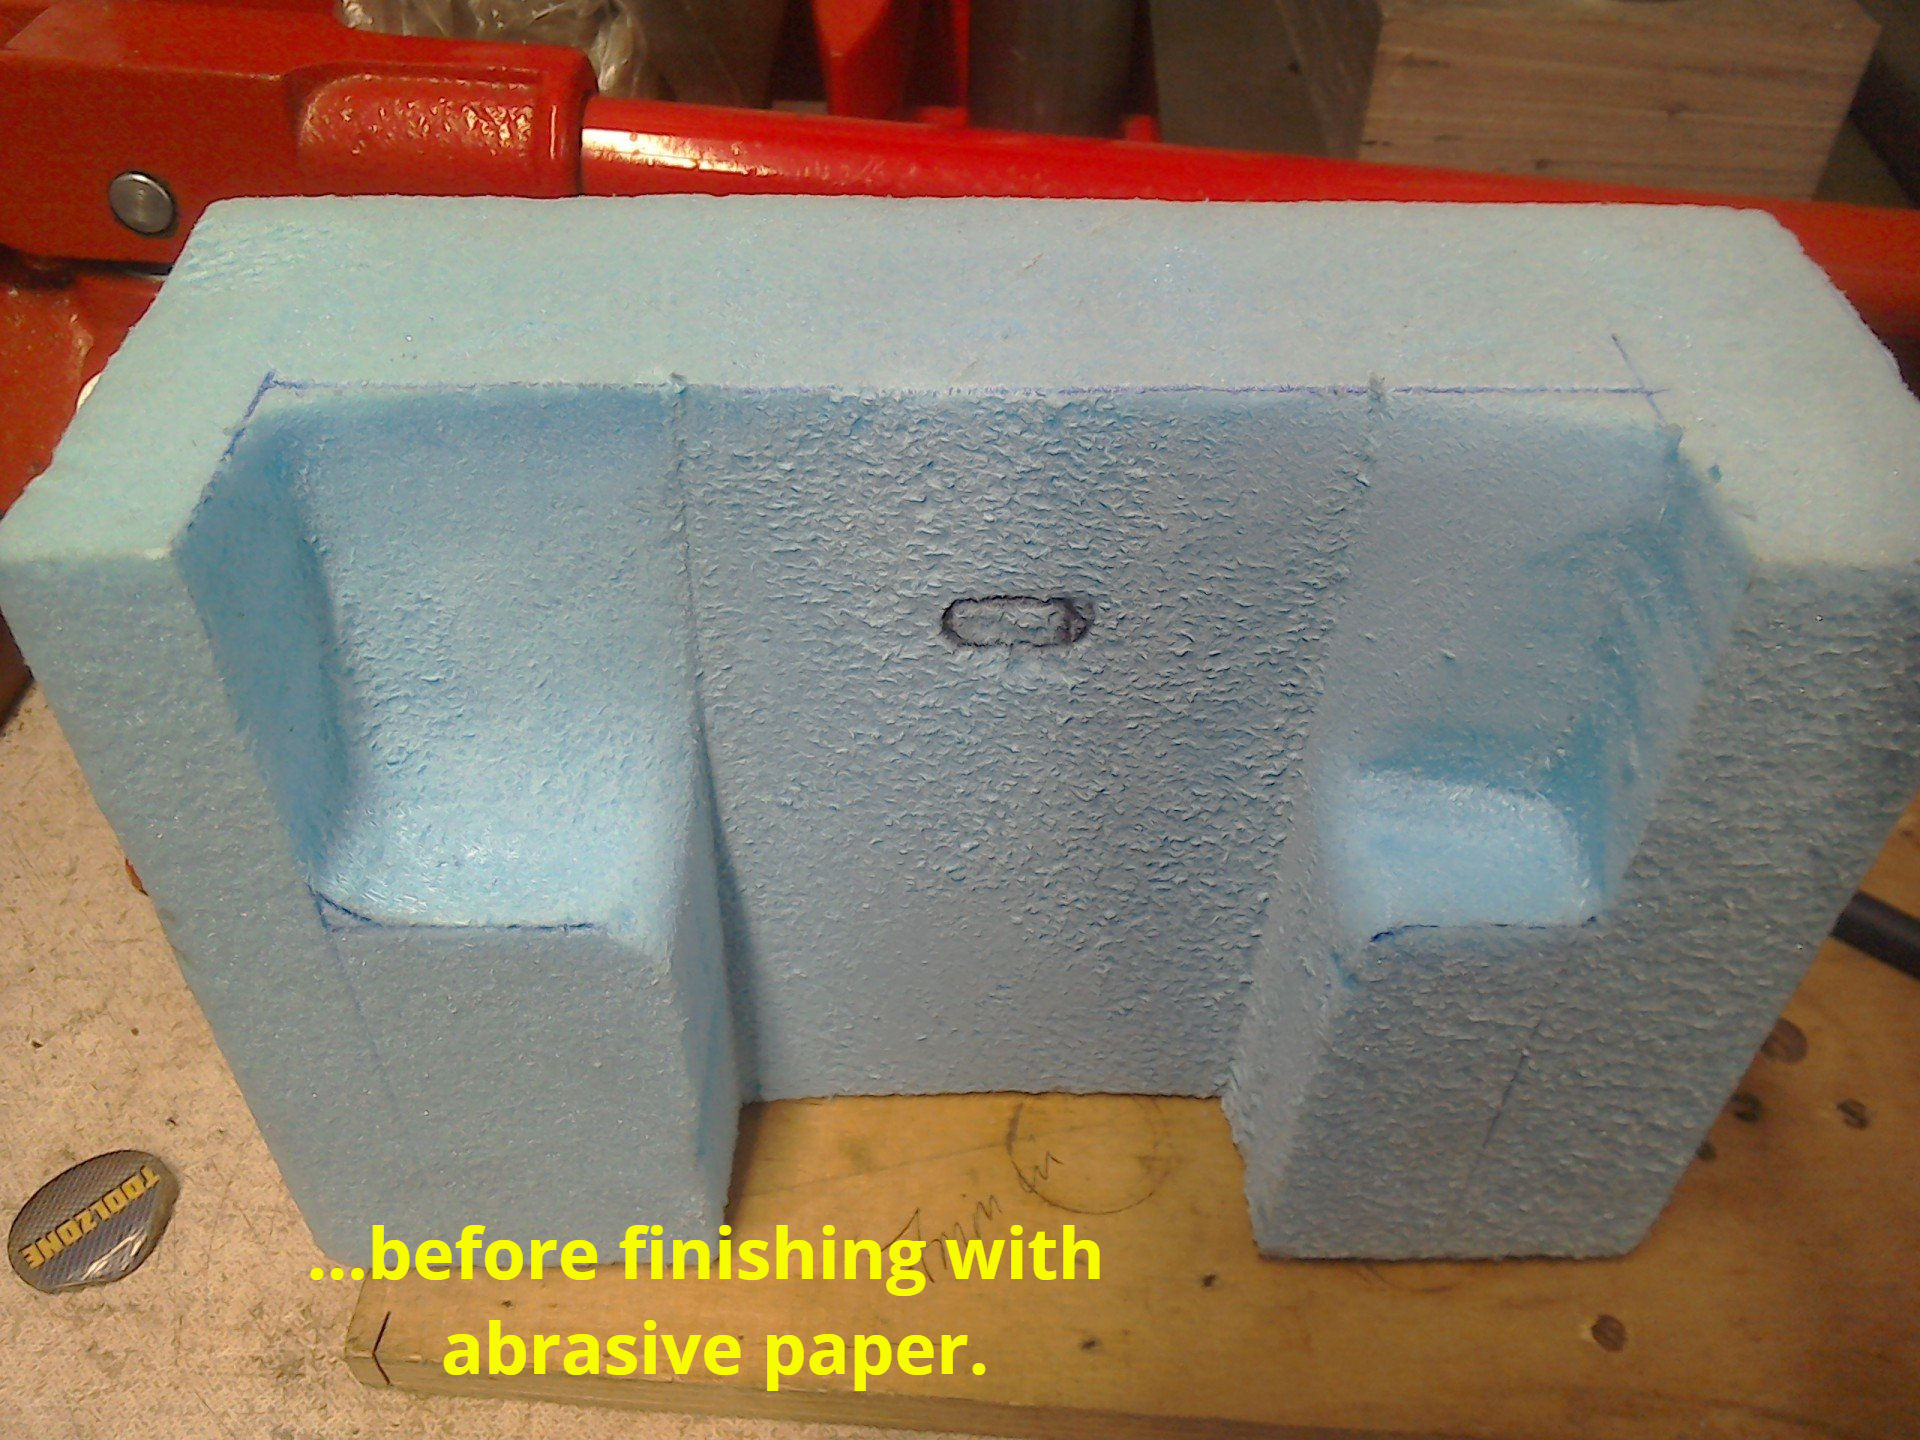
Not much to report this week, but I have made a start shaping the Styrofoam to mock up the petrol tank. Styrofoam is very easy to shape with standard hand tools. Wood saws and rasps remove material quickly, a finer finish can be achieved using abrasive papers.
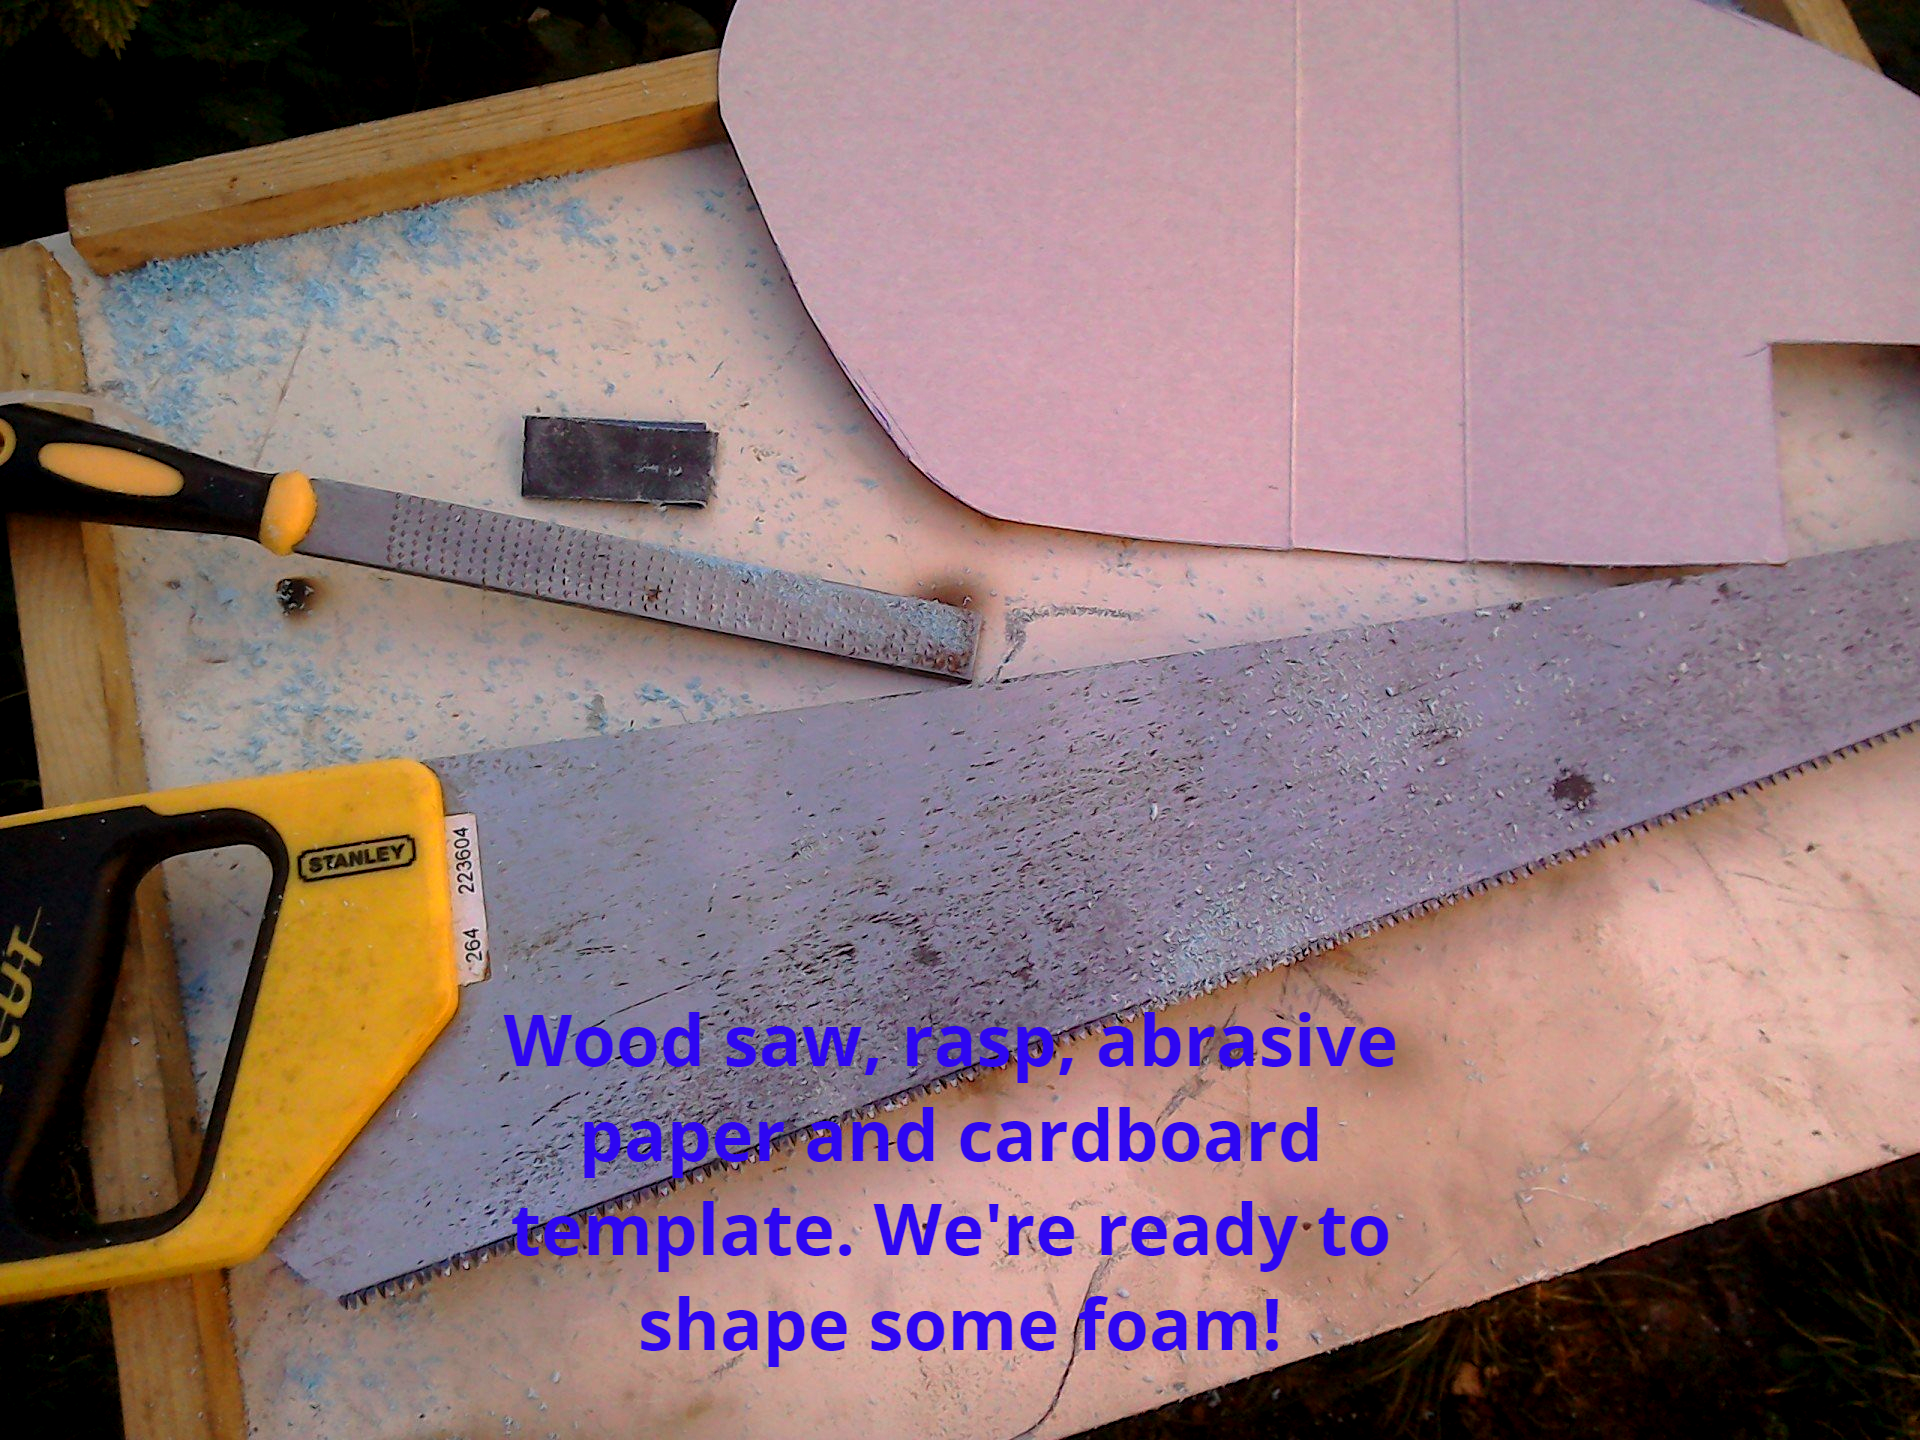
It can also be cut and shaped with a hot wire cutter, although that’s slower than a saw if you want to remove a lot of material. One advantage of using the hot wire is that you can bend the wire to the shape that you want to cut out. You have to cut slowly as it’s very easy to pull the wire out of shape, but with some patience, you can rough out shapes for final finishing with abrasive paper.
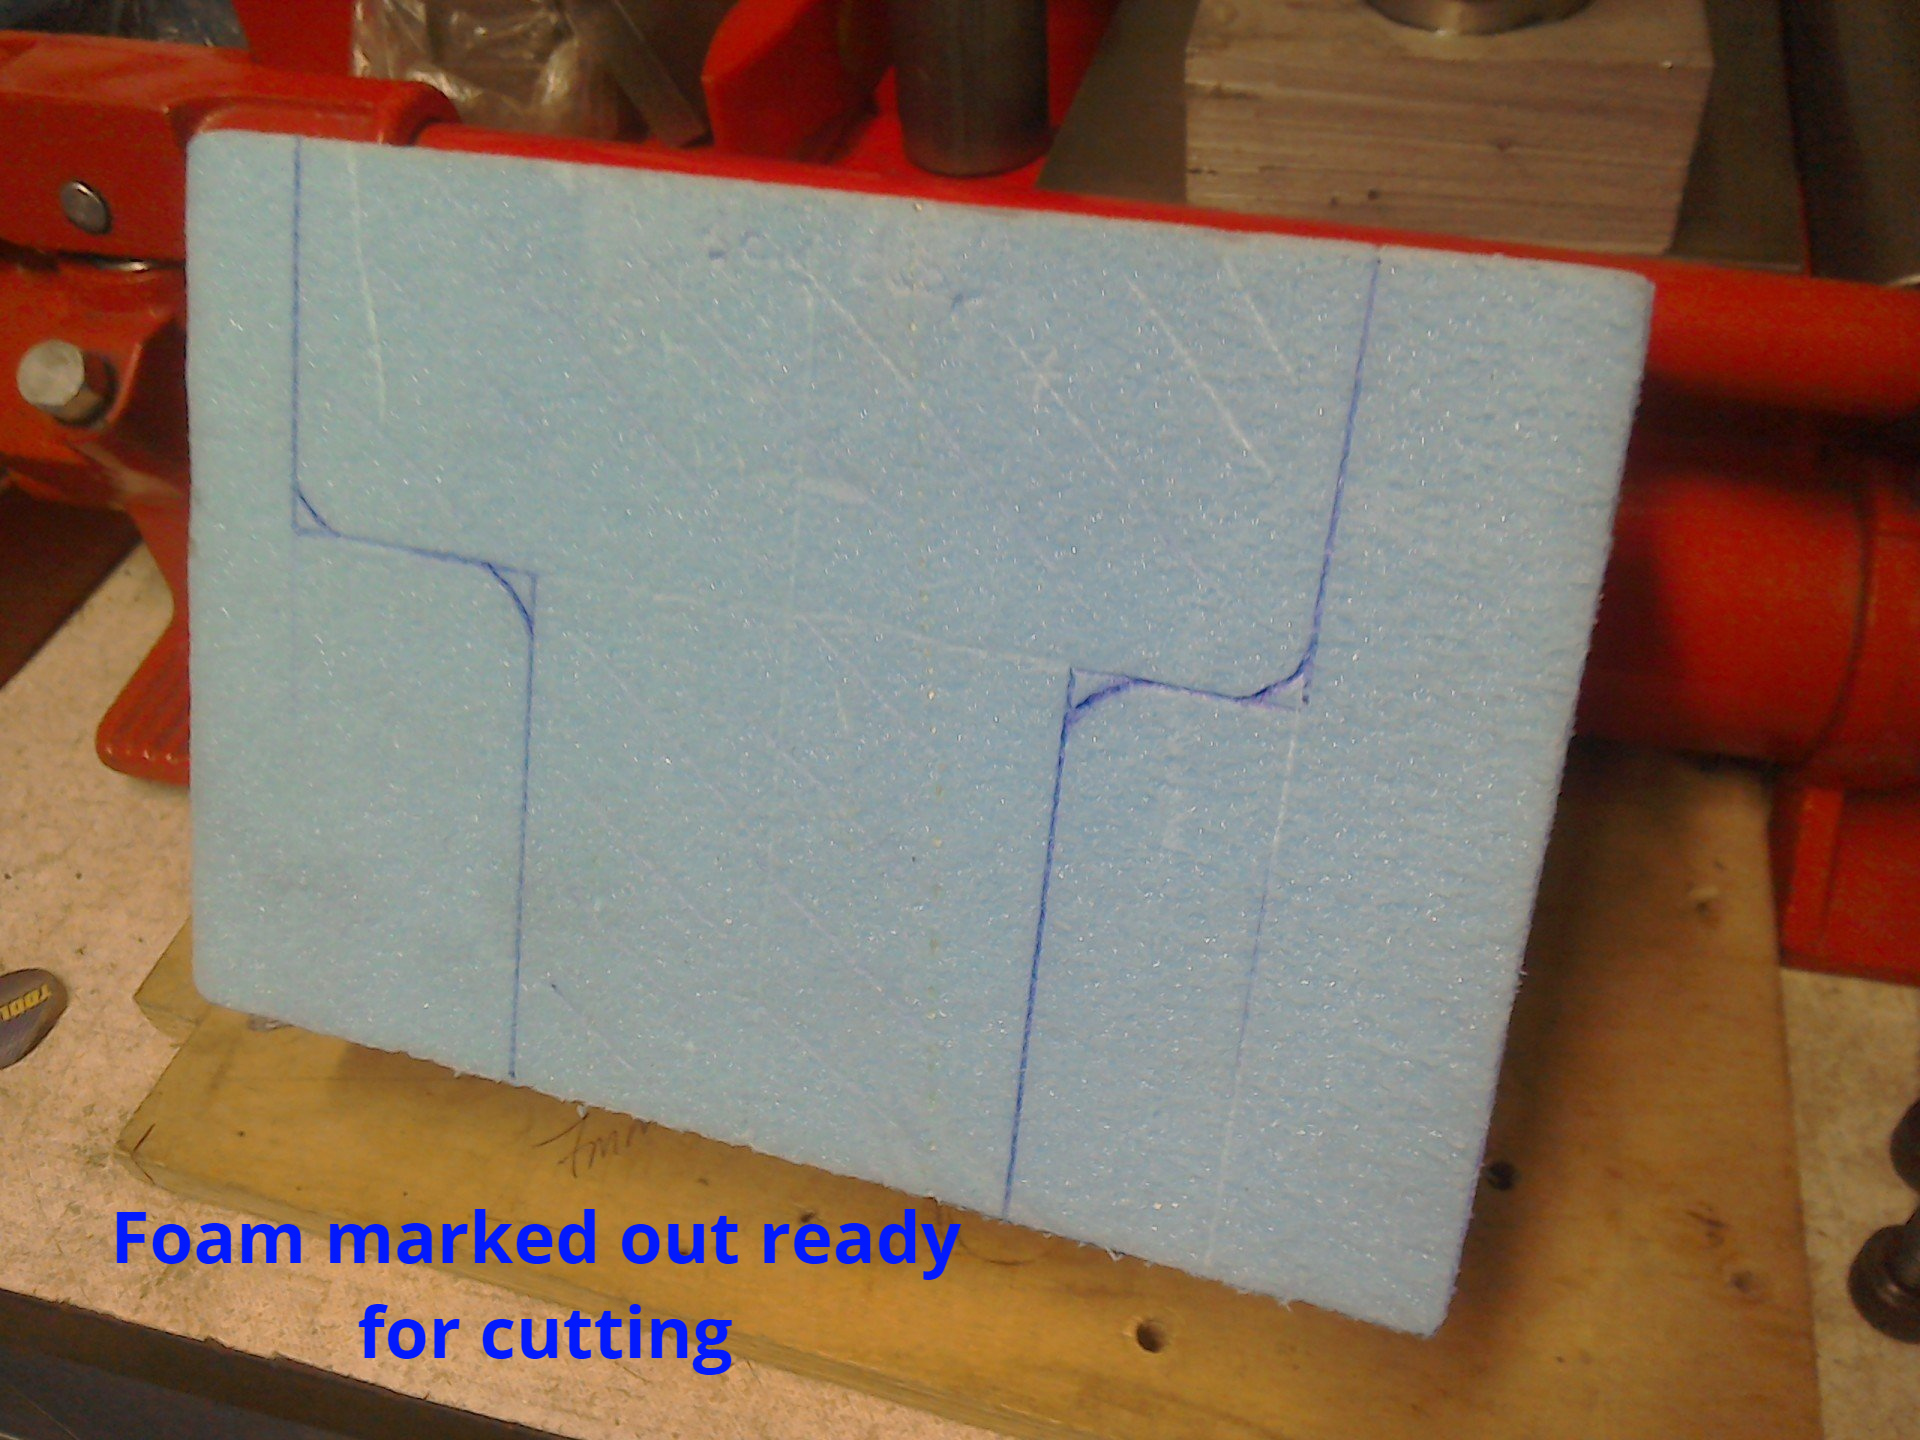
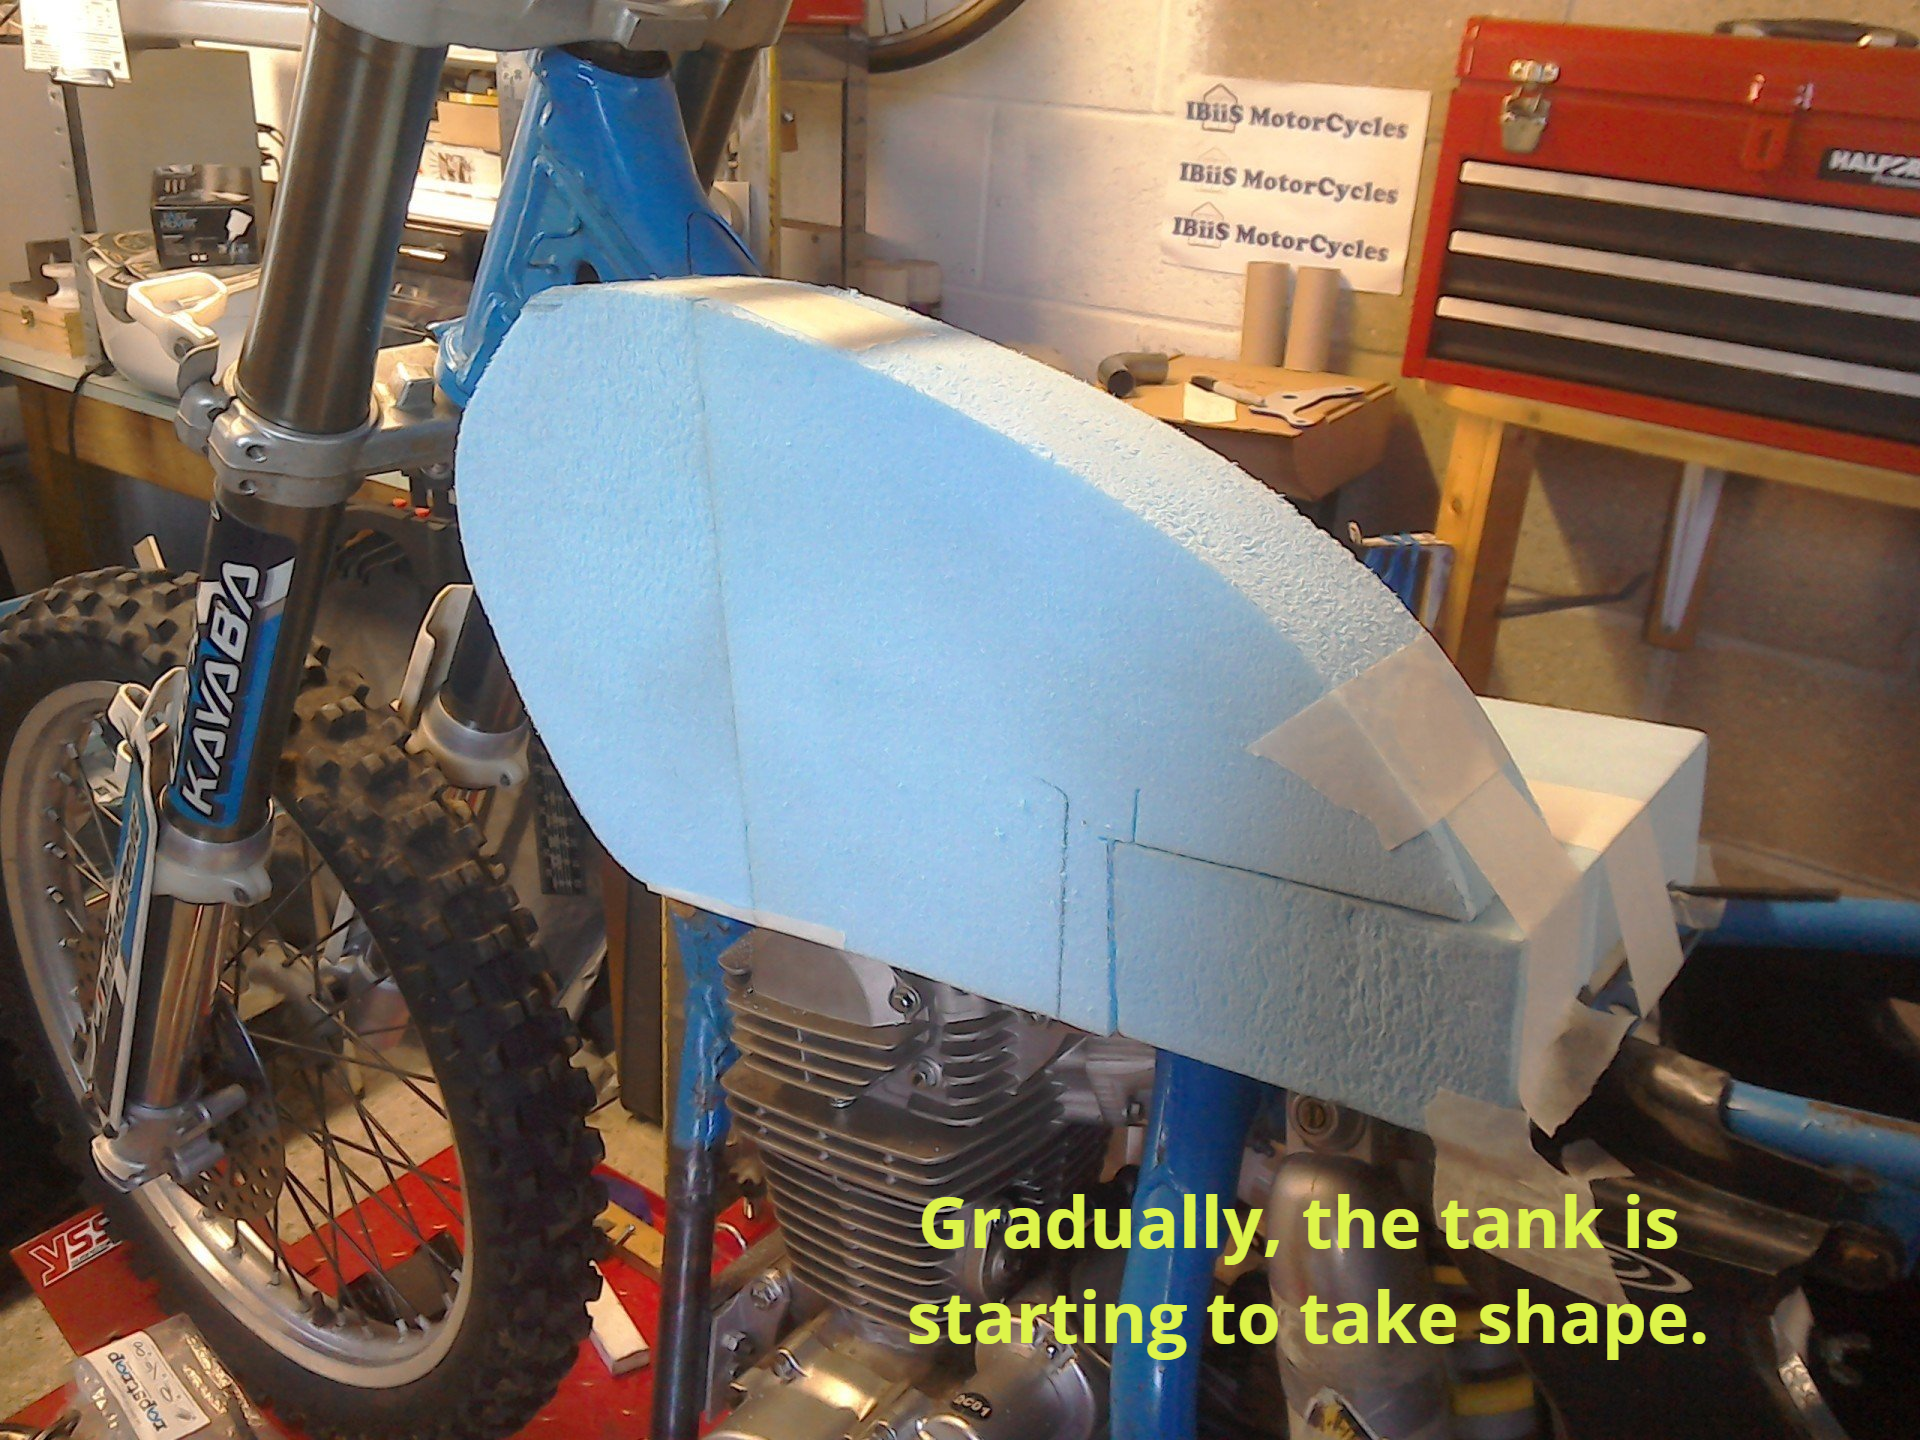
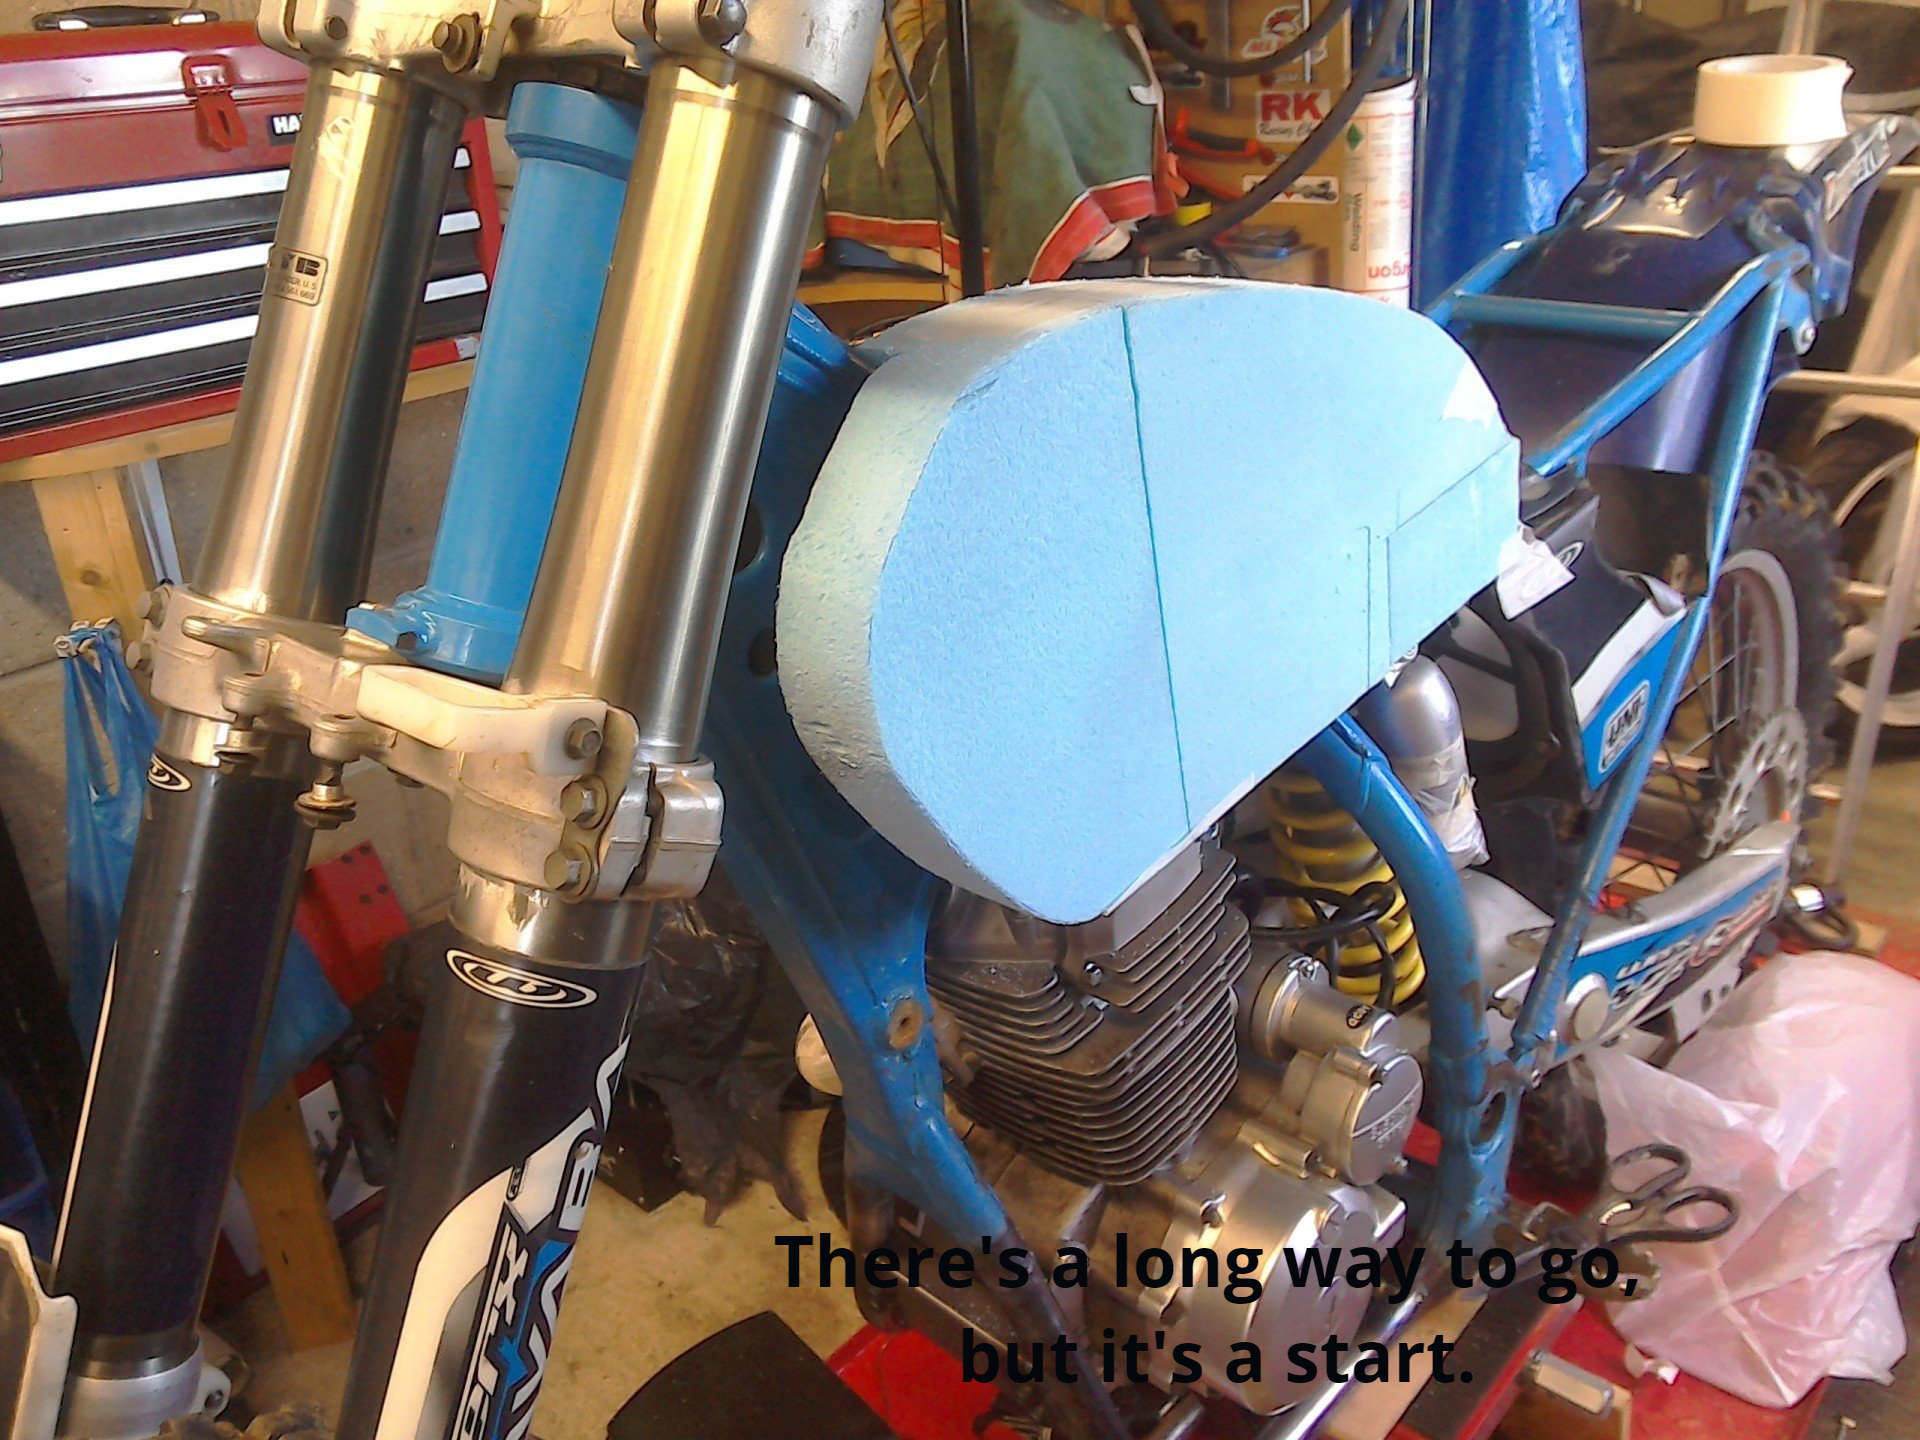
With the help of some cardboard templates, the tank is starting to take shape. The final tank will be made from fibreglass (with appropriate precautions taken to try and avoid any ethanol related issues) so the foam model will be used as a buck or plug from which a mould can then be made.