Monday Articles - February 2021
Scroll down for latest installment.
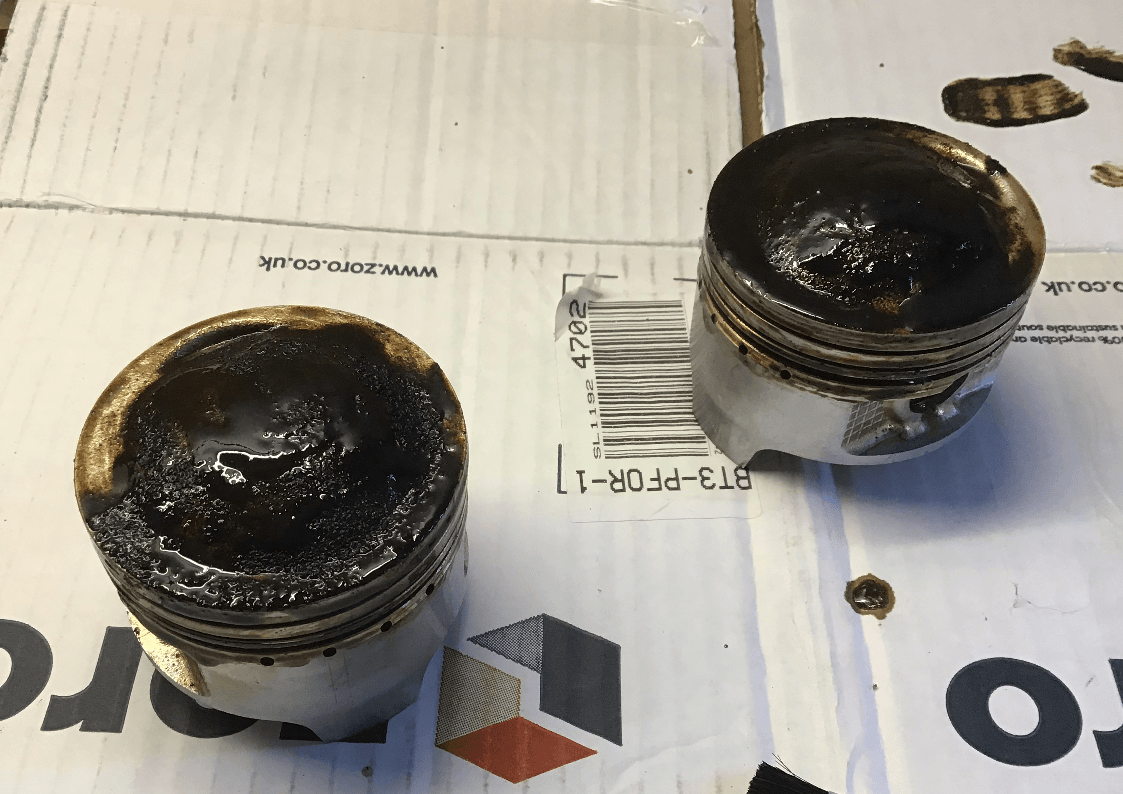
Pistons needed a good clean. This time the Carbon Off gunk did a good job, removing the crud without having to resort to scraping. Here they are with the gunk busy doing its job.
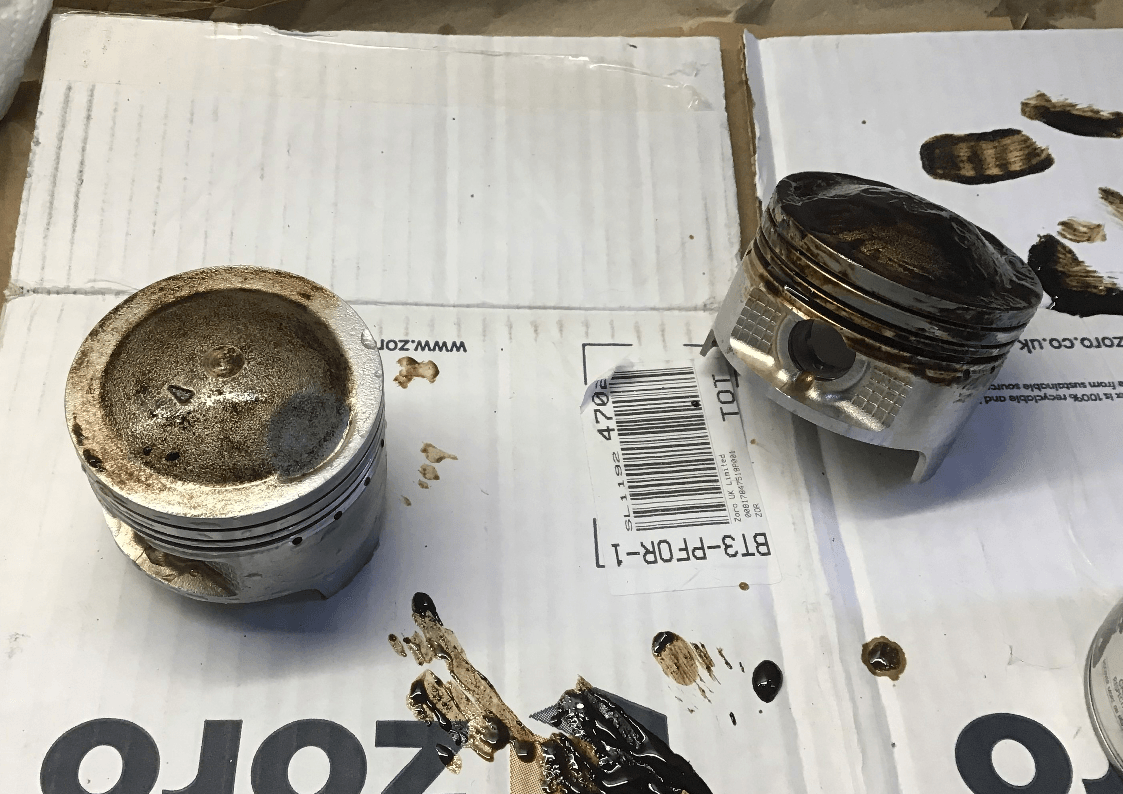
And after washing off the first of the pistons.
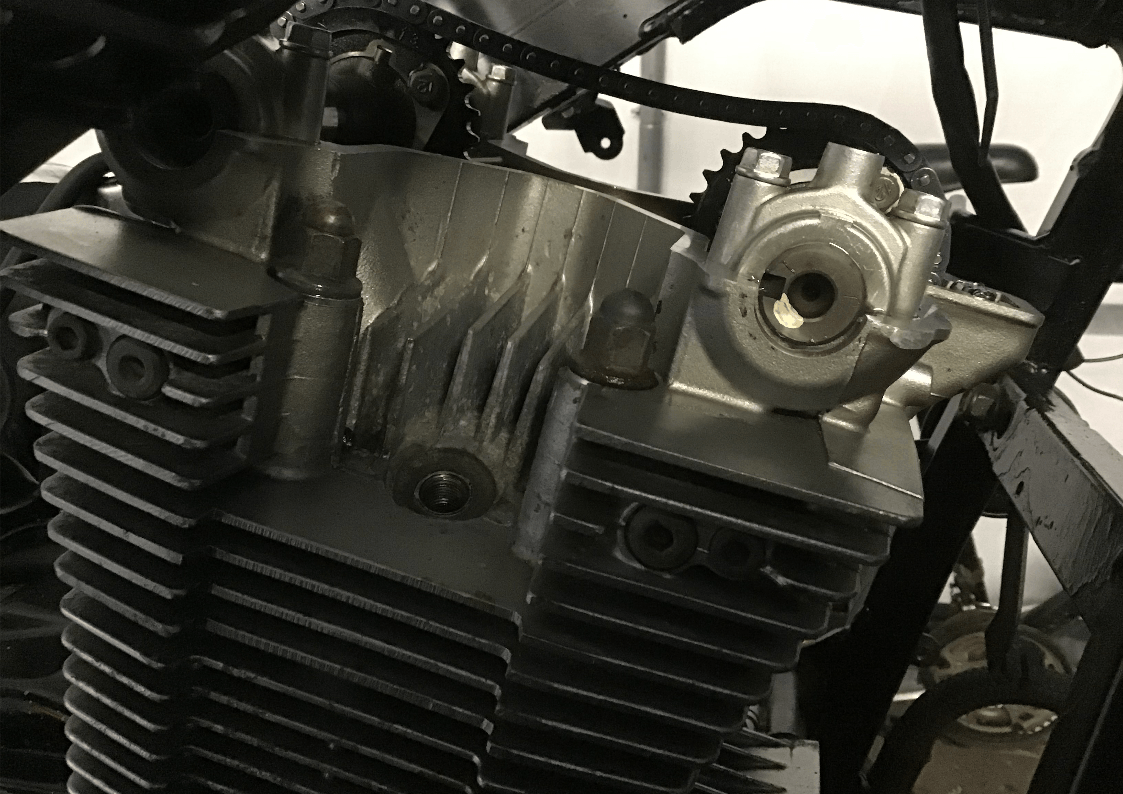
With the valves re-faced and lapped just enough to match them to their respective seats, it’s time to rebuild the head.
The valve stem seals also need replacing, this was another job new to me. The Haynes manual told me to remove them with pliers. After a couple of fruitless attempts with standard pliers, which seemed to be more likely to damage the head than remove the seals, I decided to see if there was a special tool available. There was, and there was also a cheap version that I could afford. So I bought that and waited for it to turn up before having another go. It was a much easier job with the special pliers.
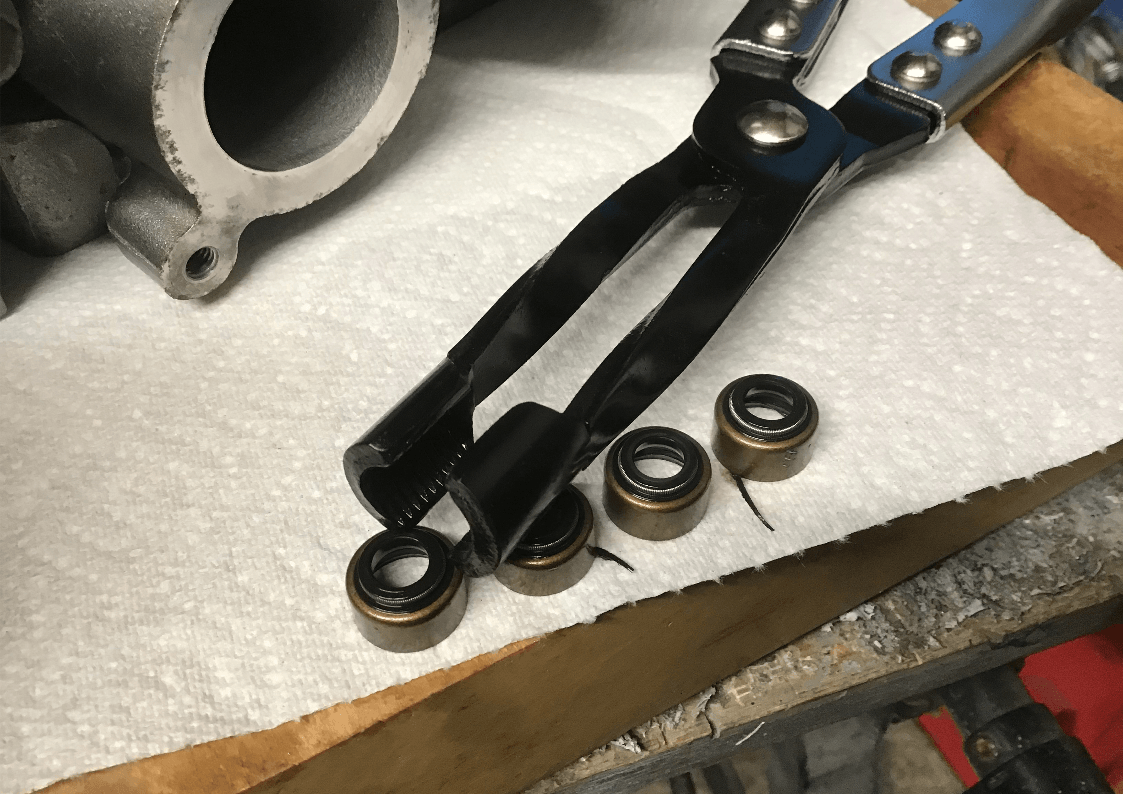
The kit also came with the tools to insert the new valve seals.
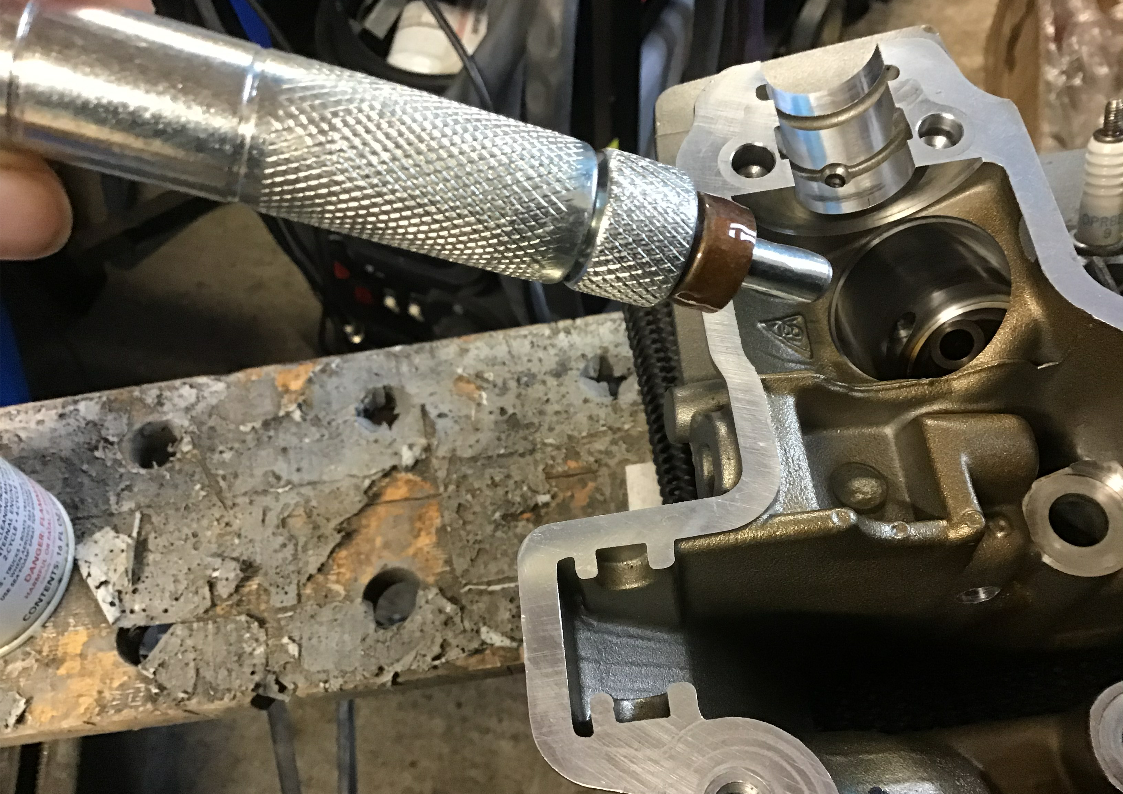
Which it did with no fuss at all.
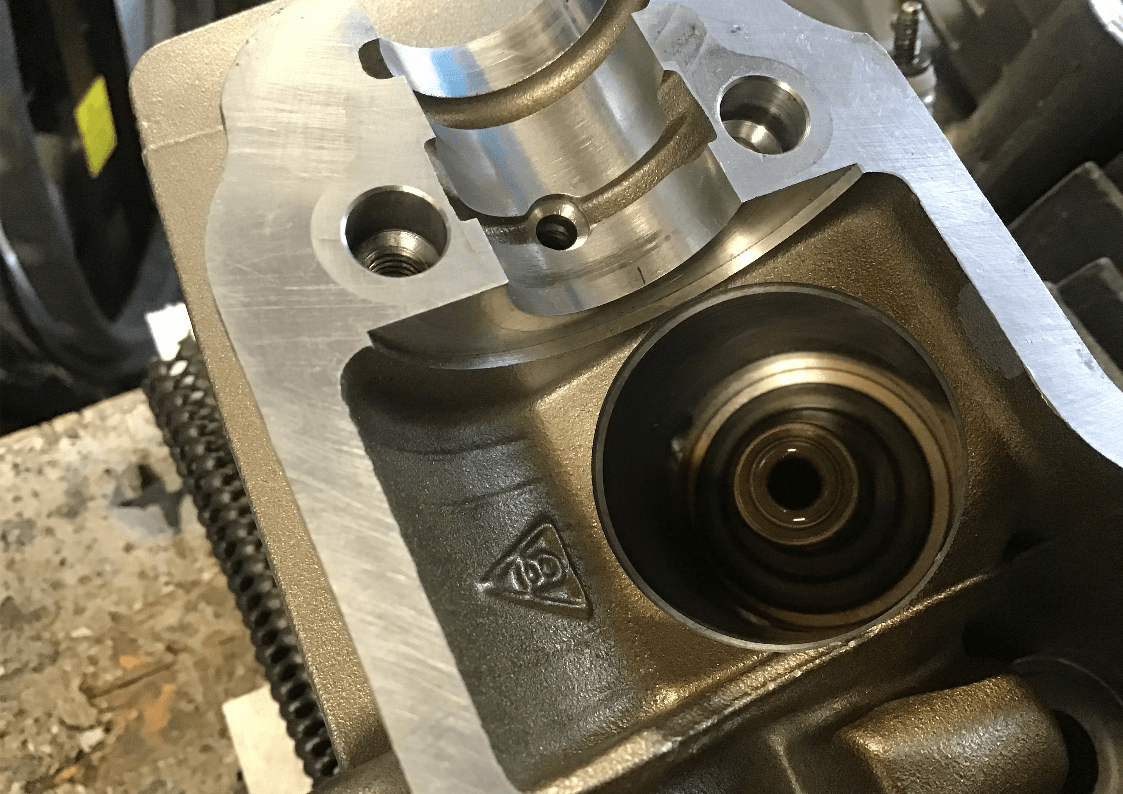
With the new seals fitted, the valves could then be installed back into the head. I spent considerable time playing hunt the collet as I repeatedly dropped the little sods while trying to get them in place. Next the cleaned pistons were united with new piston rings.
Now it was time to build the engine back up. There are few pictures of this bit as I was so engrossed (and stressed) about getting everything back together, that I forgot to take any. Suffice to say, getting the pistons safely back in the bores proved a little trying. I’d never done a twin before and I certainly don’t ever want to try an inline four!
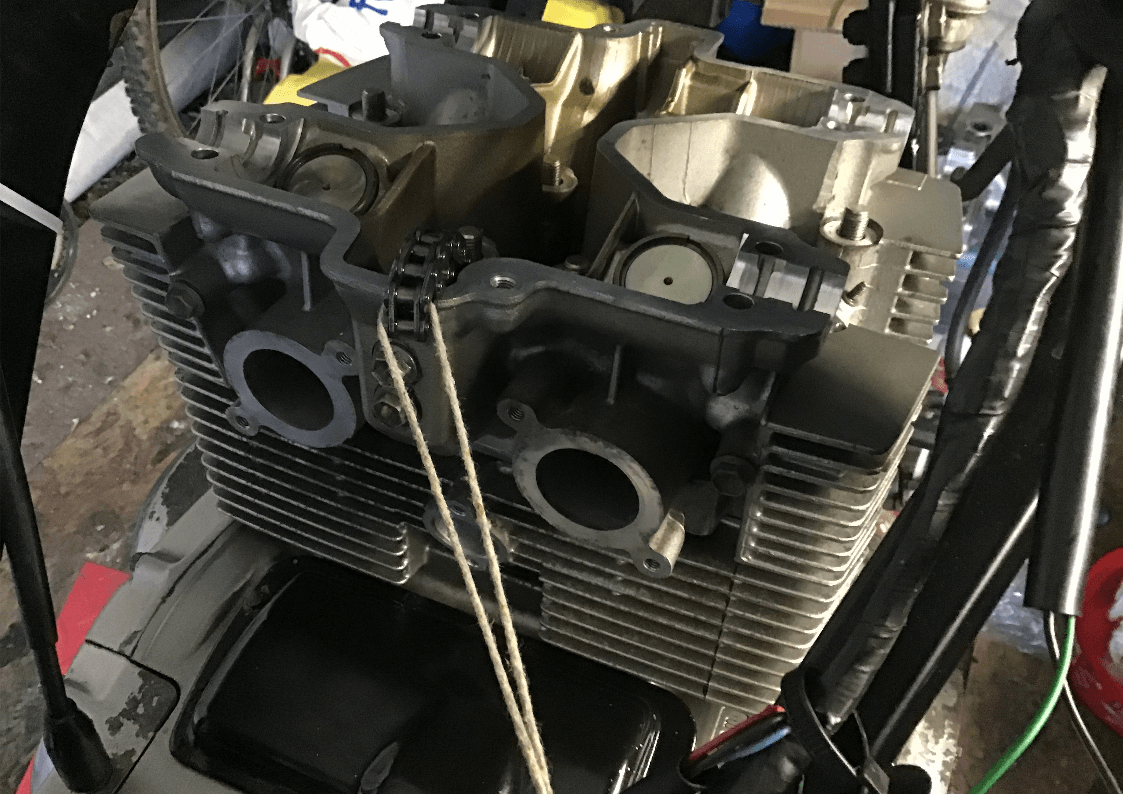
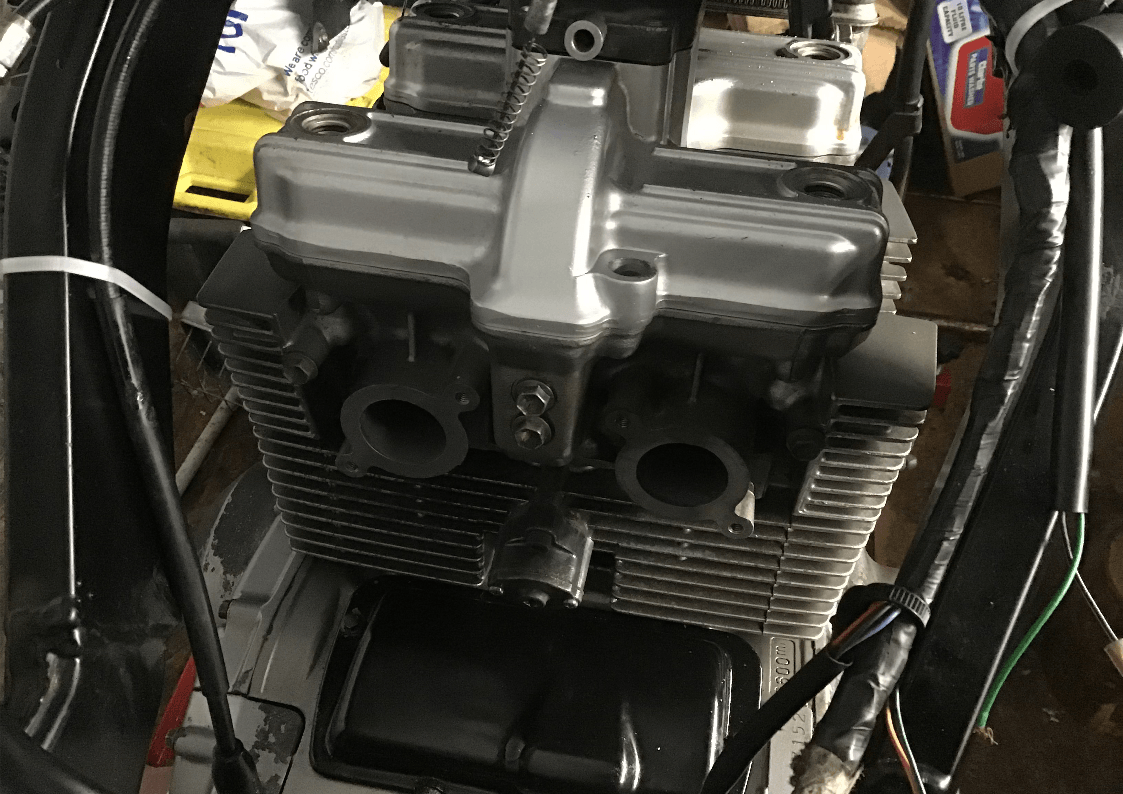
Eventually both cylinder and head are in place and I hadn’t lost the cam chain down the tunnel.
Head on and torqued down. Cams back in and set according to the factory manual. Cam chain is loose as the tensioner is not yet installed. The original tensioner turned out to be sticky, so it’s going to be replaced with another one from my stash of spares.
Valve cover is not yet bolted in place. I’m waiting for some new valve shims to arrive, so I can’t finish it off yet. But, I have managed to finally replace the studs on the oil filter cover. Now I can do a filter change without having to worry that the (slightly iffy) threads might give way.
Oh dear. Oh dear. This was meant to be a fairly simple top end refresh of my ‘rusty but trusty’ winter steed. But it’s all got out of hand and so it is now officially titled ‘Project Snowball’ - because it just keeps on growing…
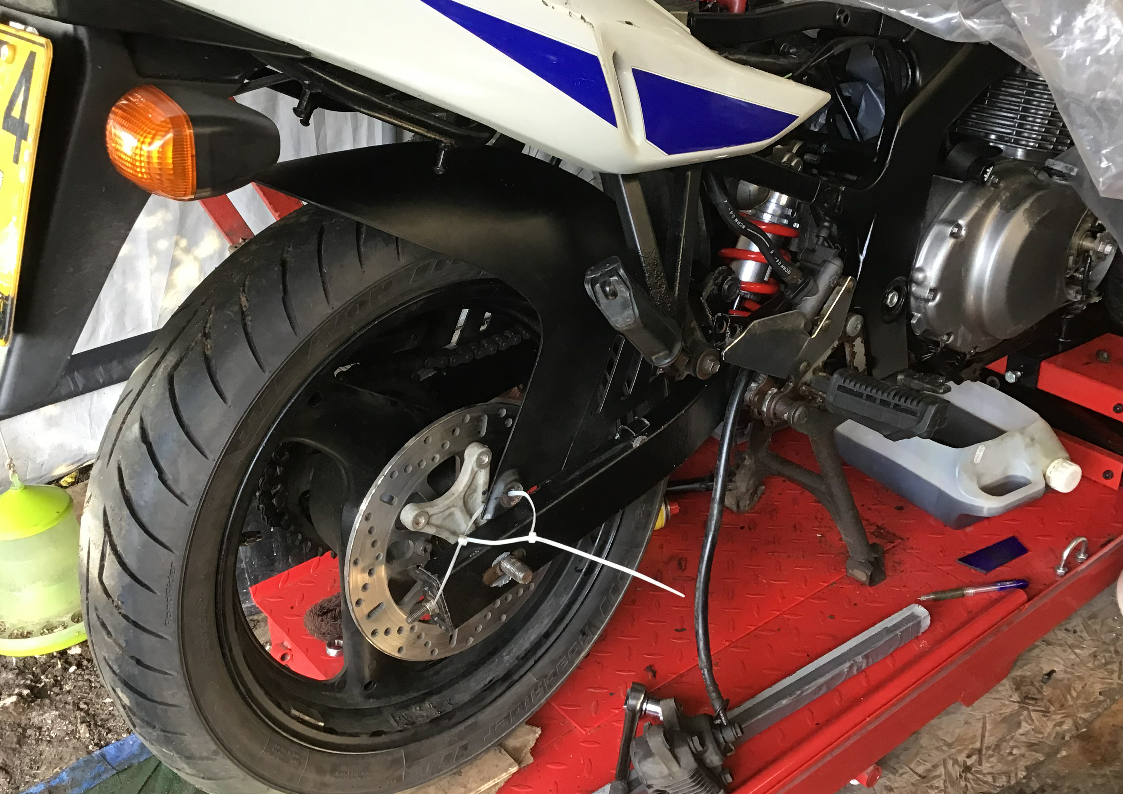
I needed some new valve shims, so I decided to repaint the rusty swingarm while I was waiting for them to arrive. Initially the plan was just to brush paint the worst bits with some ‘direct to rusty metal’ paint like Smoothrite. After looking at the extensive rust, I decided that I ought to repaint the whole thing, so it needed to come off. If the swingarm was coming off, then I might as well clean, regrease and paint the linkage as well. And ooh look! The shock’s a bit rusty too. Why don’t I fit the R6 shock that I bought 4 years ago? Why? Because it was really nice and shiny and I didn’t want it to get dirty. So, why don’t I also fit the hugger that’s also been on the shelf for years? That’d keep the shock clean. And so my to-do list has grown…
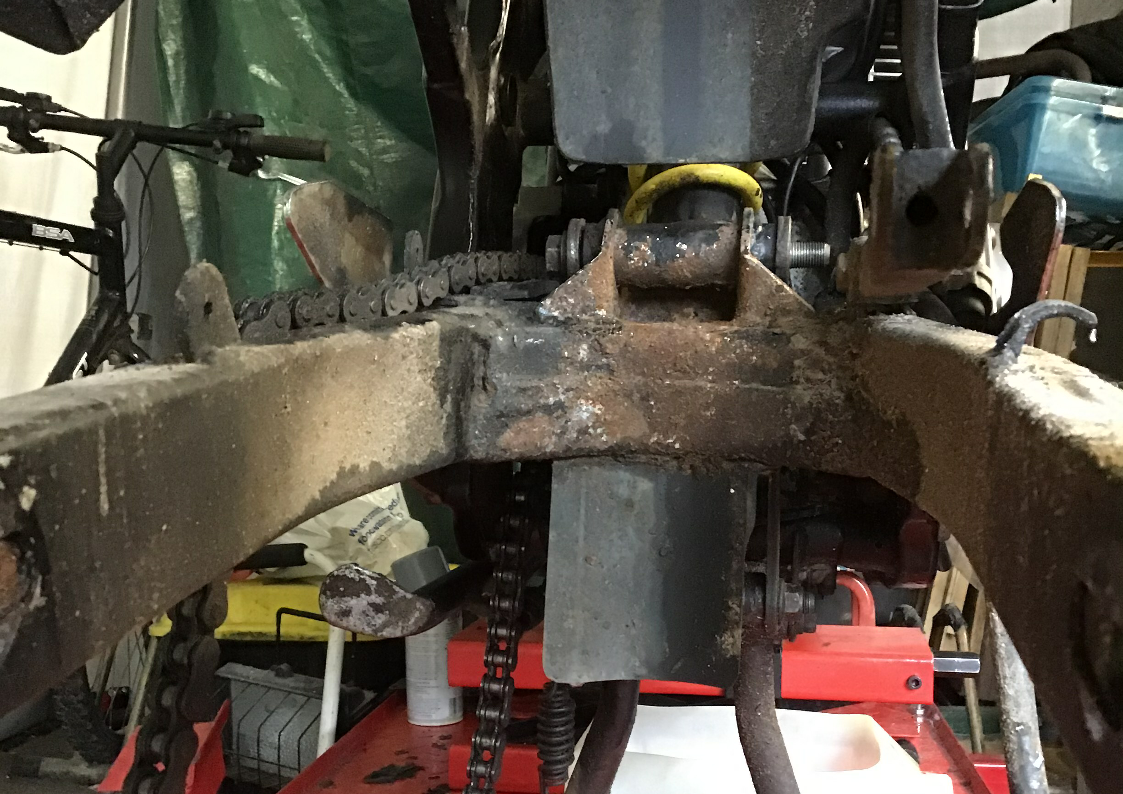
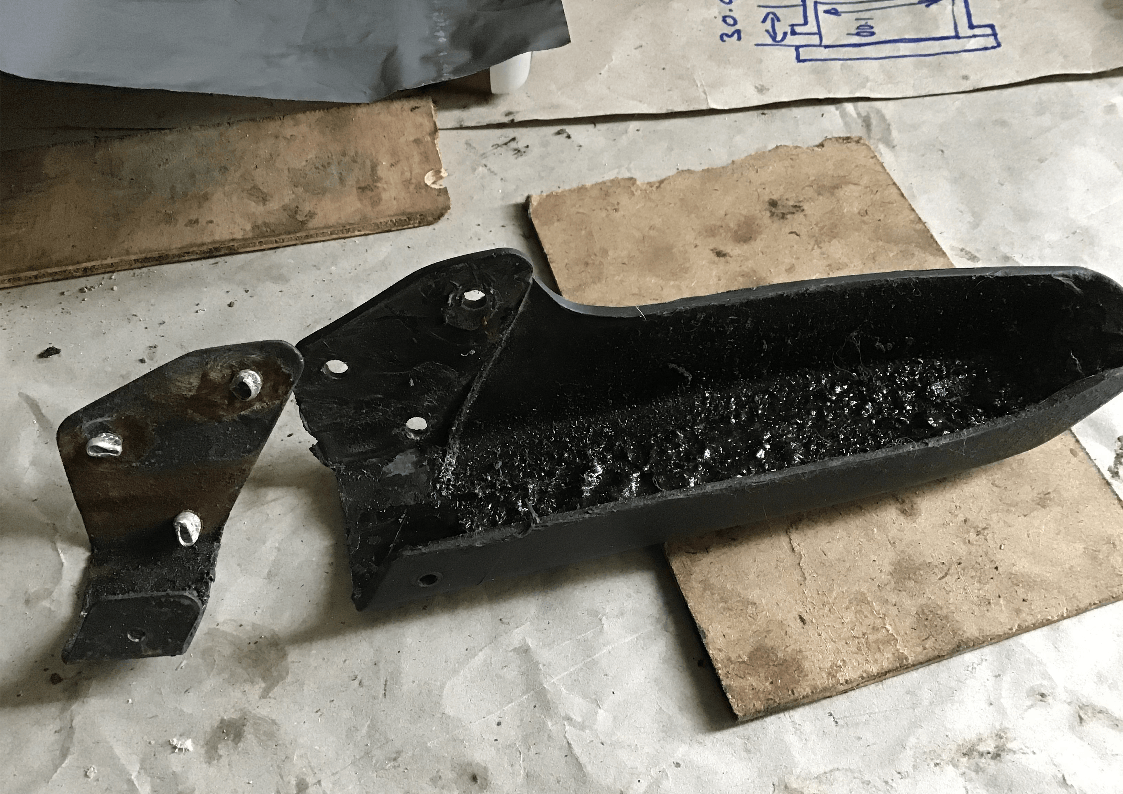
First pic is of the (pretty disgusting) swingarm.
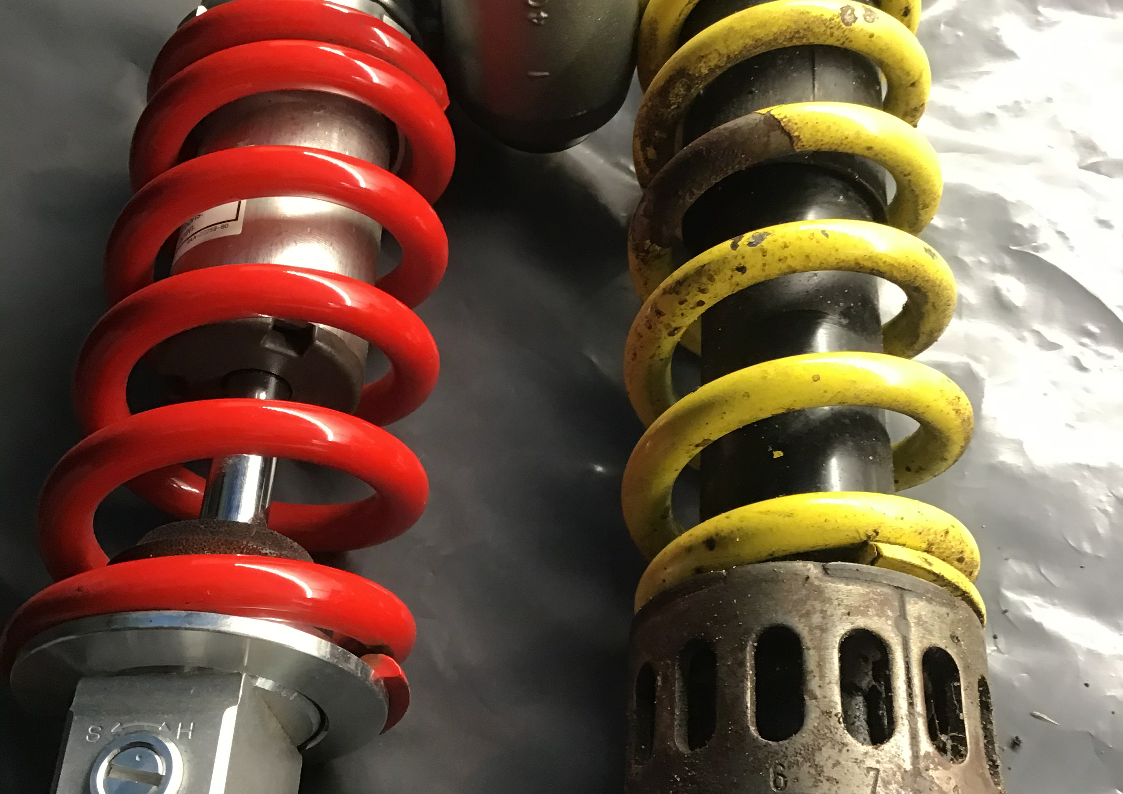
And here’s the lovely replacement rear shock, next to the less lovely original.
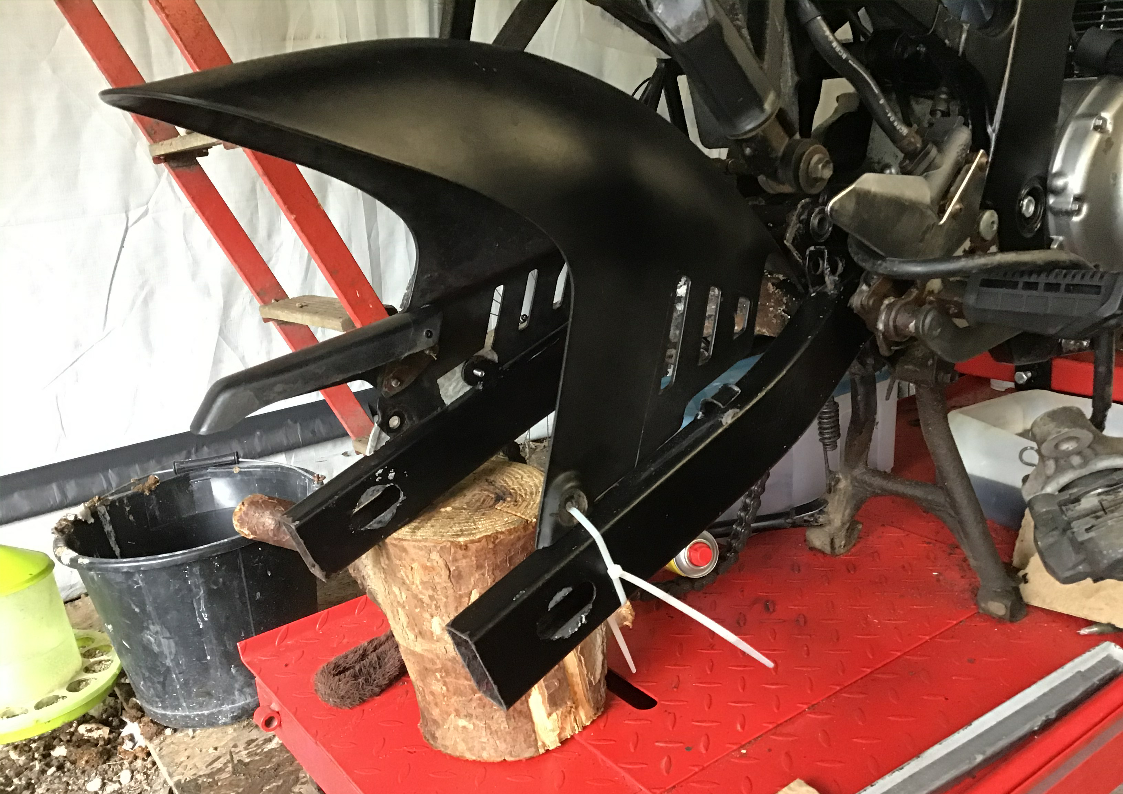
First trial fit of the hugger. It’s a Bandit 400 one, which is a popular retro fit to the GS. It could go on like this, but I wanted to close up the gap at the front, to try and stop the muck from the wheel covering the linkage mounting point on the swingarm.
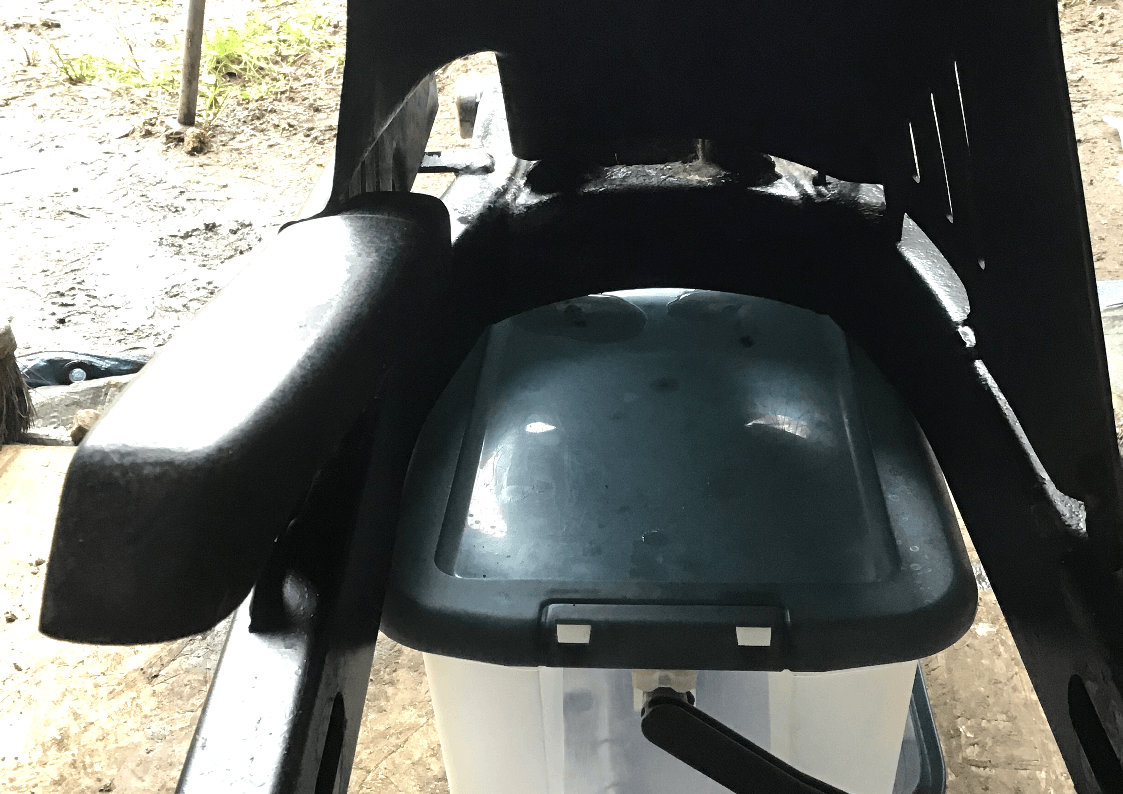
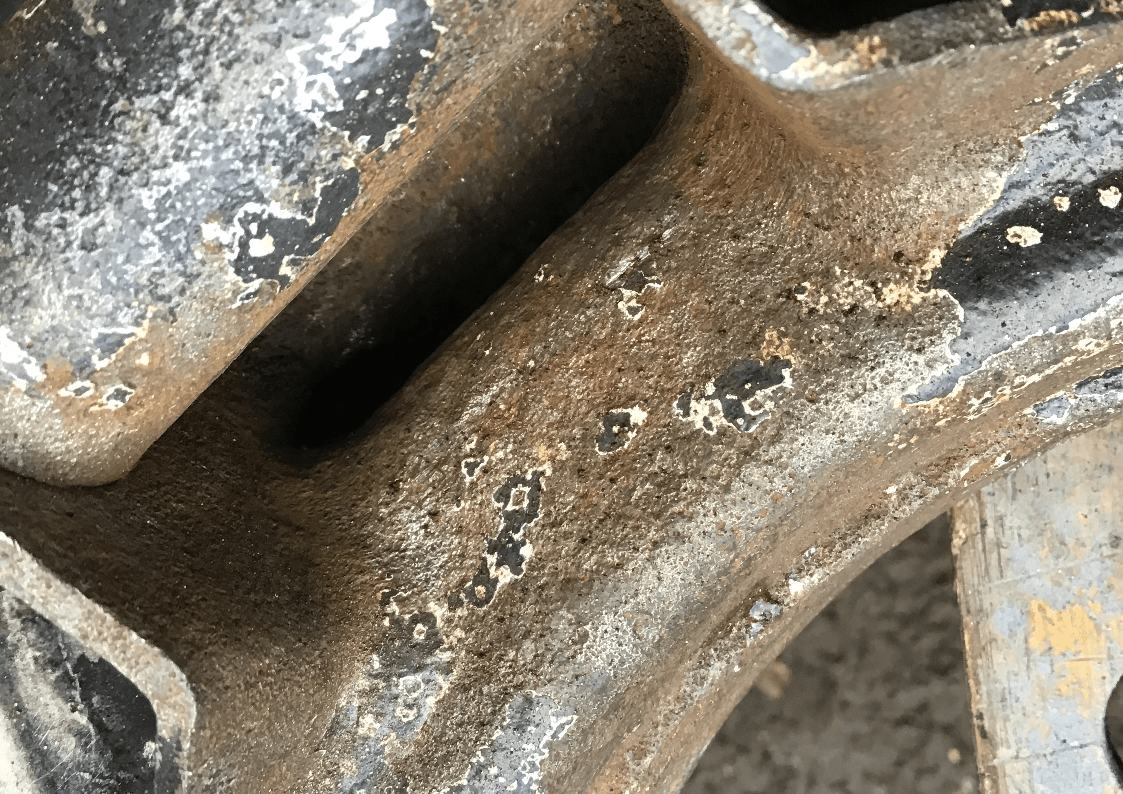
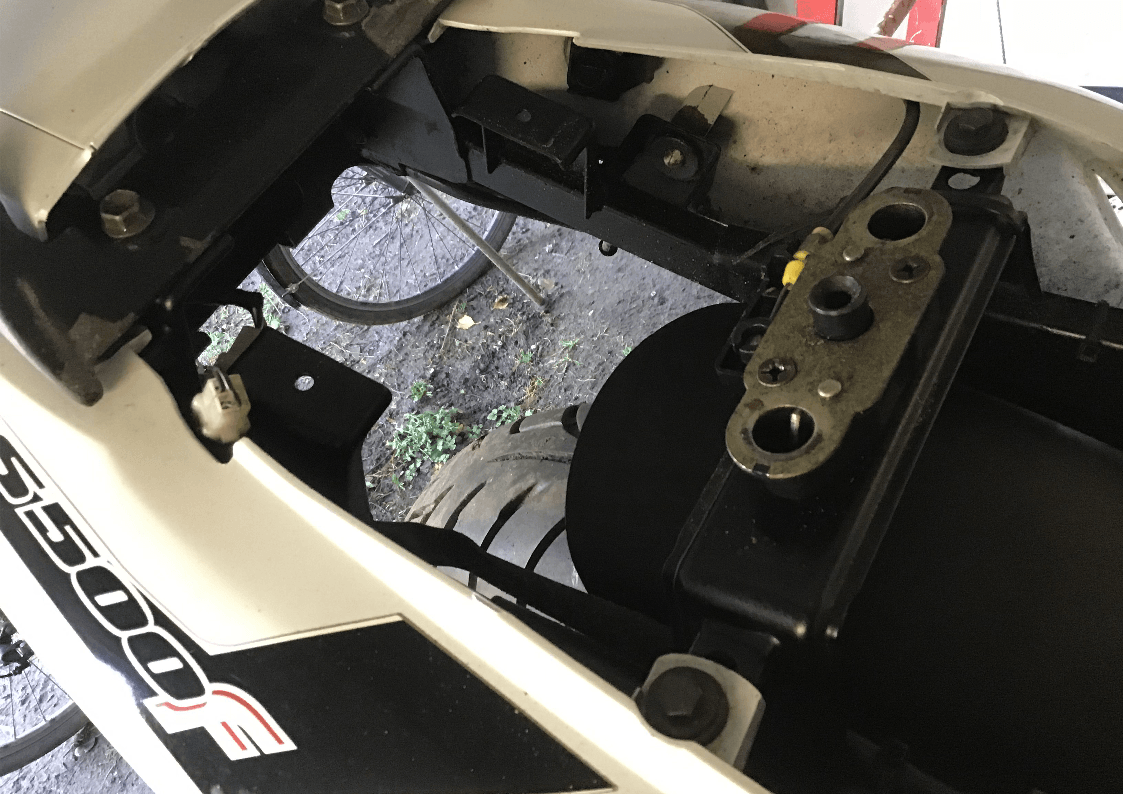
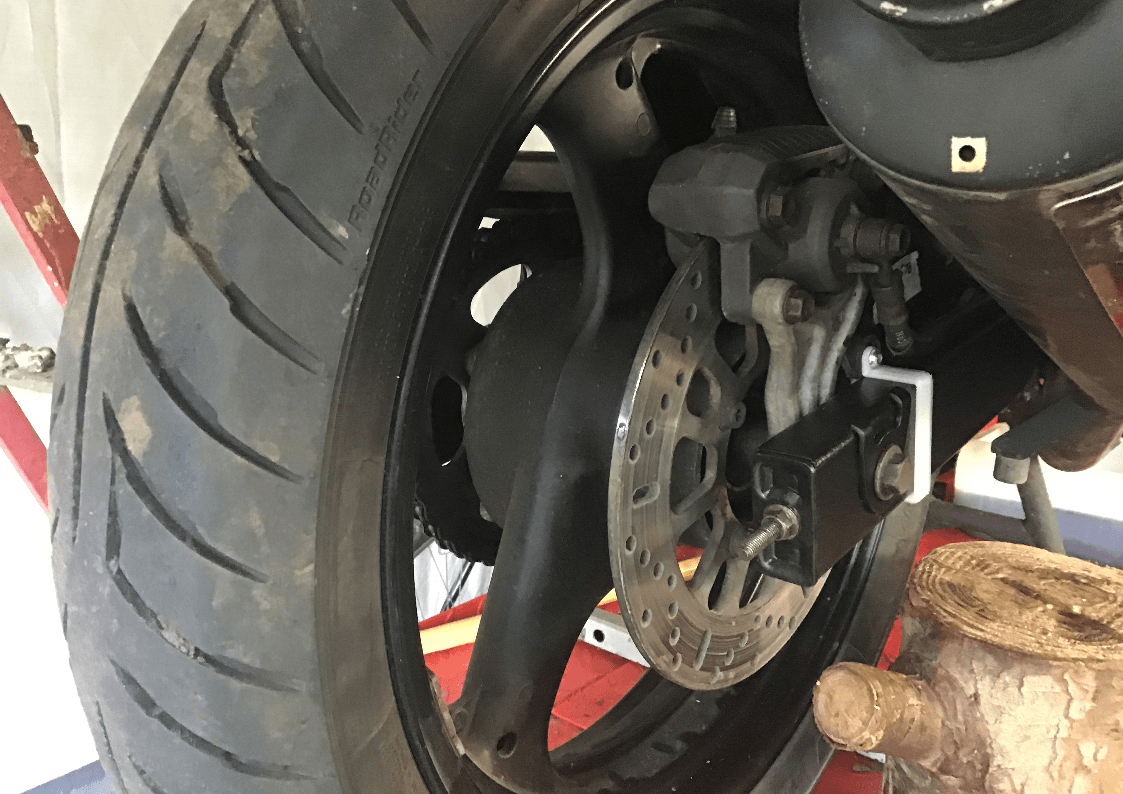
Here’s a close up of the linkage mount on the swingarm. This area fills nicely with road crud and creates a nice environment for some rusting to occur. There’s a hole at the bottom of that chasm, which should allow water to drain away, but it quickly gets blocked. I’d like the hugger to shield this area.
After a bit of trimming, that gap is closed up.
And a side view of the progress so far.
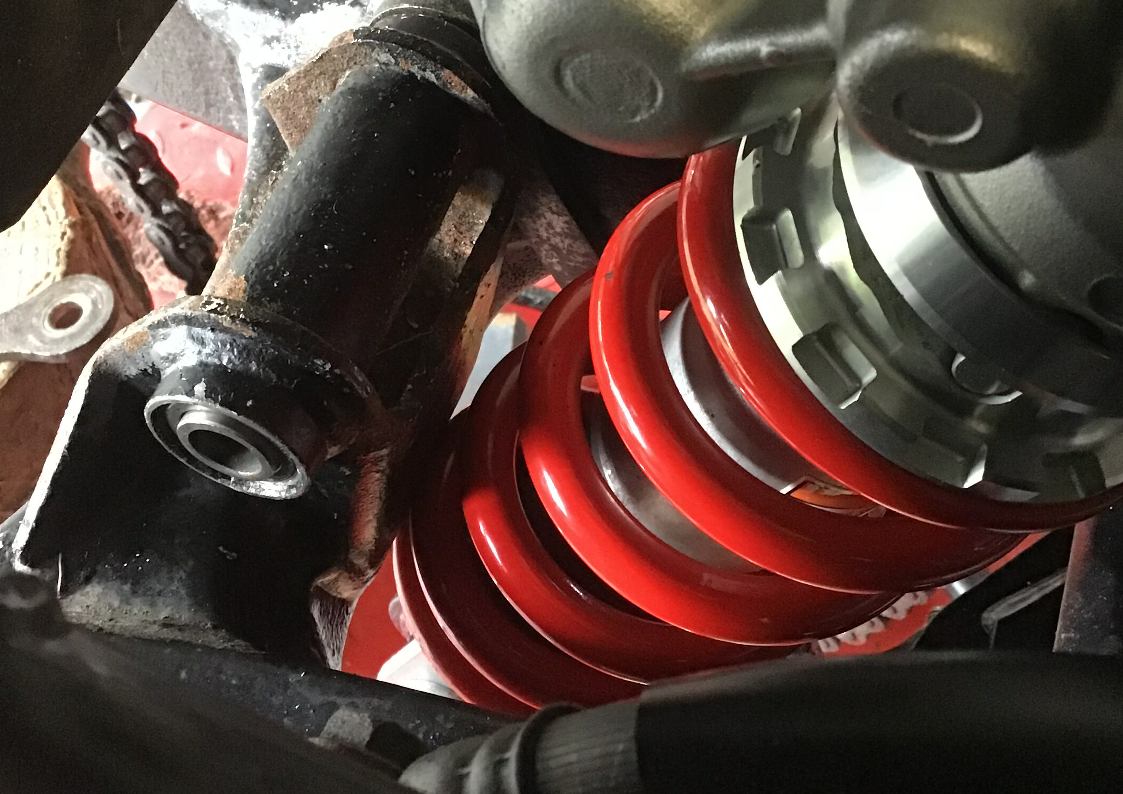
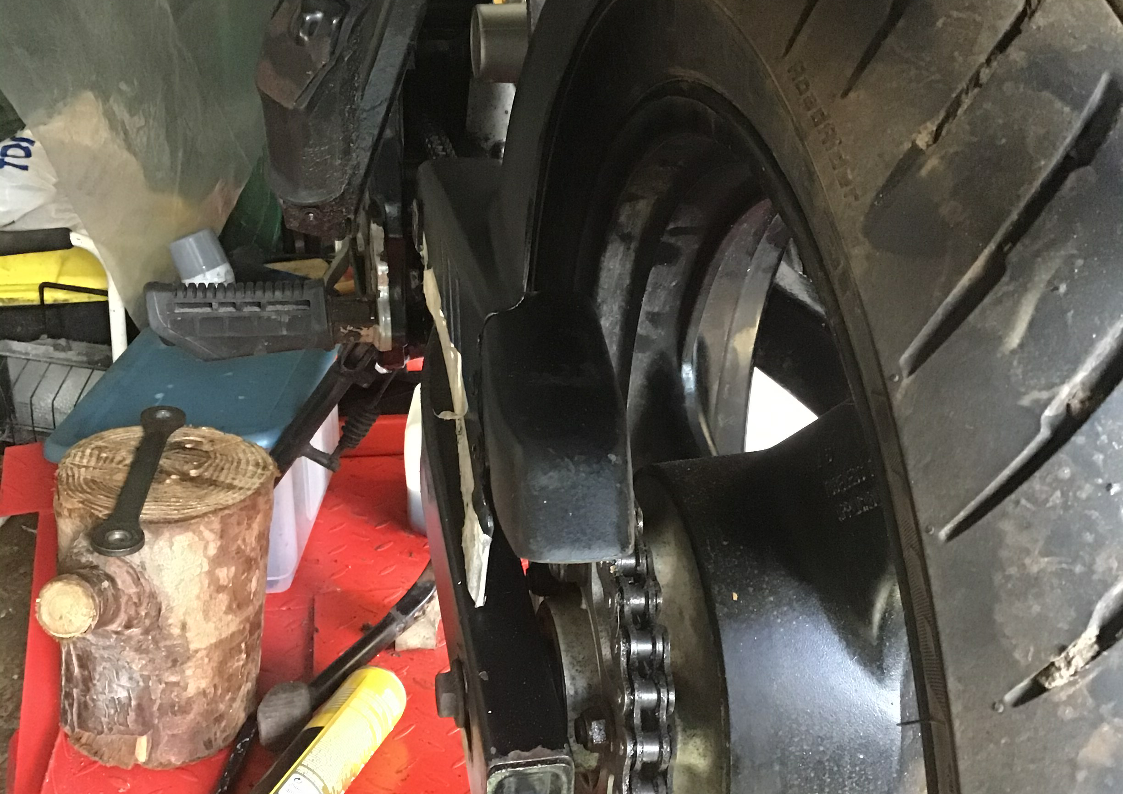
Now to see if the shock fits. The R6 shock swap is also a common GS500 mod, but often needs a little grinding on the swingarm to make it fit. This one is no exception, can’t quite get the linkage bolt holes to line up…
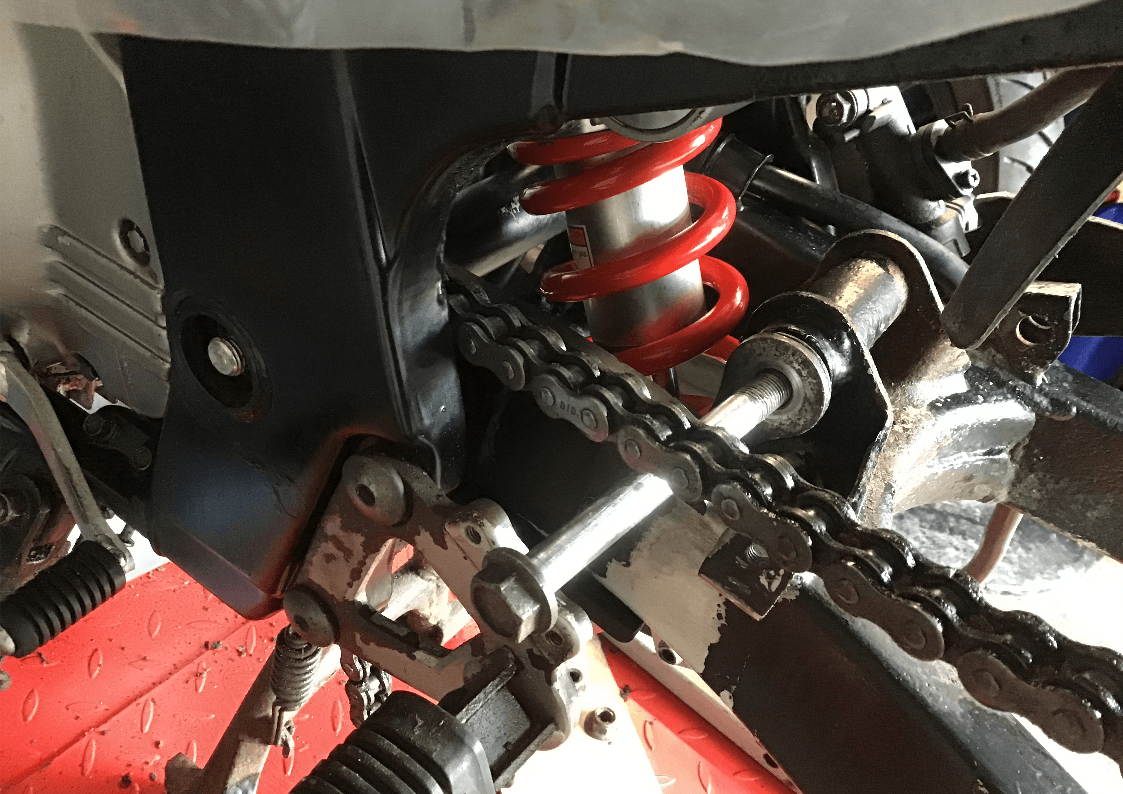
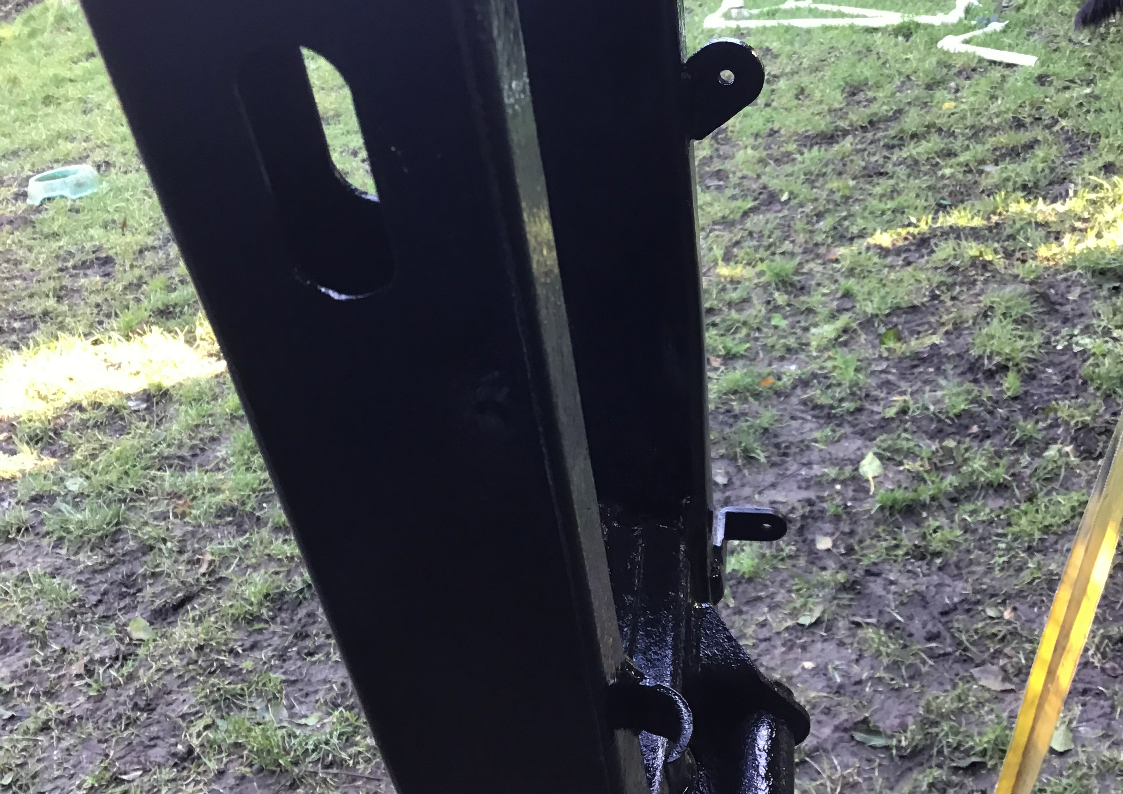
Here you can see the swingarm / shock spring interface. Swingarm needs a little tickle with the grinder to get everything to fit.
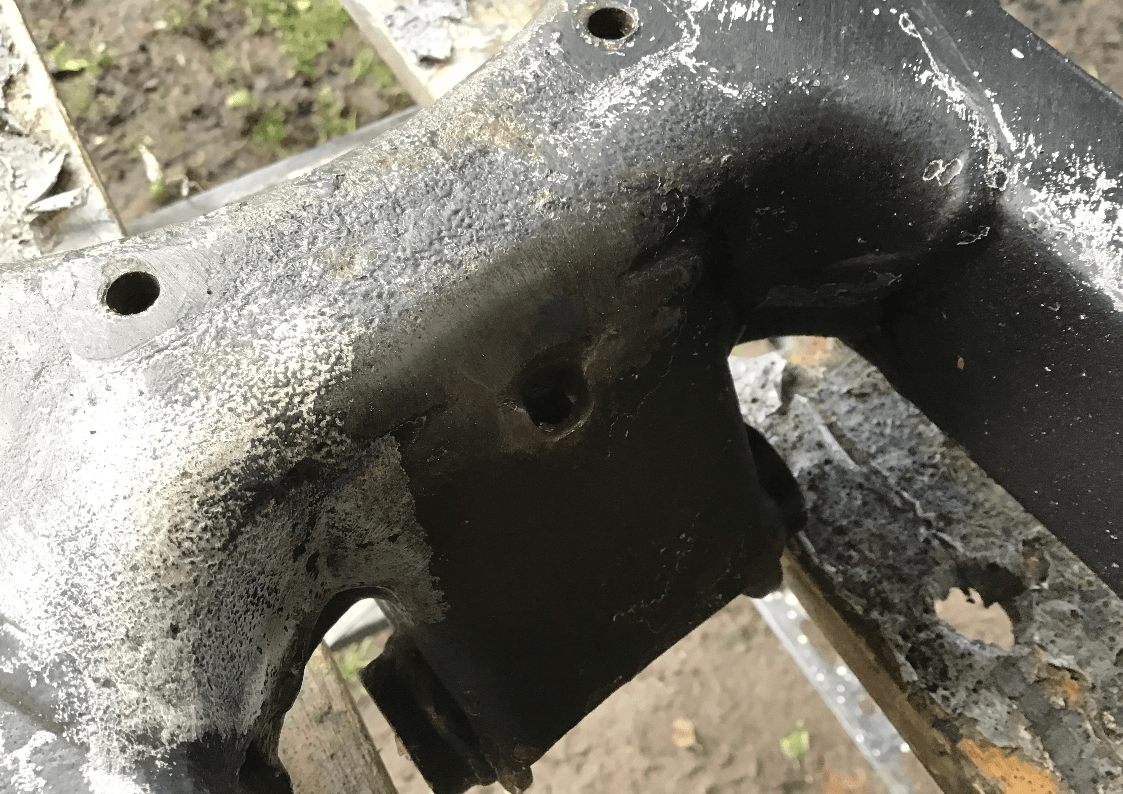
This is the underside of the swingarm, showing the bit that needed a little grinding to help the shock spring clear. That’s the hole that should allow water to drain away. It would do if it didn’t get blocked so easily.
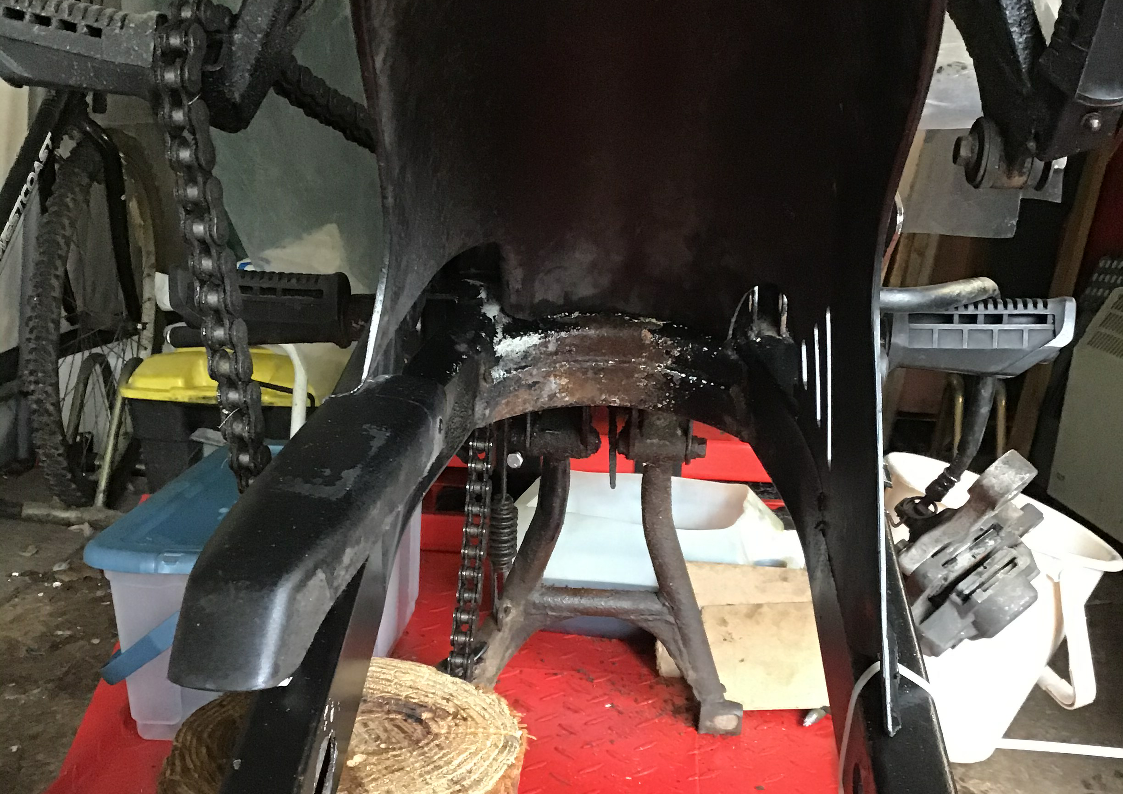
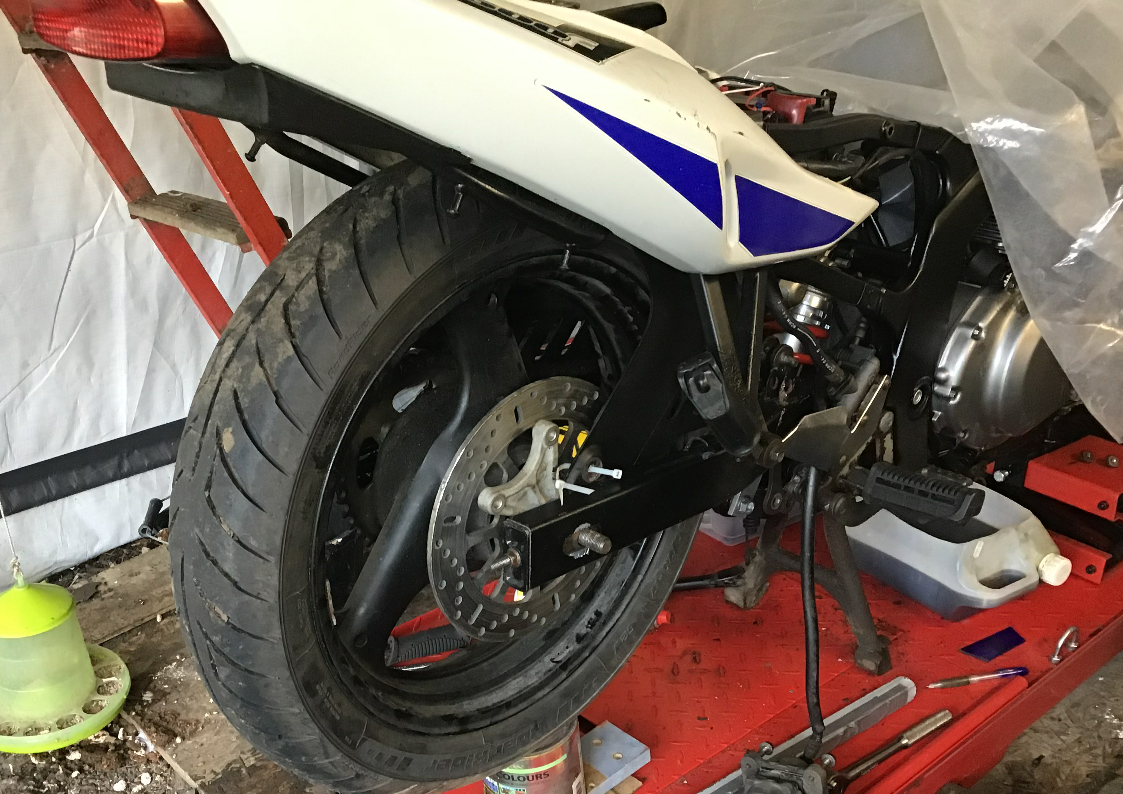
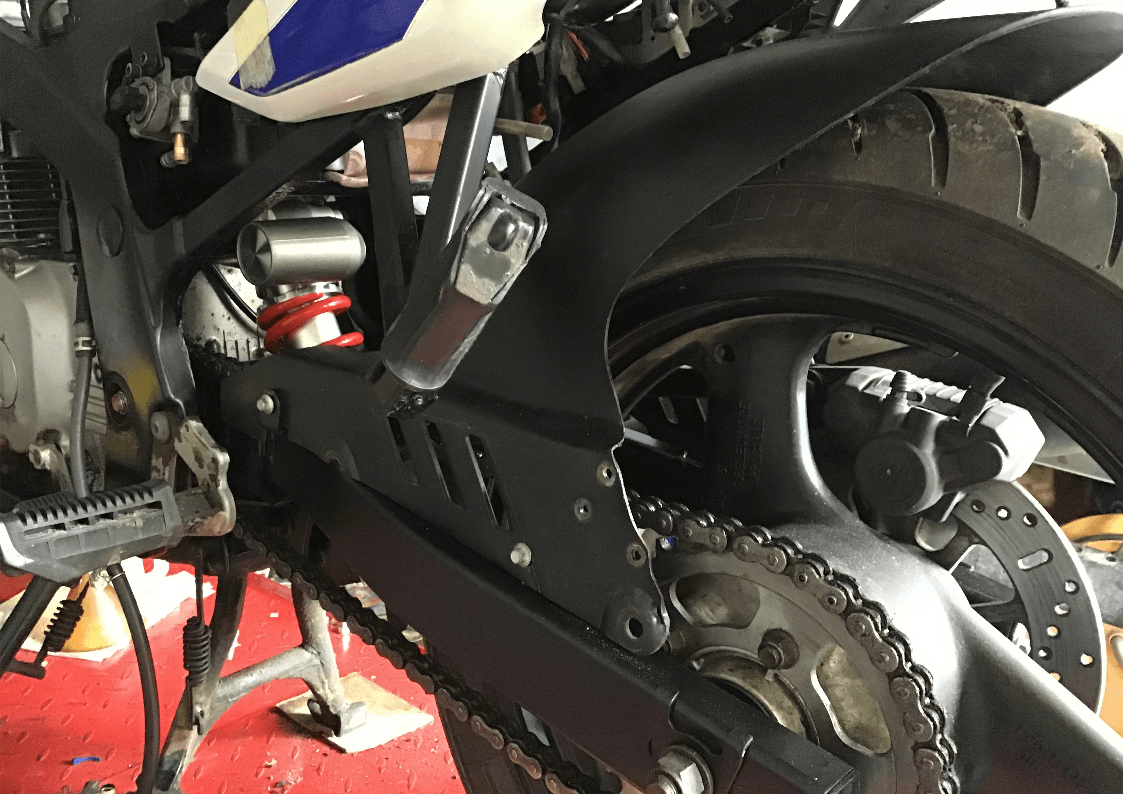
Eventually both shock and hugger are in place.
Front of the chainguard lines up nicely, but the back’s a bit off. Luckily, that rear part is just riveted in place, a little modification should get it all lined up and looking better.
Now to check that when the suspension is fully compressed the hugger doesn’t hit anything. Actually it does hit. I only get about 55mm rear wheel travel before the hugger hits the sides of the existing rear mudguard / undertray. In this pic, the undertray has already been removed to allow the wheel to move into the fully up position. I’m allowing for a wheel travel of 120mm (or about the height of that paint can that’s under the wheel!). So, ideally, to avoid hugger / undertray collisions, I need to junk the undertray.
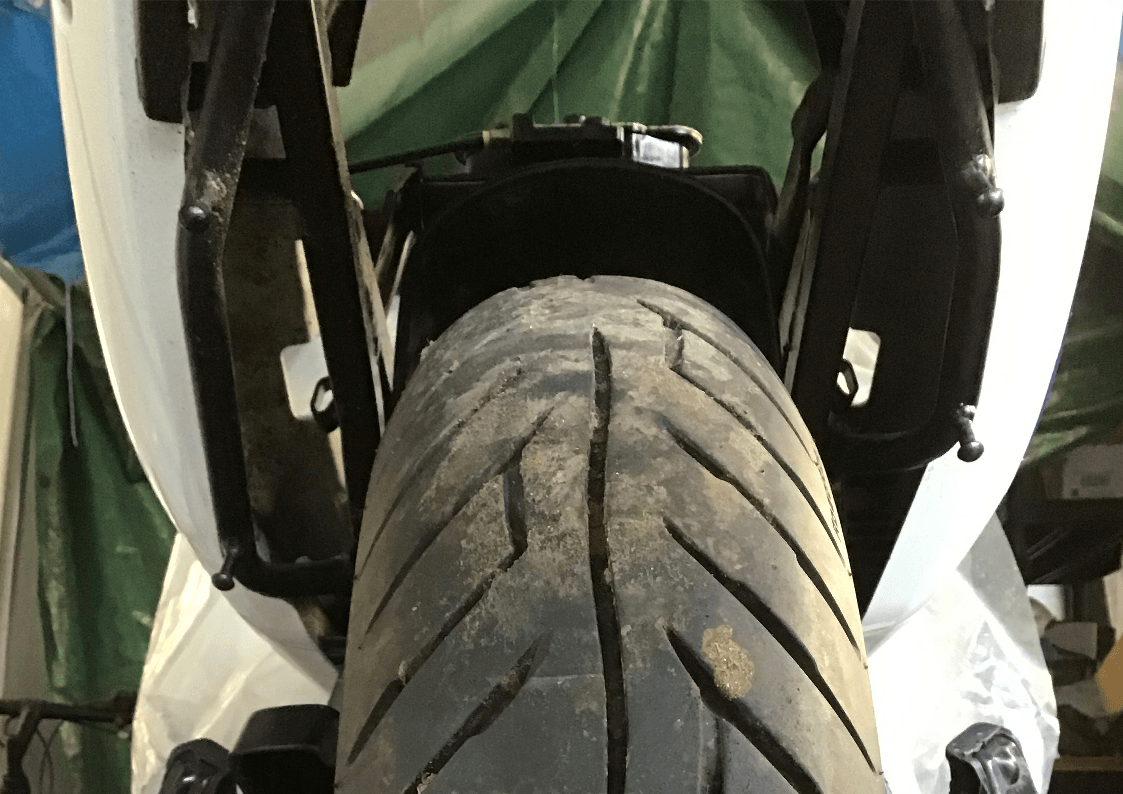
Here’s a rear view. Without the undertray, hugger fits nicely between the subframe rails.
Getting rid of the undertray causes a few problems. The hugger (by modern standards) is fairly all encompassing, so it should limit the amount of crud thrown up, but I’d like to fill this gap and anyway I need to fashion some kind of number plate mount, so hopefully I can come up with a design that fulfills both requirements.
At the other end, I’d like a small plate just to shield the wiring, brake fluid reservoir etc.
Painting of swingarm, linkage, torque arm etc. underway. Instead of Smoothrite I used a cheaper alternative from Polar. Time will tell if it’s any good at keeping rust at bay.
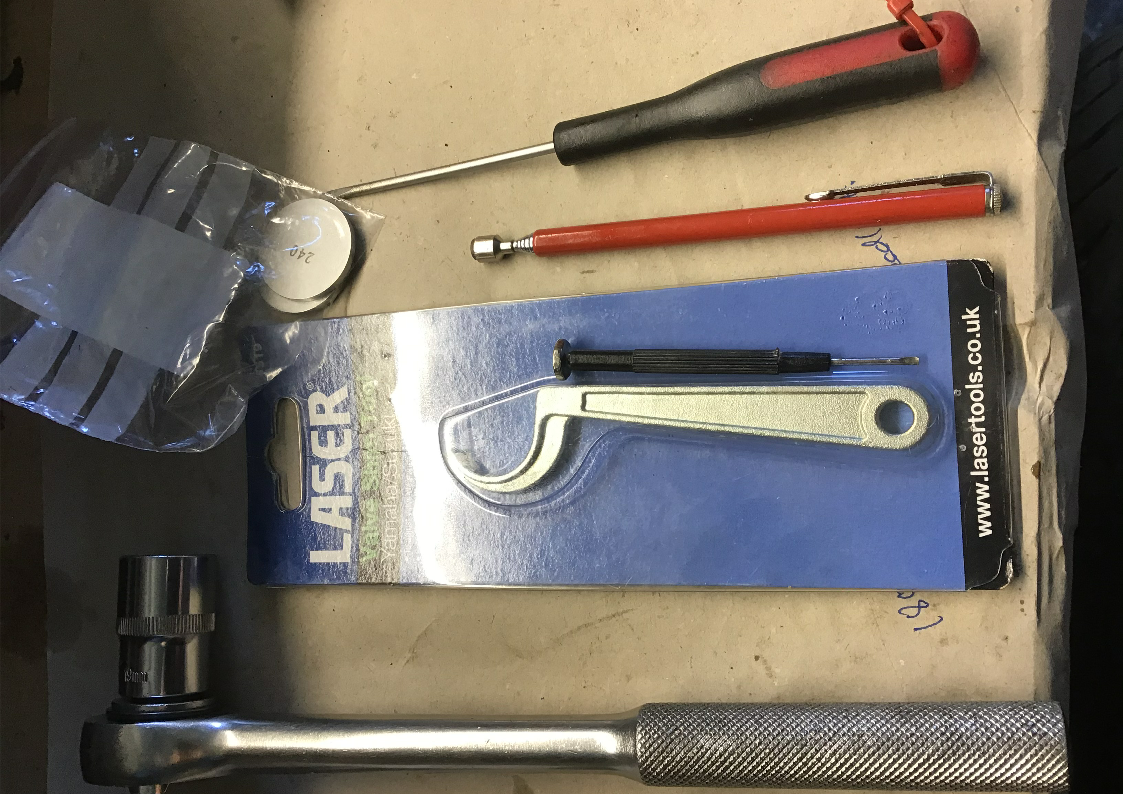
But now, the valve shims are here. Laser tool is good at pushing the followers down, but the shims often don’t want to leave their snug little bucket. Tiny jeweller’s screwdriver is the best thing for flicking them up from their resting place. Magnetic tool and larger screwdriver can then be used to extract them from under the cam.Next week, I’m hoping that I will have put some of the bike back together, rather than taking yet more parts off. Time will tell…
Not a great deal of progress this week. The Arctic temperatures outside have made the garage and the ‘tent’ (with their limited heating facilities) unappealing places to spend any length of time. Never mind, next week’s weather forecast is looking better.
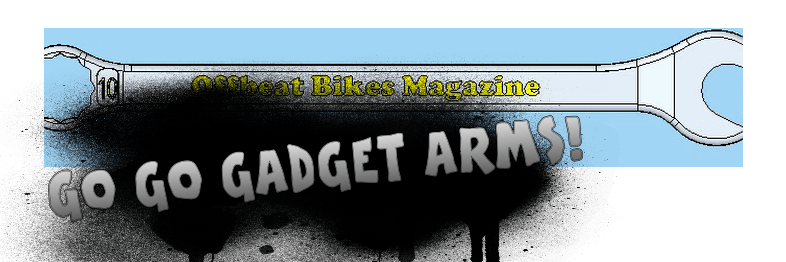
But, I have managed to get the freshly painted swingarm on, together with the fancy shock and overhauled suspension linkages. I’ve also got the exhaust back on, which meant that I could fire up the refreshed engine for the first time. I’d turned it over by hand several times just to make sure everything freely rotated, but pressing the starter button for the first time was still a little nerve wracking. Thankfully, she started and ran Ok. Getting that exhaust on single handedly required a little improvisation. The standard GS500 exhaust is a single unit - no separate down pipes and silencer. With two people, one at front, one at back, I imagine it’s quite easy to do. On your own, unless you have unusually long arms, or Inspector Gadget's extending ones, it’s a little more tricky to manoeuvre. After a couple of failed attempts ‘free hand’ (which came perilously close to damaging the new paint on the swingarm) it was deemed advisable to have some assistance. As there was no human assistance available, I eventually settled on some wooden props at the silencer end and a jack-up stand under the down-pipes.
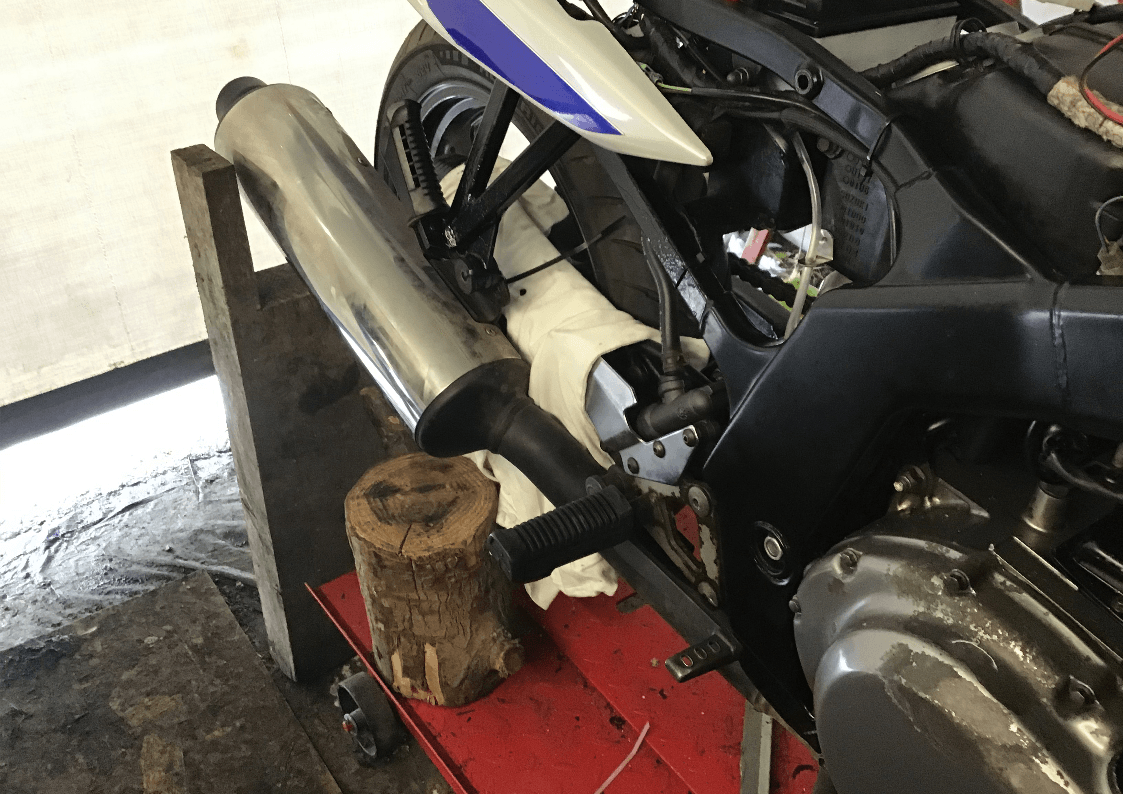
Incremental lifting at either end, gradually got the rear close enough to get a long cable tie through the mounting bolt holes. Now that the back end wasn’t going to fall and damage anything, the front pipes could be located in the cylinder head and bolts added finger tight to keep them there. Replace cable tie with bolt, tighten everything up and it’s on. I’m really tempted to replace the rusty standard unit with a nice shiny stainless steel system, but can’t really justify doing that at the moment - I need to let the original rust away a little more…
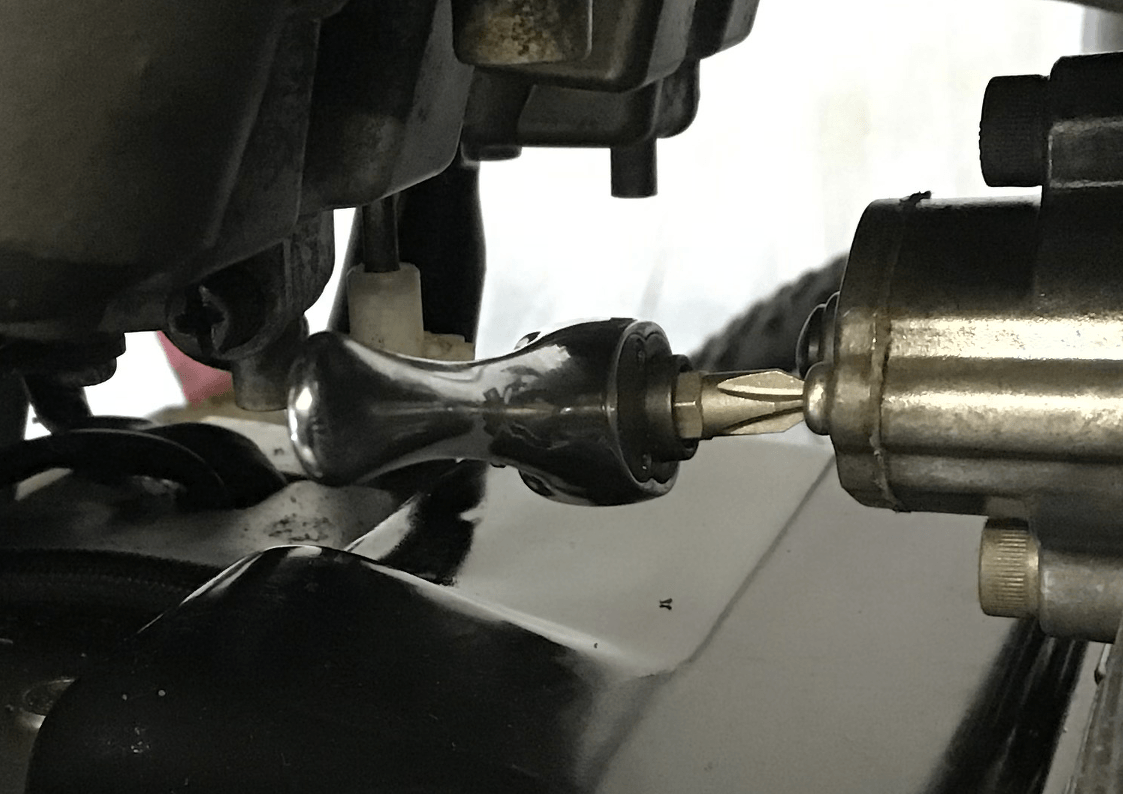
At last, I’ve also found a use for the micro ratchets. I bought them, mostly because they looked really cute. They’re tiny, about 8cm long. This is the hex bit driver…
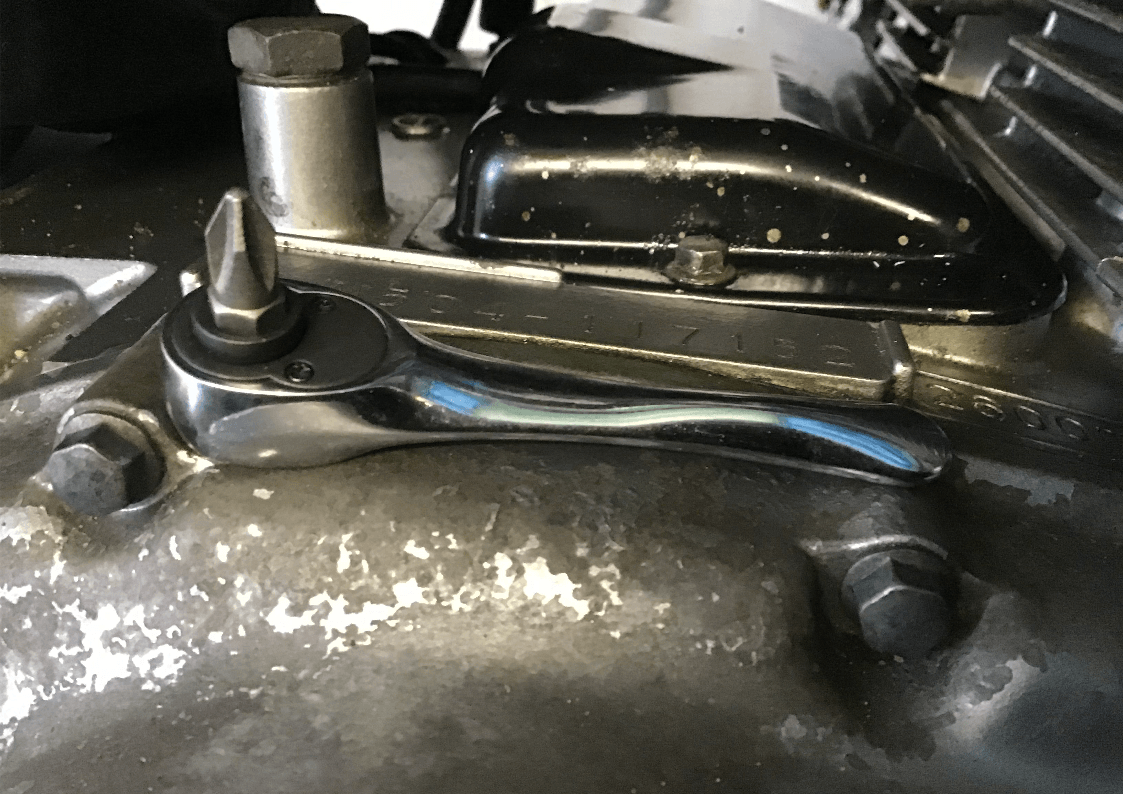
…and it fitted neatly in the tiny gap under the carbs and allowed me to get the back plate of the cam-chain tensioner off, so that I could put the little rubber bung in the back of it. I’d forgotten to do this before refitting the carbs and it’s quite difficult to push that little bung in once they’re on. I know, I tried (and swore at it) for some time before deciding that removing the back plate to fit the bung was probably going to be easier. It was!
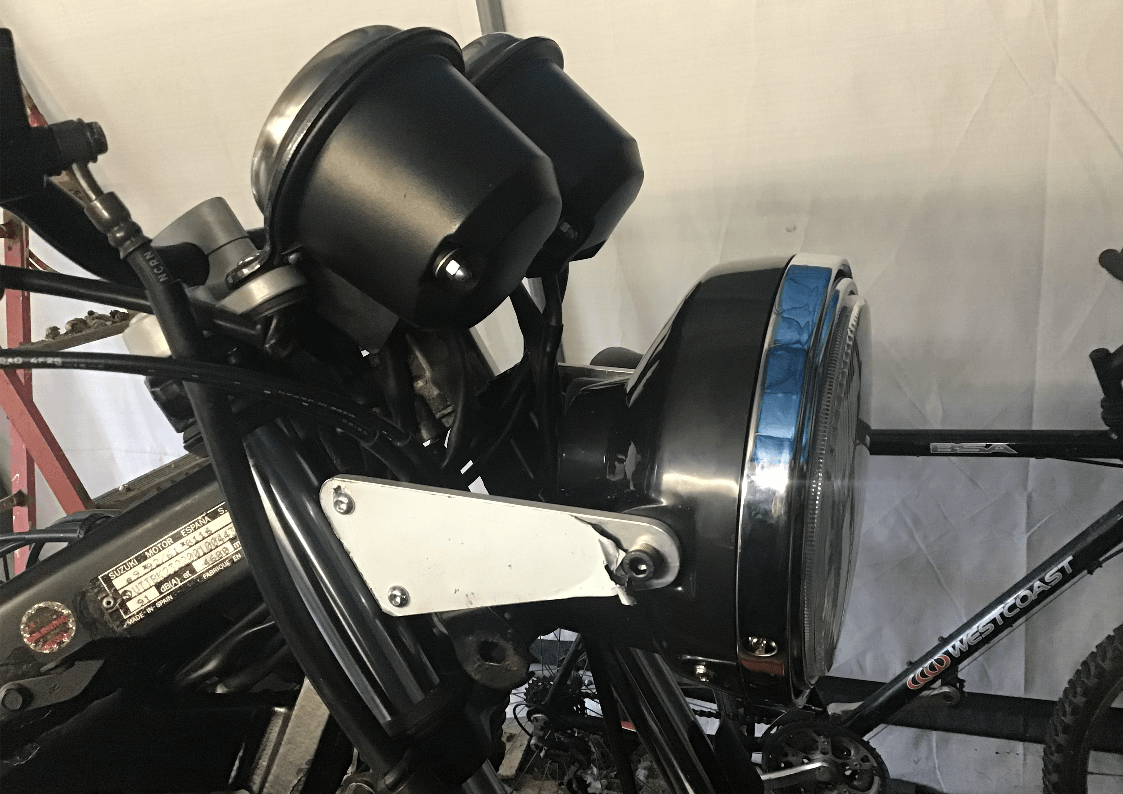
This GS500 is (was) a fully faired version, but we’re going to try being naked for a little while. That means a new headlight is required. After due consideration, I choose a copy of an RD350LC unit. It was a good price (£28) and is actually quite nicely made.
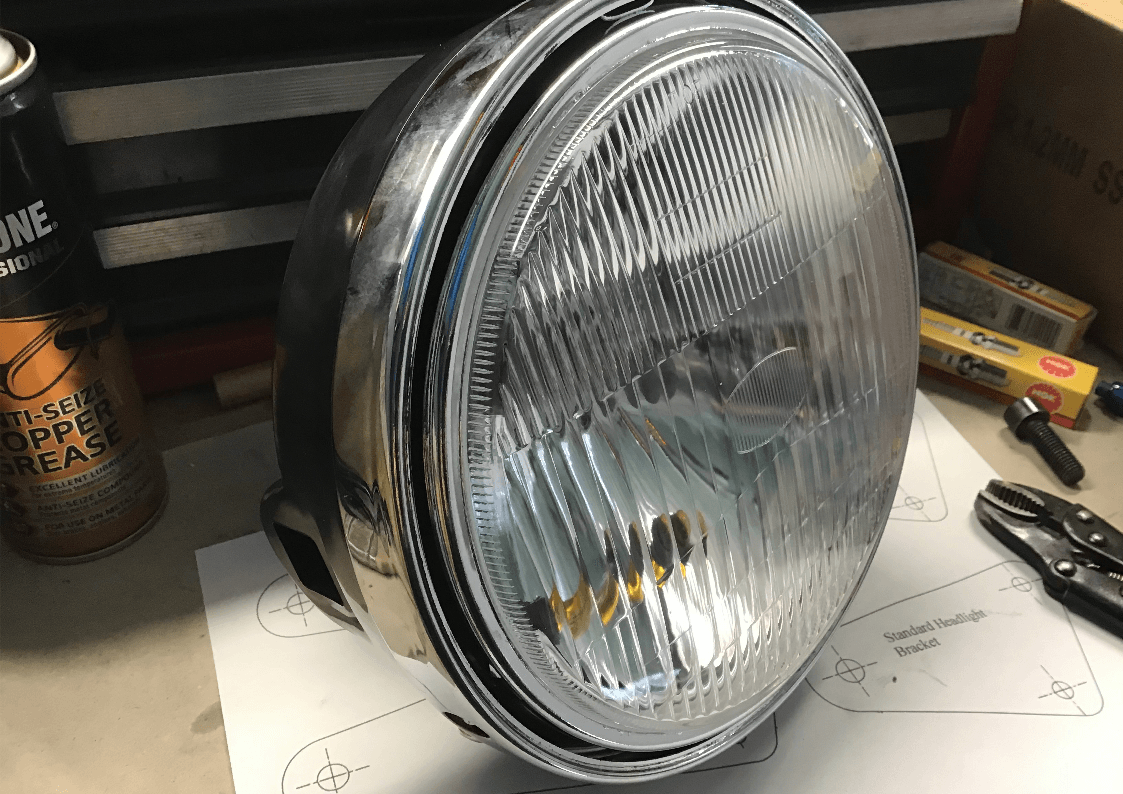
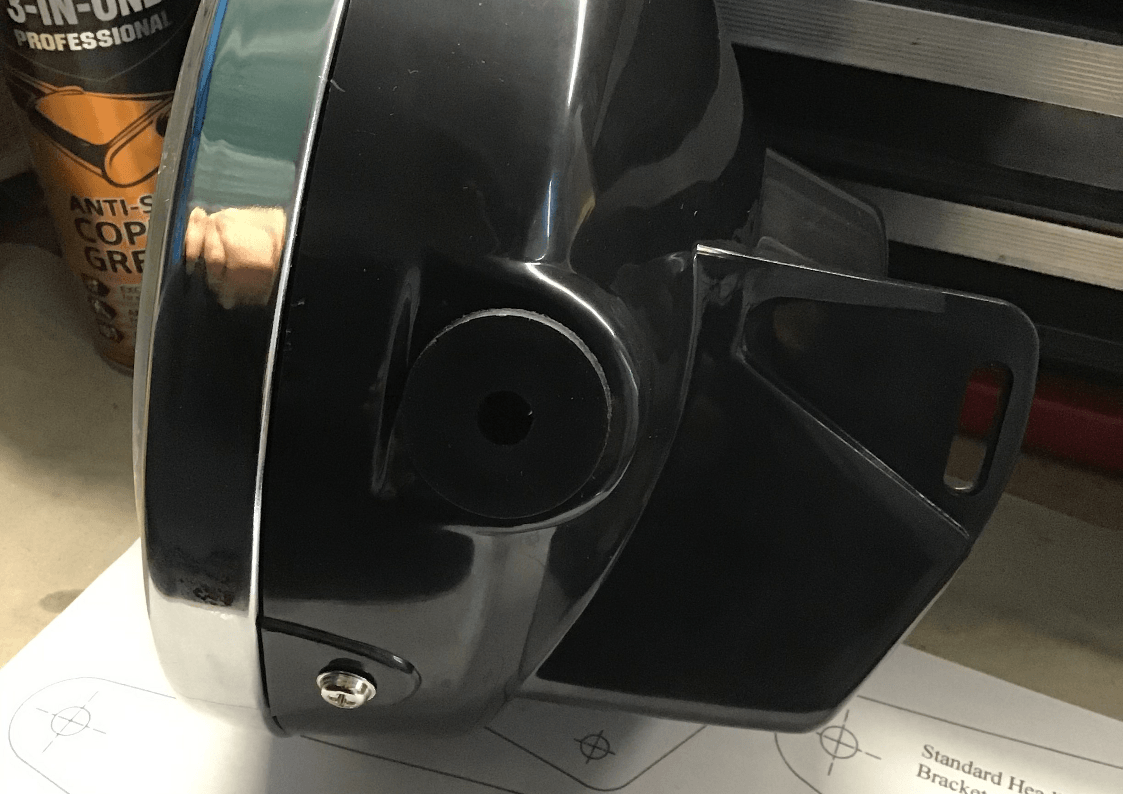
At one side there is the facility to cobble up an adjuster, if you wish, and there’s quite a bit of space at the back to hide wiring in.
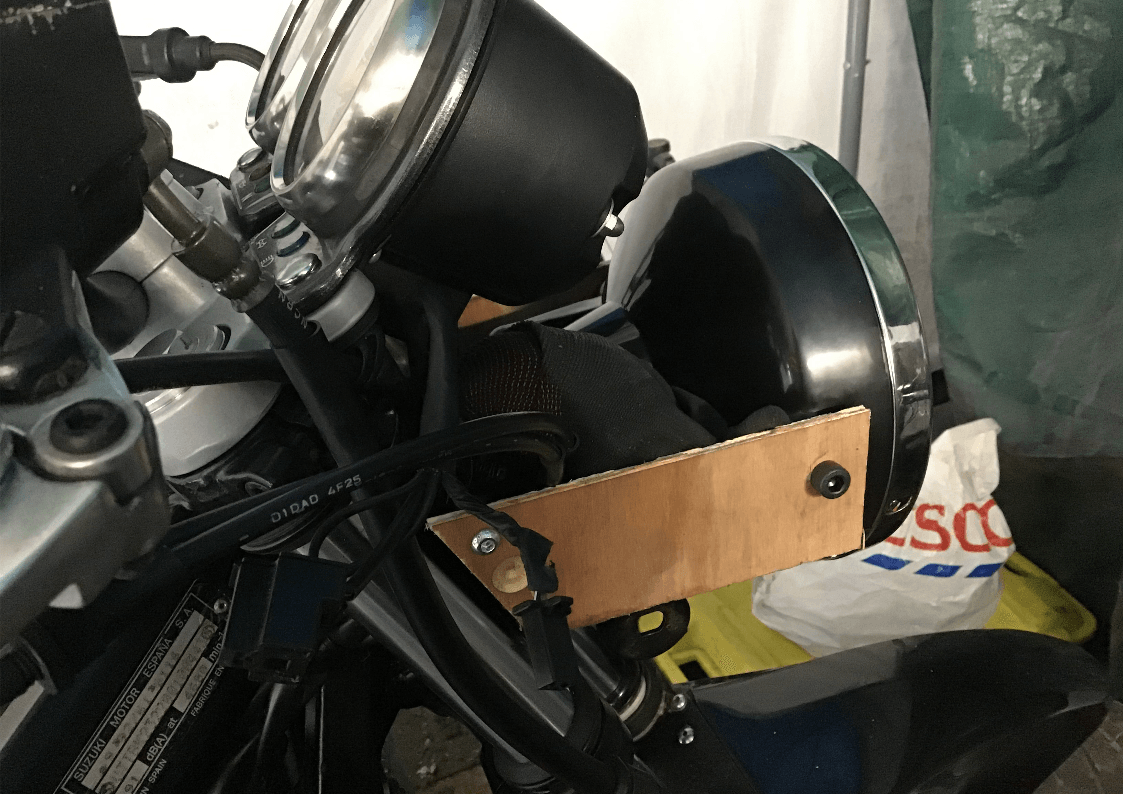
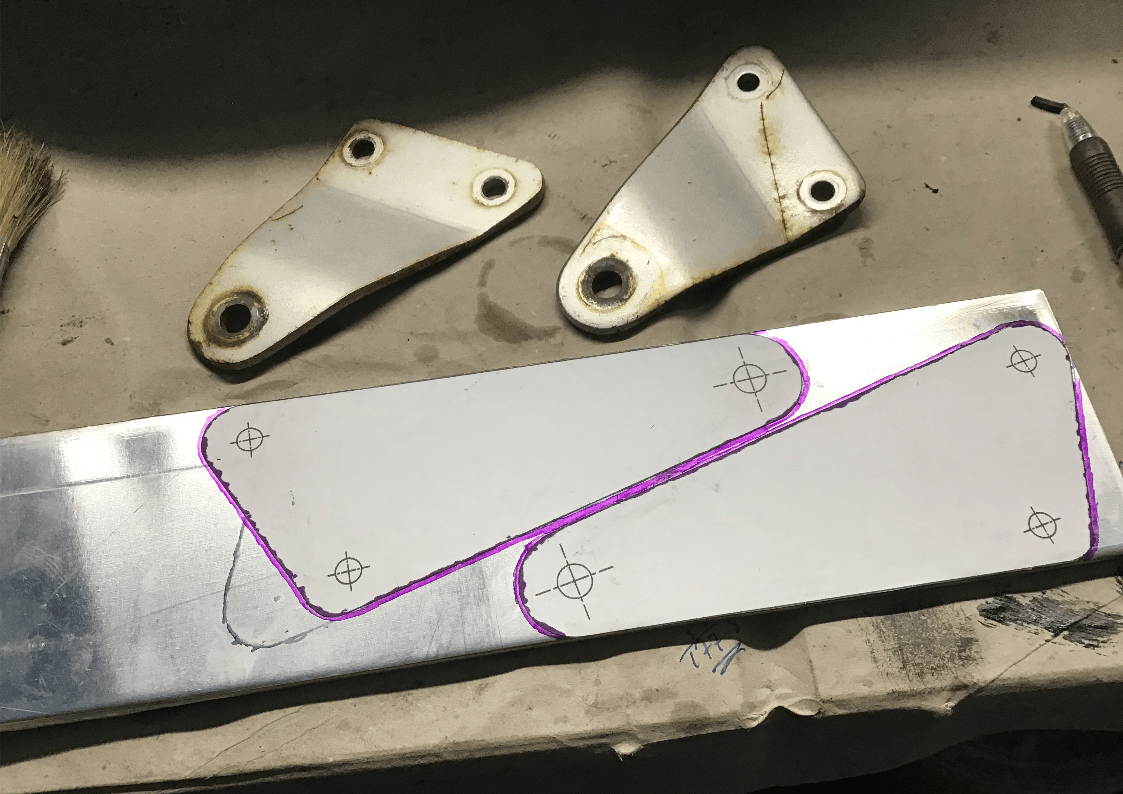
I also needed some headlight brackets. I’d made some for a previous bike and thought I’d look up the drawing that I did for those. It would make a good starting point at least. Intriguingly, my drawing also included the dimensions of a standard headlight bracket - surely, then I must have measured one, which must mean that I already have some standard ones, somewhere… Half an hour spent in the loft of the garage liberated not only some headlight brackets, but also some new spark plugs as well.

Sadly, the brackets didn’t solve all my problems. The faired GS has an extra lump welded to the headstock to accommodate the top fairing bracket. Without it, I think this light would have bolted straight in, but not with it there - lump and back of light interfere with each other. I could grind a little off the lump, or file a little off the back of the light, but I want to keep both unmodified, so I needed new brackets. Here’s the light with some hastily manufactured plywood mock-up brackets. I would also like to make a small cowl to cover the gap between headlight and clocks - the project snowballs again!
Construction of some ally brackets, to replace those lovely plywood ones, is underway.
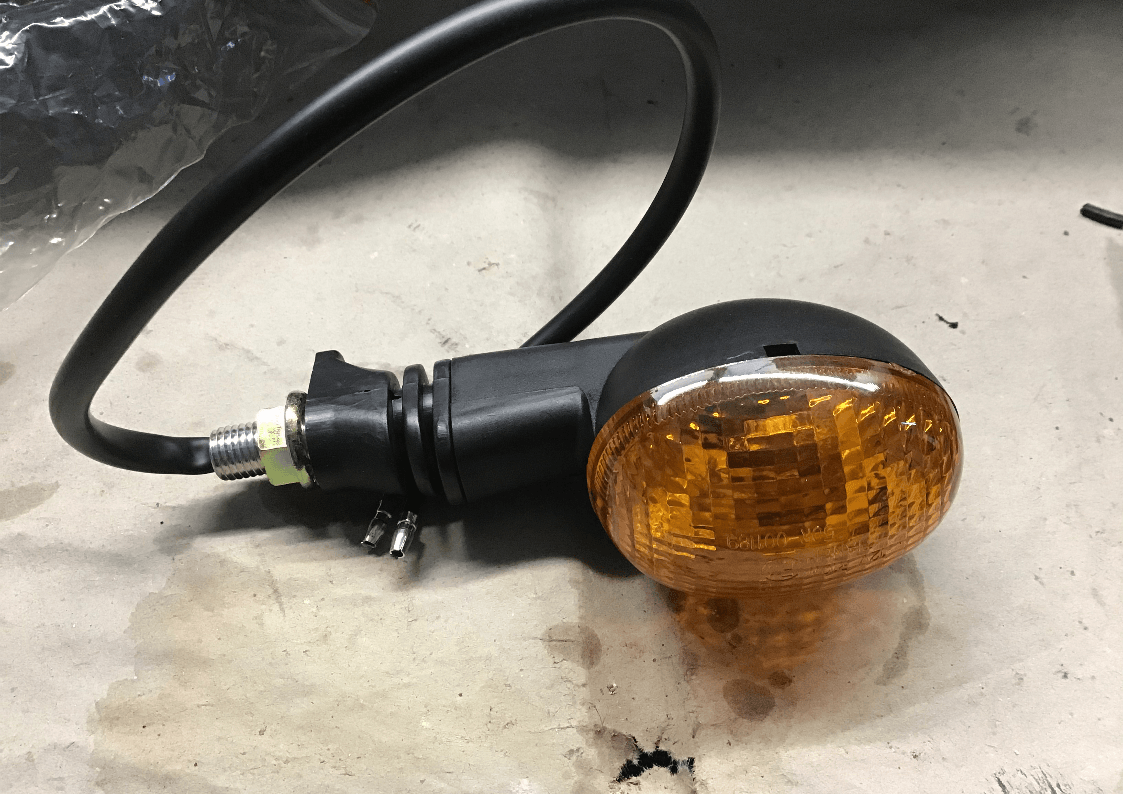
I also need some indicators. These ones were actually destined for the dirt bike project, but it won’t need them for a while, so they’ve been borrowed. By next week I hope to have the headlight and front indicators mounted. Then I can turn my attention to making a bracket for the rear hugger and a tail tidy. Well that’s the current plan…
Milder weather this week, so have I made better use of my garage time? Not really, this week has been c*ck-up week. Not content with (accidentally) spilling oil over the floor and producing a slick reminiscent of the Amoco Cadiz - nightmarish visions of oil covered guillemots and cormorants being washed up on the beach were only assuaged by the realisations that 1) I live 30 miles inland and 2) I hadn’t actually spilt that much and the only things covered in oil were me and the floor. Took some time to clear it all up, though.
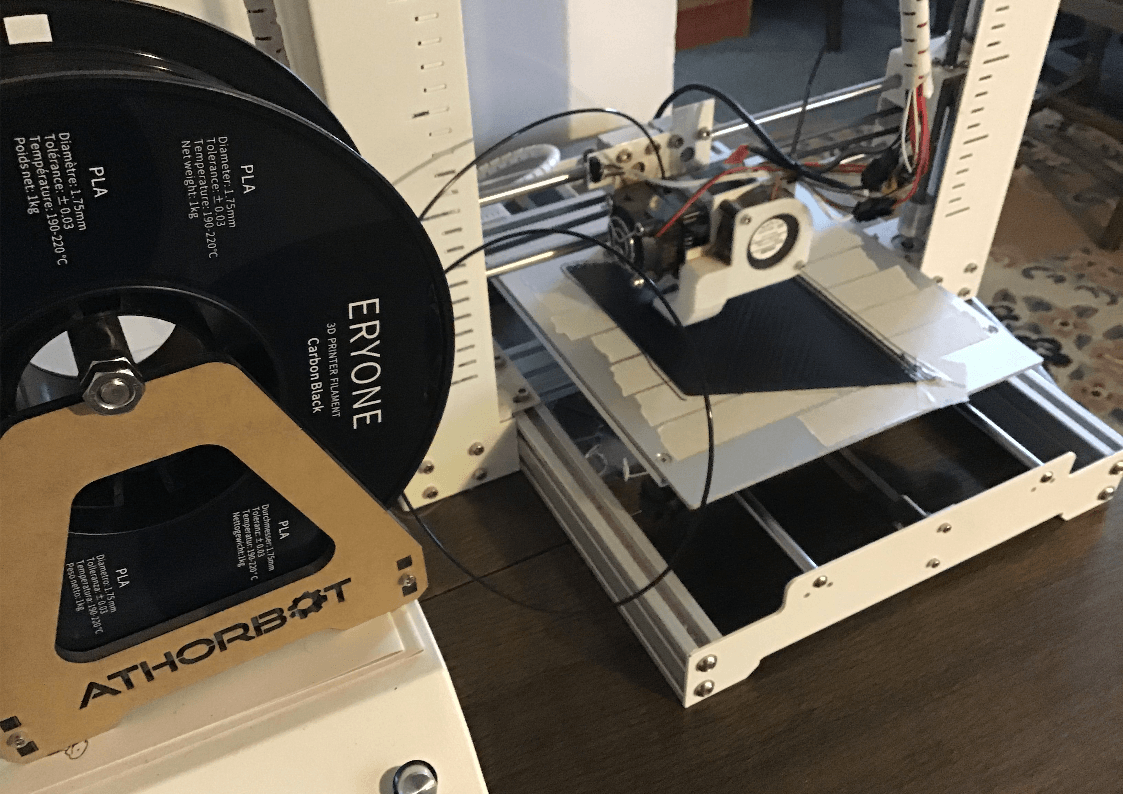
I then rounded the week off by babysitting the 3D printer for 5 hours, only to find out that I’d made it the wrong size - b*llocks!
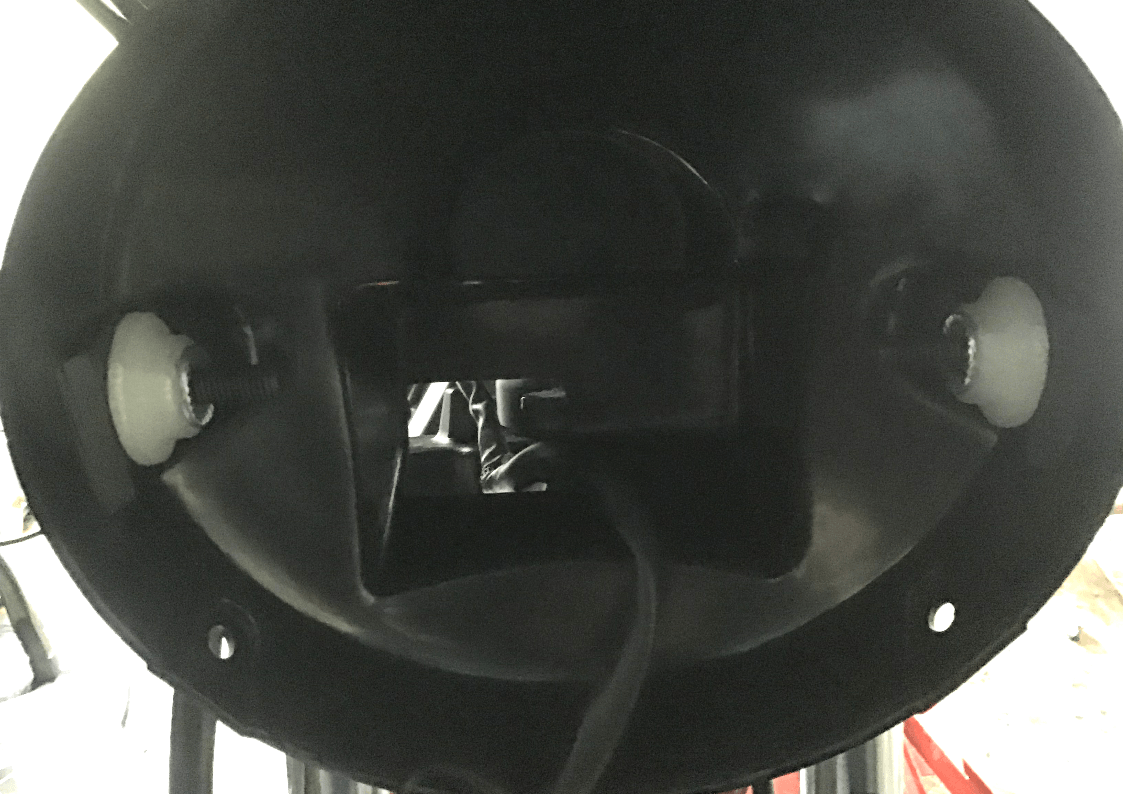
I have, however, got the headlight mounted. It needed some new brackets made, and with the aid of some aluminium plate, a hacksaw and a file, a new pair was made. The RD headlight came with rubber mountings which I decided not to use as the fork leg mounted brackets of the GS are already rubber mounted. This then meant that I needed to find something to fill the gap vacated by the rubber bungs. After due consideration, I decided some 3D printed mountings would be man enough to do the job. These were designed and printed without issue (they’re the white bits in the picture below) unlike the 3D printing I tried at the end of the week…
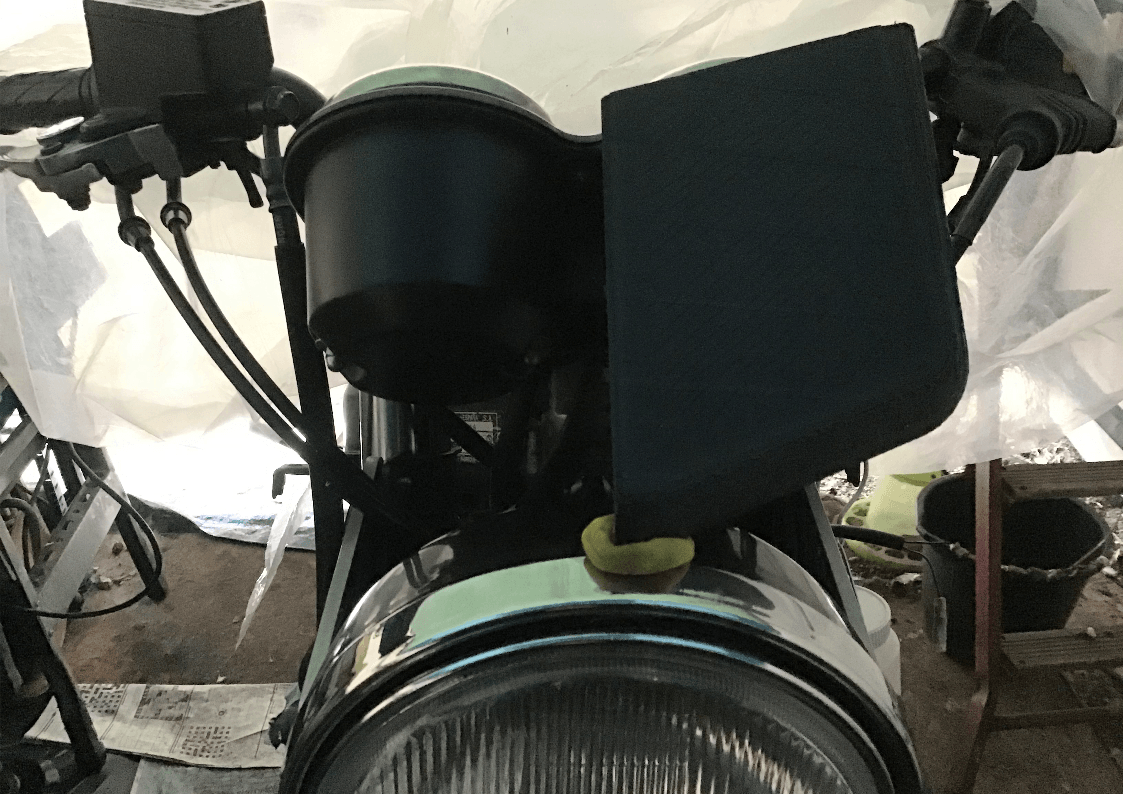
And there we go, headlight on. Now you can see the gap between headlight and clocks that I’d like to fill with a small cowl.
I had intended to use a previous fairing mould (see Ibiis GS500 in Gallery) to make a starting point which could then be modified to suit this bike. But, while wandering around the garage, I found a reject part from the dirt bike’s petrol tank which liked the look of, so it was offered up.
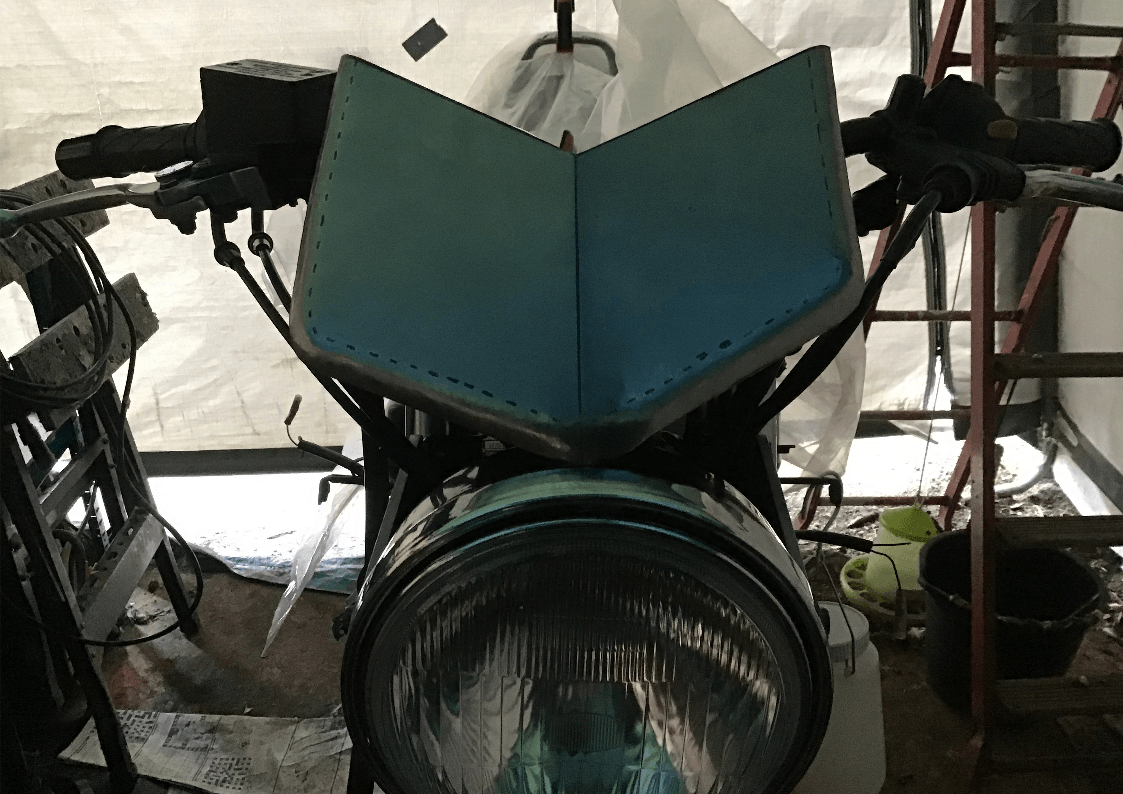
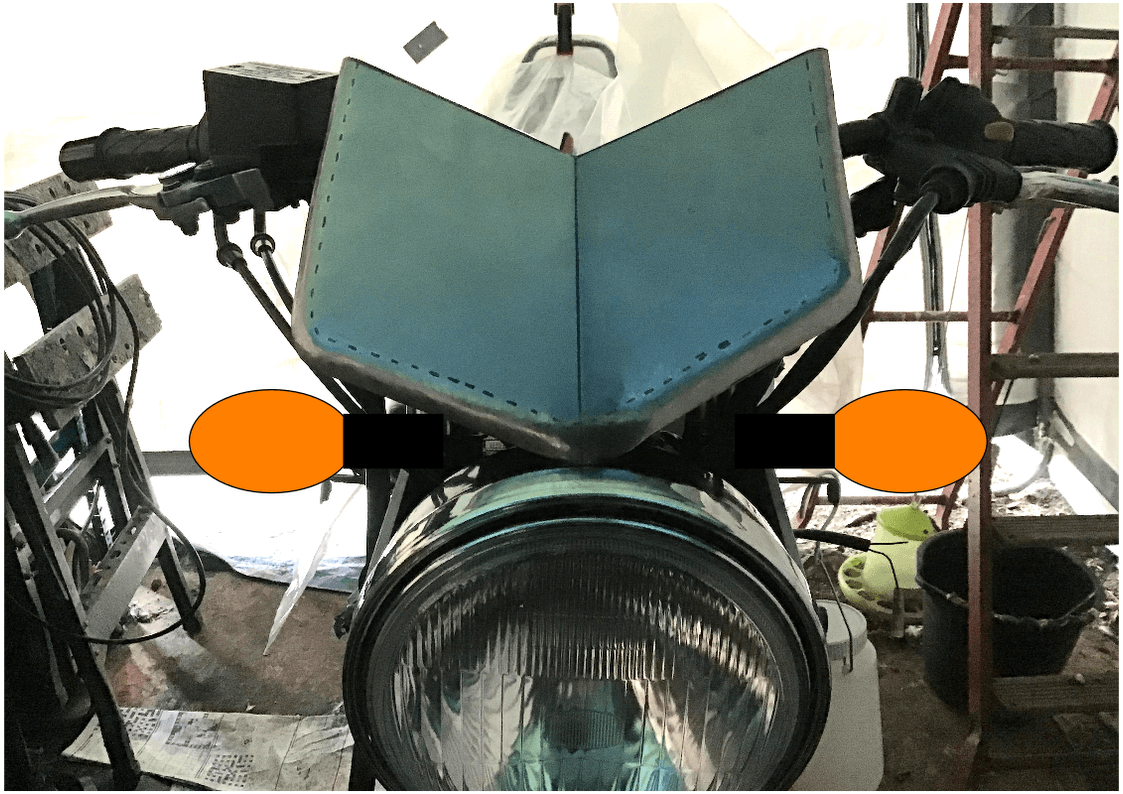
This is what it might look like with the indicators in place as well. I can’t use this steel version because it isn’t actually symmetrical and anyway I don’t want a steel flyscreen. Instead I decided to 3D print one.
Here we are, already an hour into the print. Little do I know that I made some errors drawing it up on CAD, and so, about three hours later, I was overjoyed to find that what I’d printed wasn’t the right size!
You can see the differences in this pic.
I tried it on the bike anyway (the printer isn’t big enough to do the whole cowl in one hit, so this was the first half). It looked OK, but I liked the angles of the steel one better, so back to the drawing board.
This time I did a much better job of measuring the steel original, so hopefully the next print will be better.
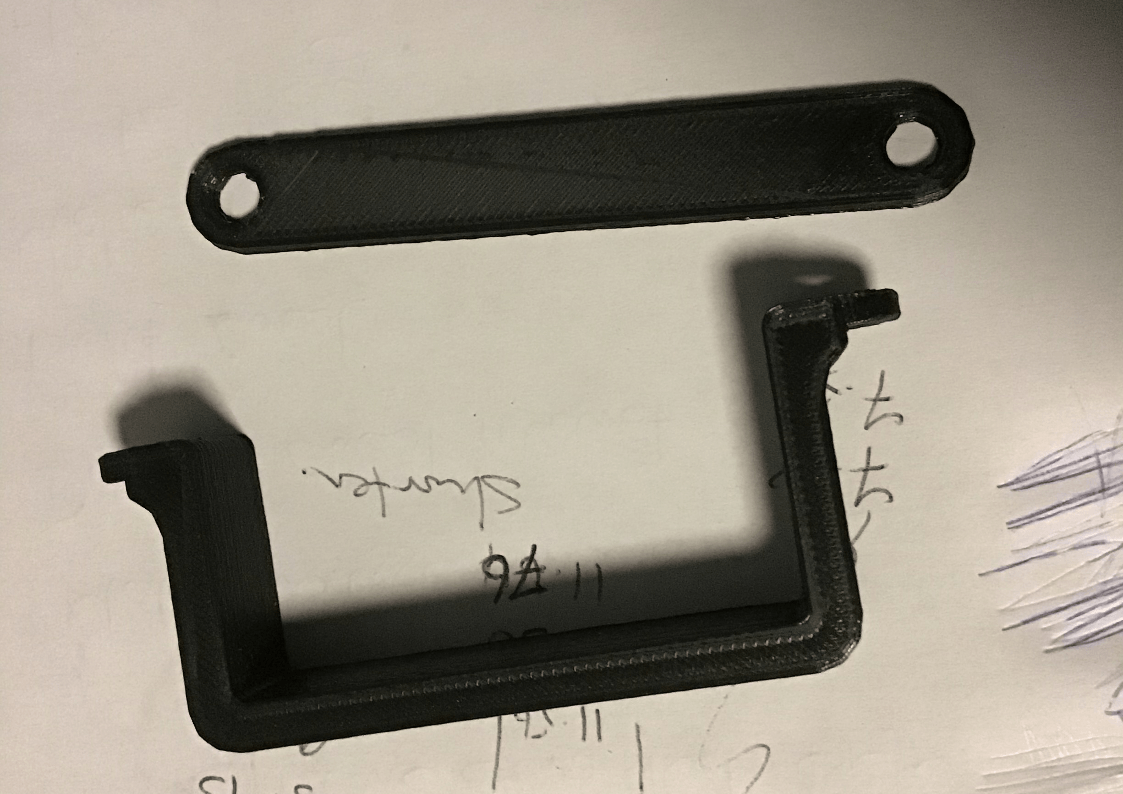
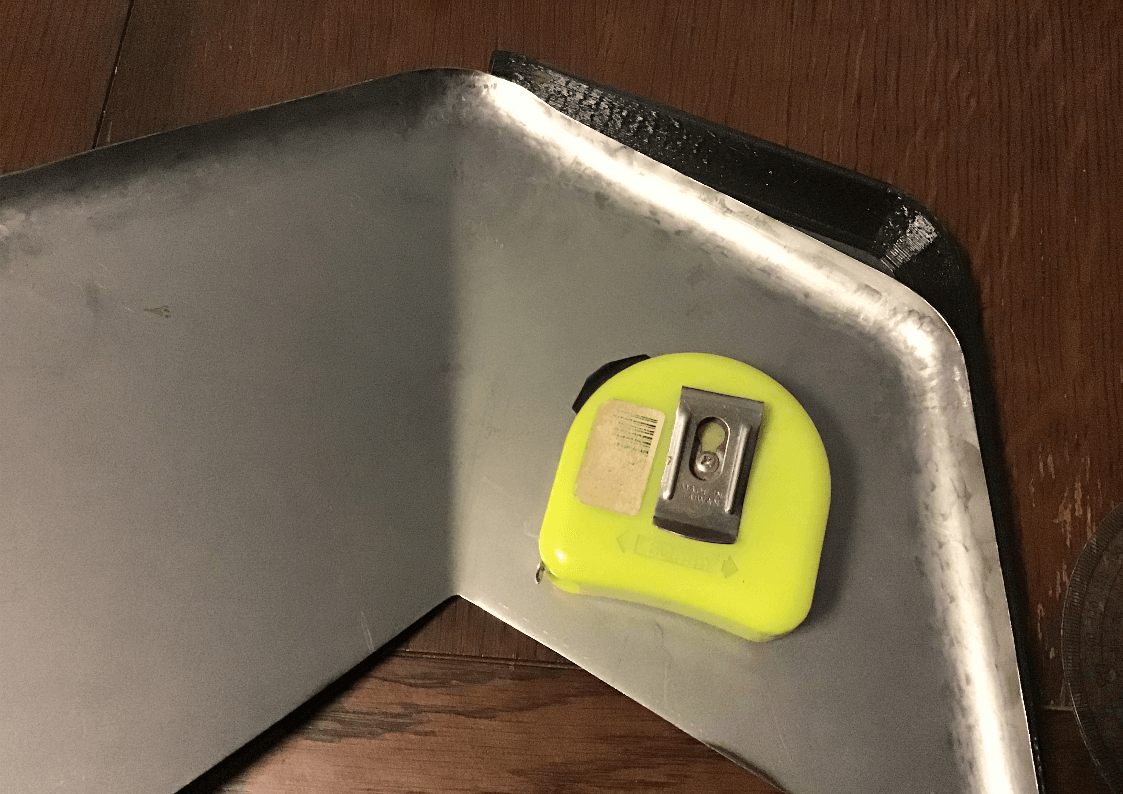
I have at least got the hugger mounted securely now. This side using the existing mounting points on the swingarm.
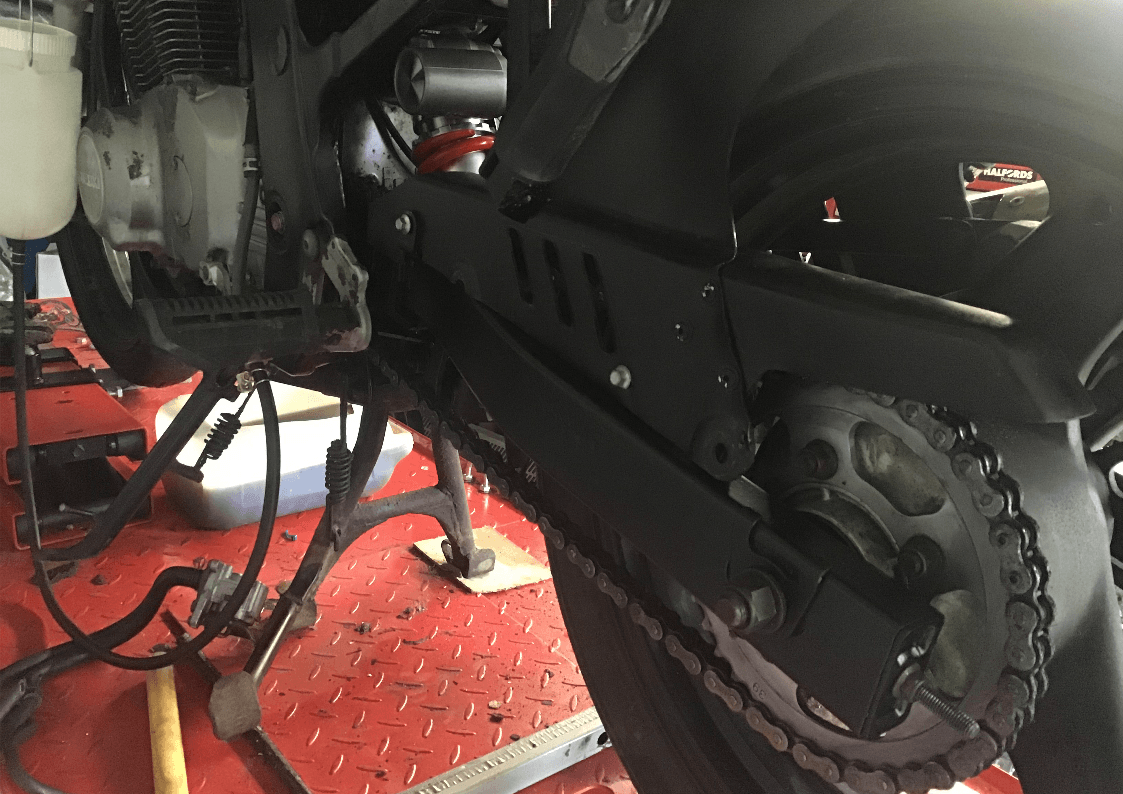
A 3D printed bracket secures it on the other side.
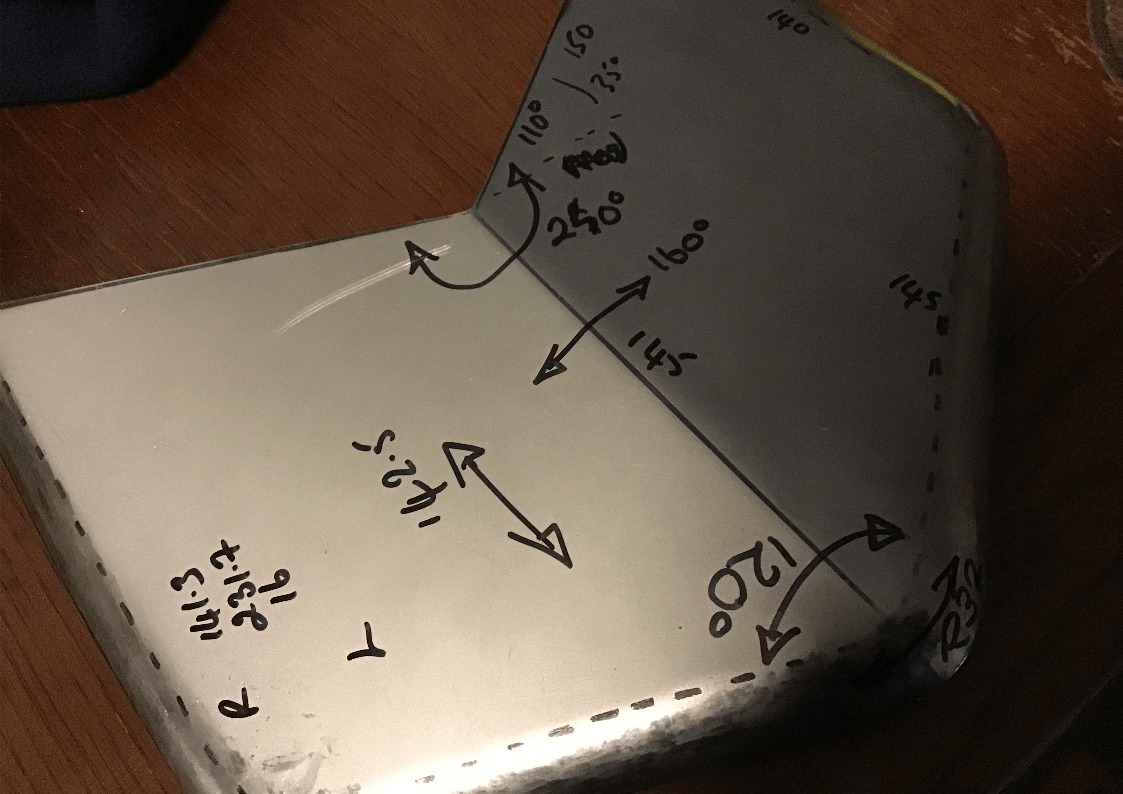
The chainguard bit at the end of the hugger was skewed off at an angle and really needed straightening up. First step was to drill out the original rivets. I quite like the look of the hugger without the end bit on, but…
…when you see the amount of crud it catches, it’s probably prudent to refit it. I need to make a new sheet steel mount to get everything lined up.
White plastic hugger mount will (eventually) be replaced with this slightly beefier black version.
So, I didn’t manage to get both headlights and indicators mounted. Neither have I managed to progress the cowl/flyscreen because the 3D printer keeps having a hissy fit! Despite now having a design the correct size, I’ve so far had 3 failed attempts to get it printed - and I thought printing it was going to be the quickest and easiest way to make it… Perhaps next week the cowl will be done and then I can work out how to mount both it, and the indicators. Then I just need to finish the hugger; design, make and fit the undertray/tail tidy; clean and adjust the chain; remove the no longer required fairing mounts; reapply ACF50 to keep rust at bay; refit the petrol tank etc. etc. I may get some of that done this week…