Workshop Blog January 2020

To give my brain a short rest from air box design I opted to drill the side panel mounting holes and make aluminium 'top hat' washers to suit.
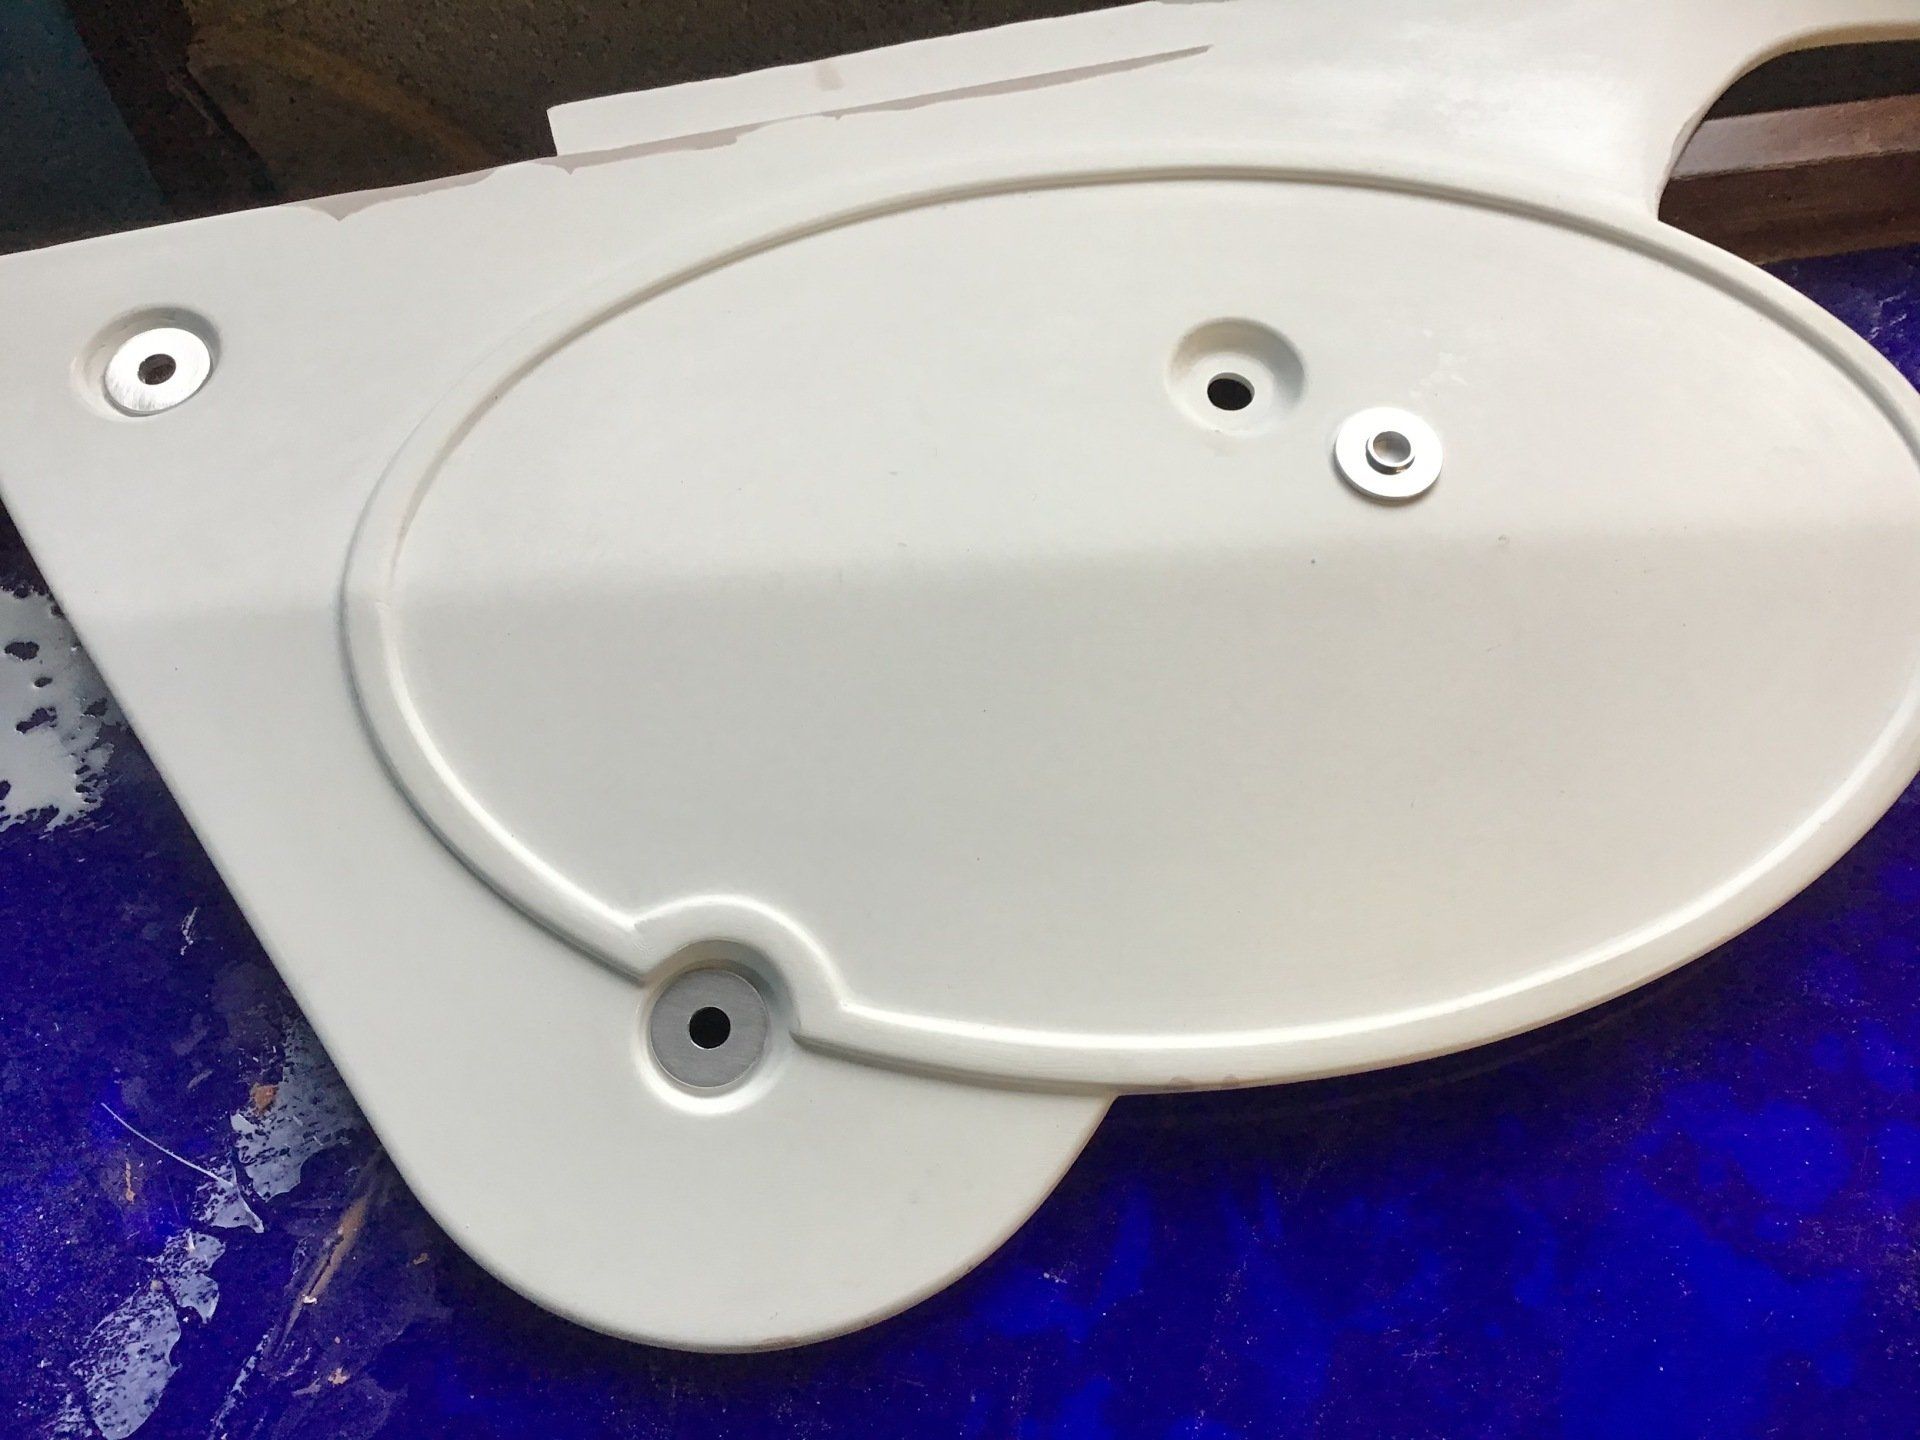
This then allowed me to mark and drill the mounting hole positions on the air box.
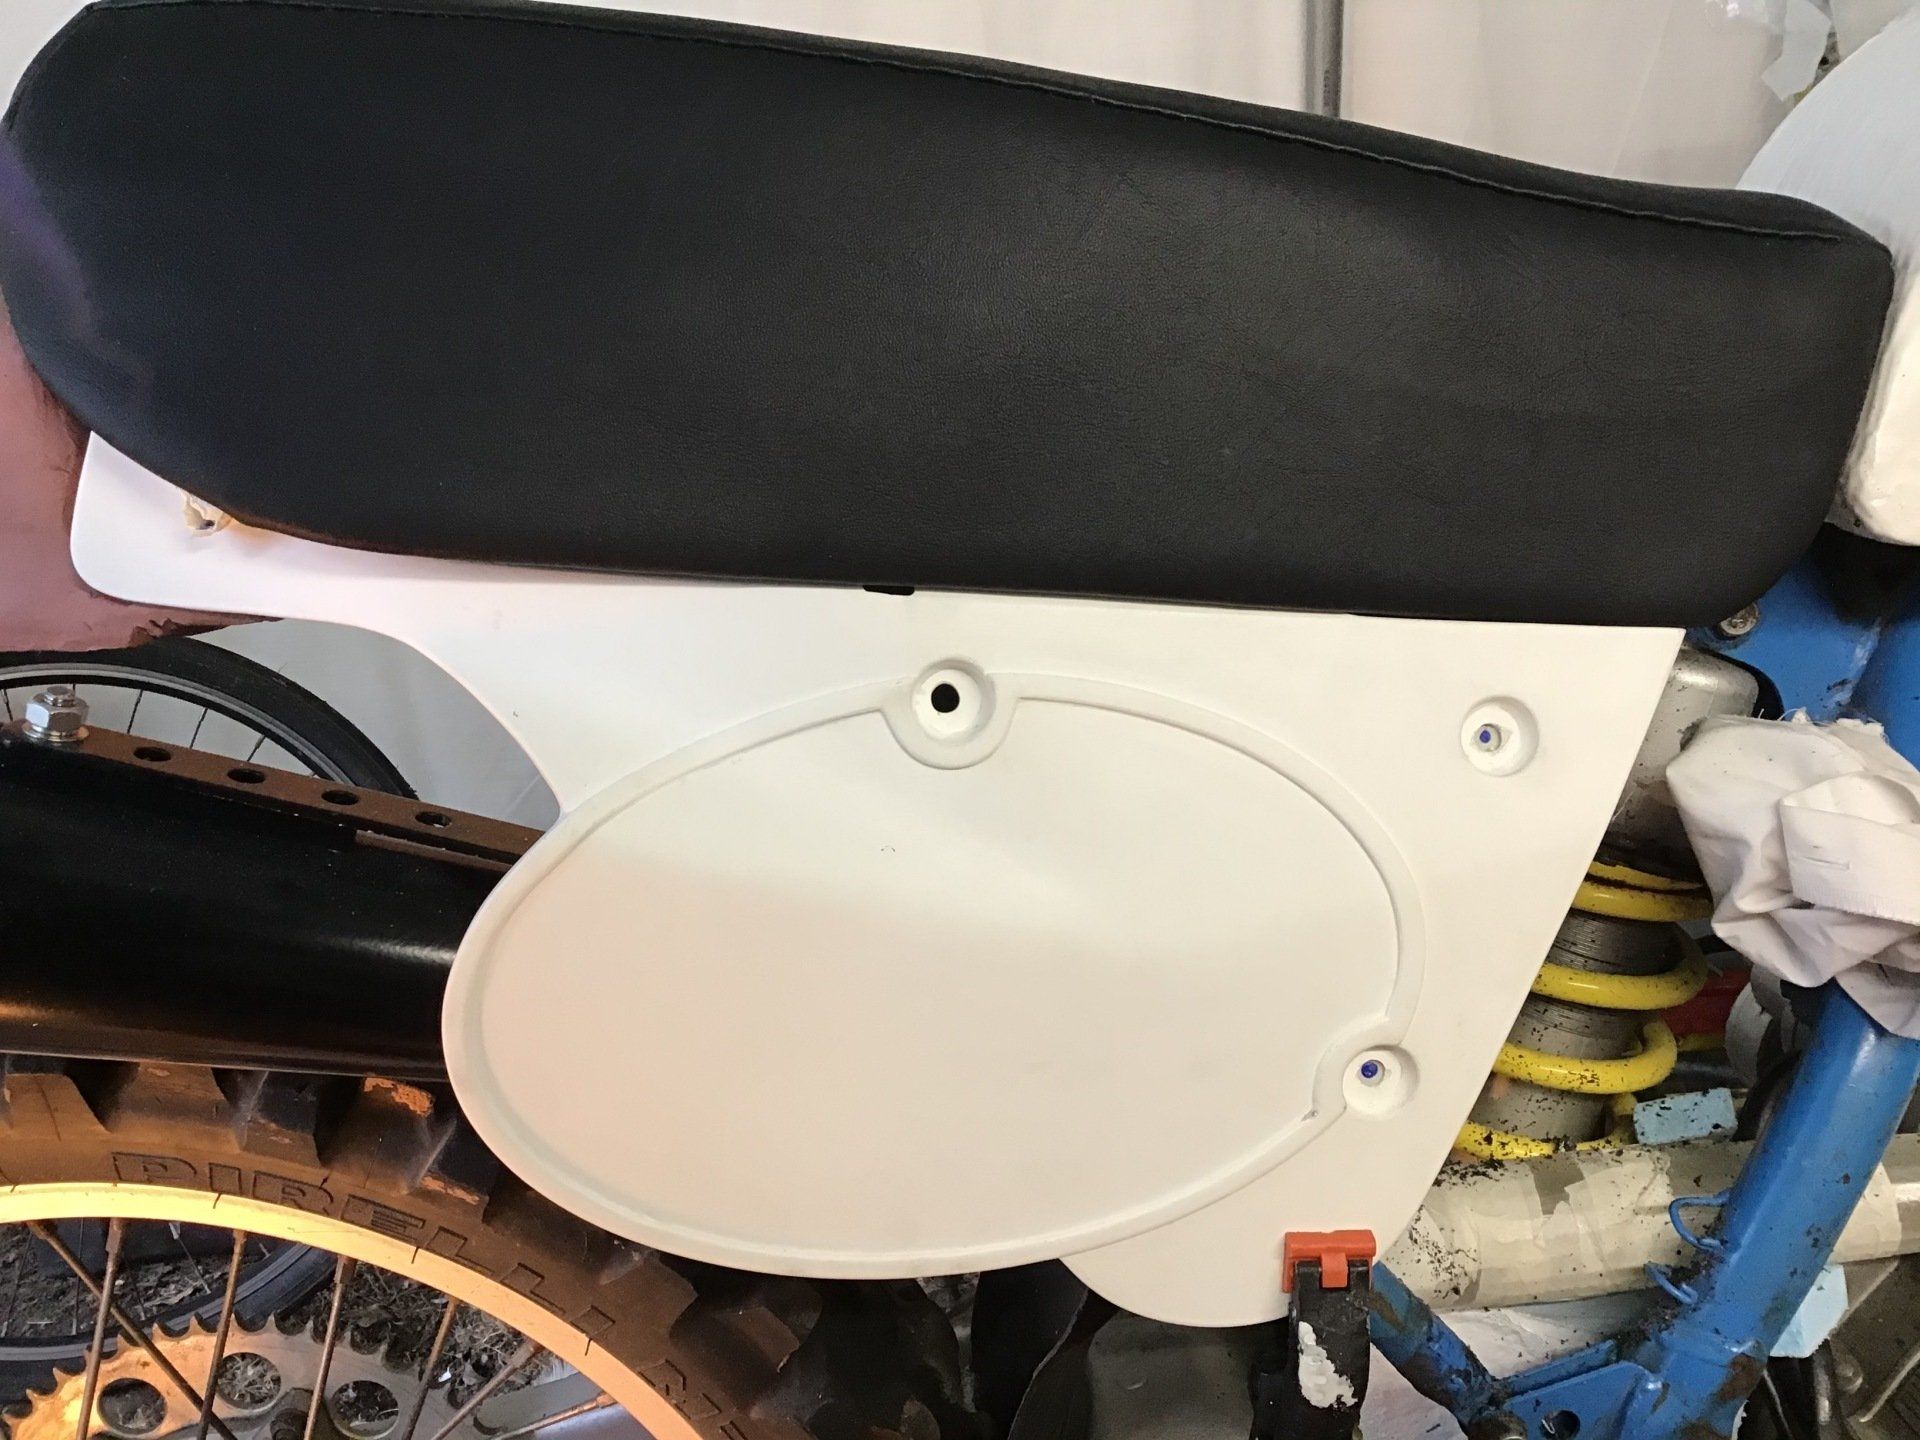
And the side panels are (very temporarily) fixed in place. But I can't avoid it any longer, I have to get back to finalising air box / air filter / battery box design.

The original air box was itself not a very rigid affair, cutting bits out of it has only made it more floppy. Here I've started adding a temporary structure inside the box to hold everything in the correct location when I take it off the bike to work on.
Here's the air box off the bike, thankfully the temporary support structure has held everything in place.
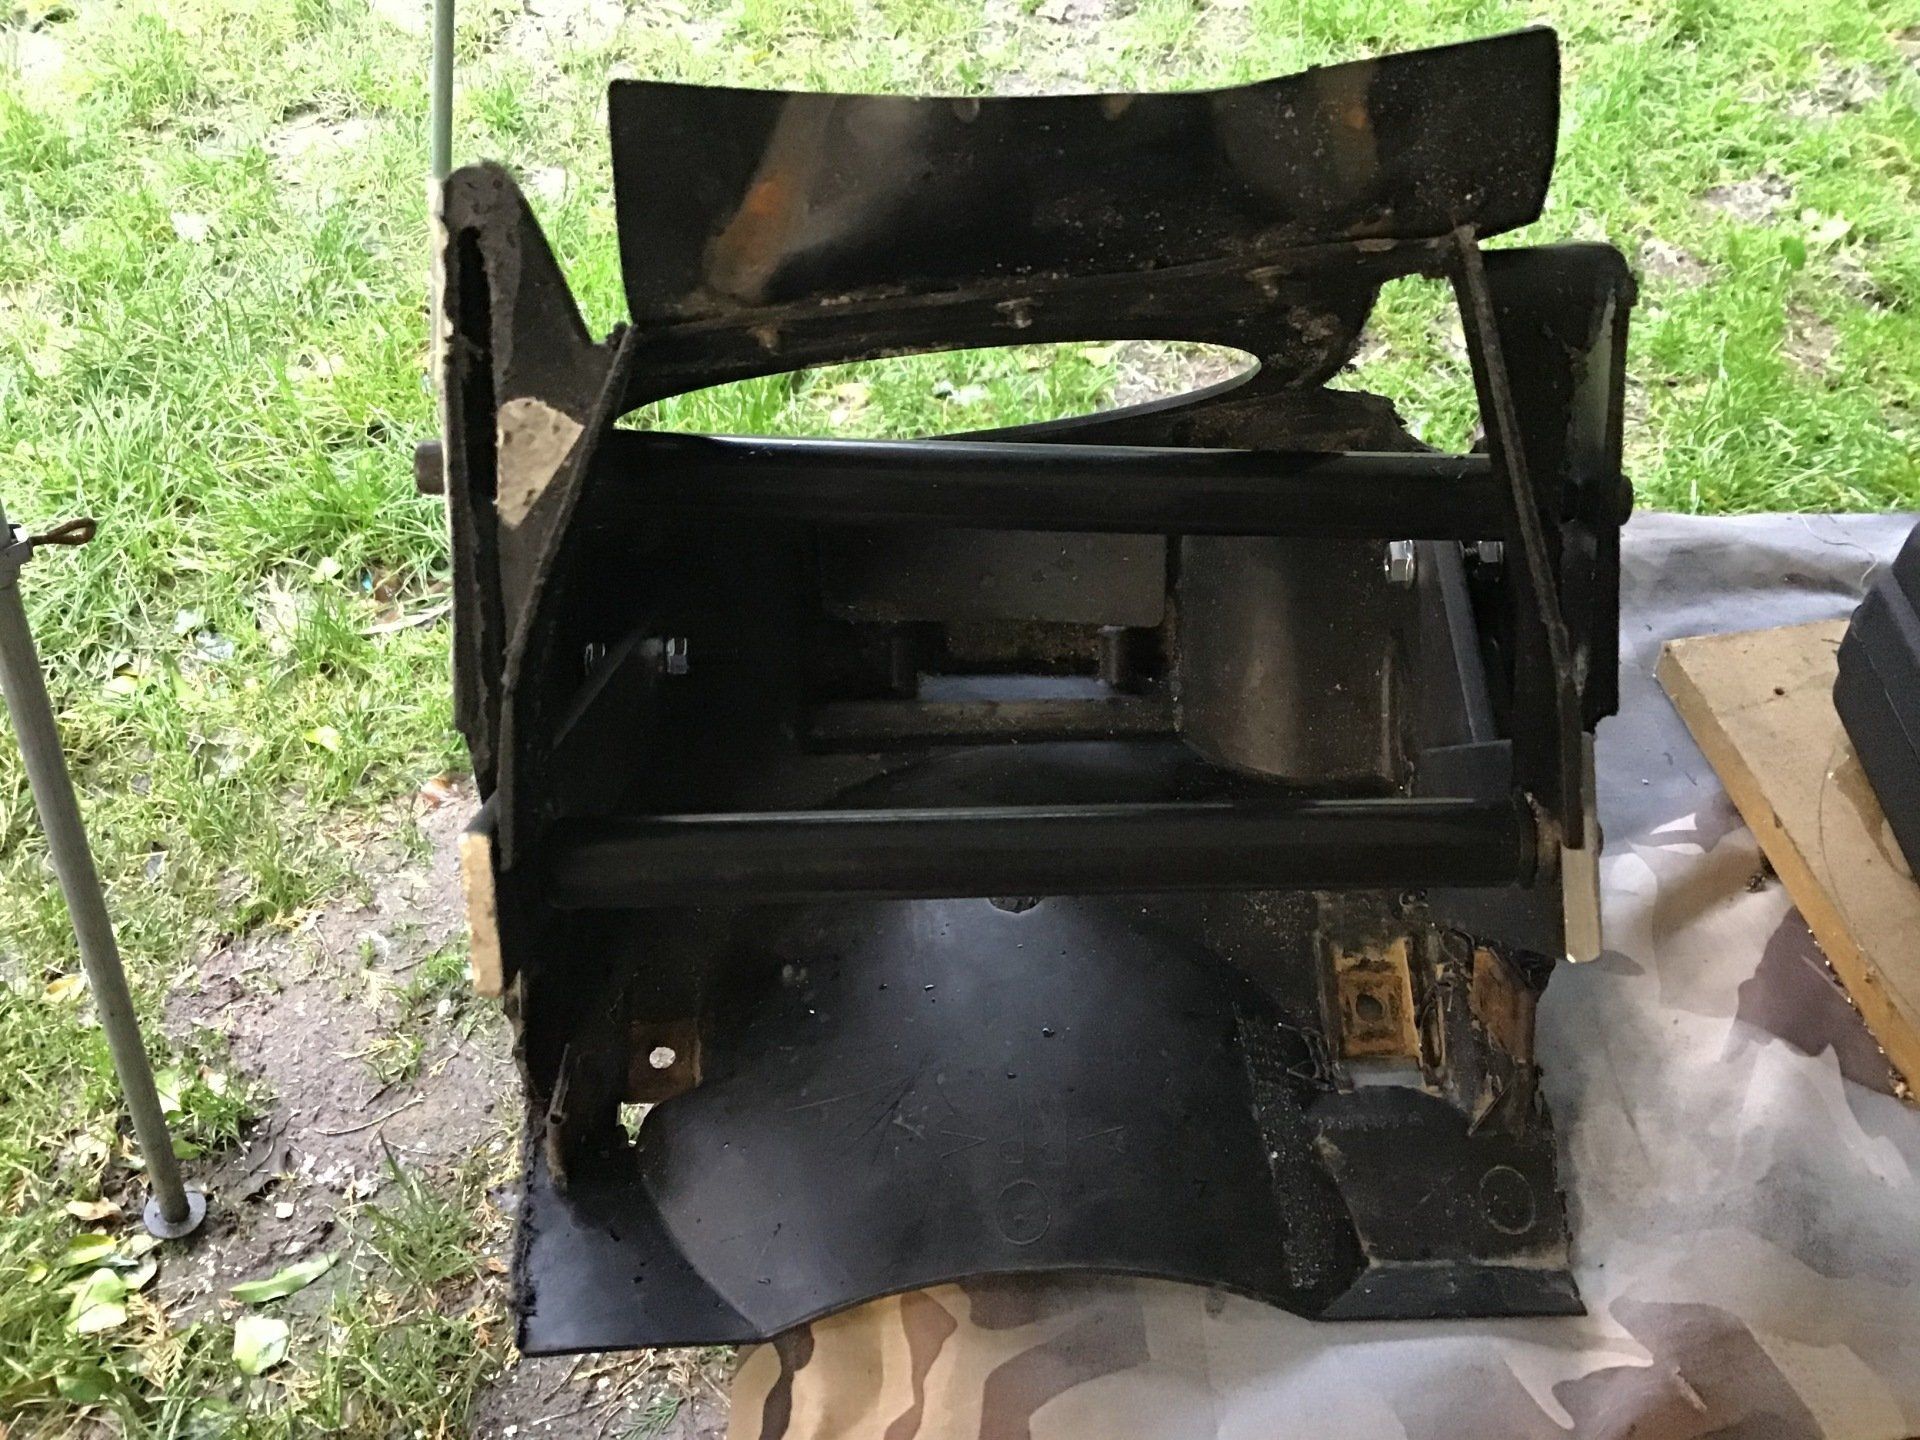
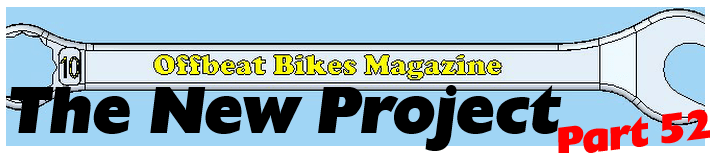
This is a better view of some of that internal support structure. The keen eyed will also spot that I've already had a slight change of plan and cut even more of the plastic away from the front of the air box.
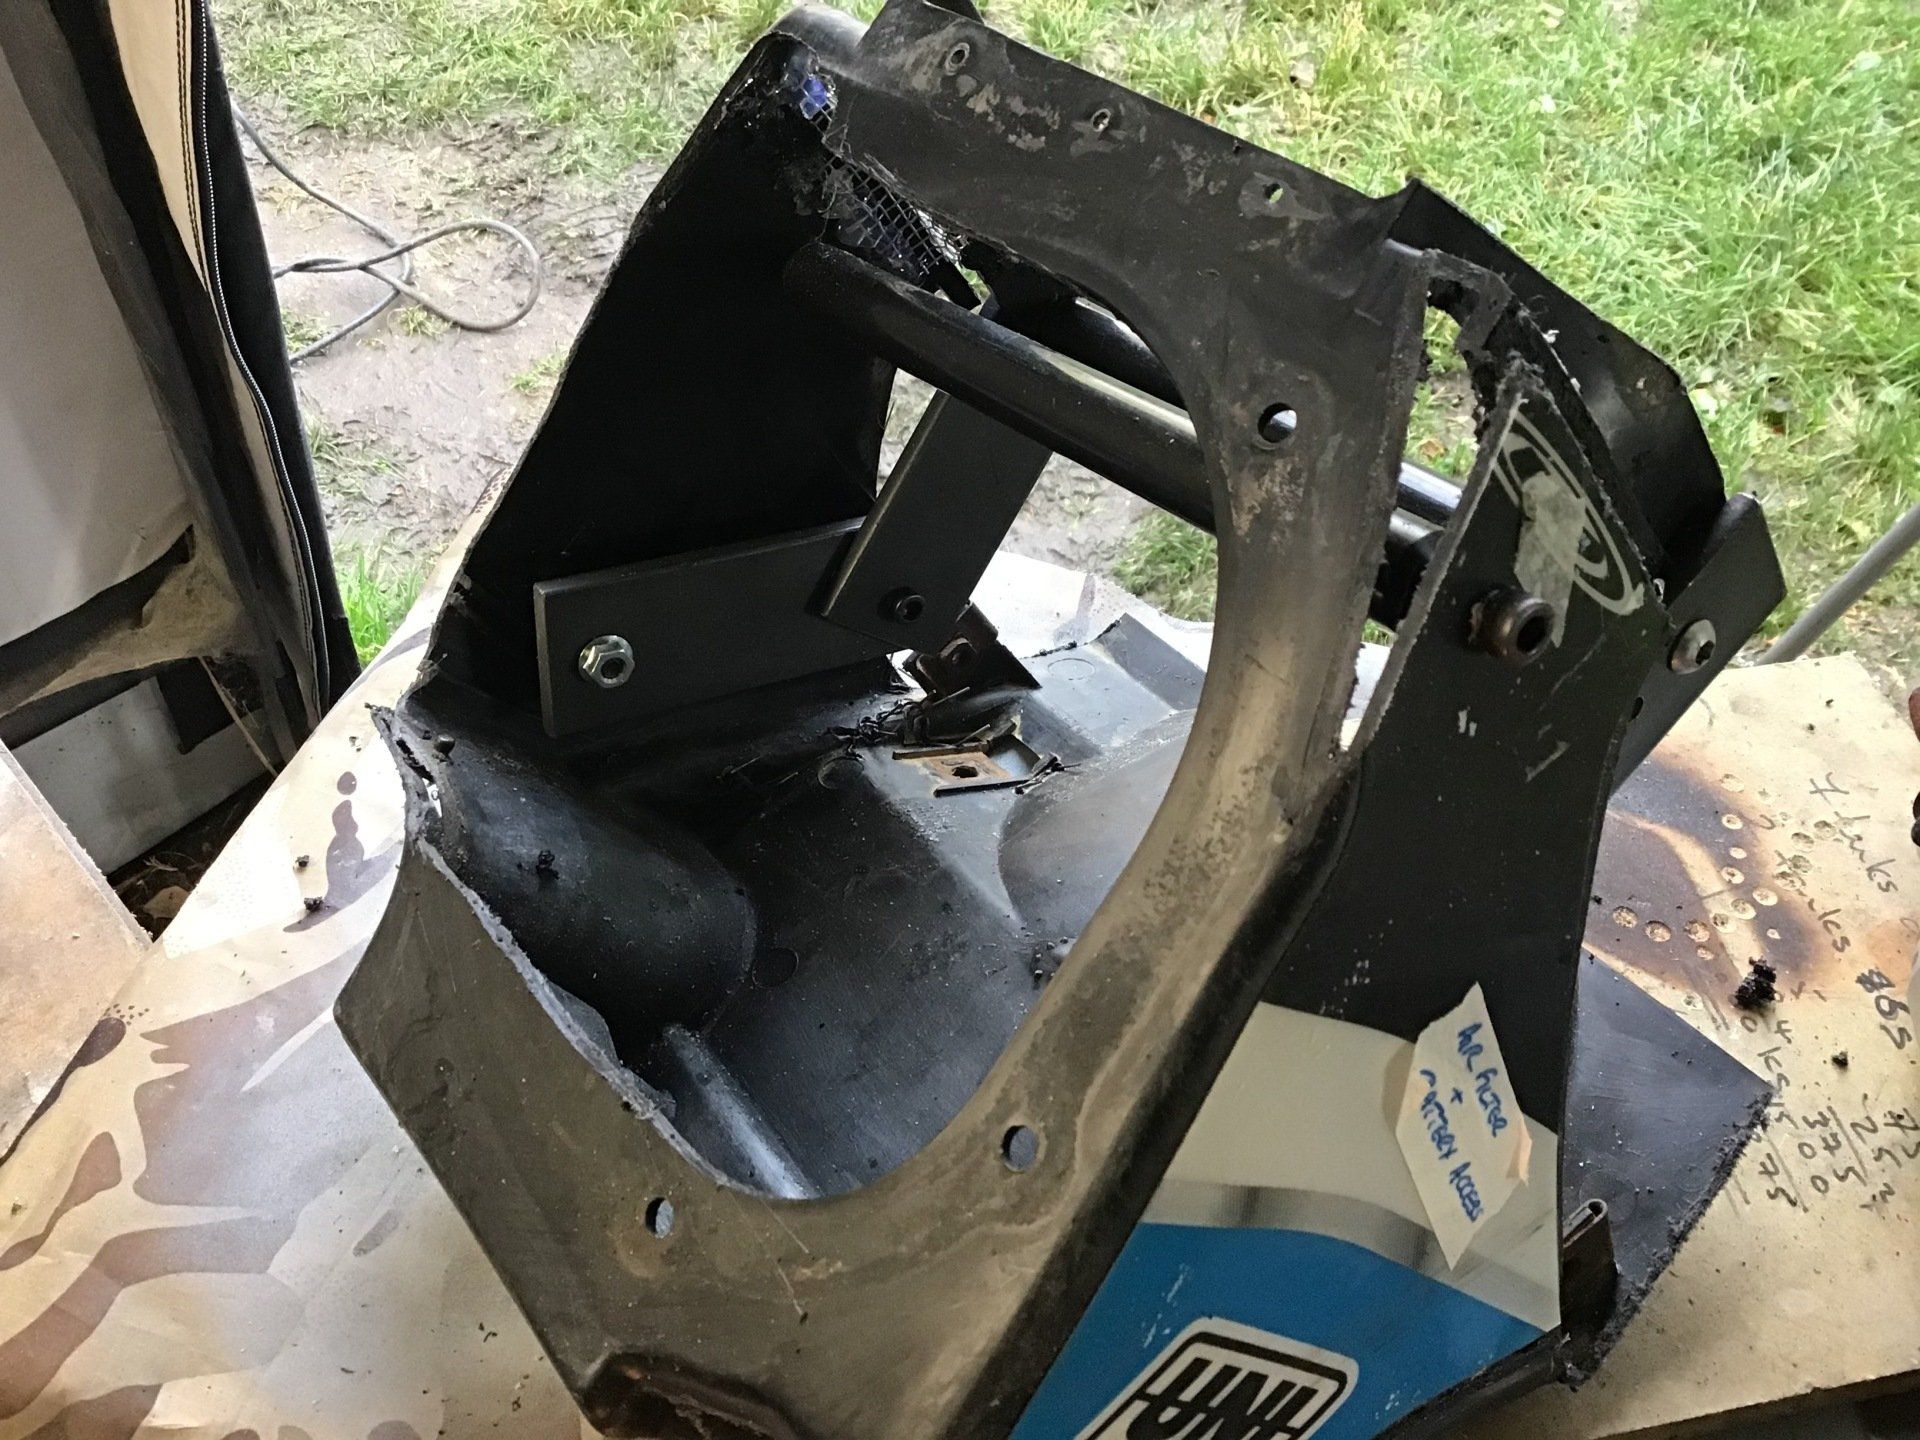
And now I've filled up the gap with the aid of some MDF and a glue gun!
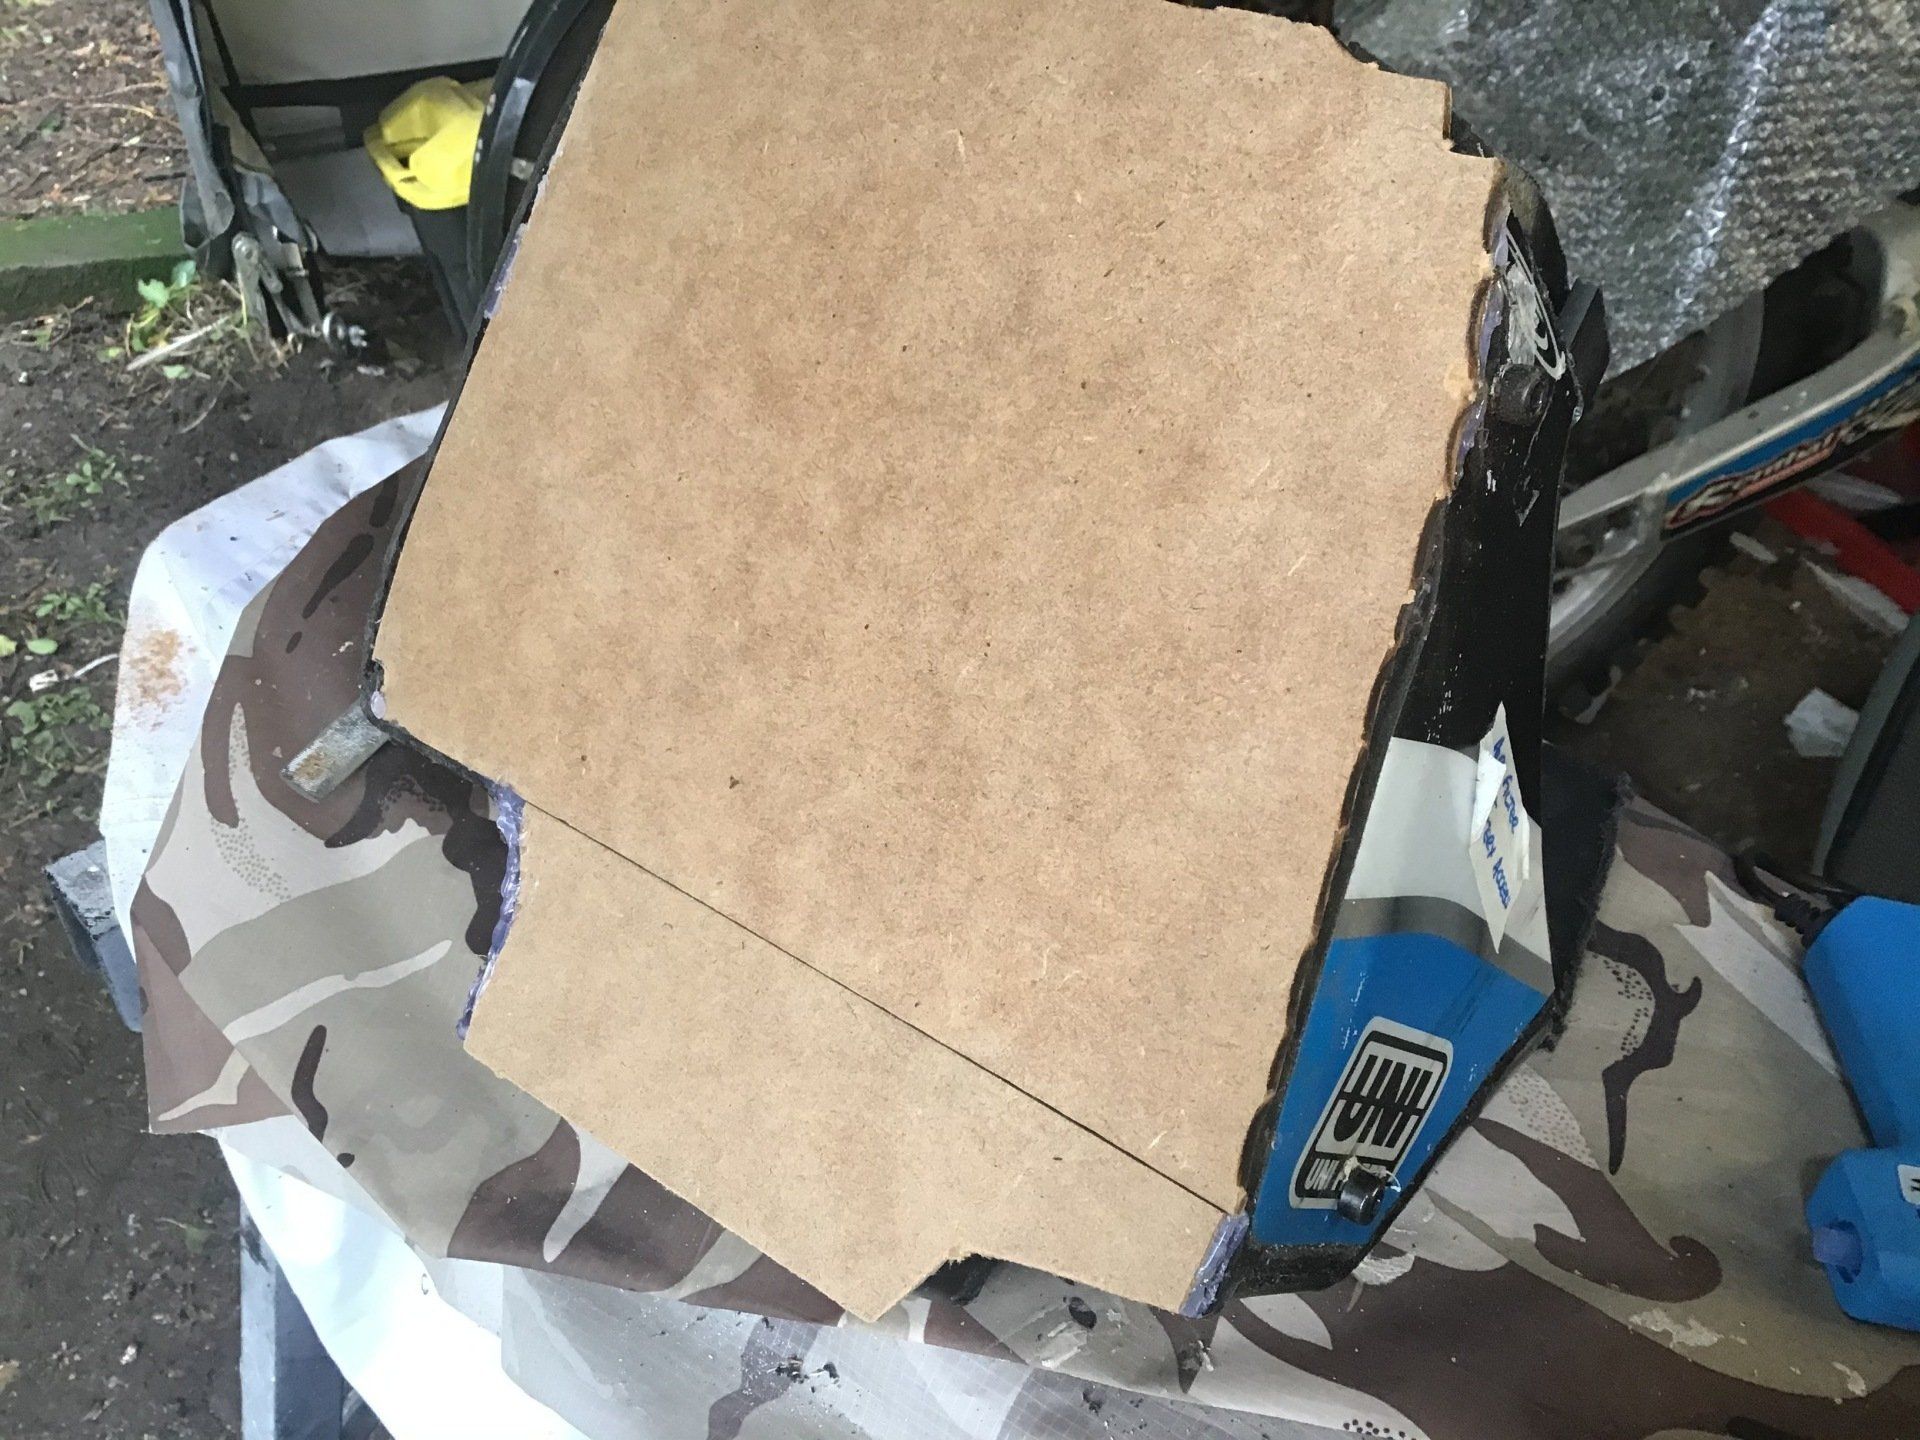
Just checking that the air box (with added MDF) still fits the gap.
Now, I wish I could tell you the exact plan for the air box but it's all a bit fluid at the moment. Or, to be more honest, I still don't have a plan and I'm winging it in the hope that eventually it'll all come good. Let's see if I've made more progress with that plan next week...
Another week of cutting pieces off and sticking pieces back onto the air box. I intend to use the side panels as the sides of the air box, so superfluous plastic is cut away and some mdf 'wings' added at the back where the third fixing of the side panel will go.
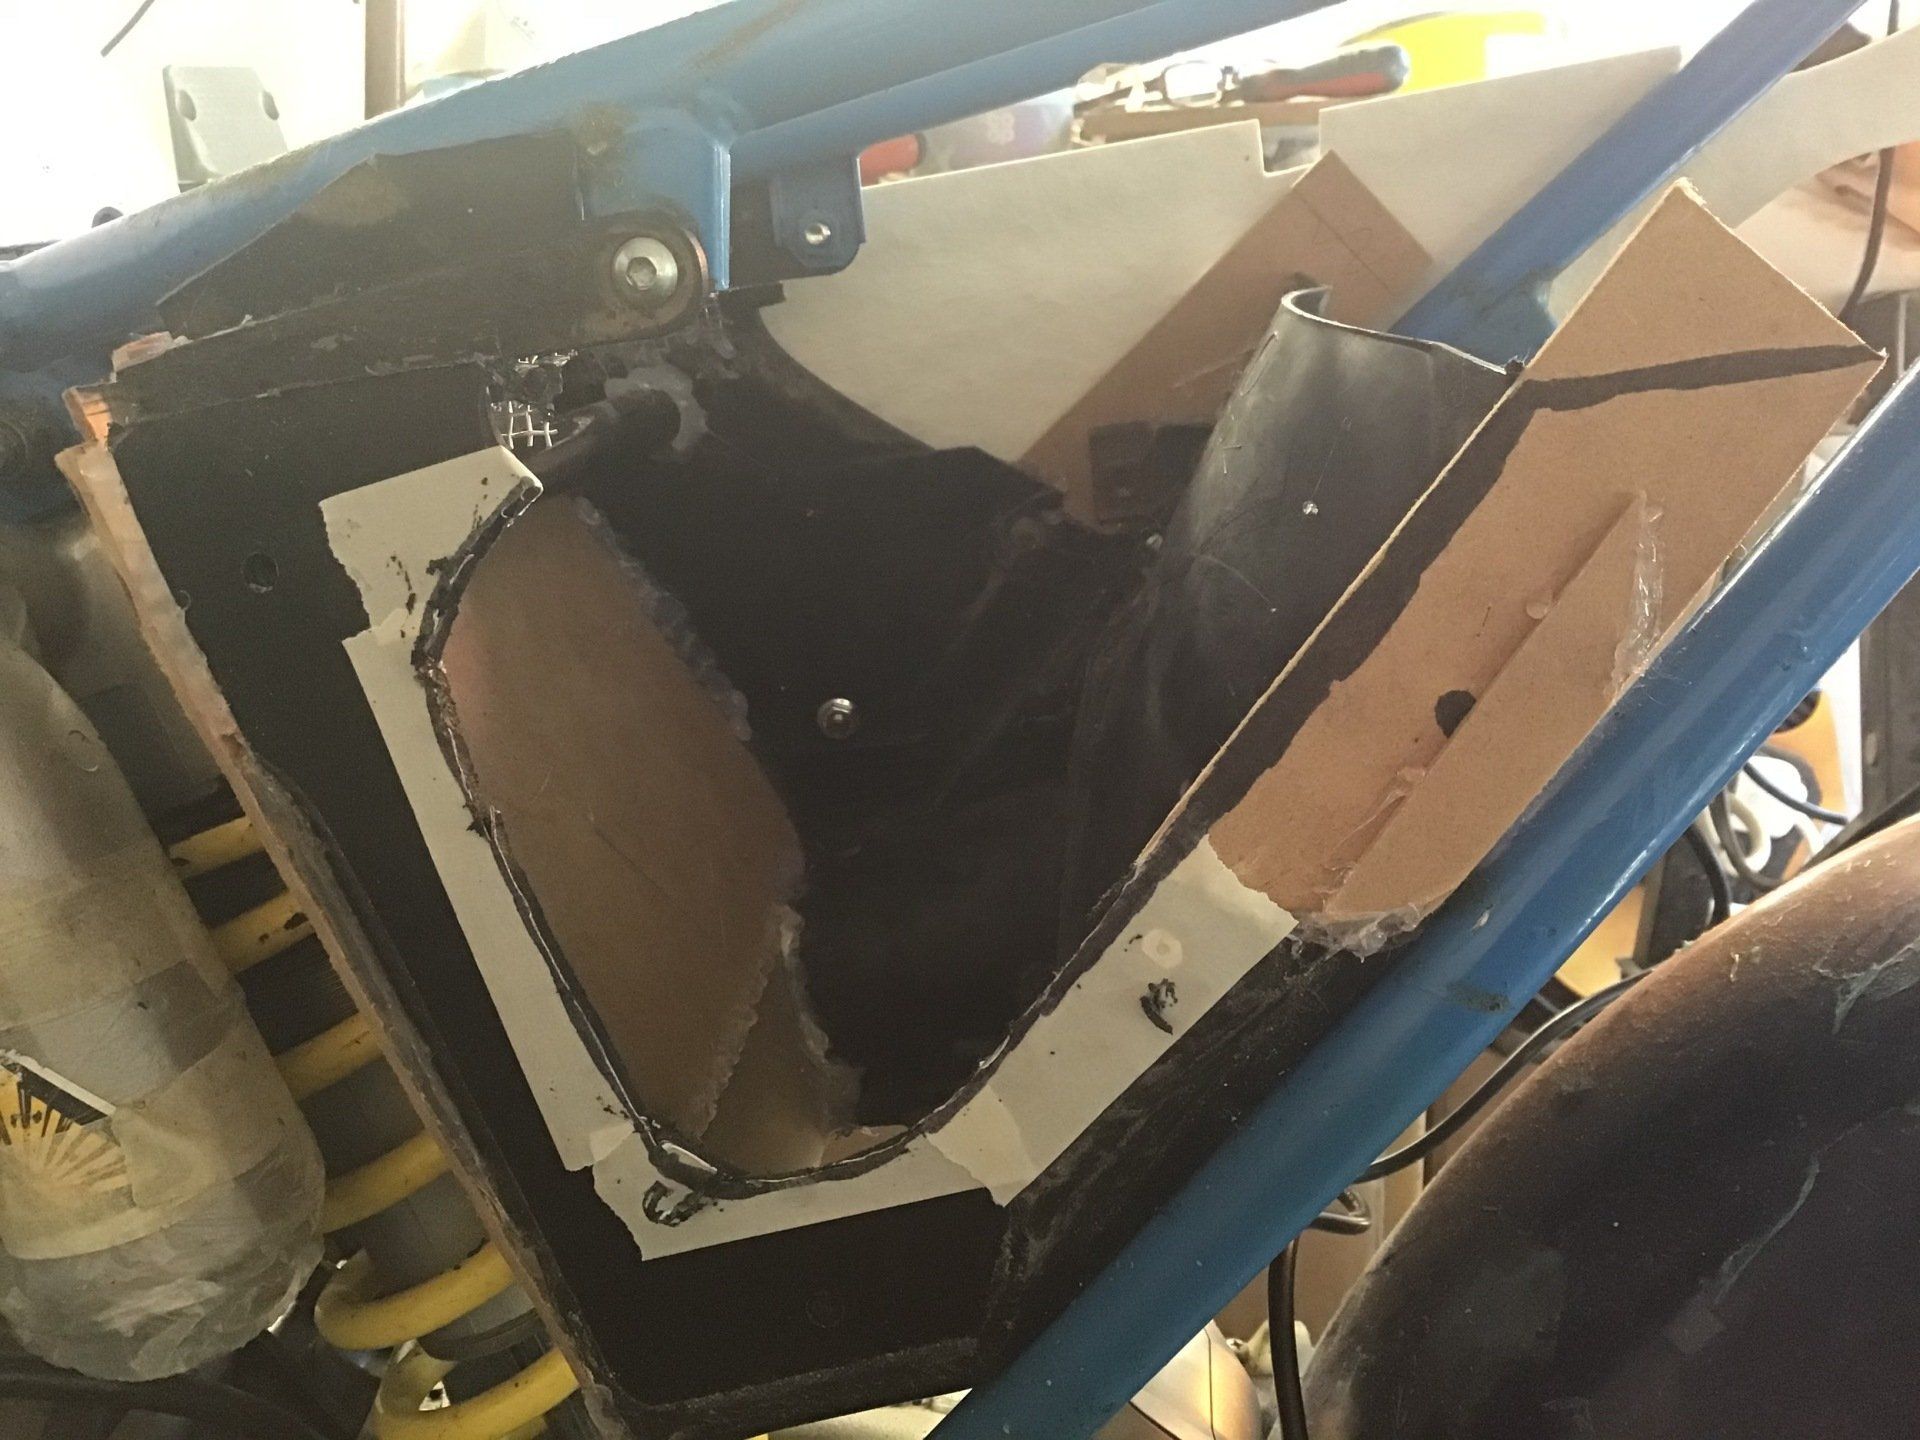
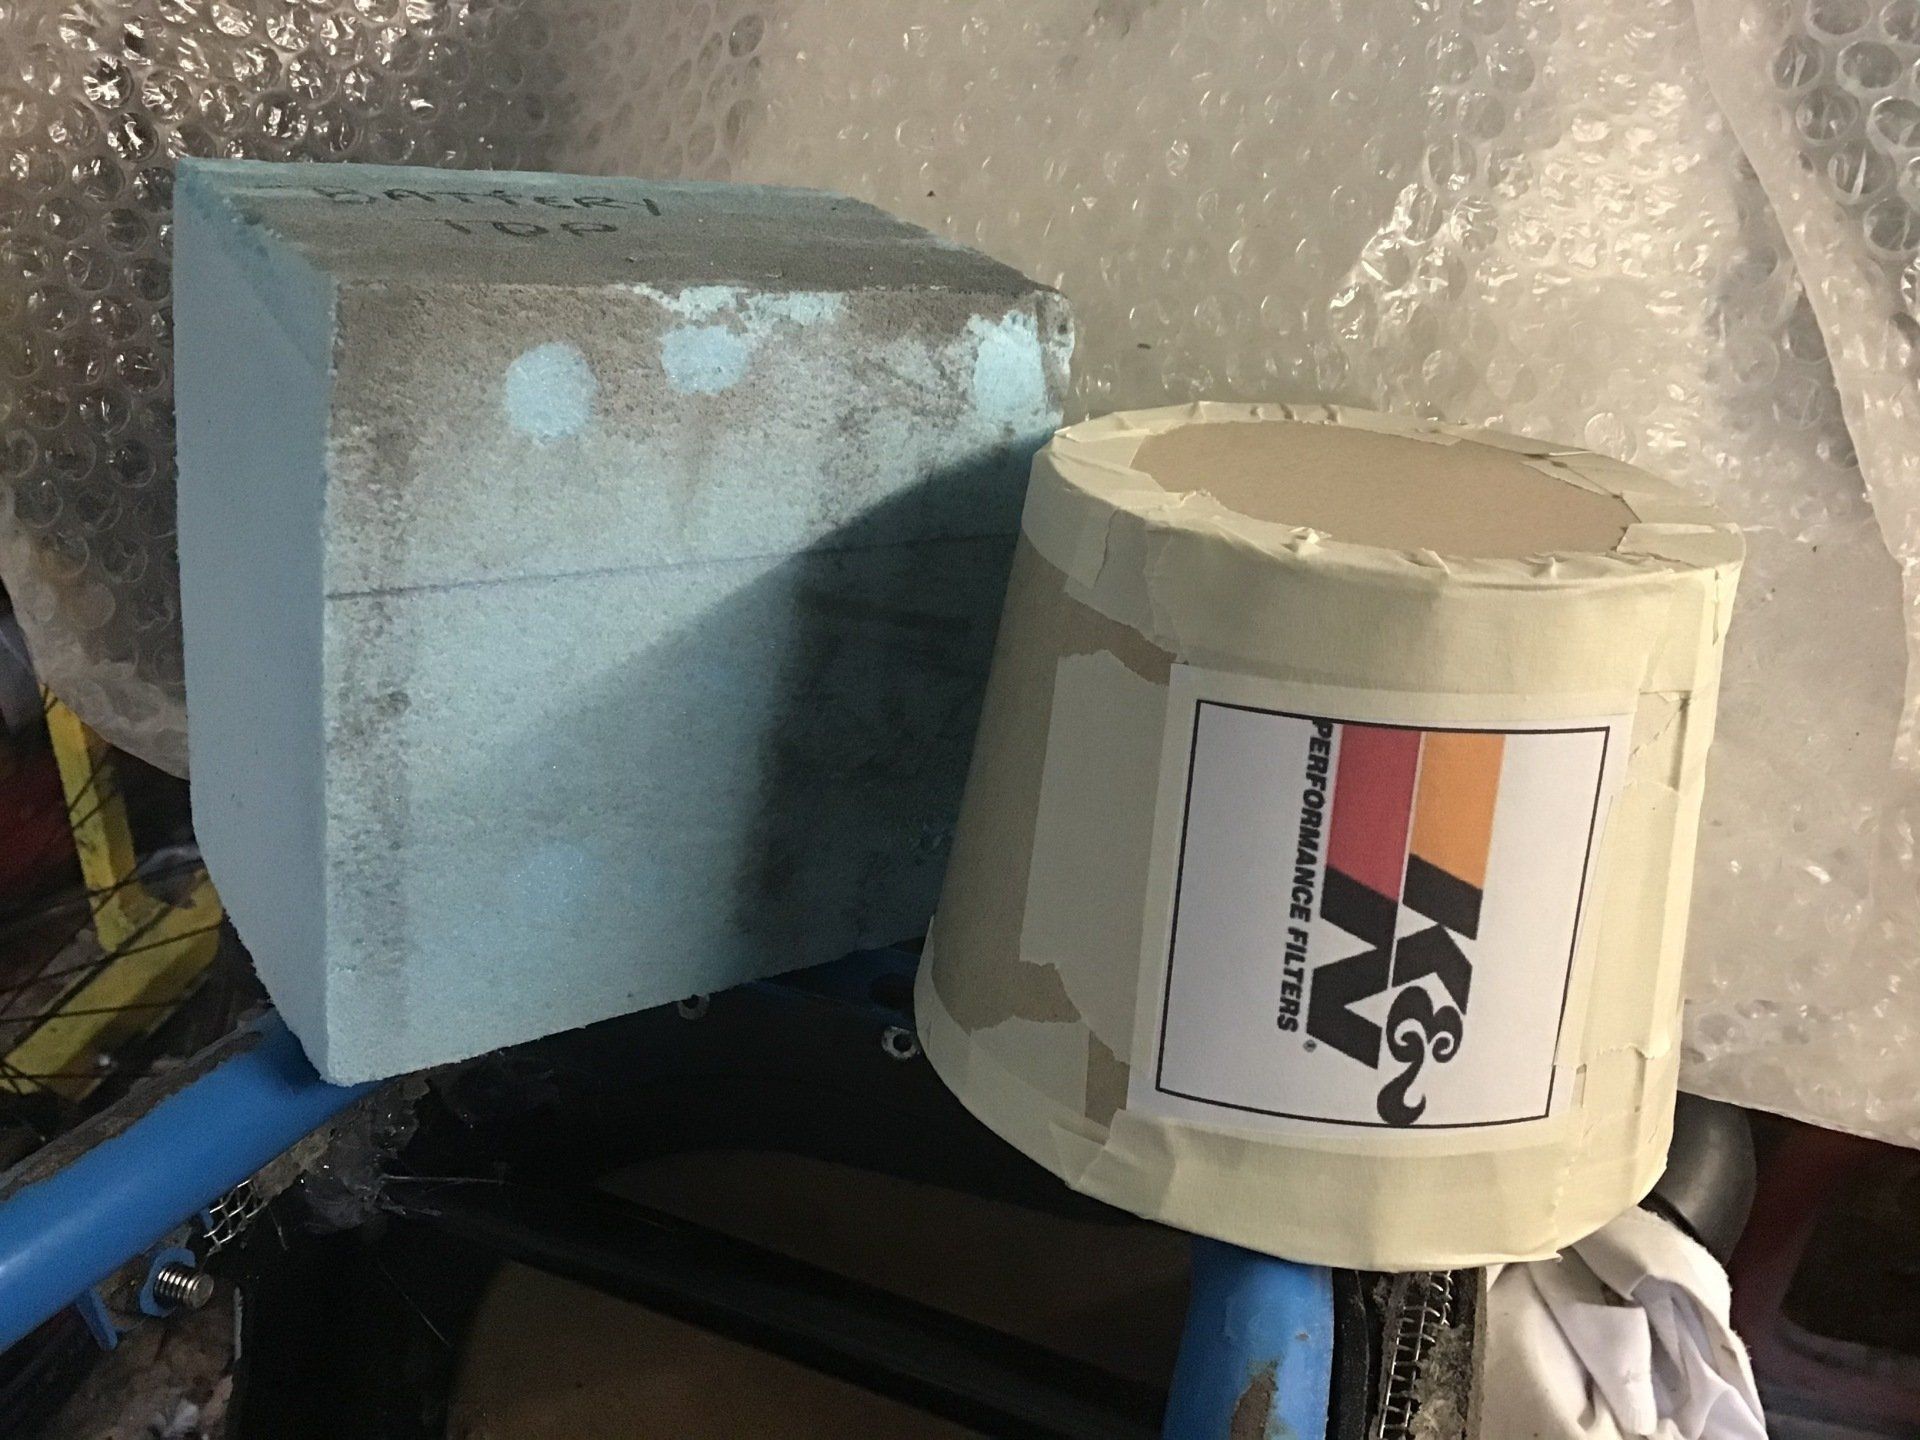
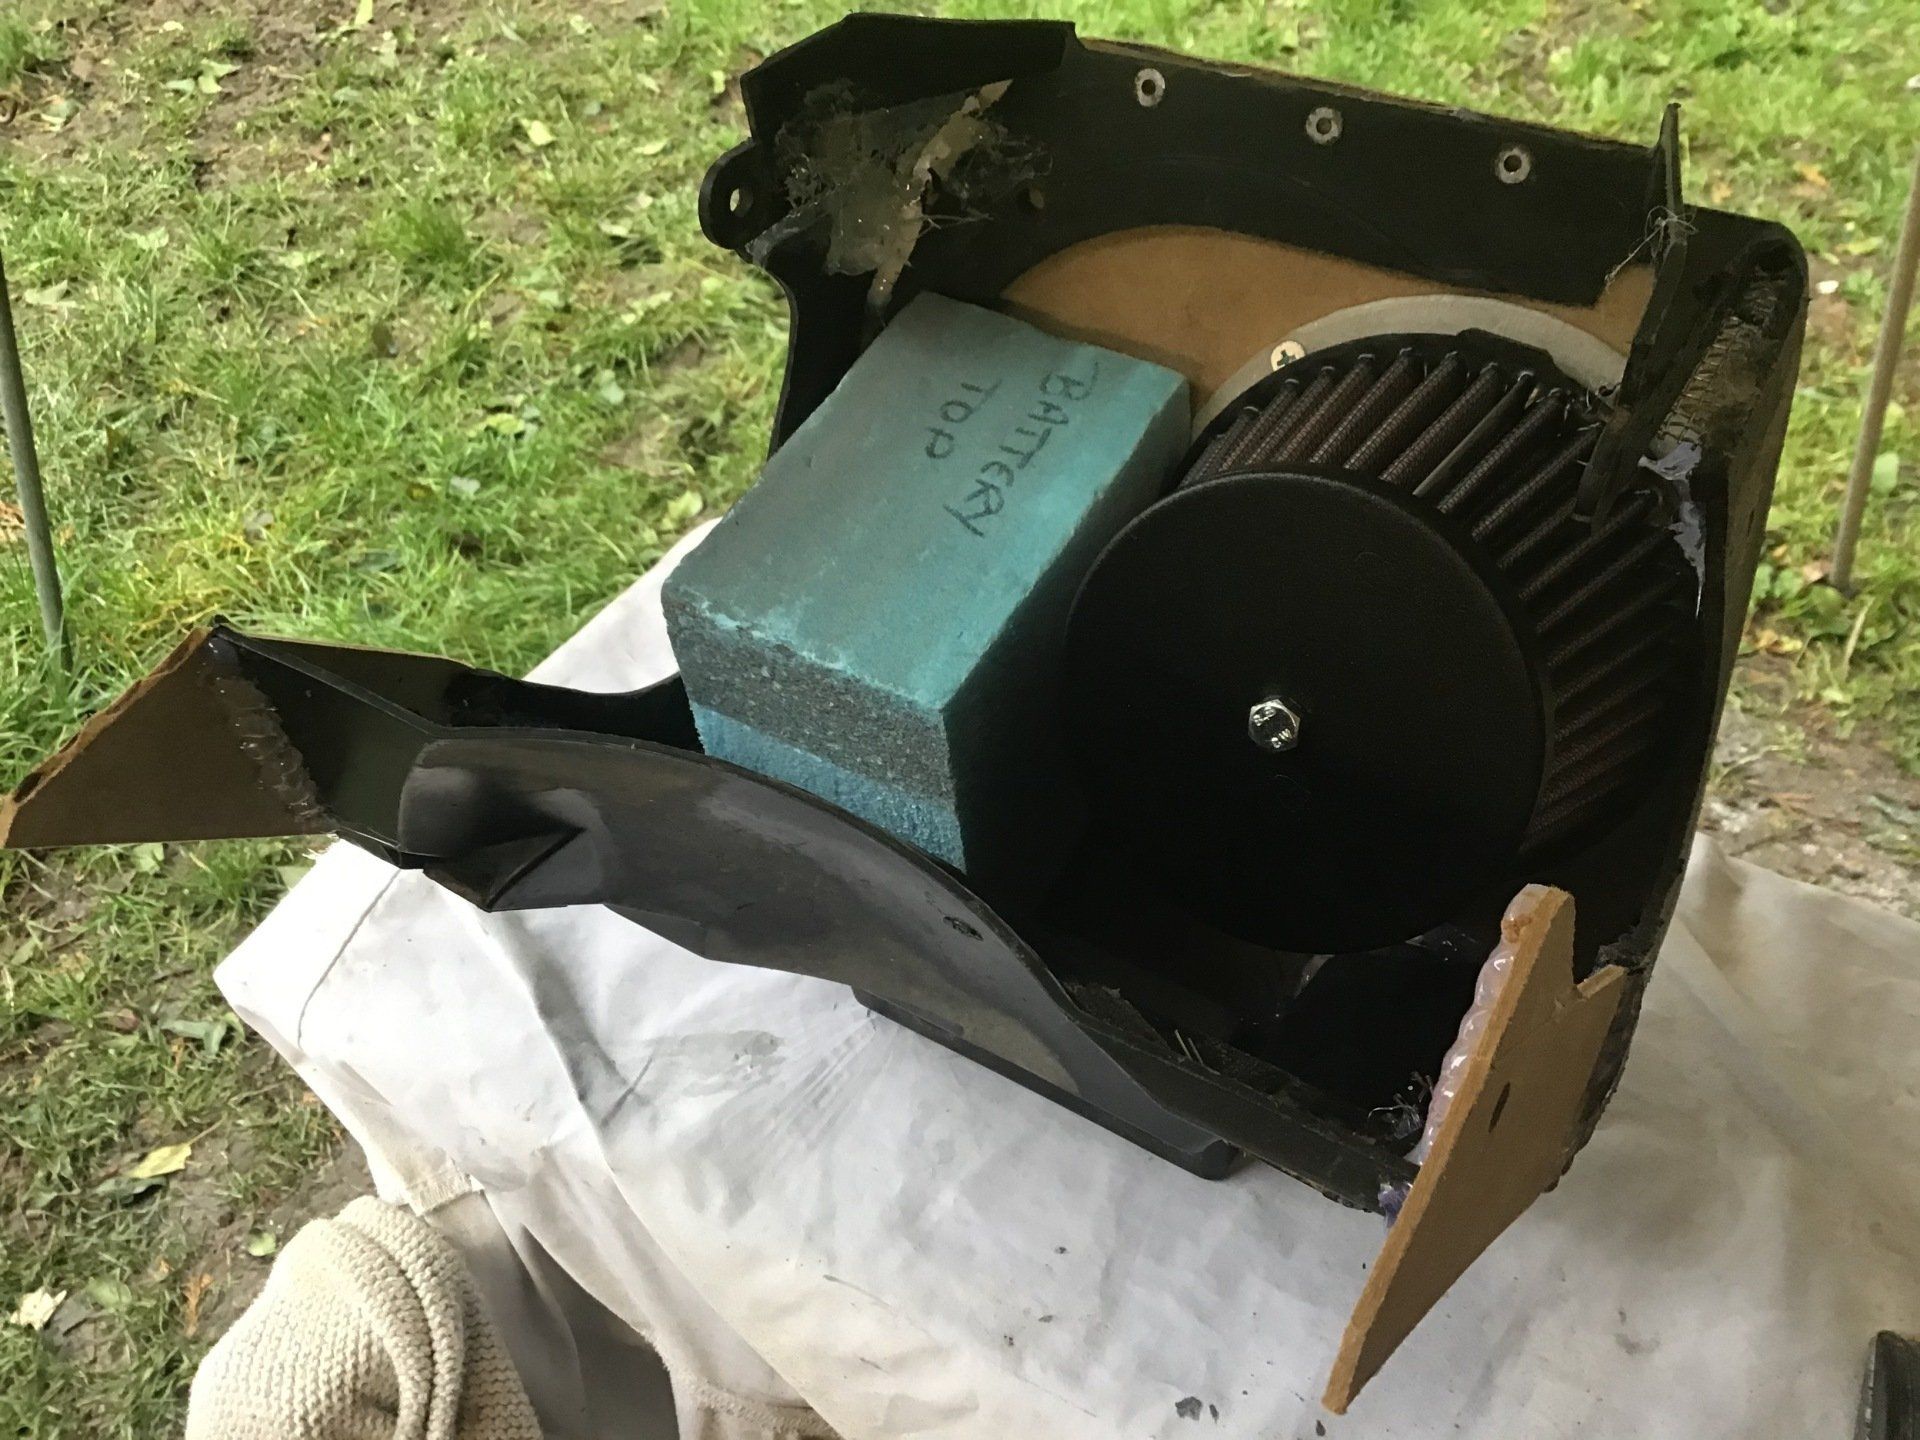
I envisaged that the battery would fit like this, but fitting it the other way would leave more room for the air filter.
Mounting the battery this way allows more room for an air filter alongside. This is a YZ80 air filter that usually resides on my MX bike, but I think it will provide adequate air flow for this application as well.
Although foam air filters are fairly cheap, they are used with a plastic 'cage' inside that I'd also need to purchase (or make). An ebay search revealed that: 1) Very few of these seem to be for sale and 2) Those that are advertised cost more than I want to spend. Further Googling unearthed that K&N made a filter for the YZ80 that didn't use the cage, but at around £50 (if you could find one in stock) that was an even more expensive option. But, by a quirk of fate, a brand new one was for sale as part of a stock clearance at a much more attractive price on ebay. It was obviously a sign, and using the logic (to justify its purchase) that if I couldn't actually use it for this project, I could use it on the MX bike, I bought it.
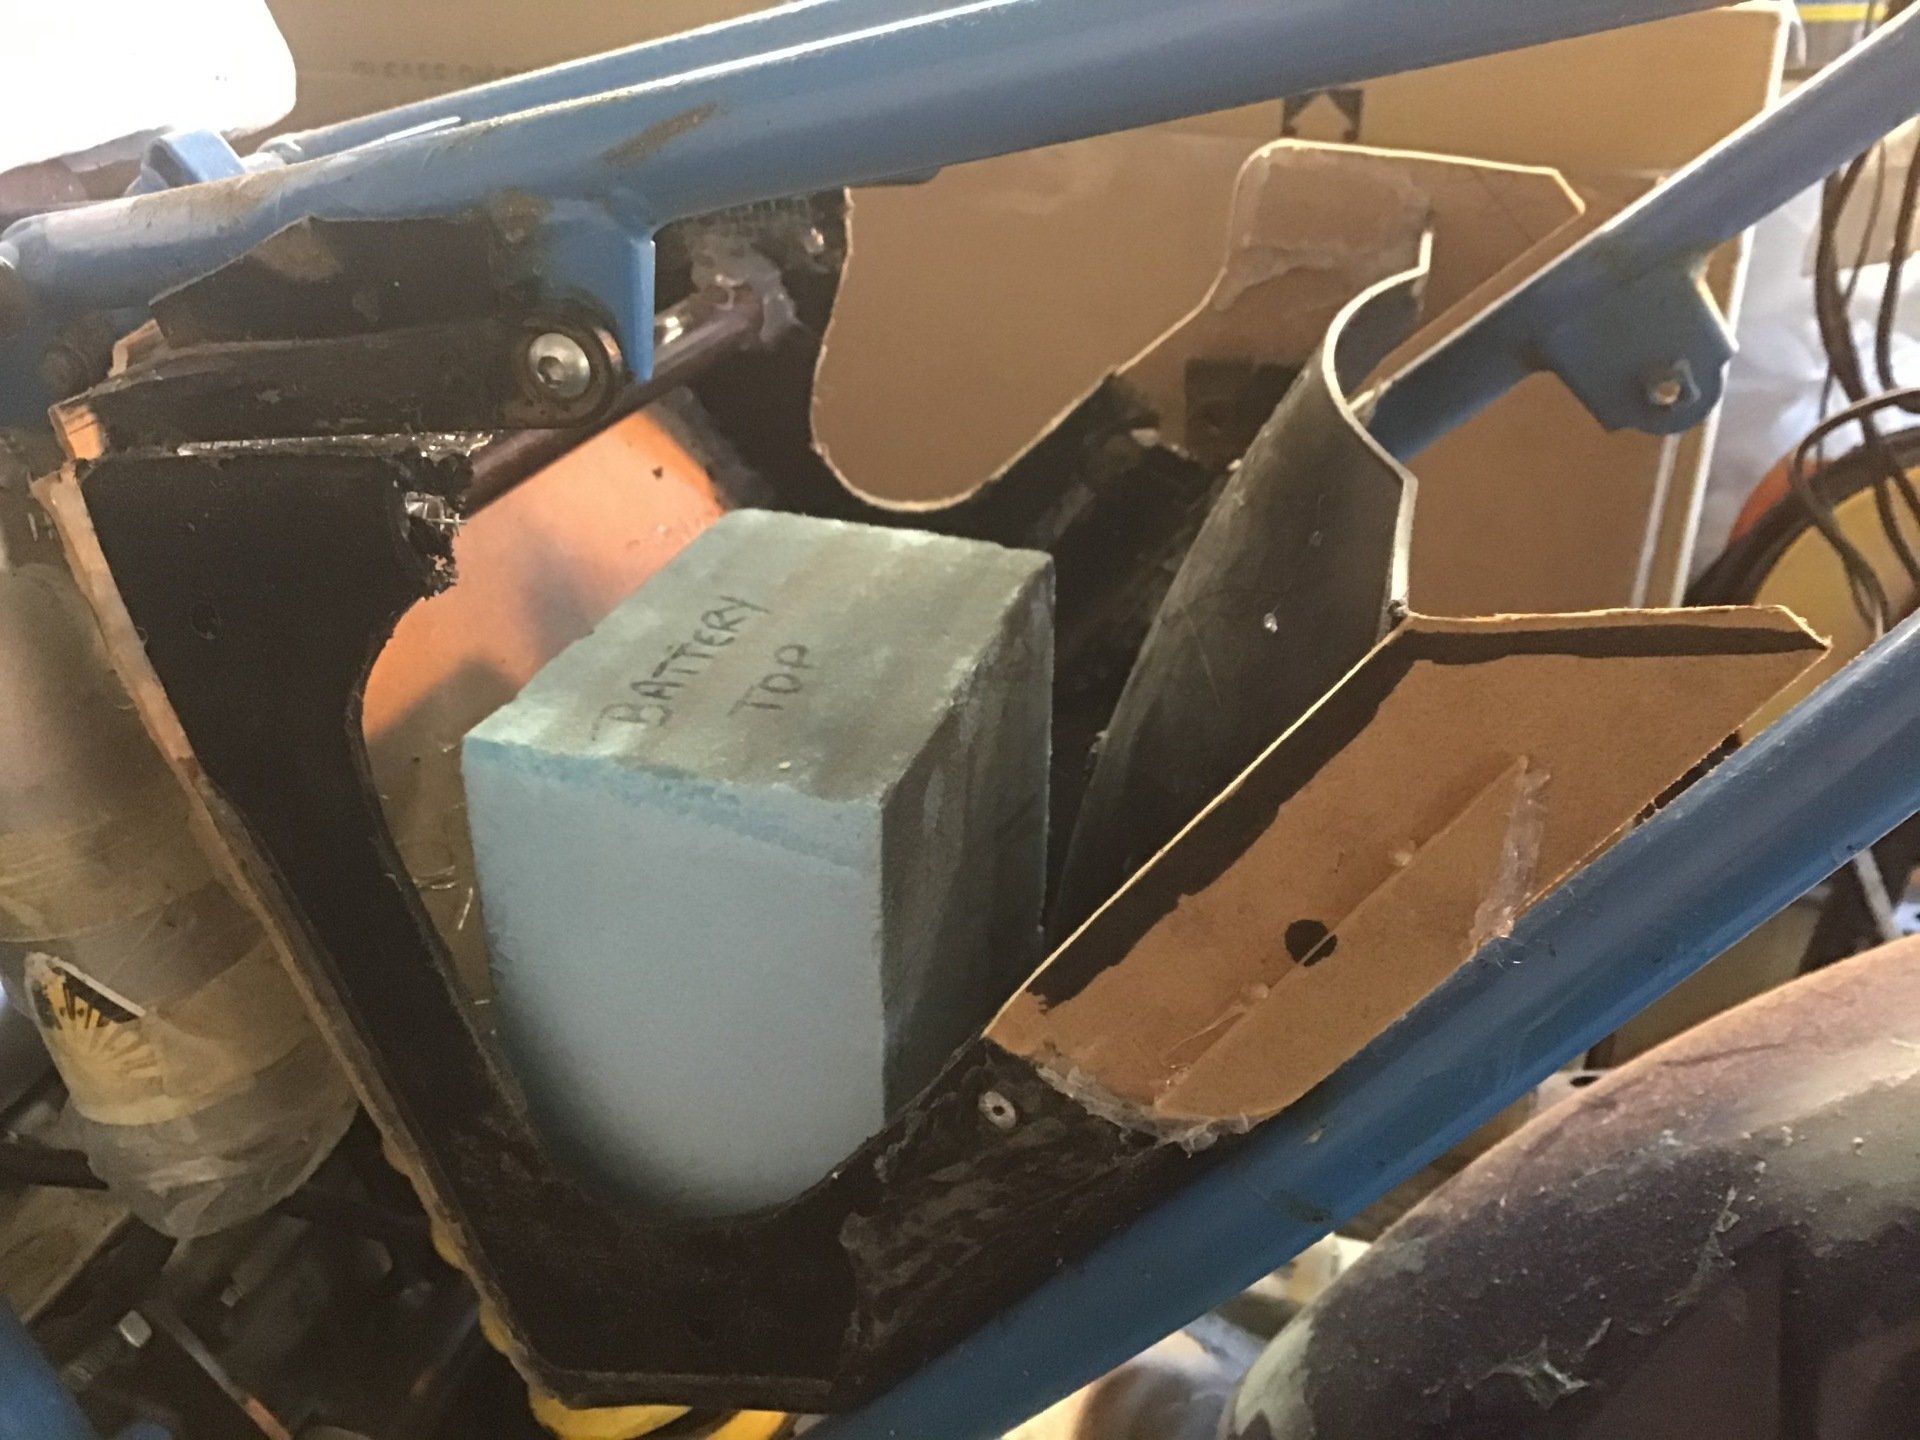
For the battery to fit this way around (and still be accessible by removing the side panel) it needed to be lowered in the air box. Time to cut some more bits off again!
Although foam air filters are fairly cheap, they are used with a plastic 'cage' inside that I'd also need to purchase (or make). An ebay search revealed that: 1) Very few of these seem to be for sale and 2) Those that are advertised cost more than I want to spend. Further Googling unearthed that K&N made a filter for the YZ80 that didn't use the cage, but at around £50 (if you could find one in stock) that was an even more expensive option. But, by a quirk of fate, a brand new one was for sale as part of a stock clearance at a much more attractive price on ebay. It was obviously a sign, and using the logic (to justify its purchase) that if I couldn't actually use it for this project, I could use it on the MX bike, I bought it.
For the battery to fit this way around (and still be accessible by removing the side panel) it needed to be lowered in the air box. Time to cut some more bits off again!
While waiting for the postman to deliver the real K&N filter, the blue foam dummy battery was joined by a life size cardboard model of the air filter.
This is the start of modifying the air box to suit the new battery location...
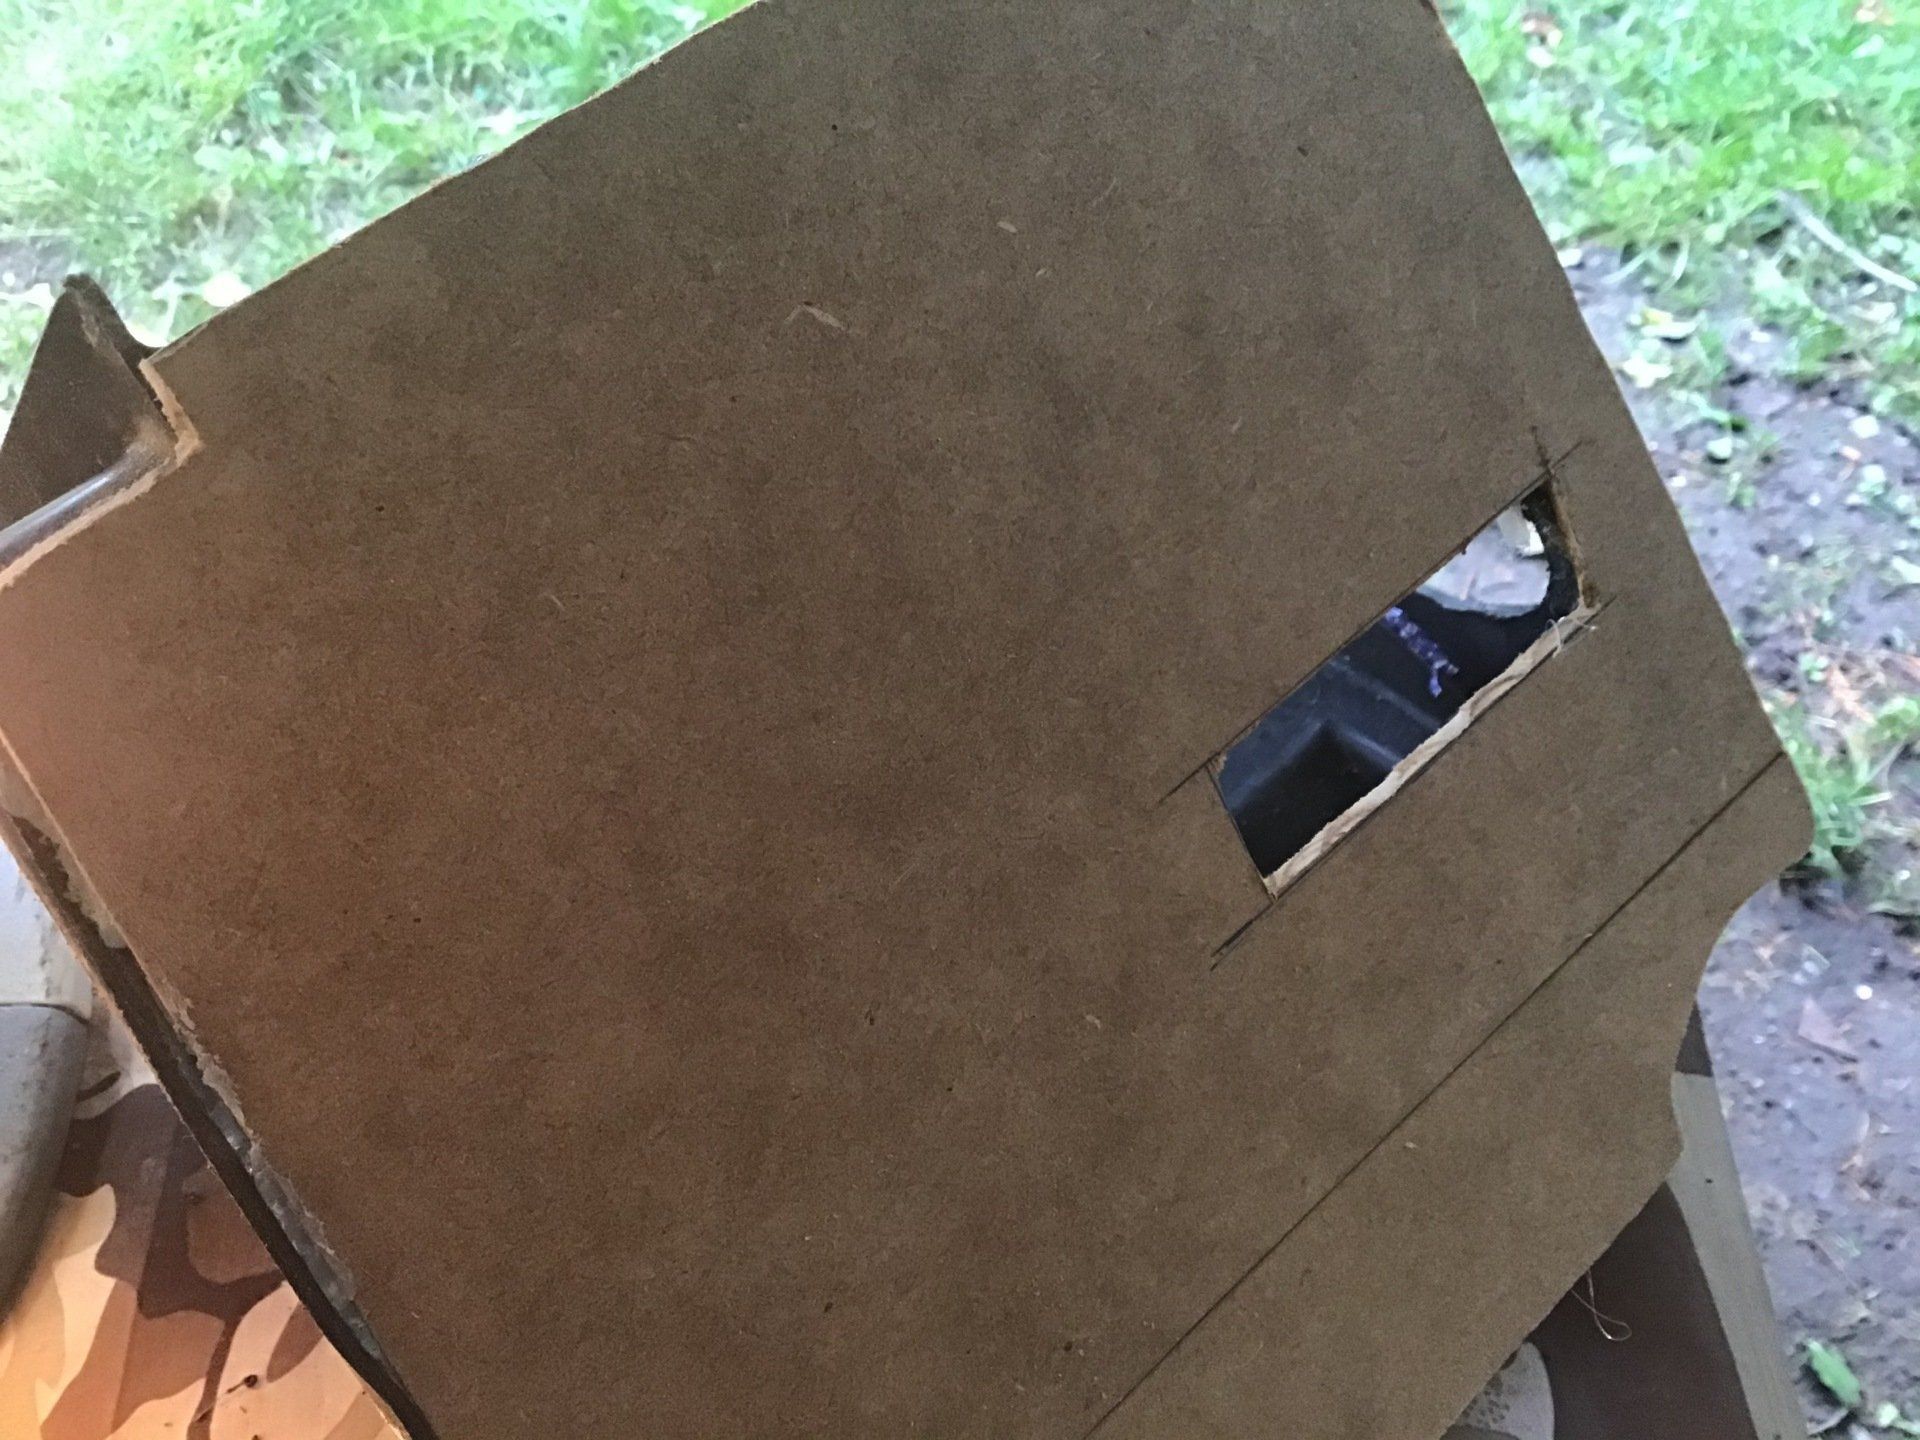
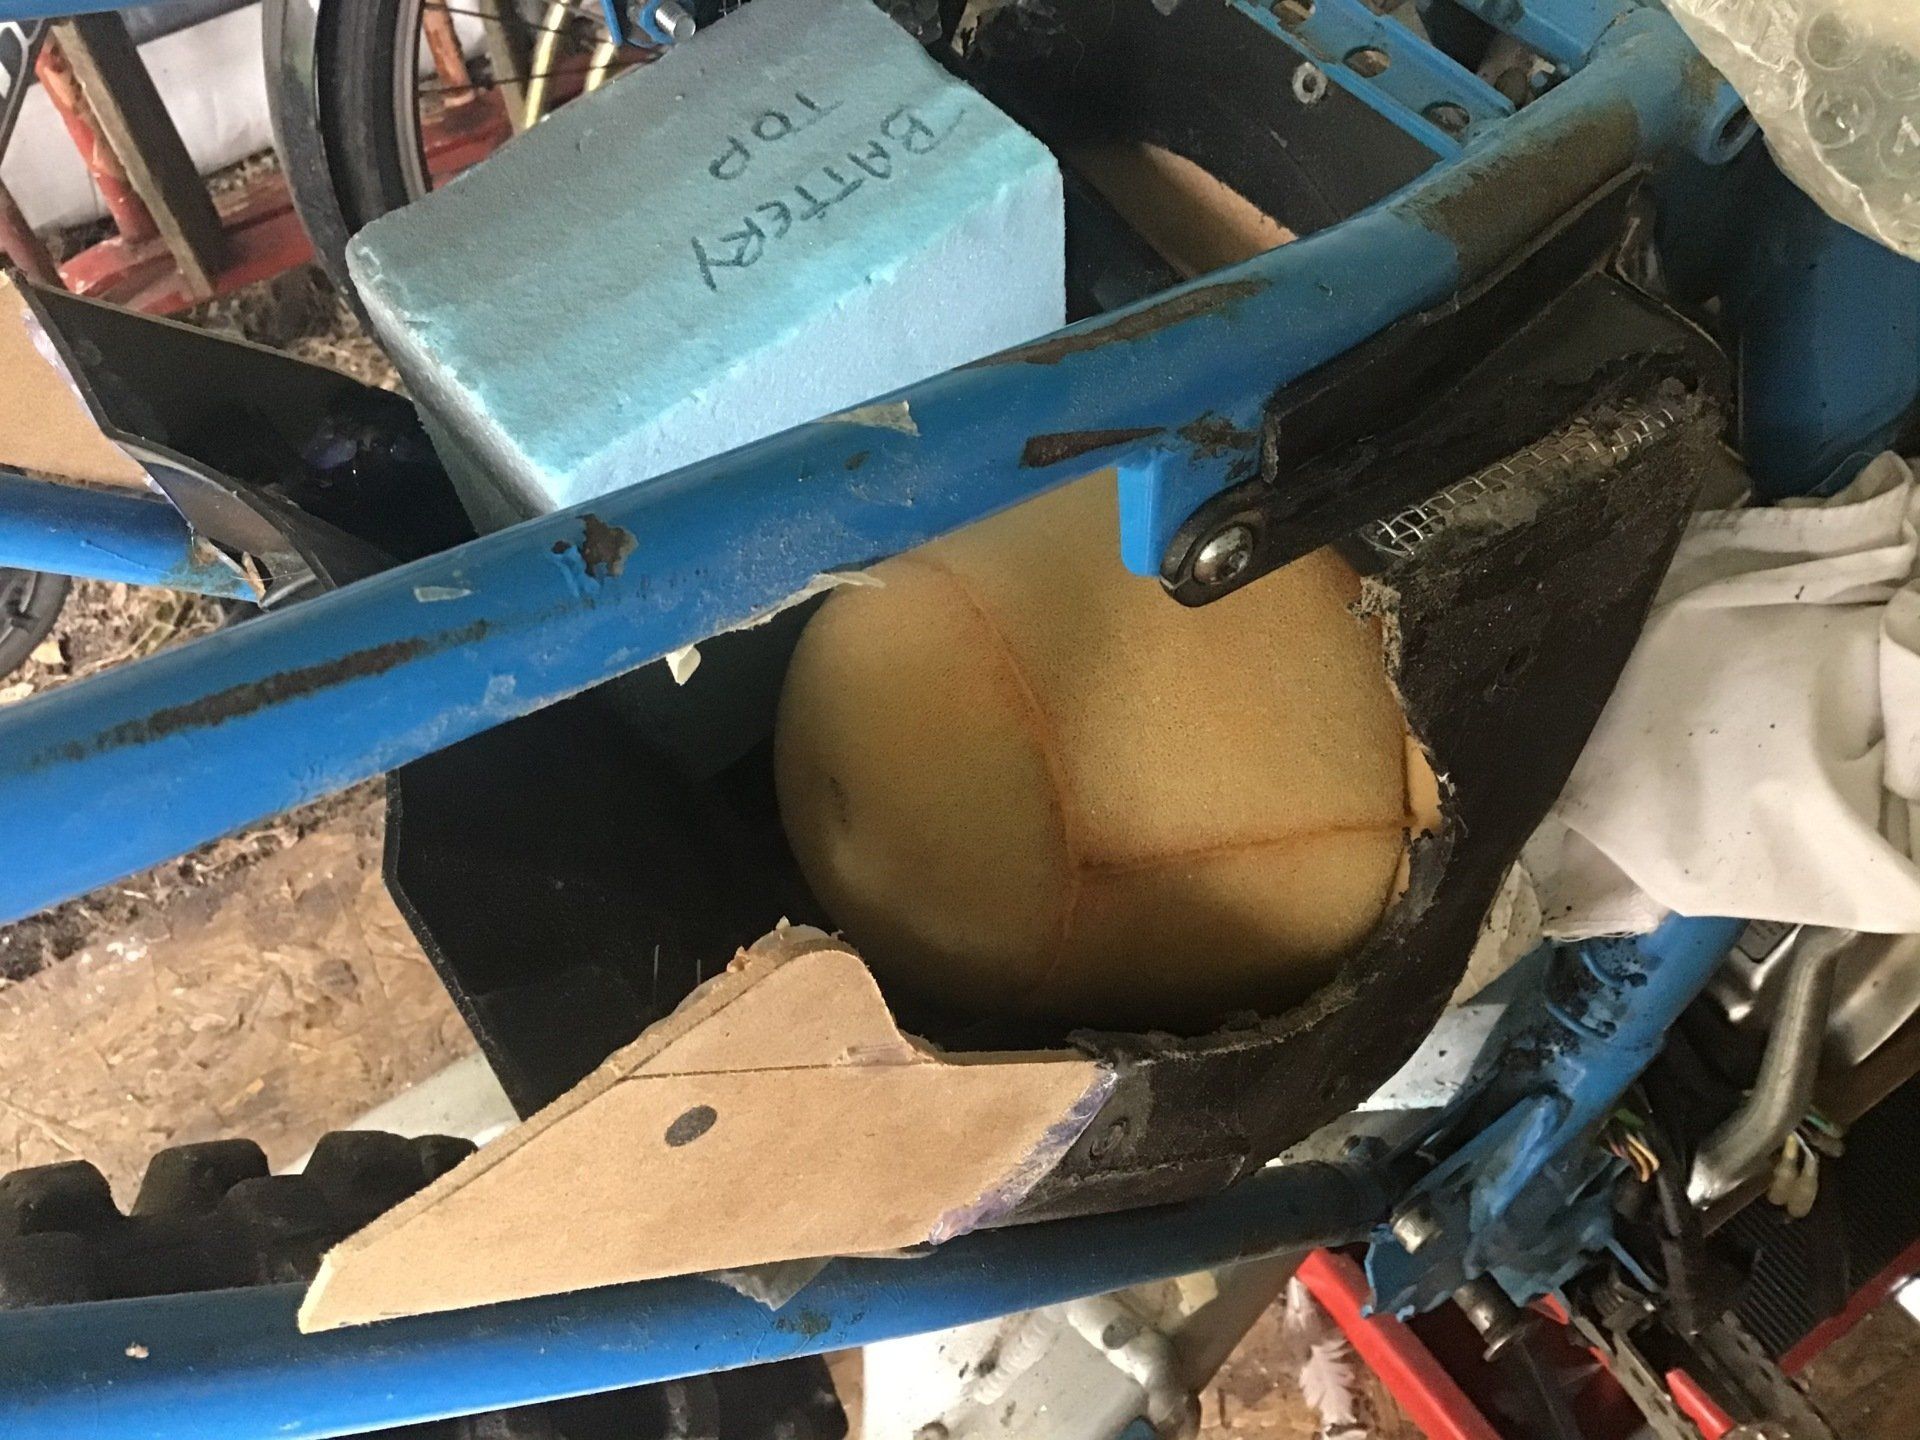
In the end I had to cut away much more than I anticipated to get the battery where I wanted it.
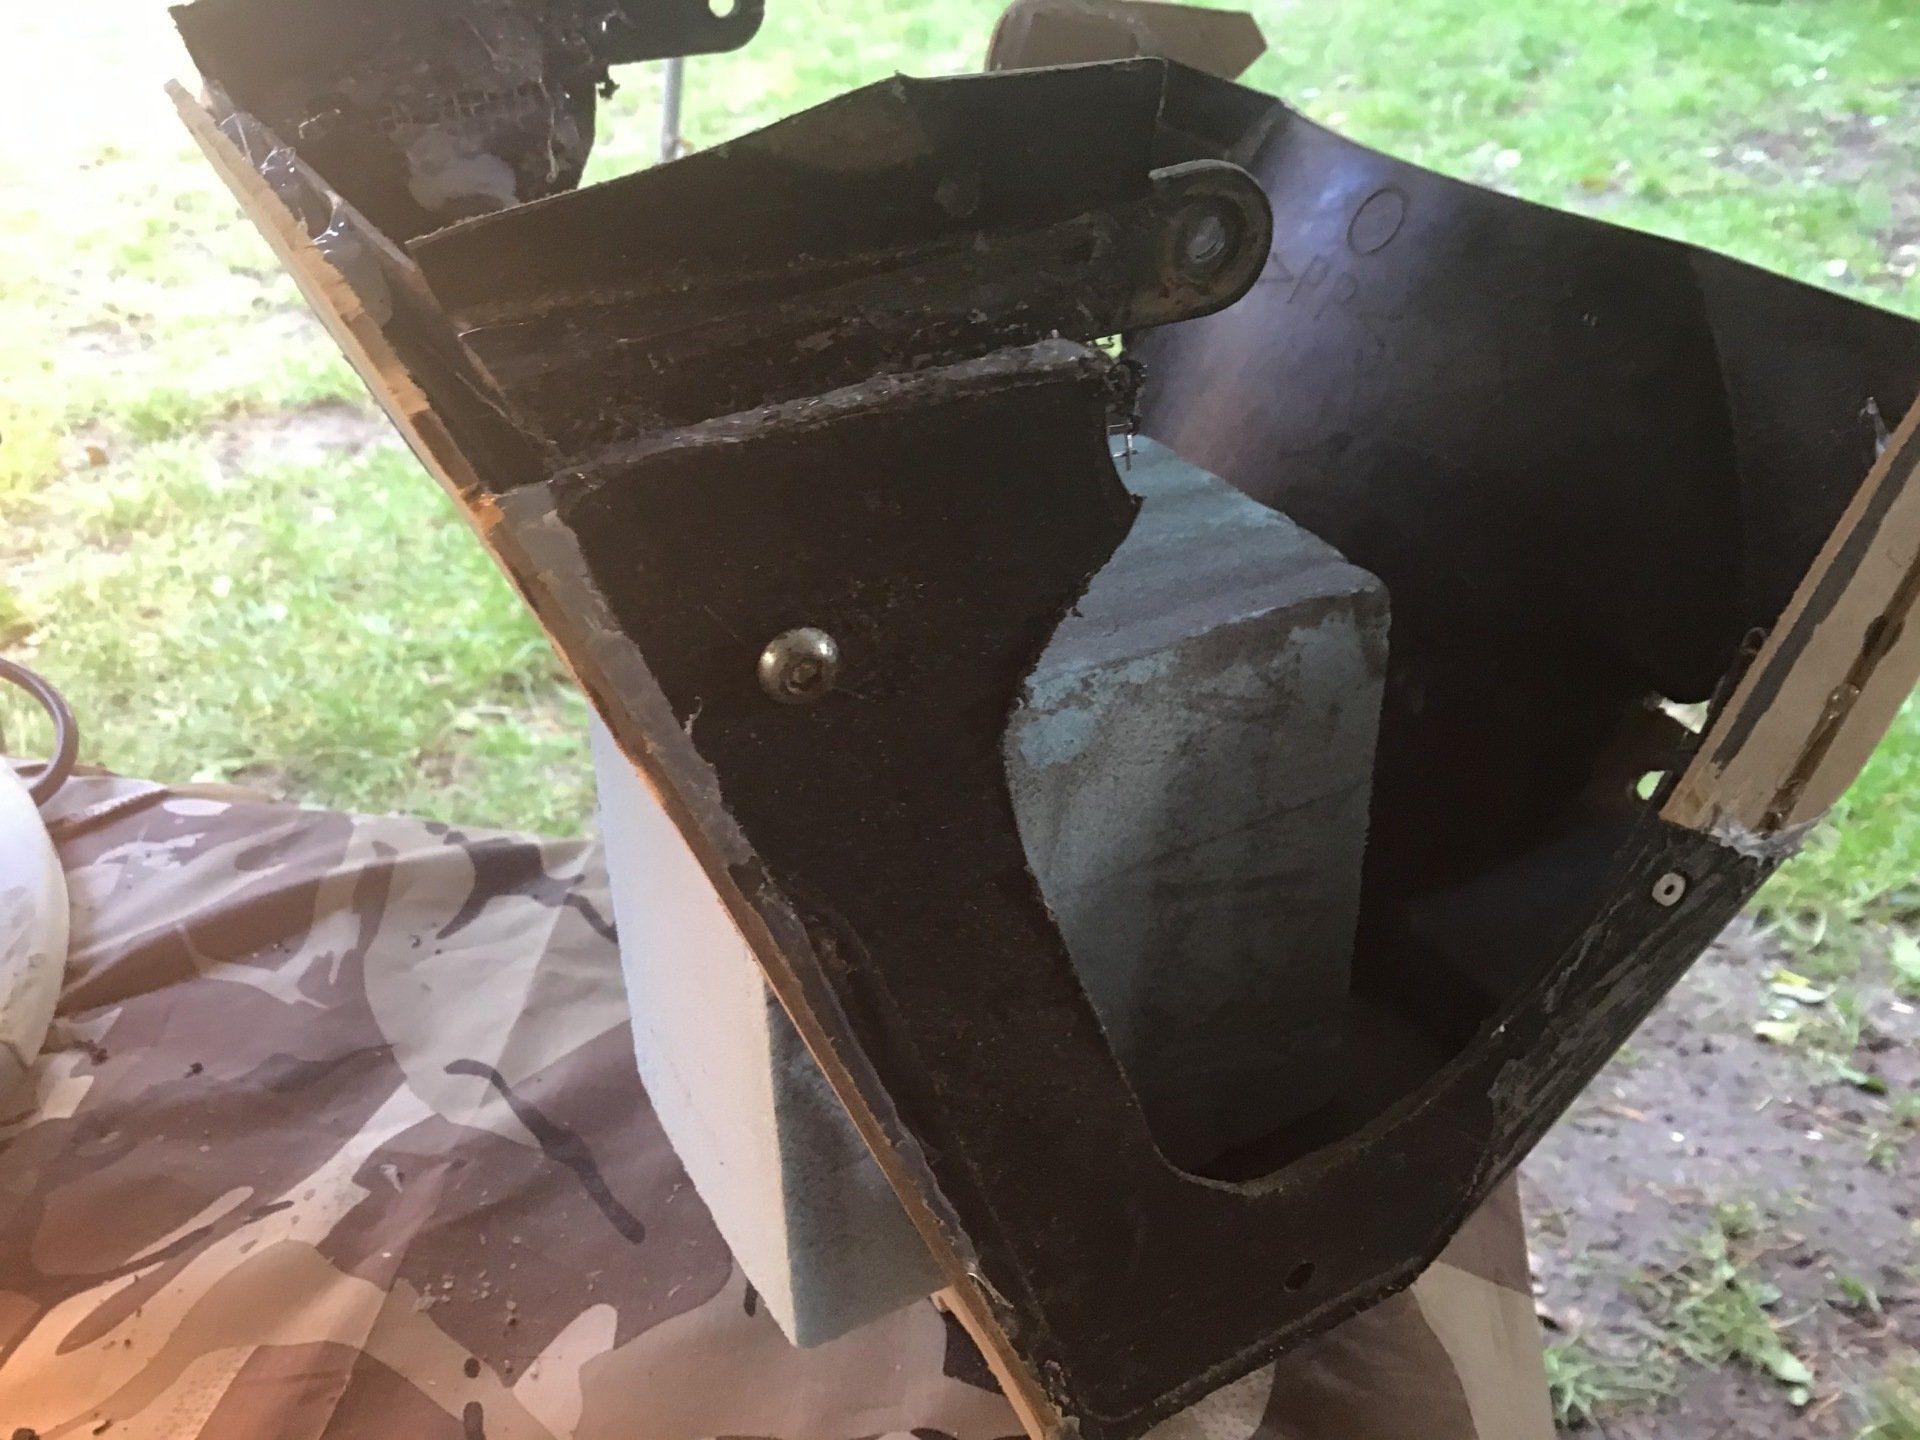
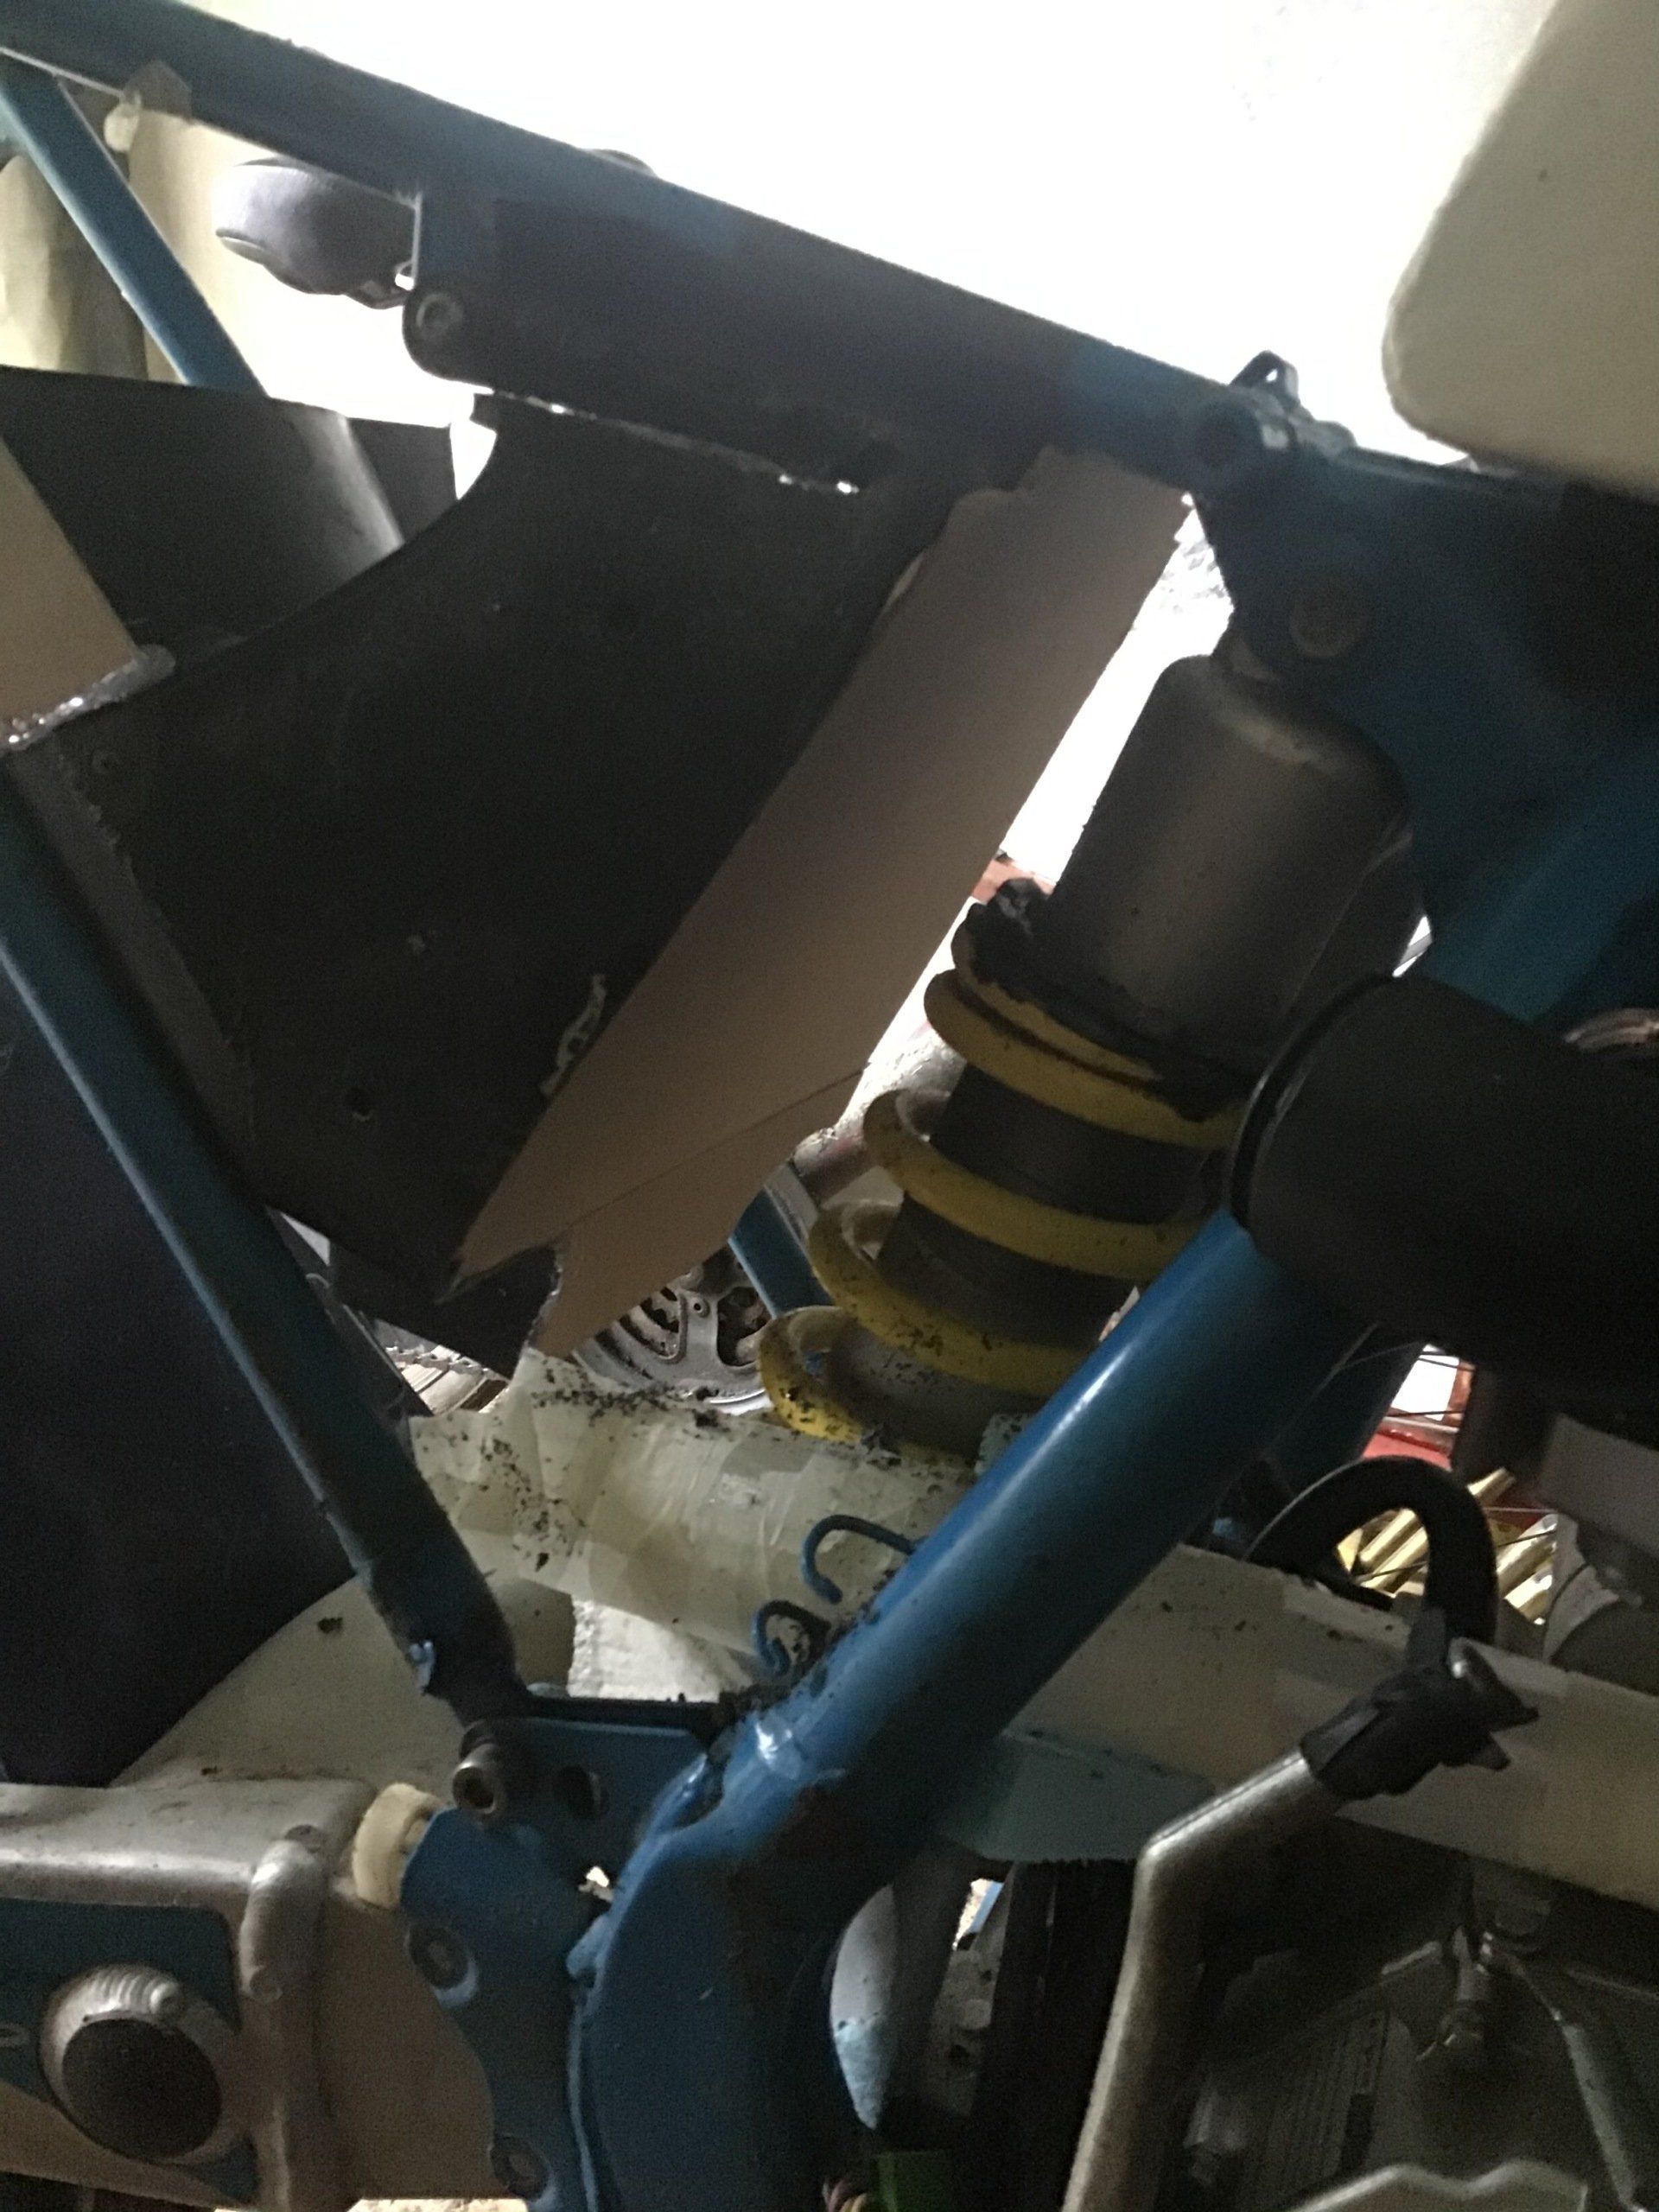
The dummy battery was then plated over with the aid of some mdf and the glue gun.
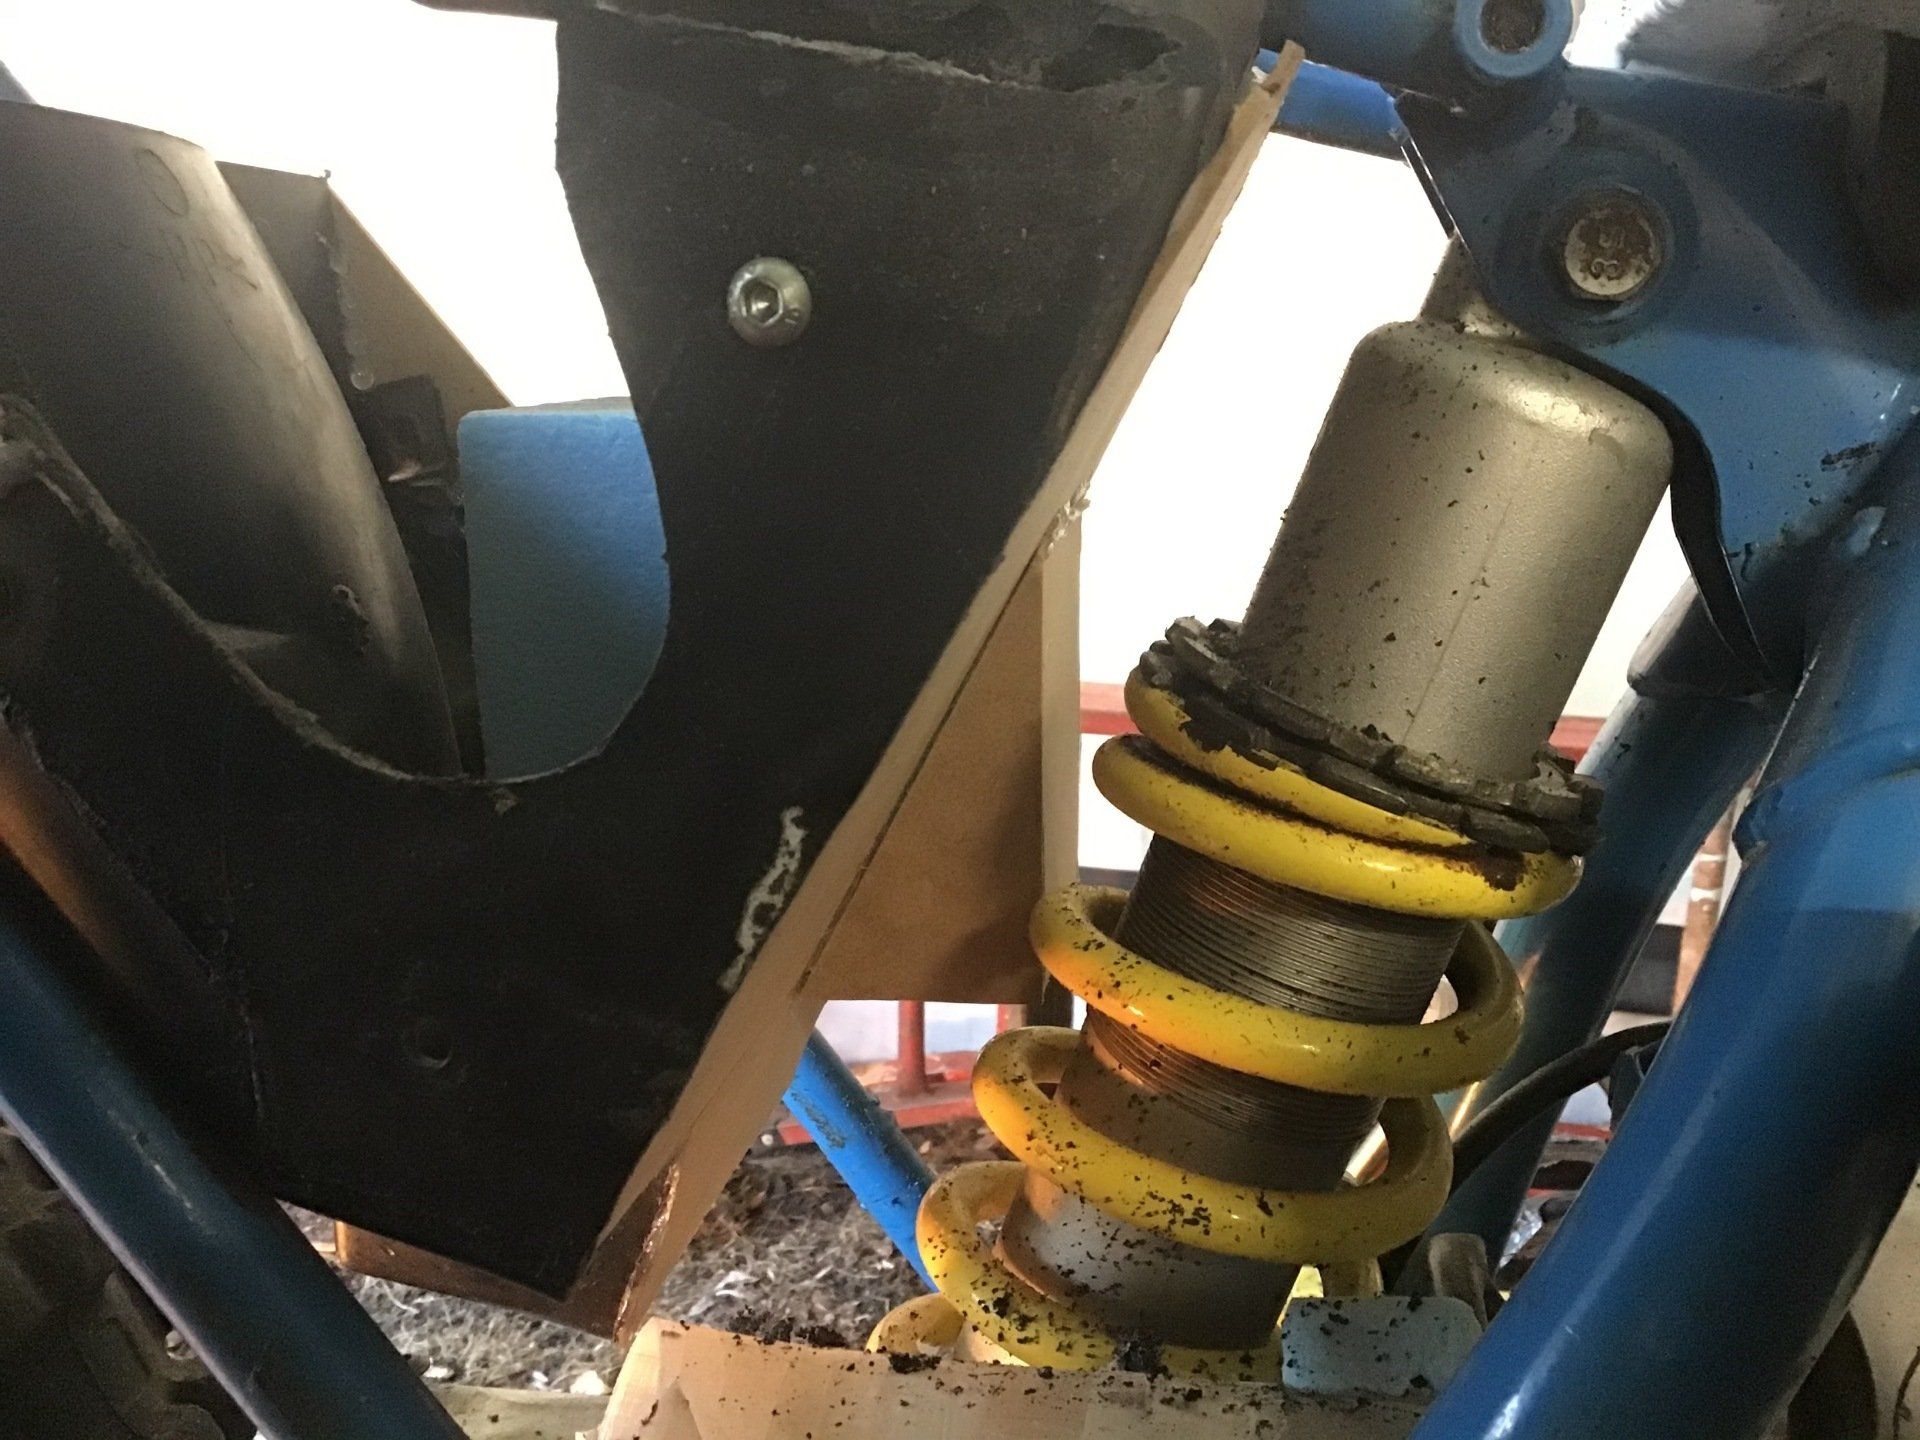
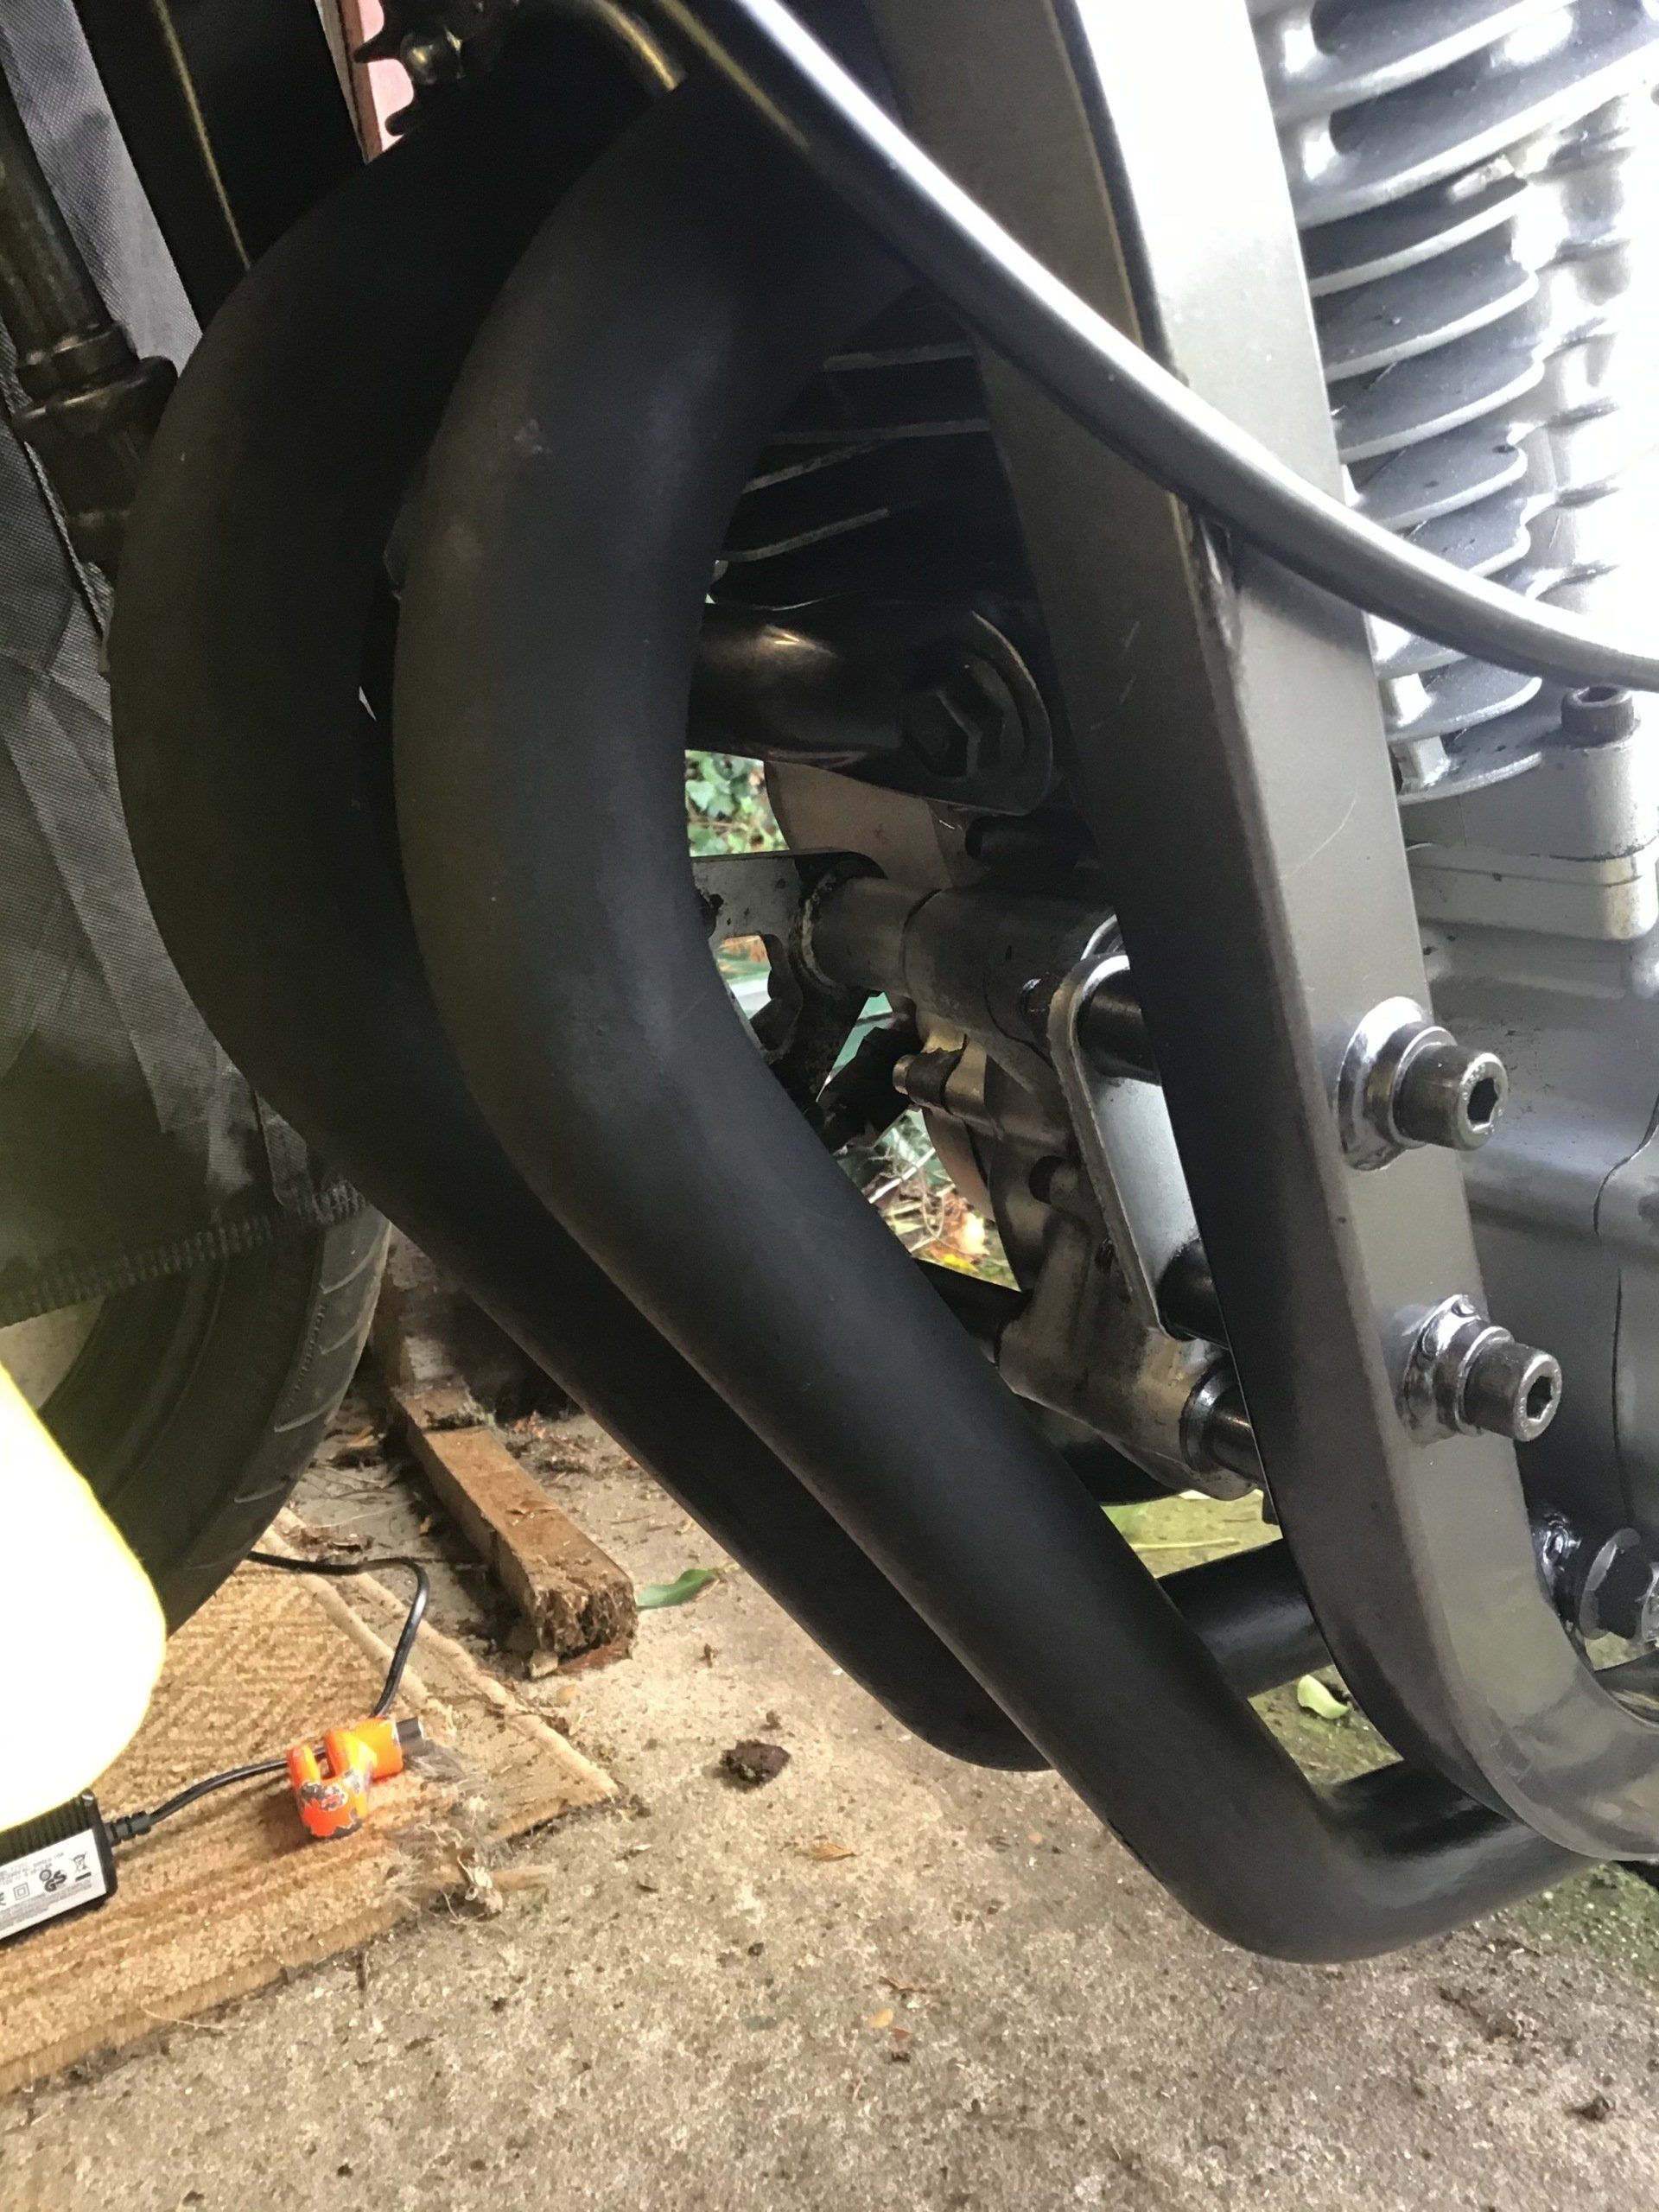
This does bring the edge of the battery box very close to the shock spring. The corners / edges of the box will get a generous radius and that will hopefully be enough to clear the shock, but its something I need to double check.

So, the beginnings of a plan are emerging, although I do still have to solve the much trickier problem of connecting air box to carb...
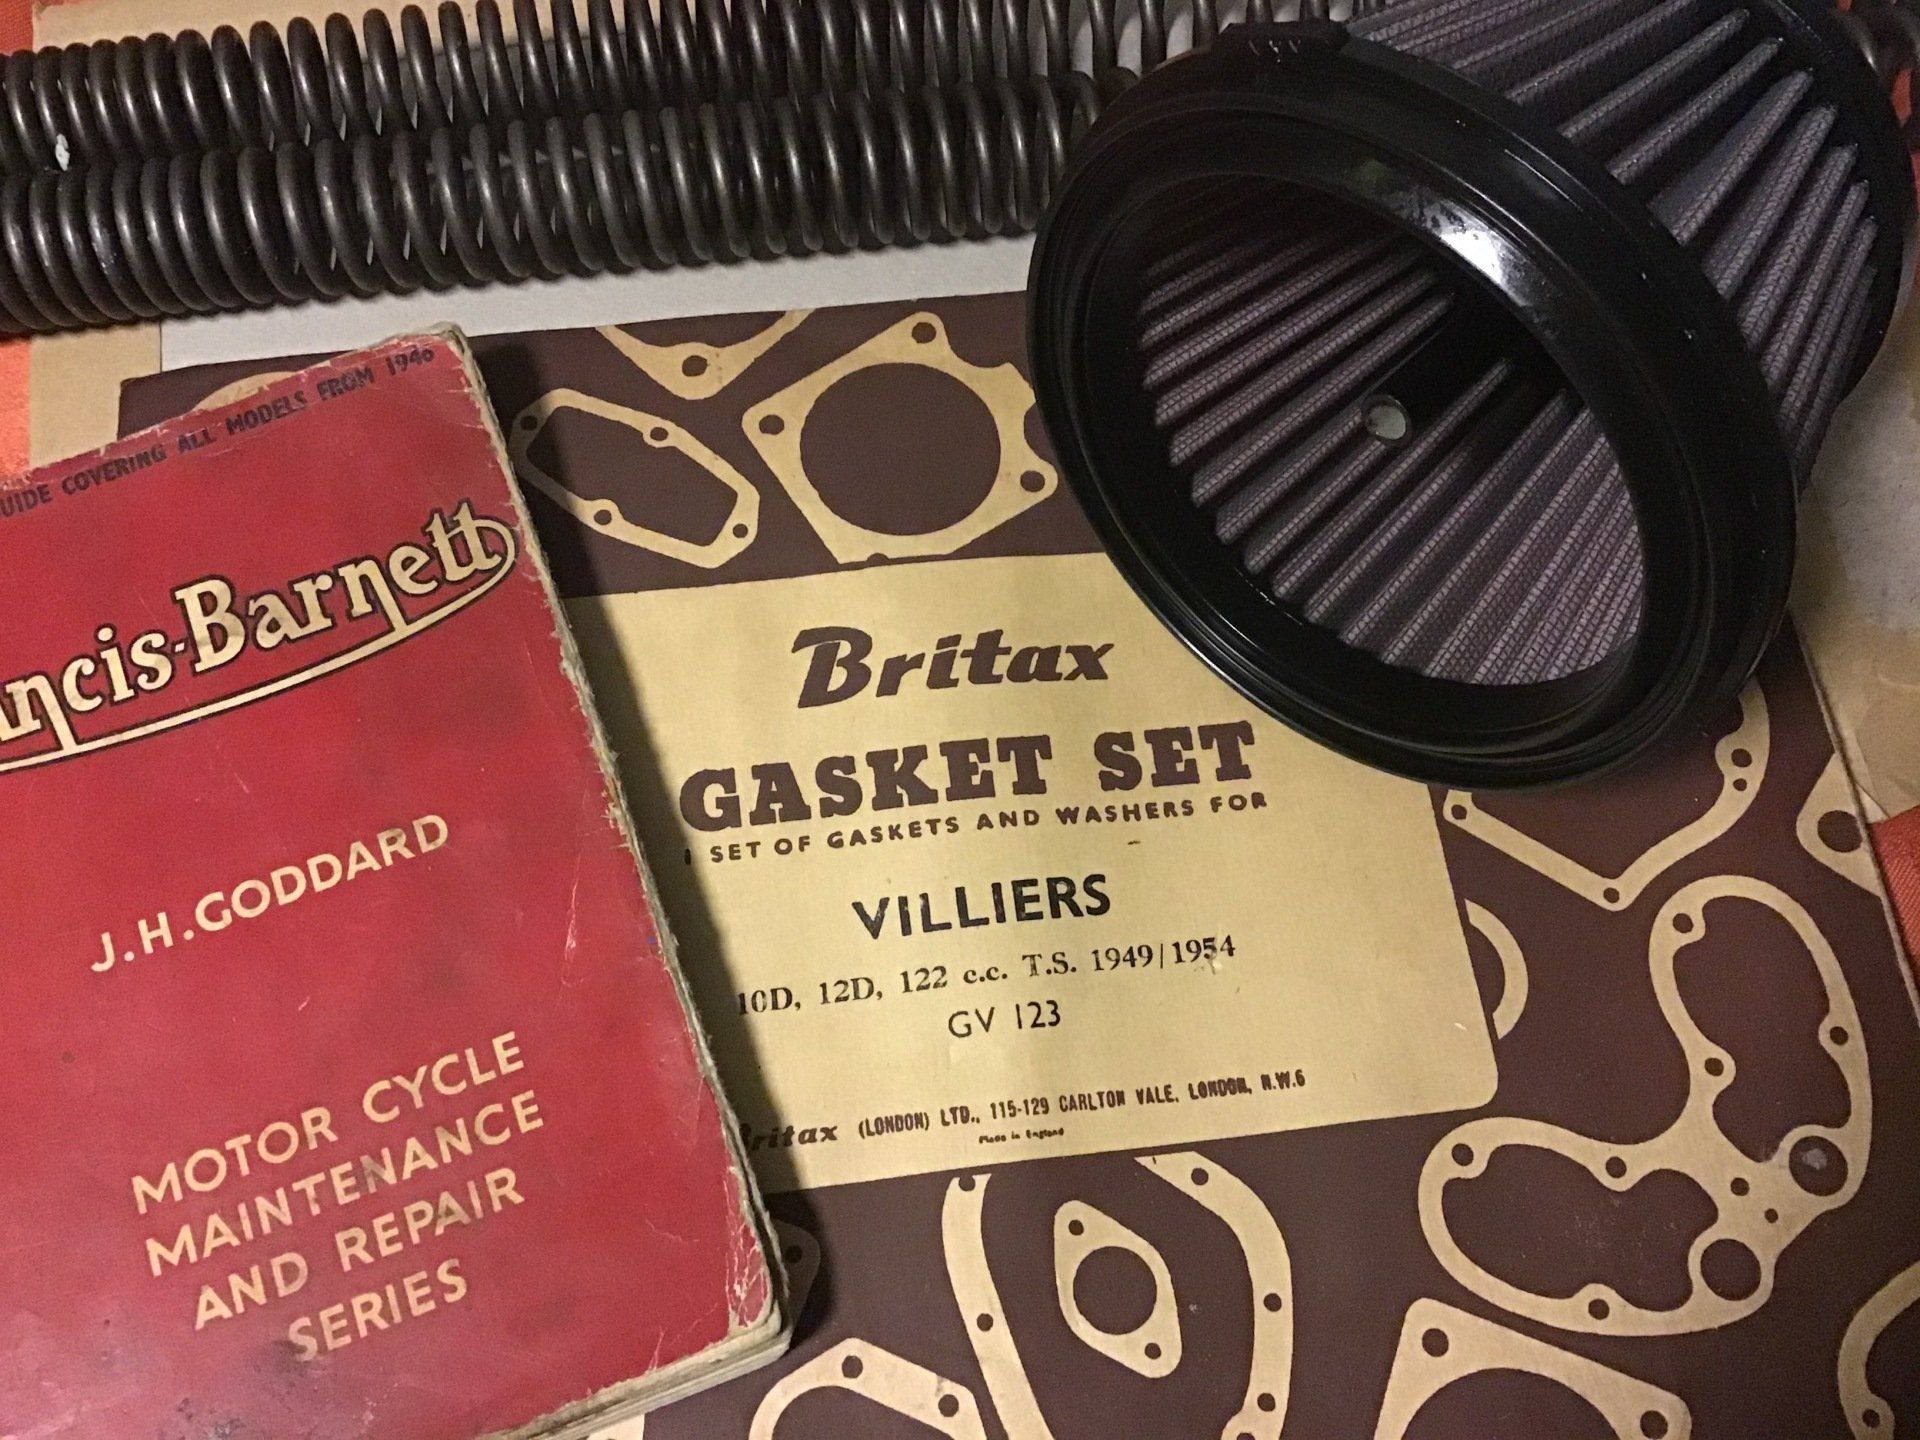
I've been sidetracked this week. The postman not only brought me the air filter that I was waiting for, he also delivered fork springs for a Yamaha and gaskets and a manual for the Francis Barnett.
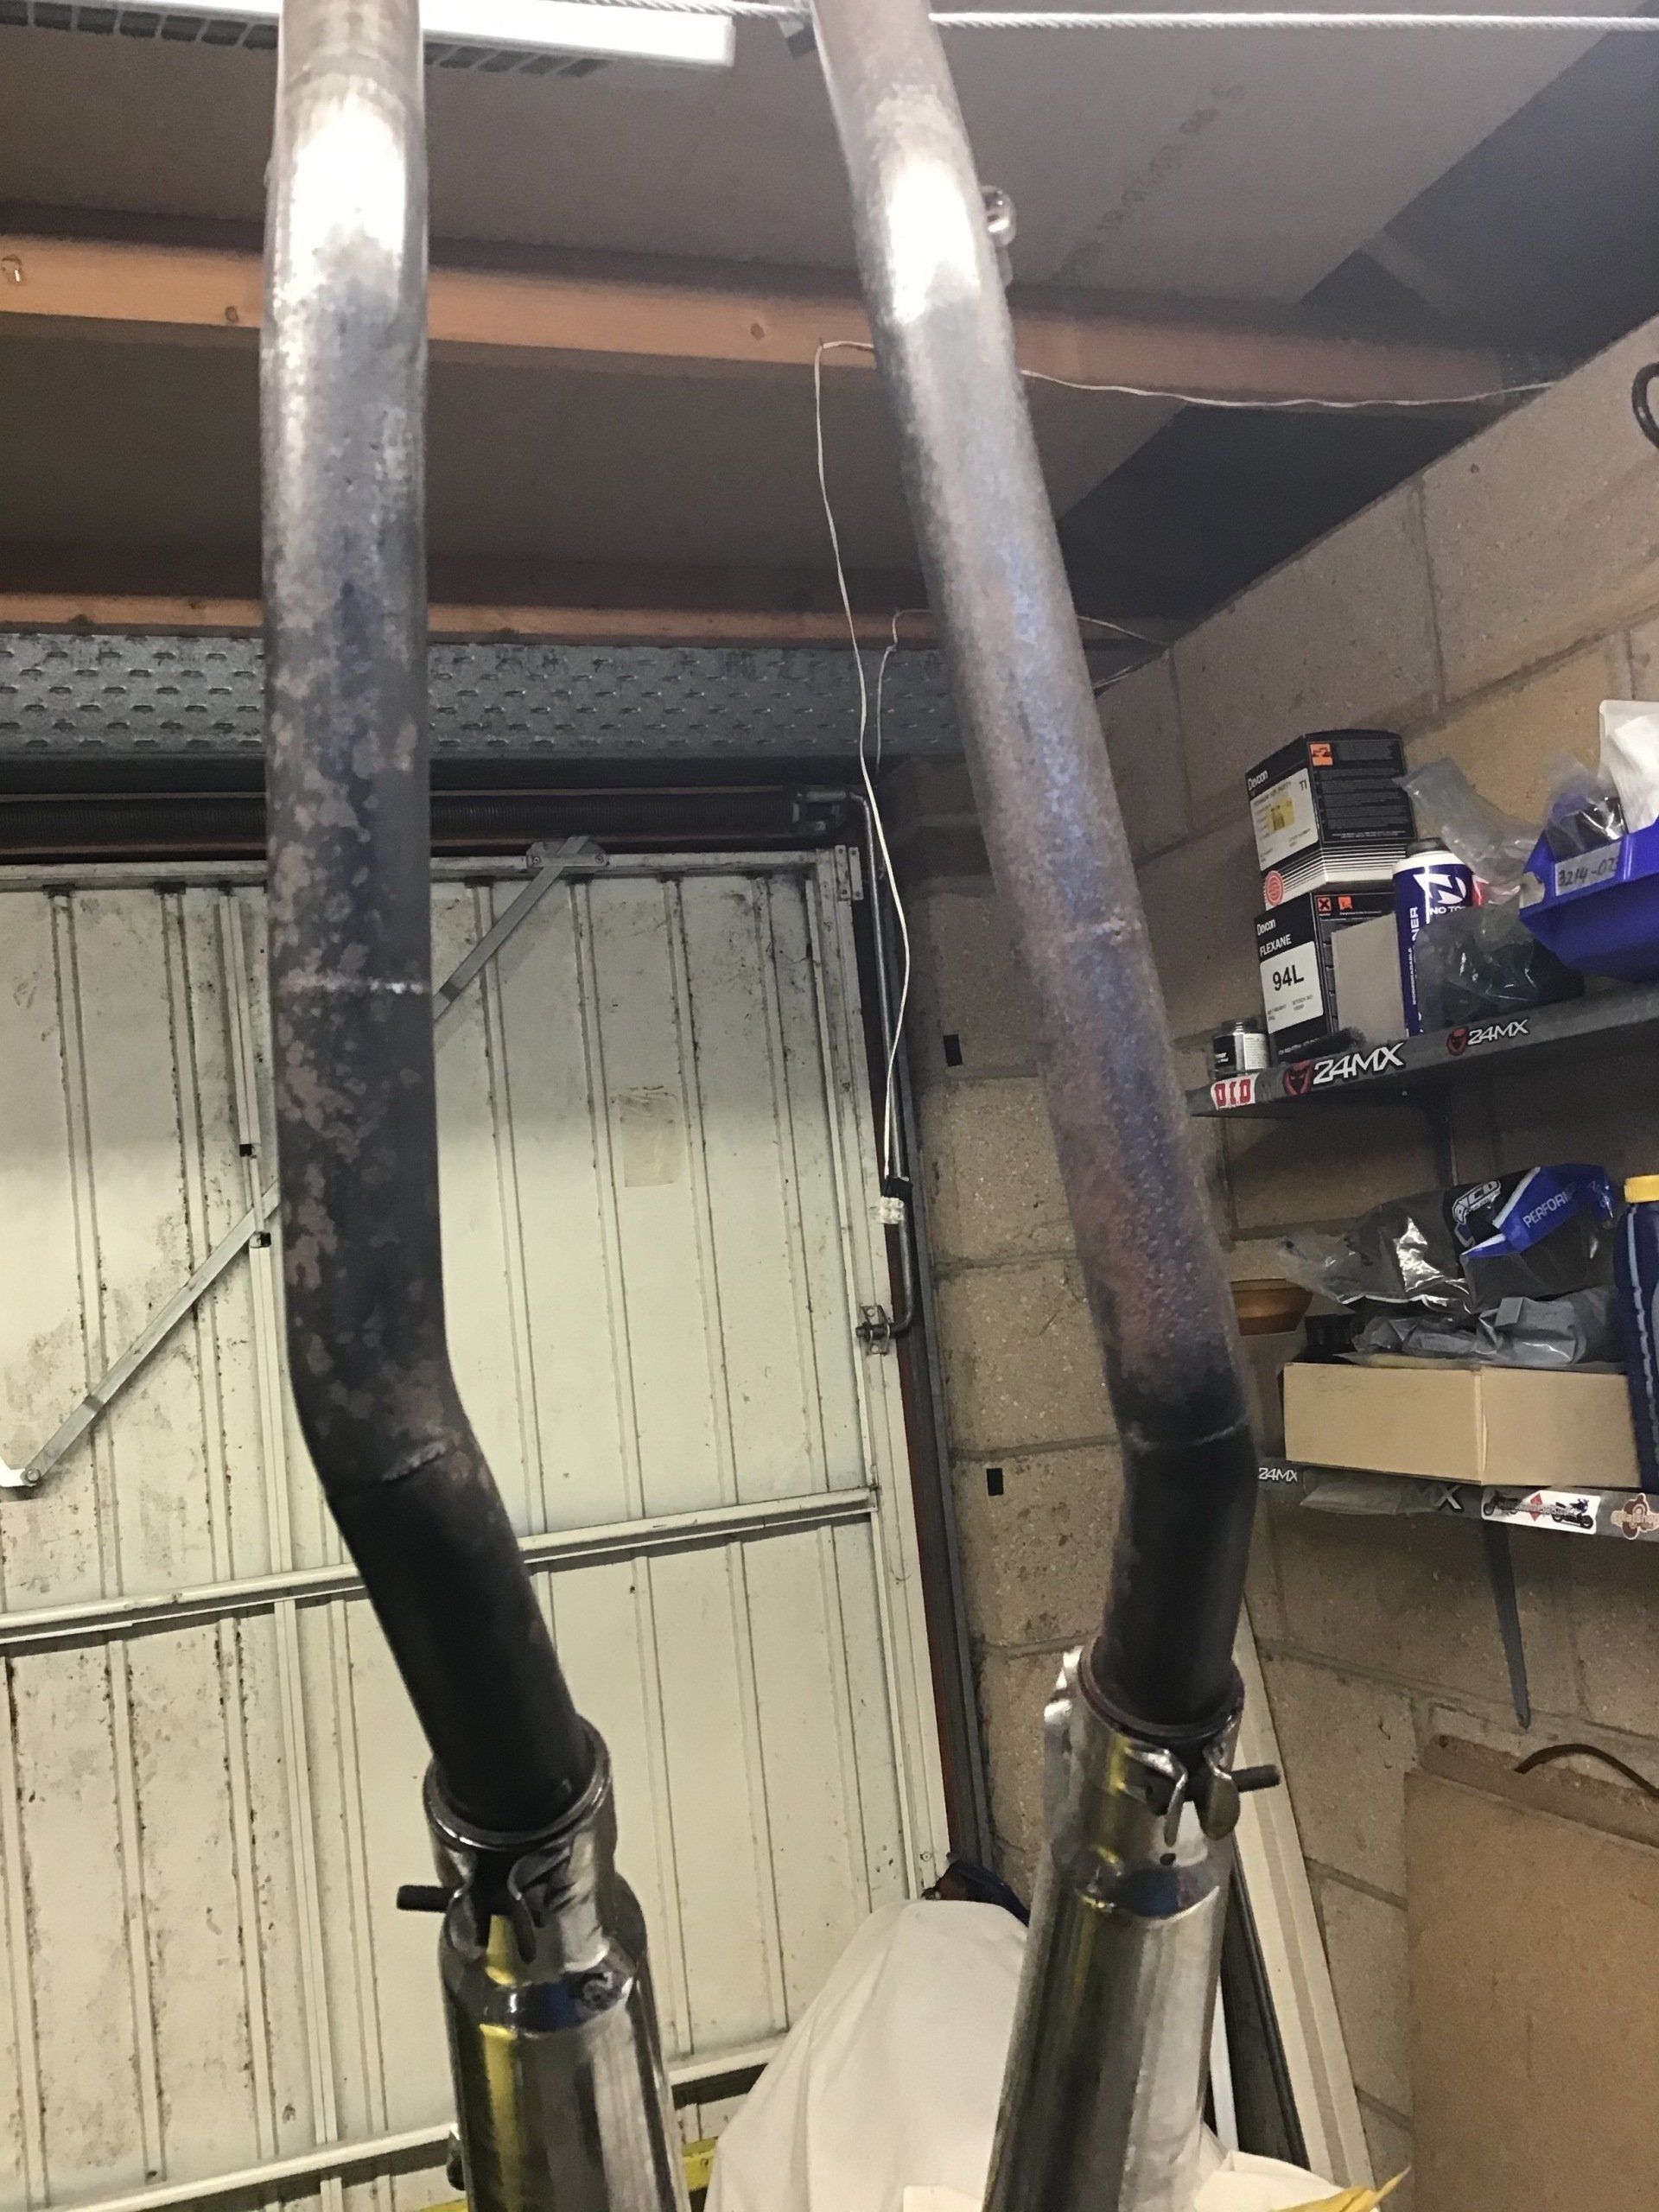
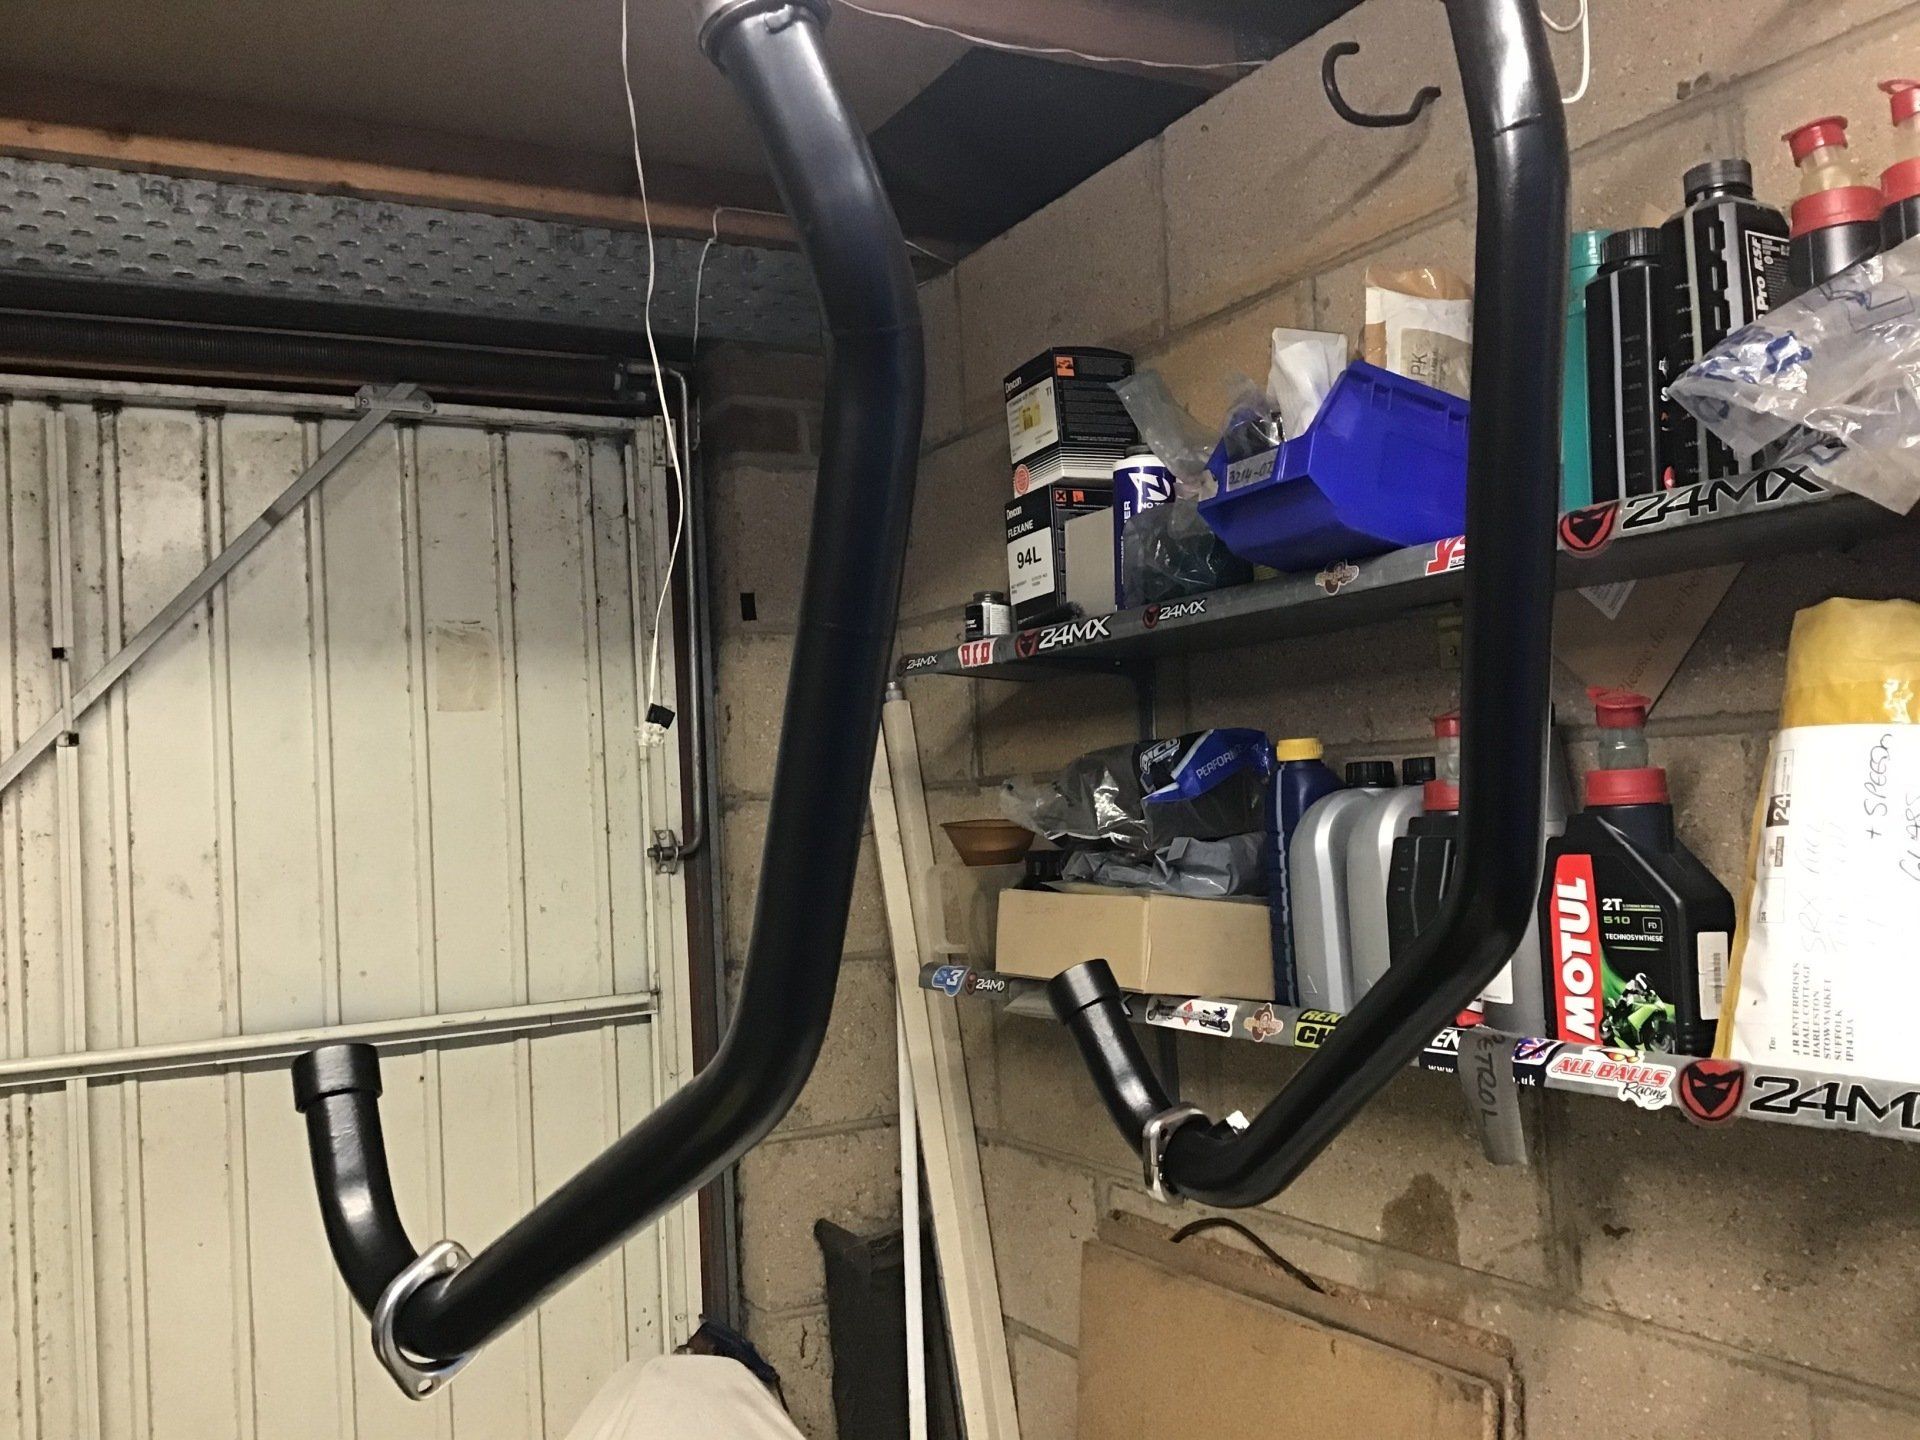
The arrival of the fork springs for the Yamaha (currently tucked up under a cover until better weather arrived) reminded me that I needed to check its tyre pressures and connect it to the battery charger. Unfortunately, that's when I noticed how bad the mild steel downpipes were looking (see pic below) and instead of just putting the cover back on and leaving it until later in the year, I felt compelled to get them looking better.
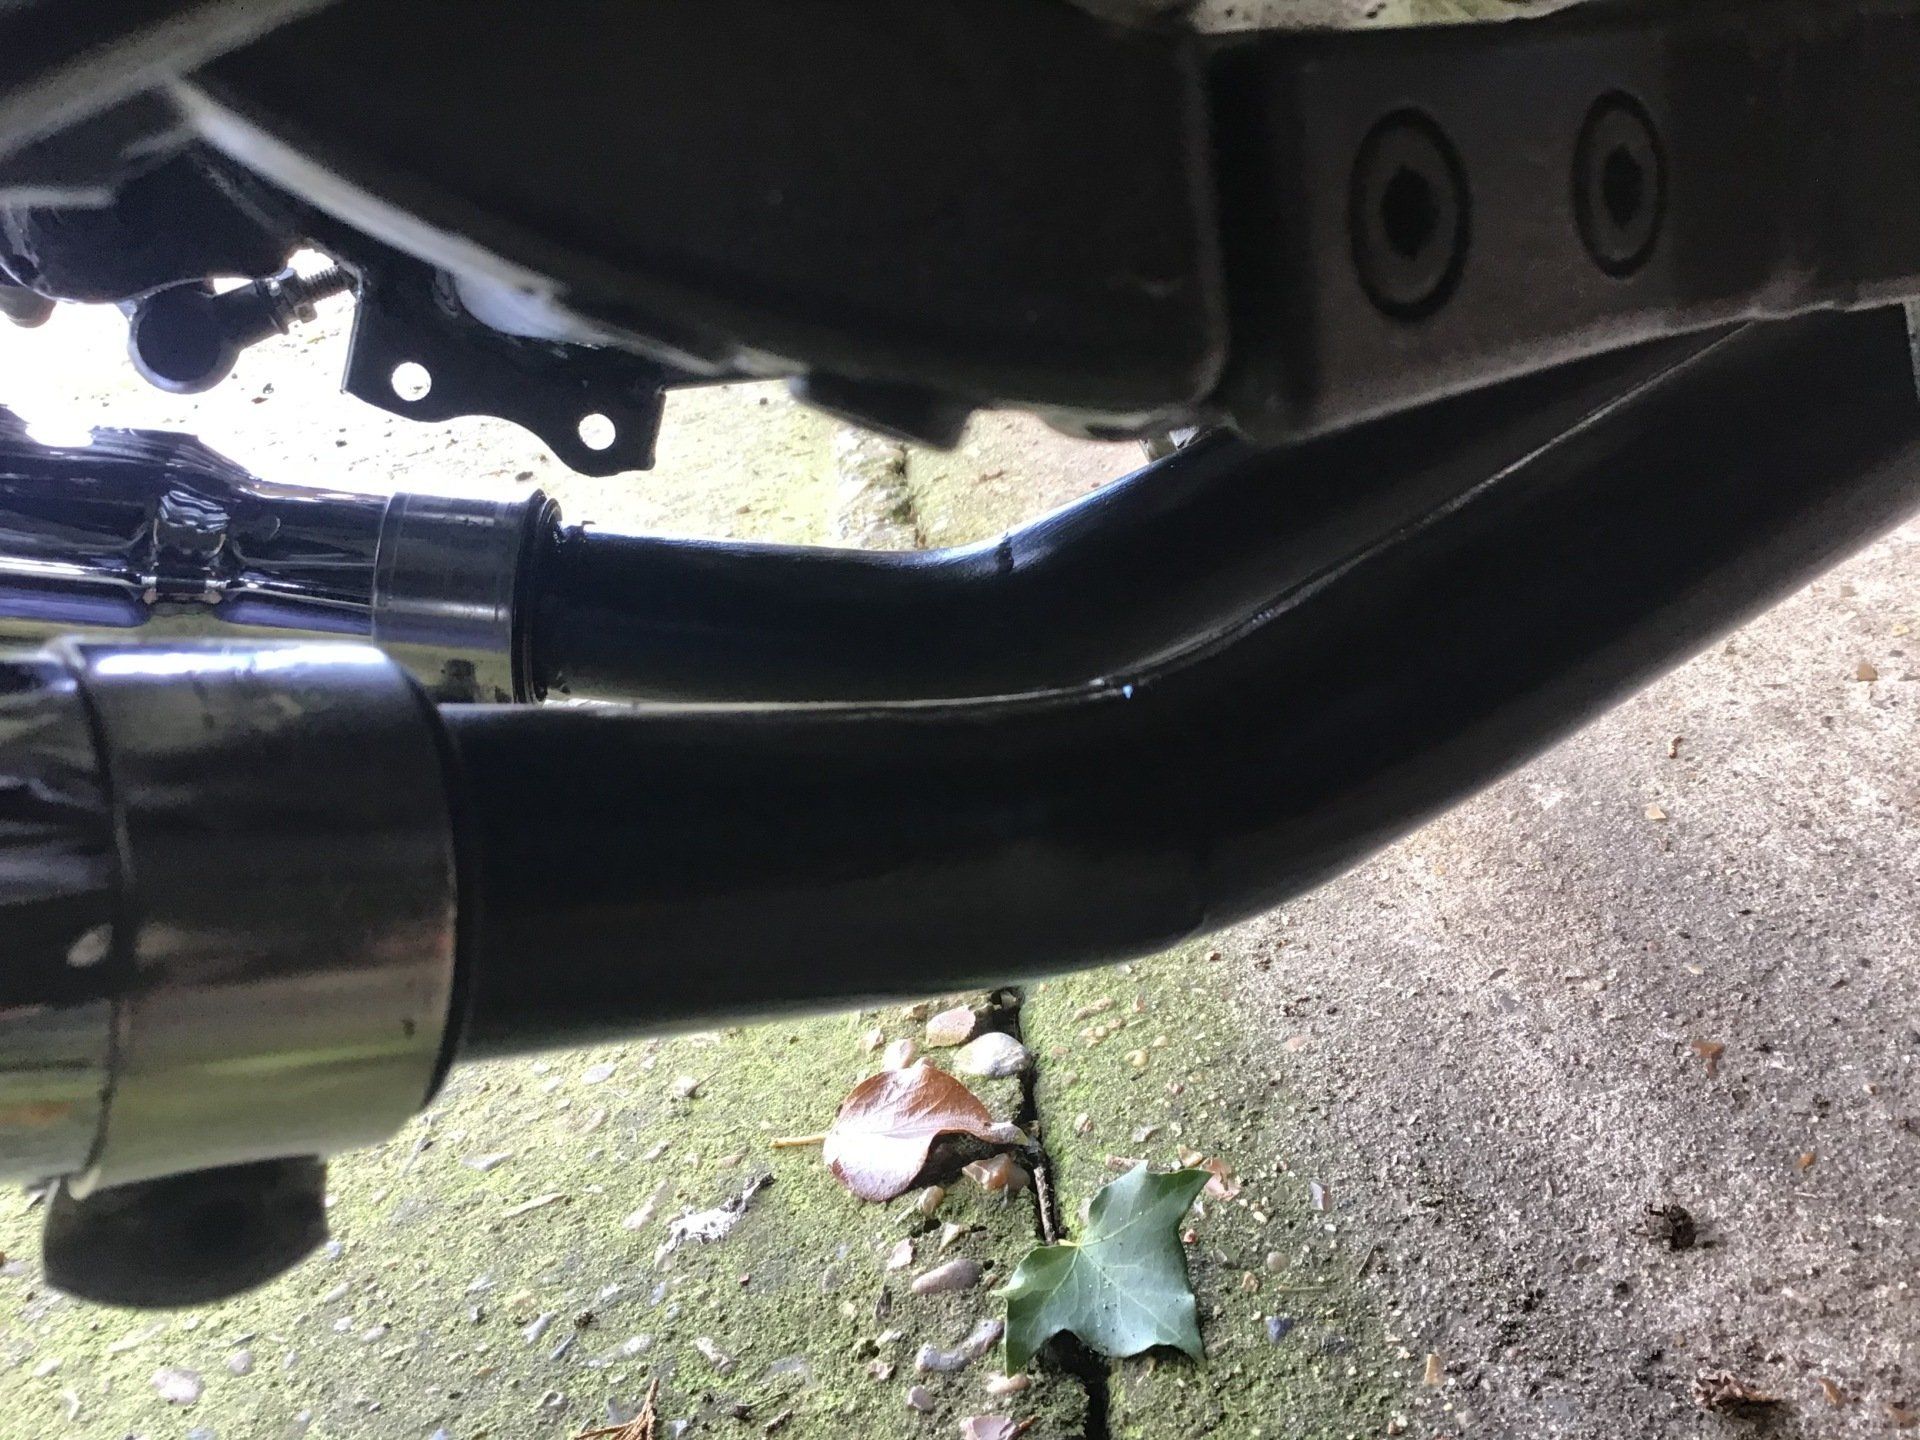
I've tried numerous exhaust paints over the years; PJ1, Sperex, Barbecue Paint etc. I've not been overly impressed with any of them. They've all gone on OK, but none have stayed on for very long before the rust starts to appear again. This time I'm trying VHT engine enamel from Halfords.
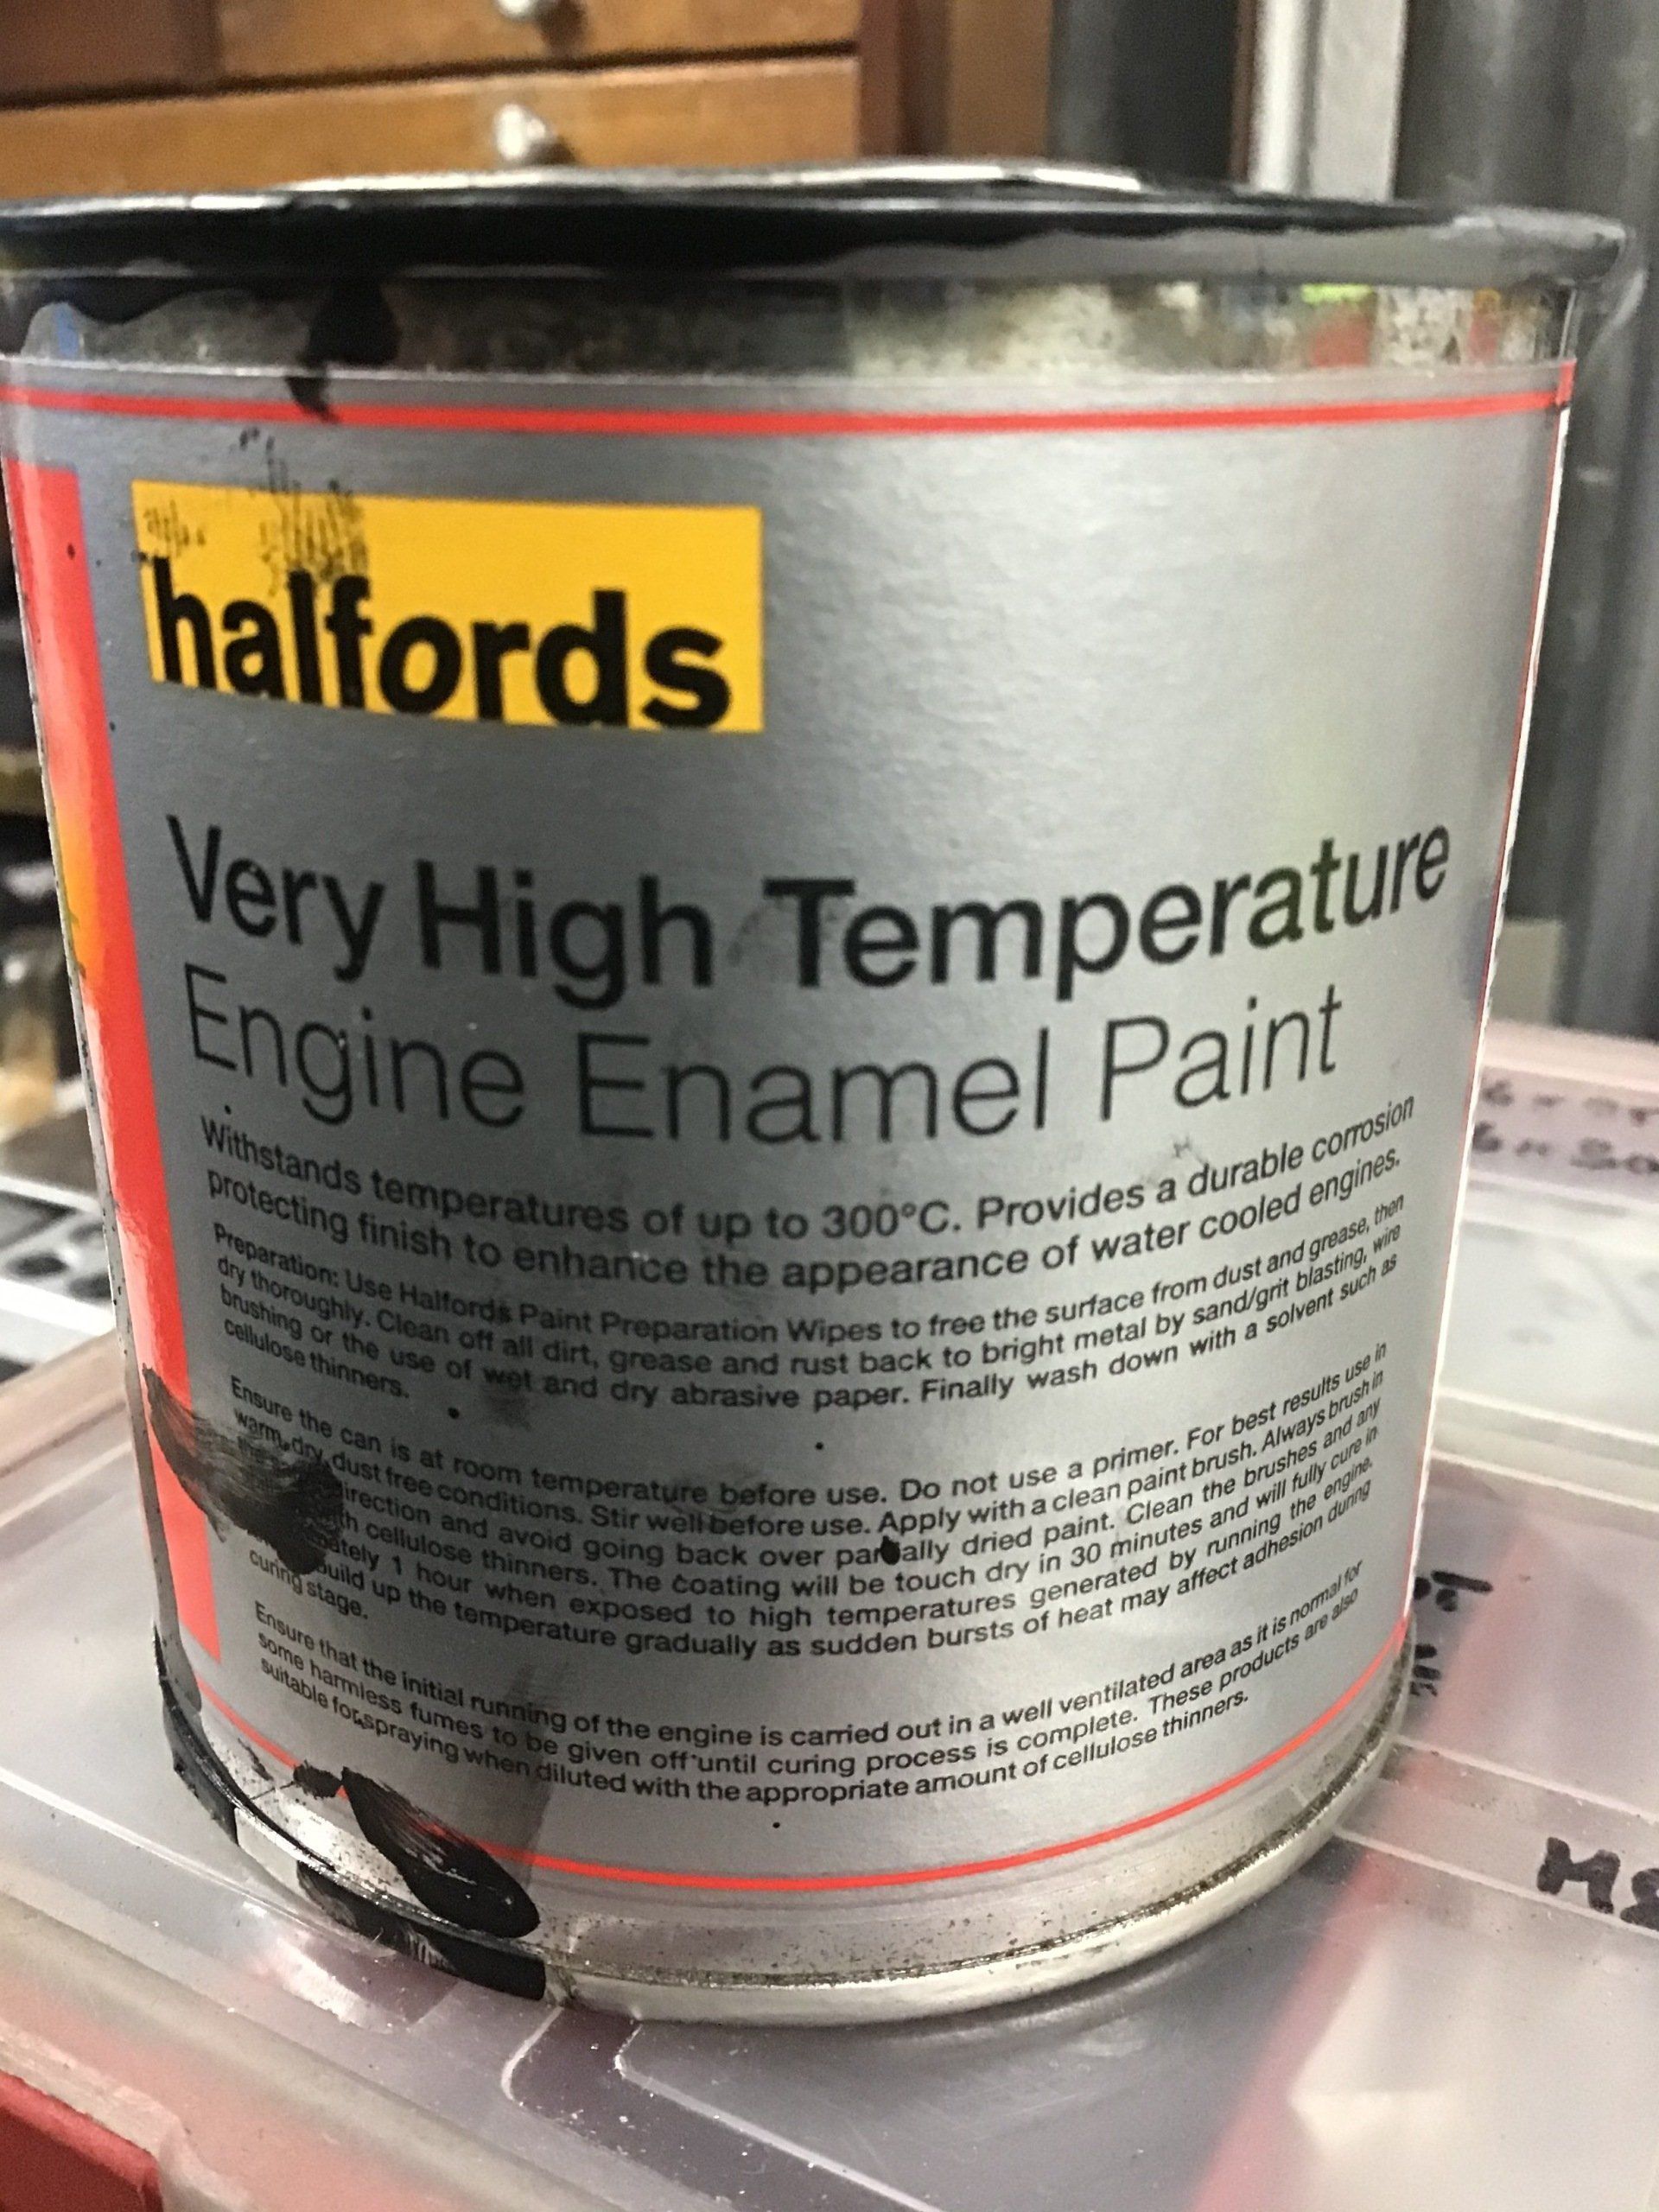
First step was to remove all of the old paint and rust with the aid abrasive paper and a wire wheel in the power drill. Then a wipe down with acetone.The Halfords paint is very thin, it will drip if you apply it too liberally. The instructions don't mention re-coating at all, so I assume you're only meant to do one coat, but after a first coat, it looked a bit thin in places, so I went for a second coat. I left the first coat for a good hour to dry before applying a second coat. It went on OK, but the brush strokes were more visible on this coat, although when dried they looked a lot better.
Like most of these paints, curing proper occurs with the heat of running the engine. When I started it up, the paint looked like it was going to bubble up and flake off, but as the temperature increased, it settled down again and produced an even matt black finish at the cylinder head end. Closer to the silencers, the paint still looks shinier and uncured (see pictures below). I really need to take the bike out for a long run to get everything good and hot. Then I just need to see how long it lasts.
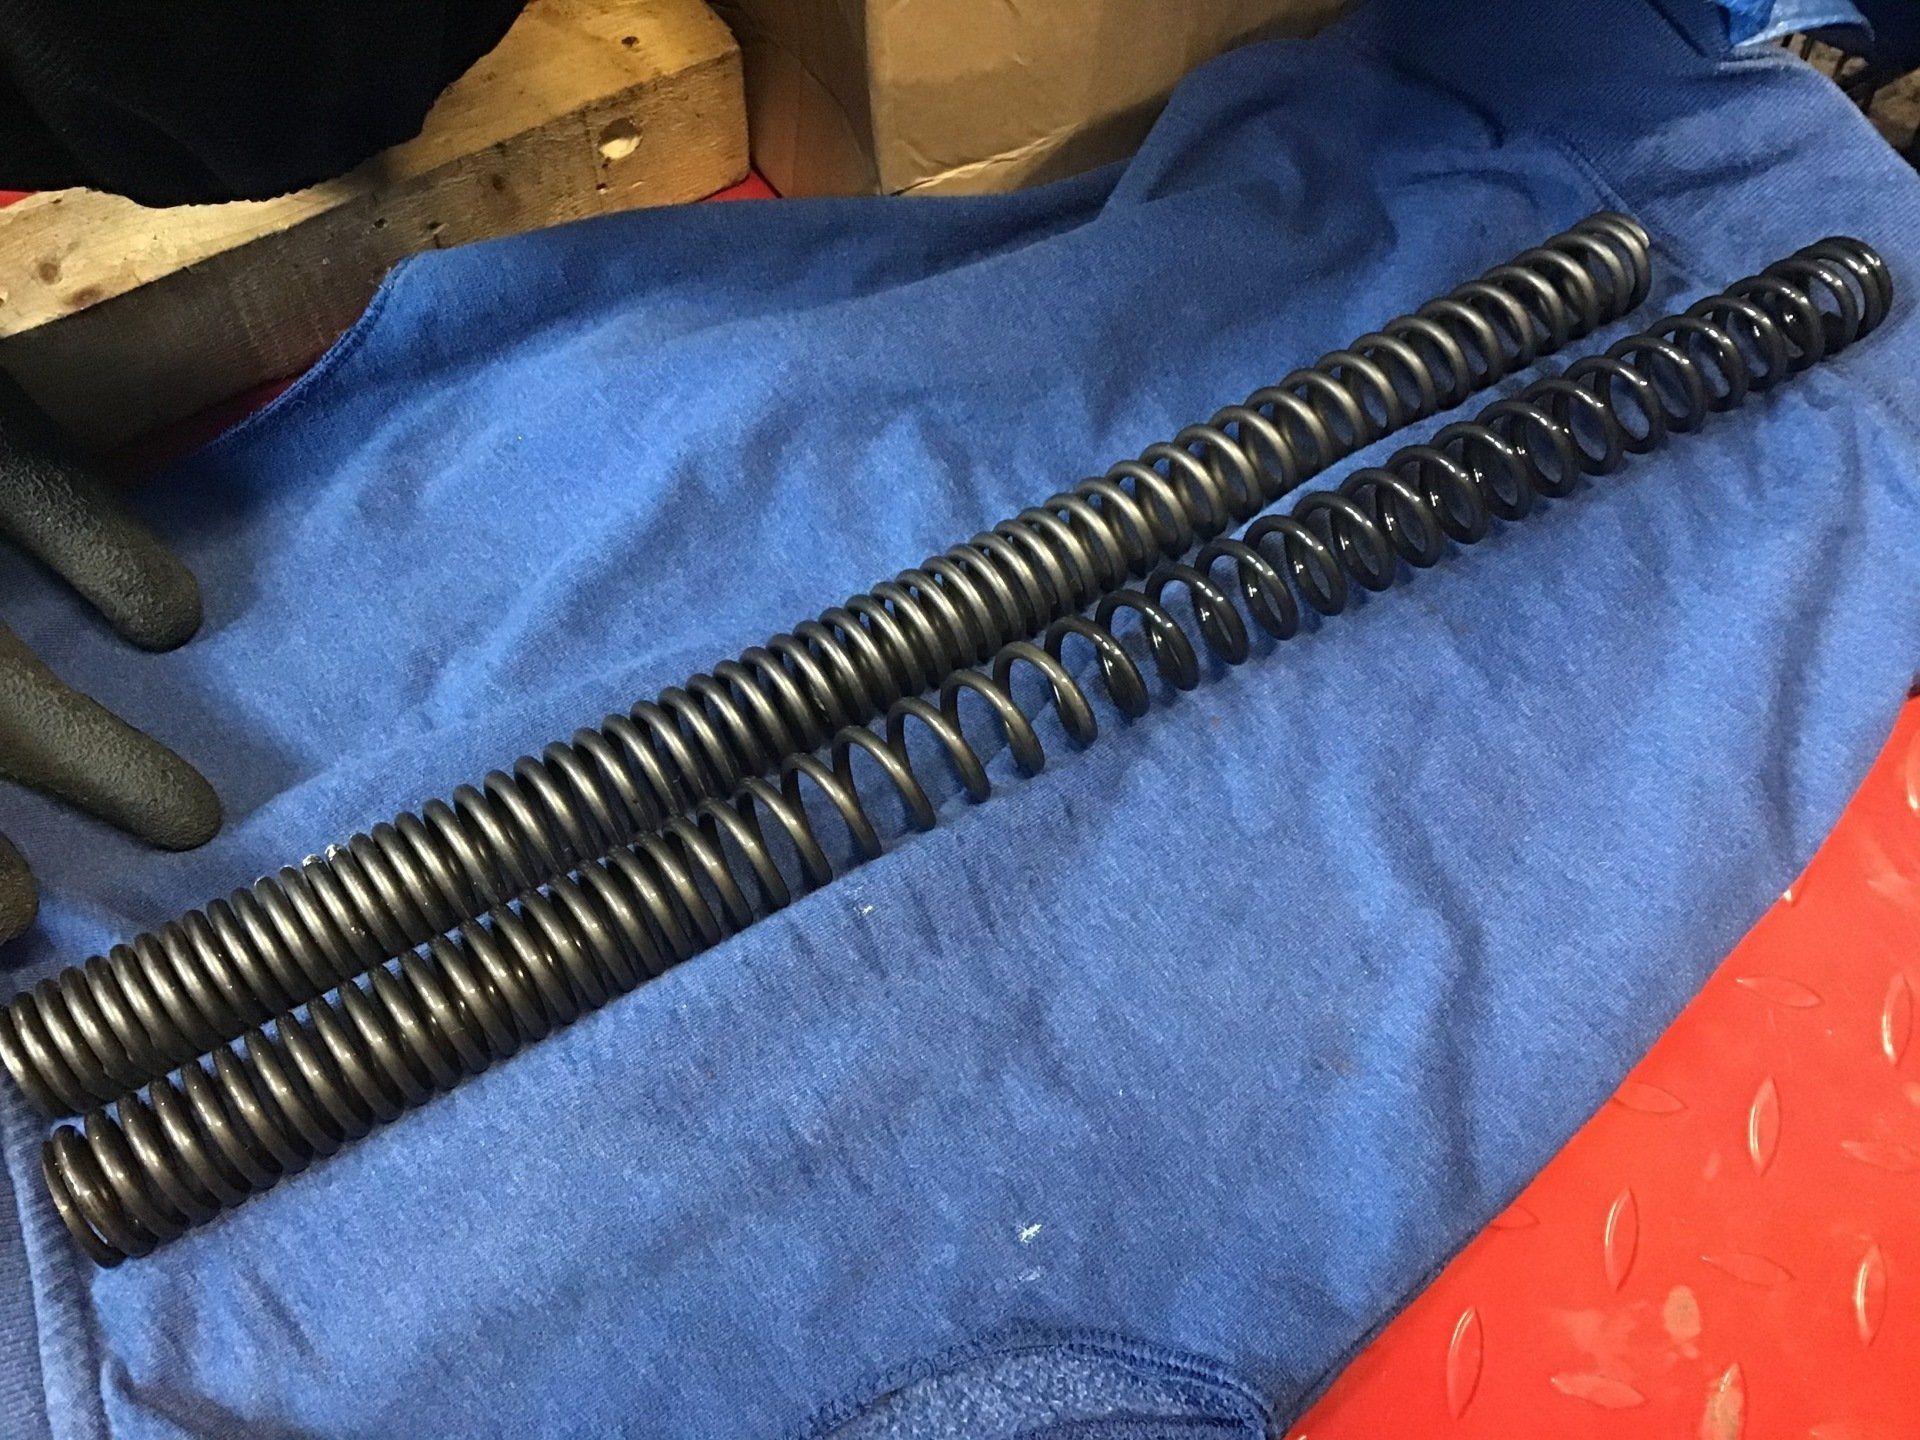
As I'd already spent too long working on a bike that wasn't actually on the 'to do' list, I thought that I might as well fit the replacement fork springs as well. The bike is a grey import and the standard springs (bottom of pic) where designed for a lightweight Japanese rider. Despite being short, I'm not that lightweight, so front suspension was a bit soft and saggy. The replacement springs cost £15 (used) and originally propped up a Honda XBR500. They're a bit shorter and stiffer, and after a bit of experimenting with pre-load spacer lengths, we're not sagging quite so much now. Everything feels OK under a static bounce test in the garage. I need some dry weather now to test both the suspension and fully cure the exhaust paint.
Now I really do need to concentrate on the air box...
This week I've managed to avoid all other distractions and actually do some work on the air box!
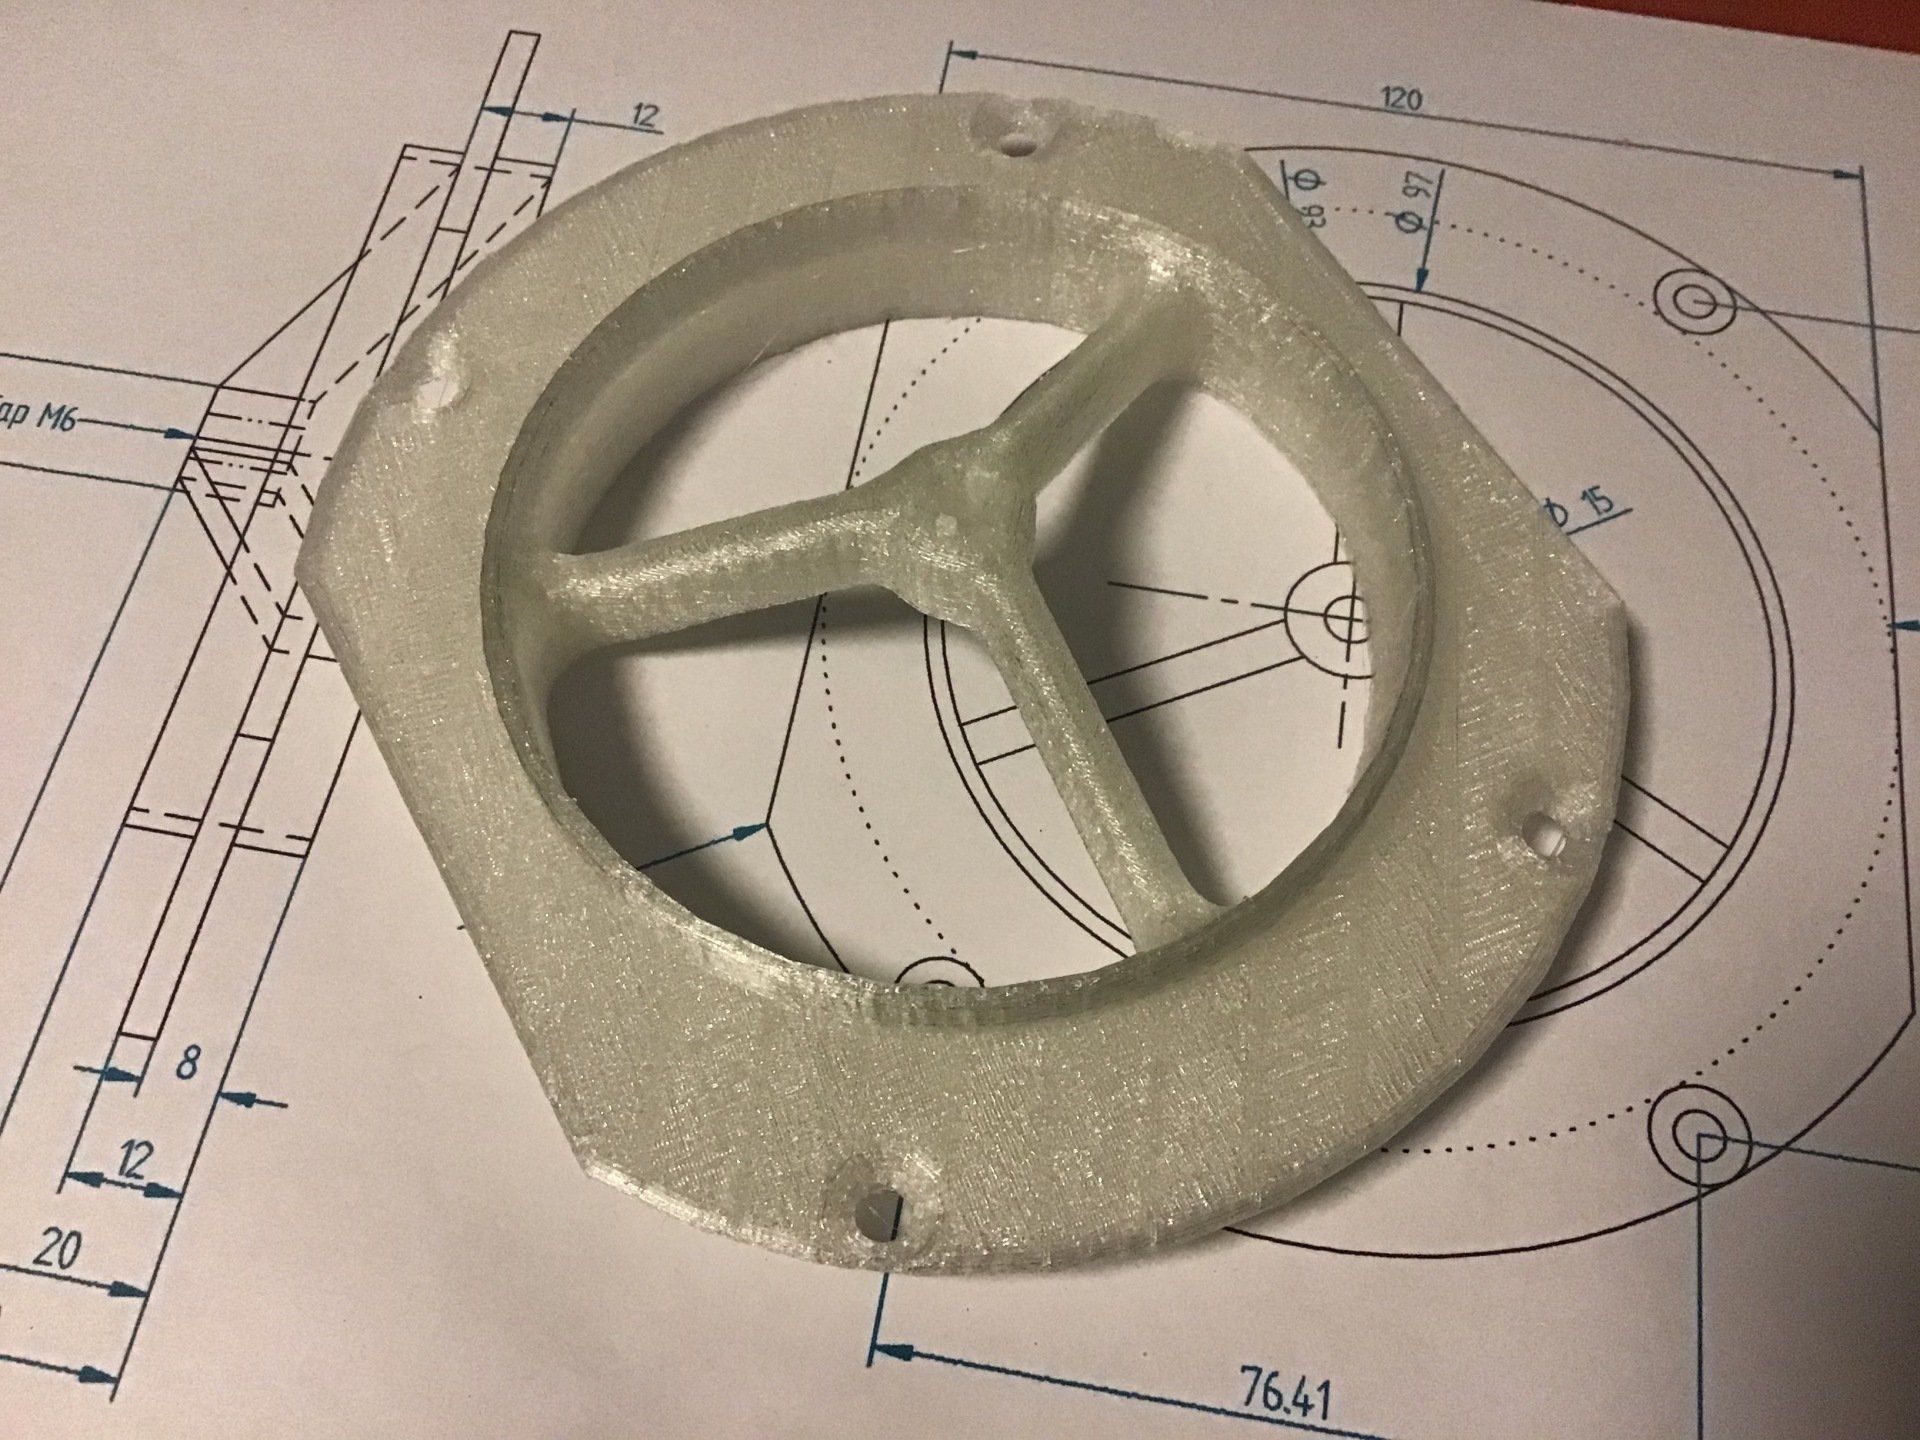
The filter that I've chosen to use fastens via a central bolt, so a suitable mount needs to be made. The mount requires a central threaded boss for the fixing bolt, it also needs to have a flat surface for the filter to seal against, a raised ring to centre the filter on one side and one on the other to facilitate the mounting of whatever air box to carb boot I come up with. If that's not enough things to accommodate, it also needs to allow for some method of fixing it to the air box and fit in the available space.
With that list of criteria in mind, this was the design that I came up with.
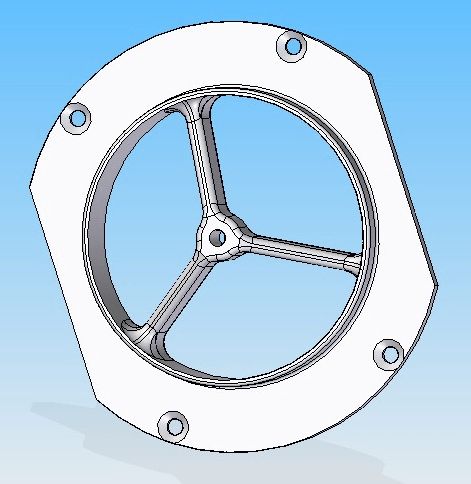
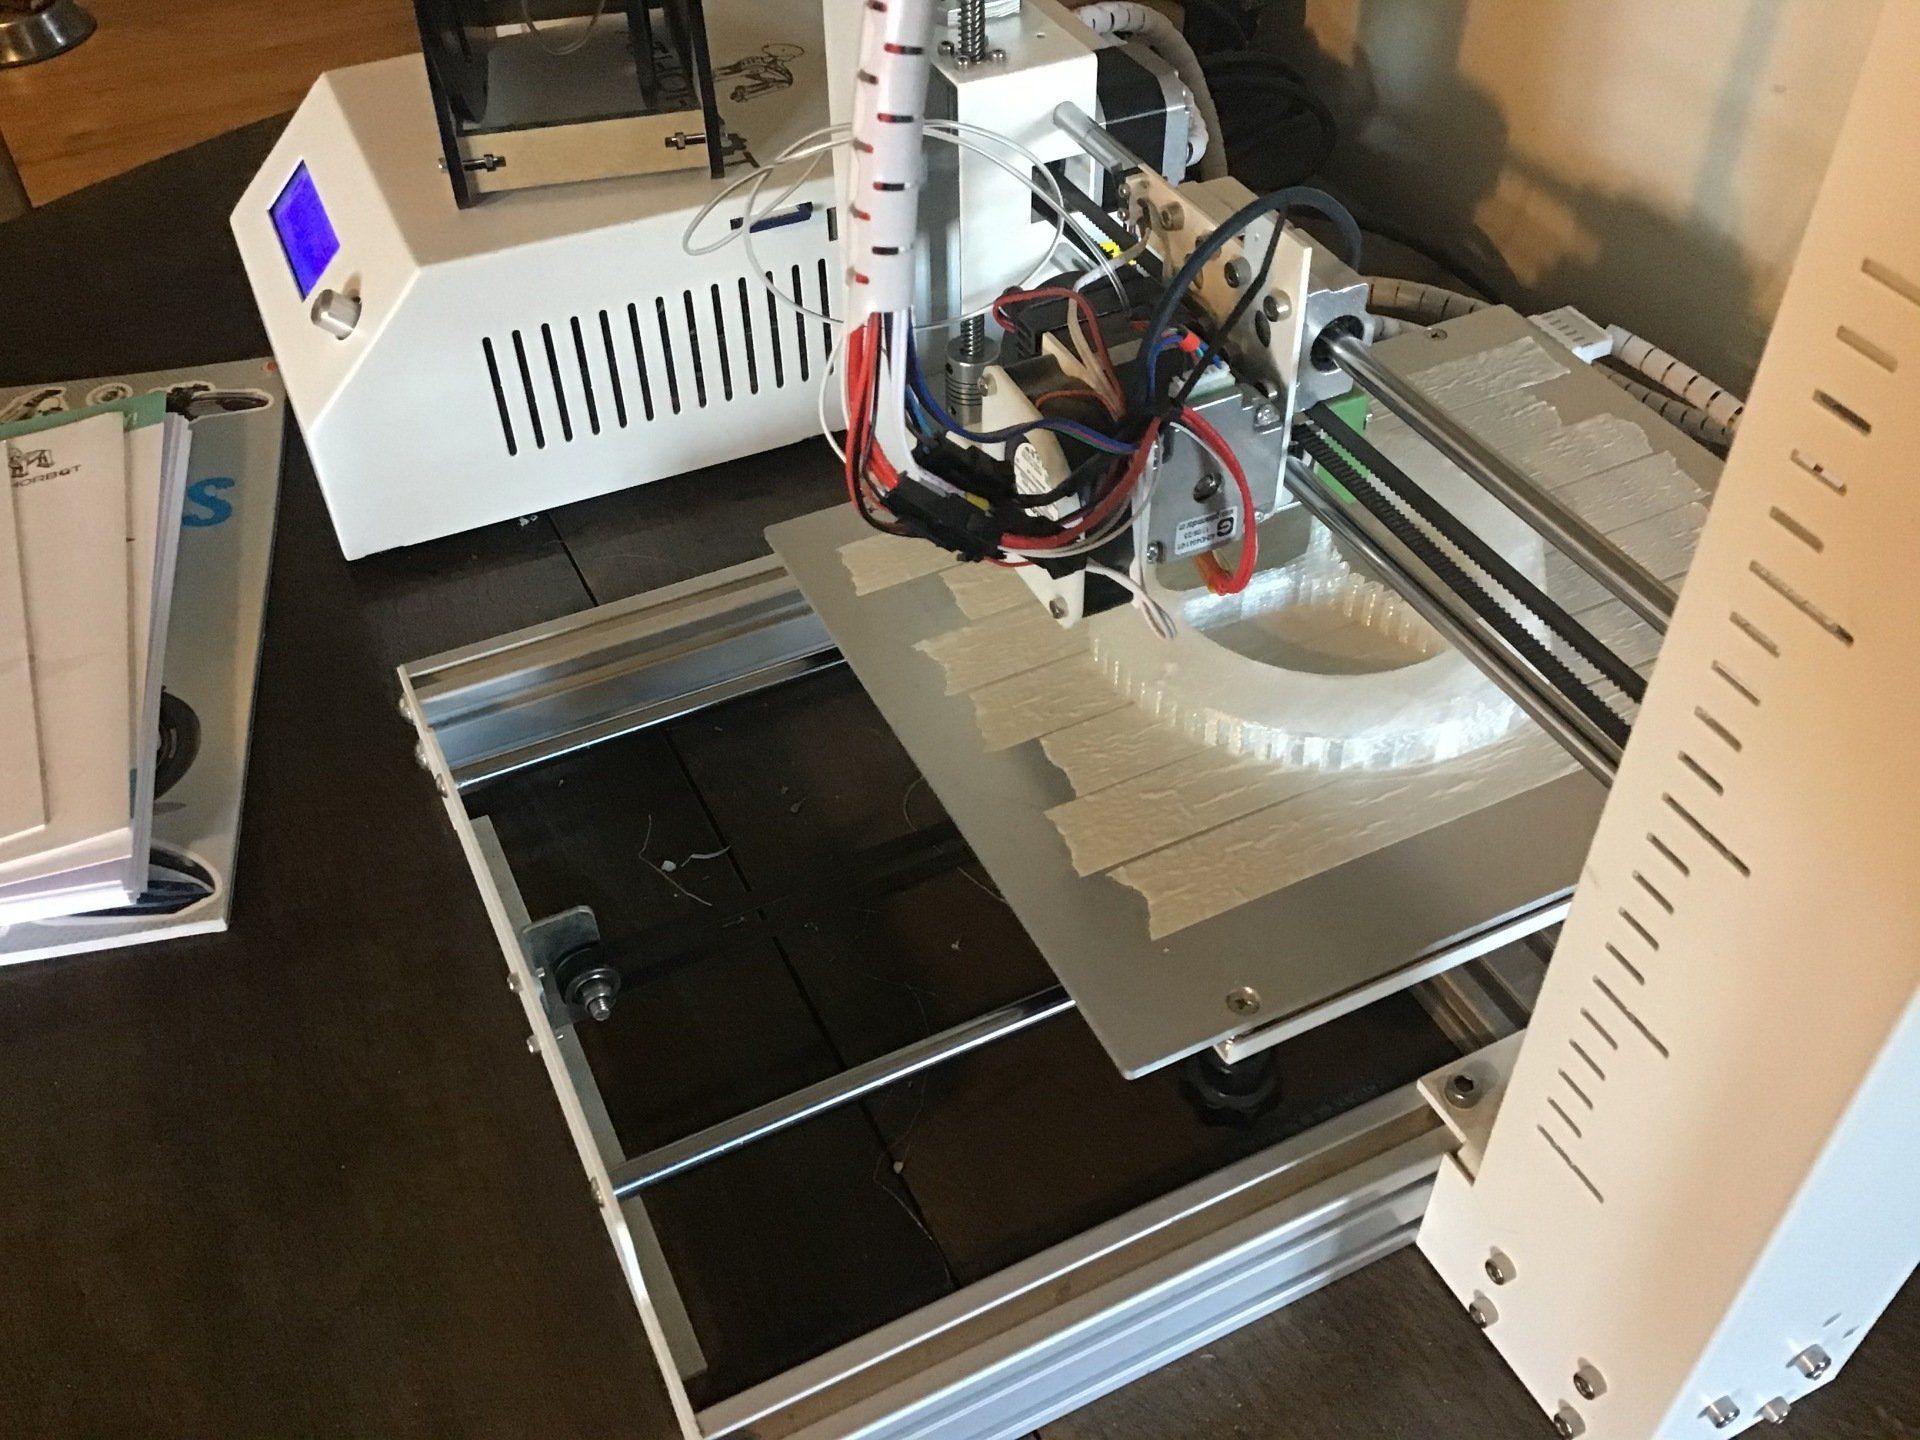
Then it was a case of babysitting the printer (for 6 hours!) whilst it printed the prototype.
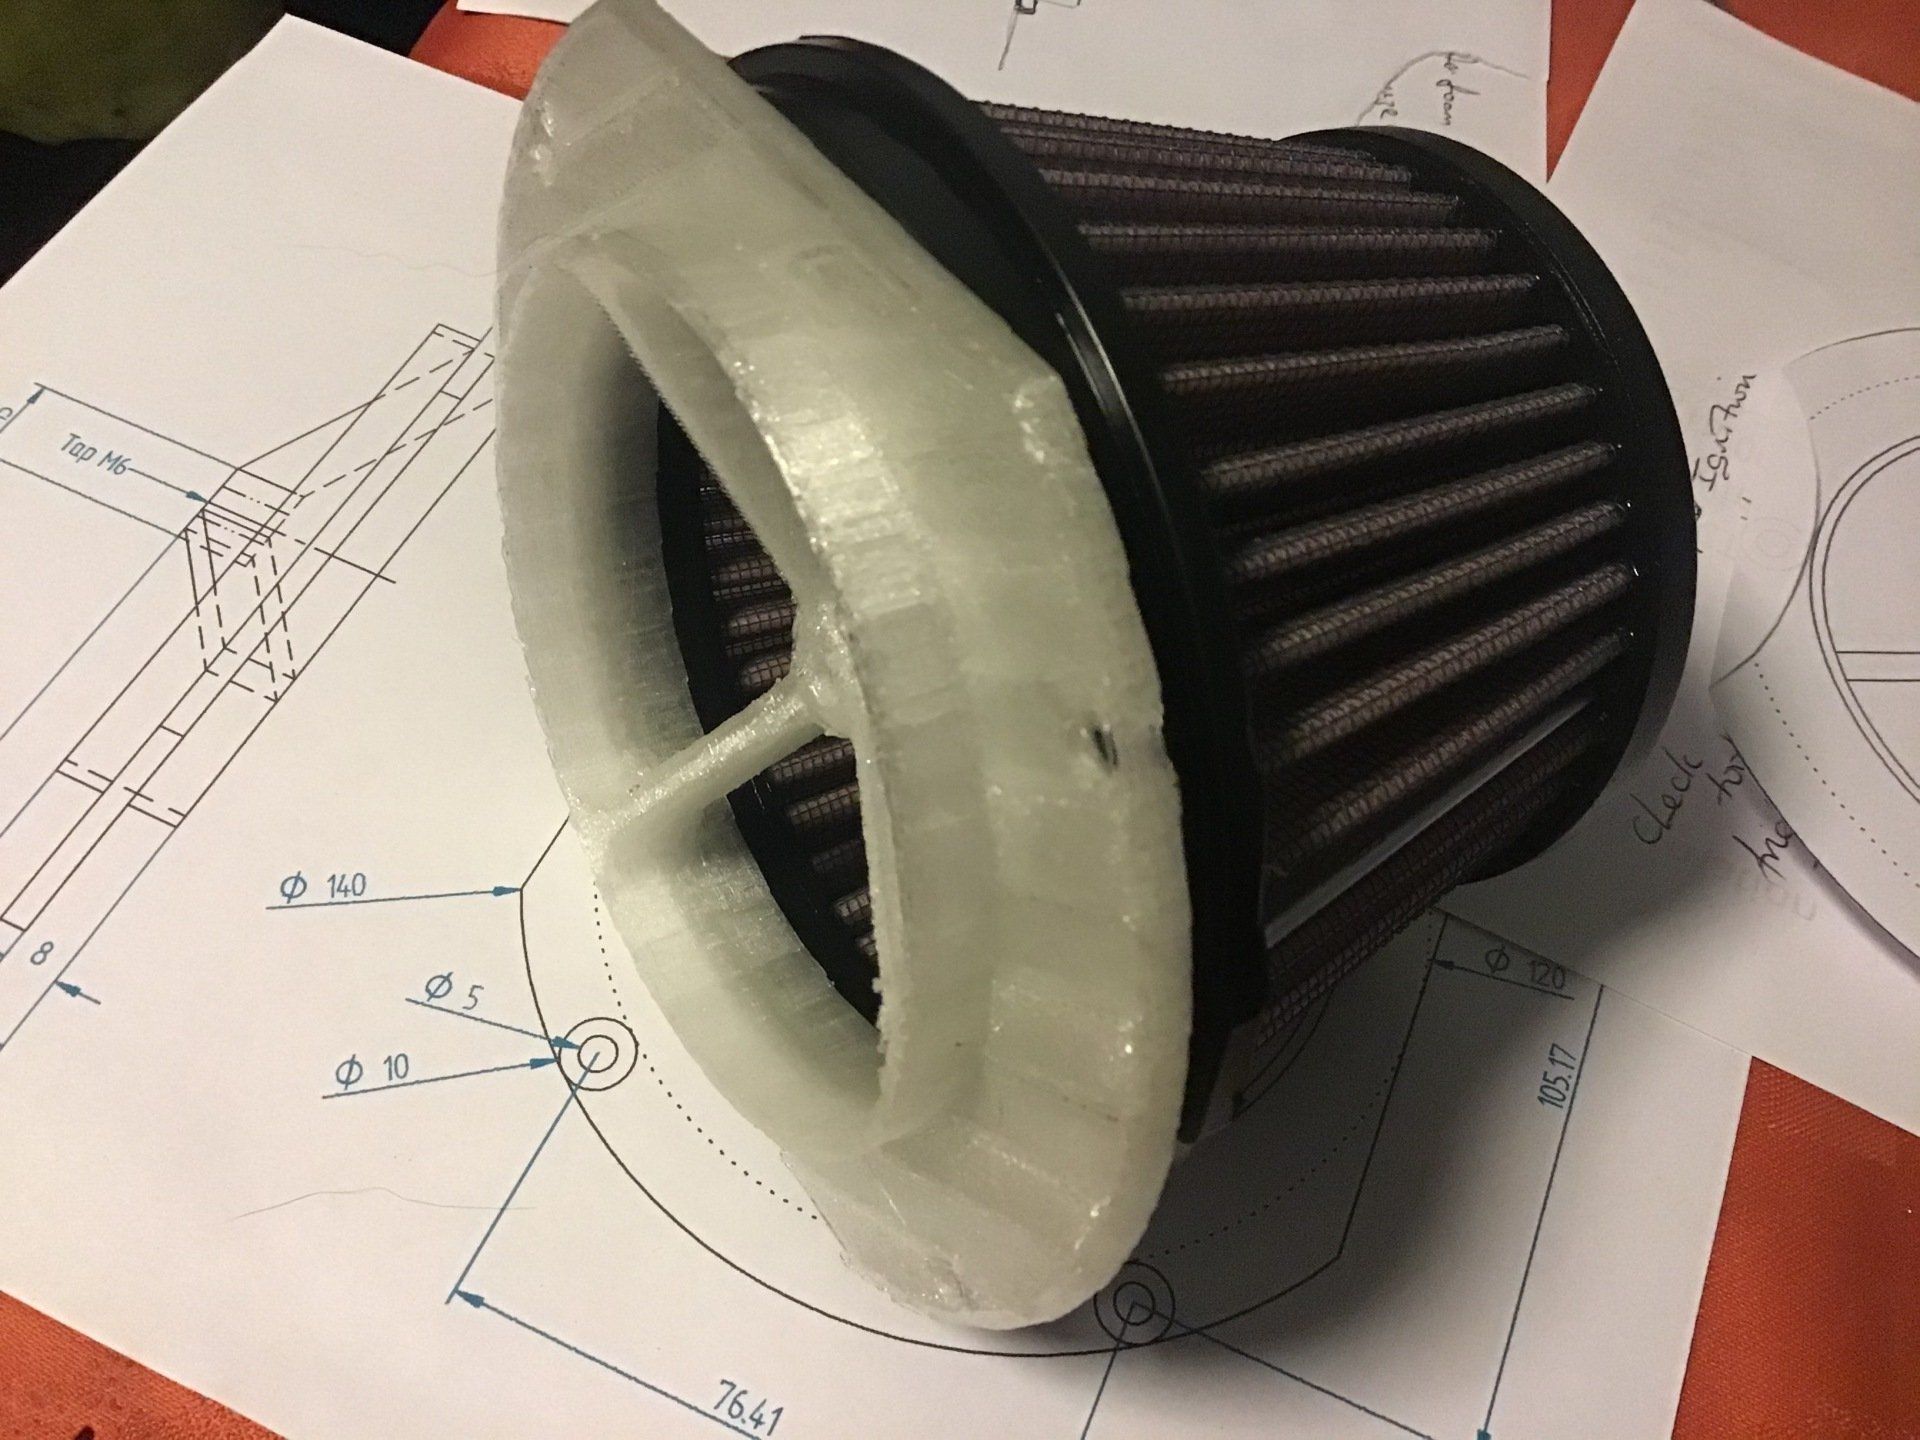
And here it is...
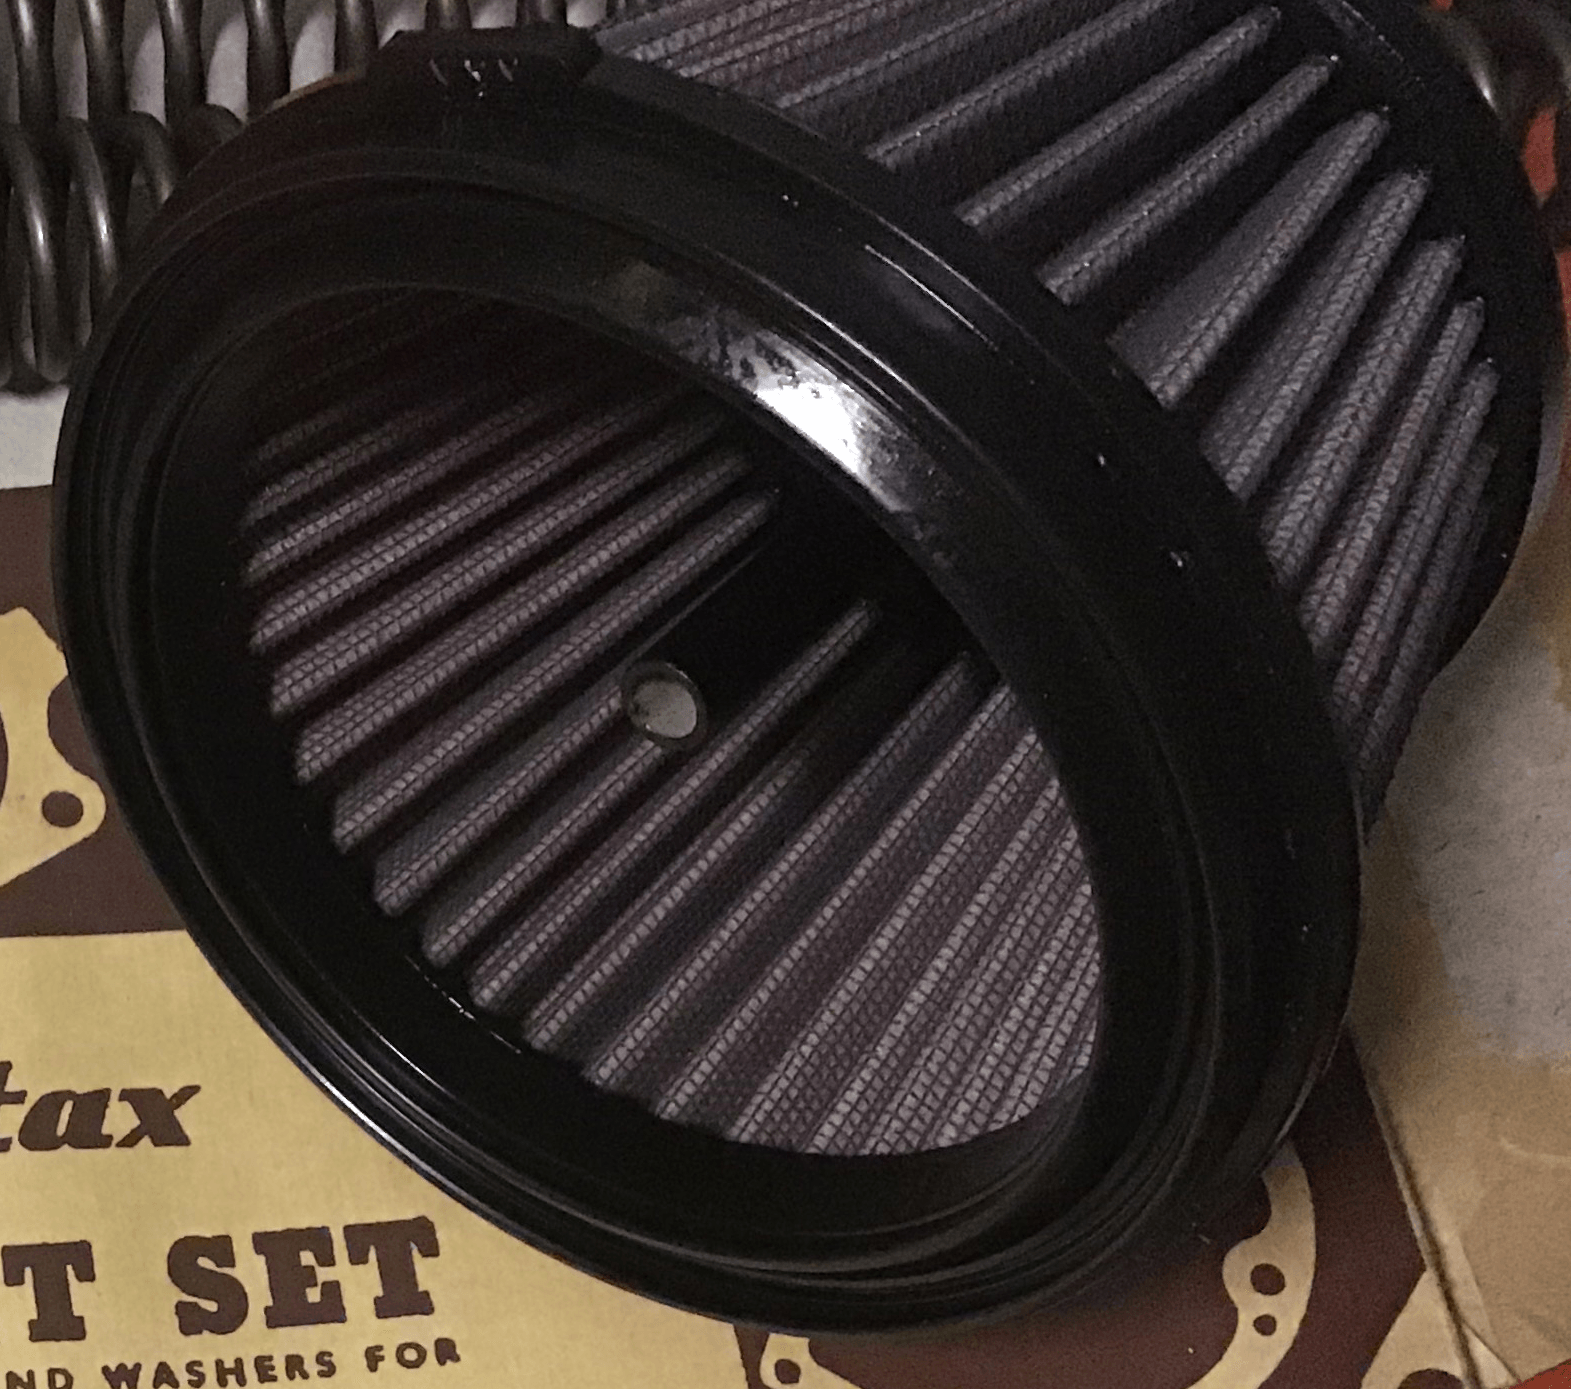
Luckily I've got the measurements correct, and the air filter fits.
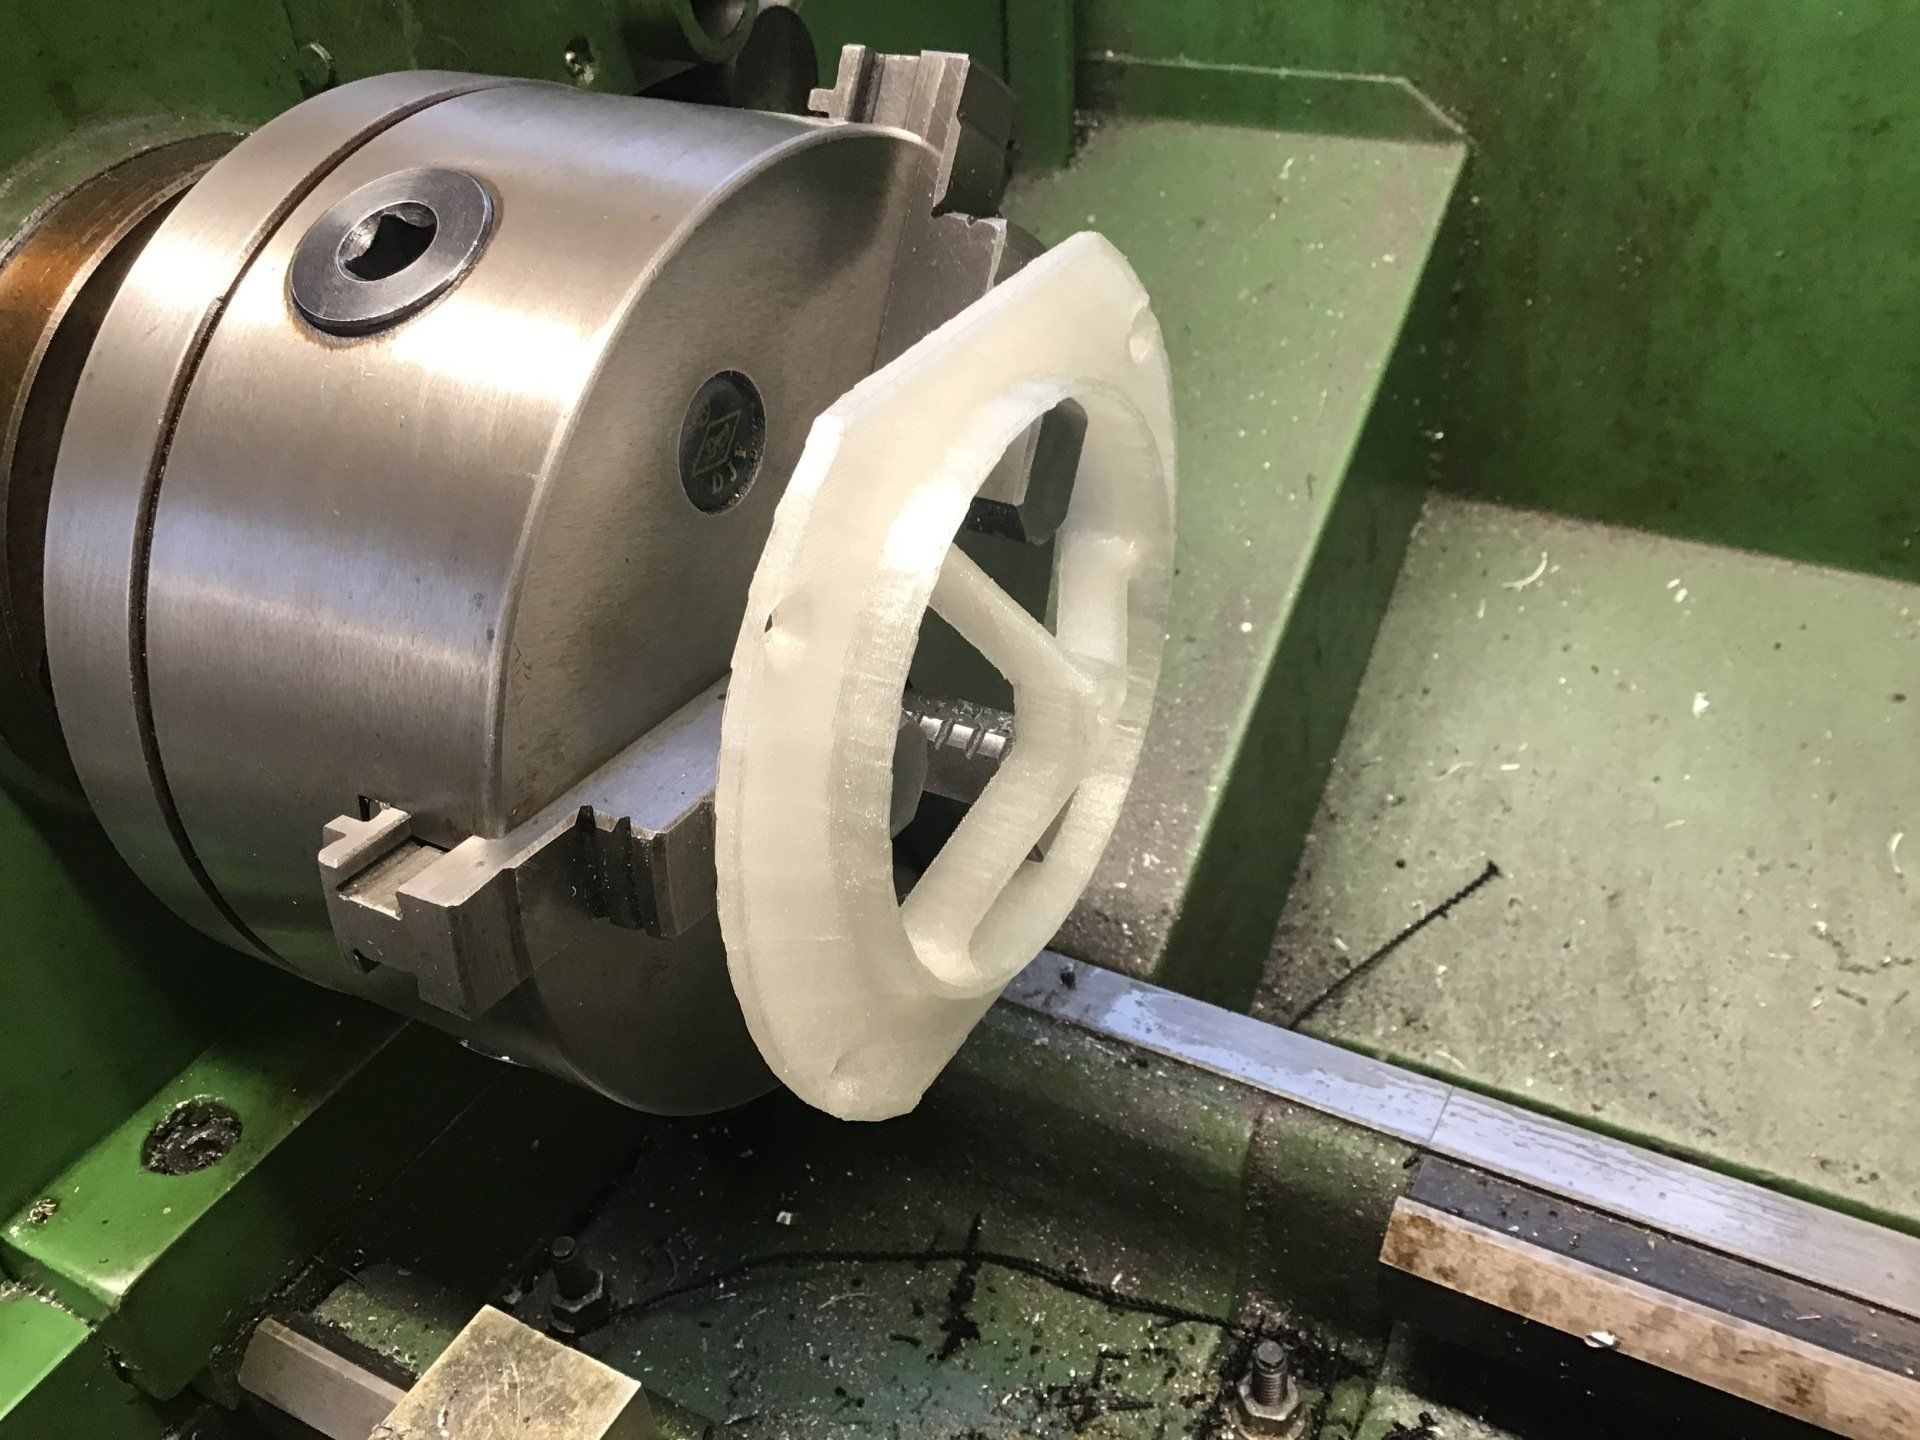
Because the 3D printer prints in layers, the surface finish is quite rough. It requires a lot of sanding / filling if you want to get a nice surface finish. I thought I'd see if I could speed things up by taking a light surface cut on the lathe. It wasn't successful. It may have been better with a nice sharp HSS tool, but I was being lazy and just used the round nosed carbide tool that was already set up. At the moment, surface finish is immaterial, I just need prototypes to confirm dimensions etc.
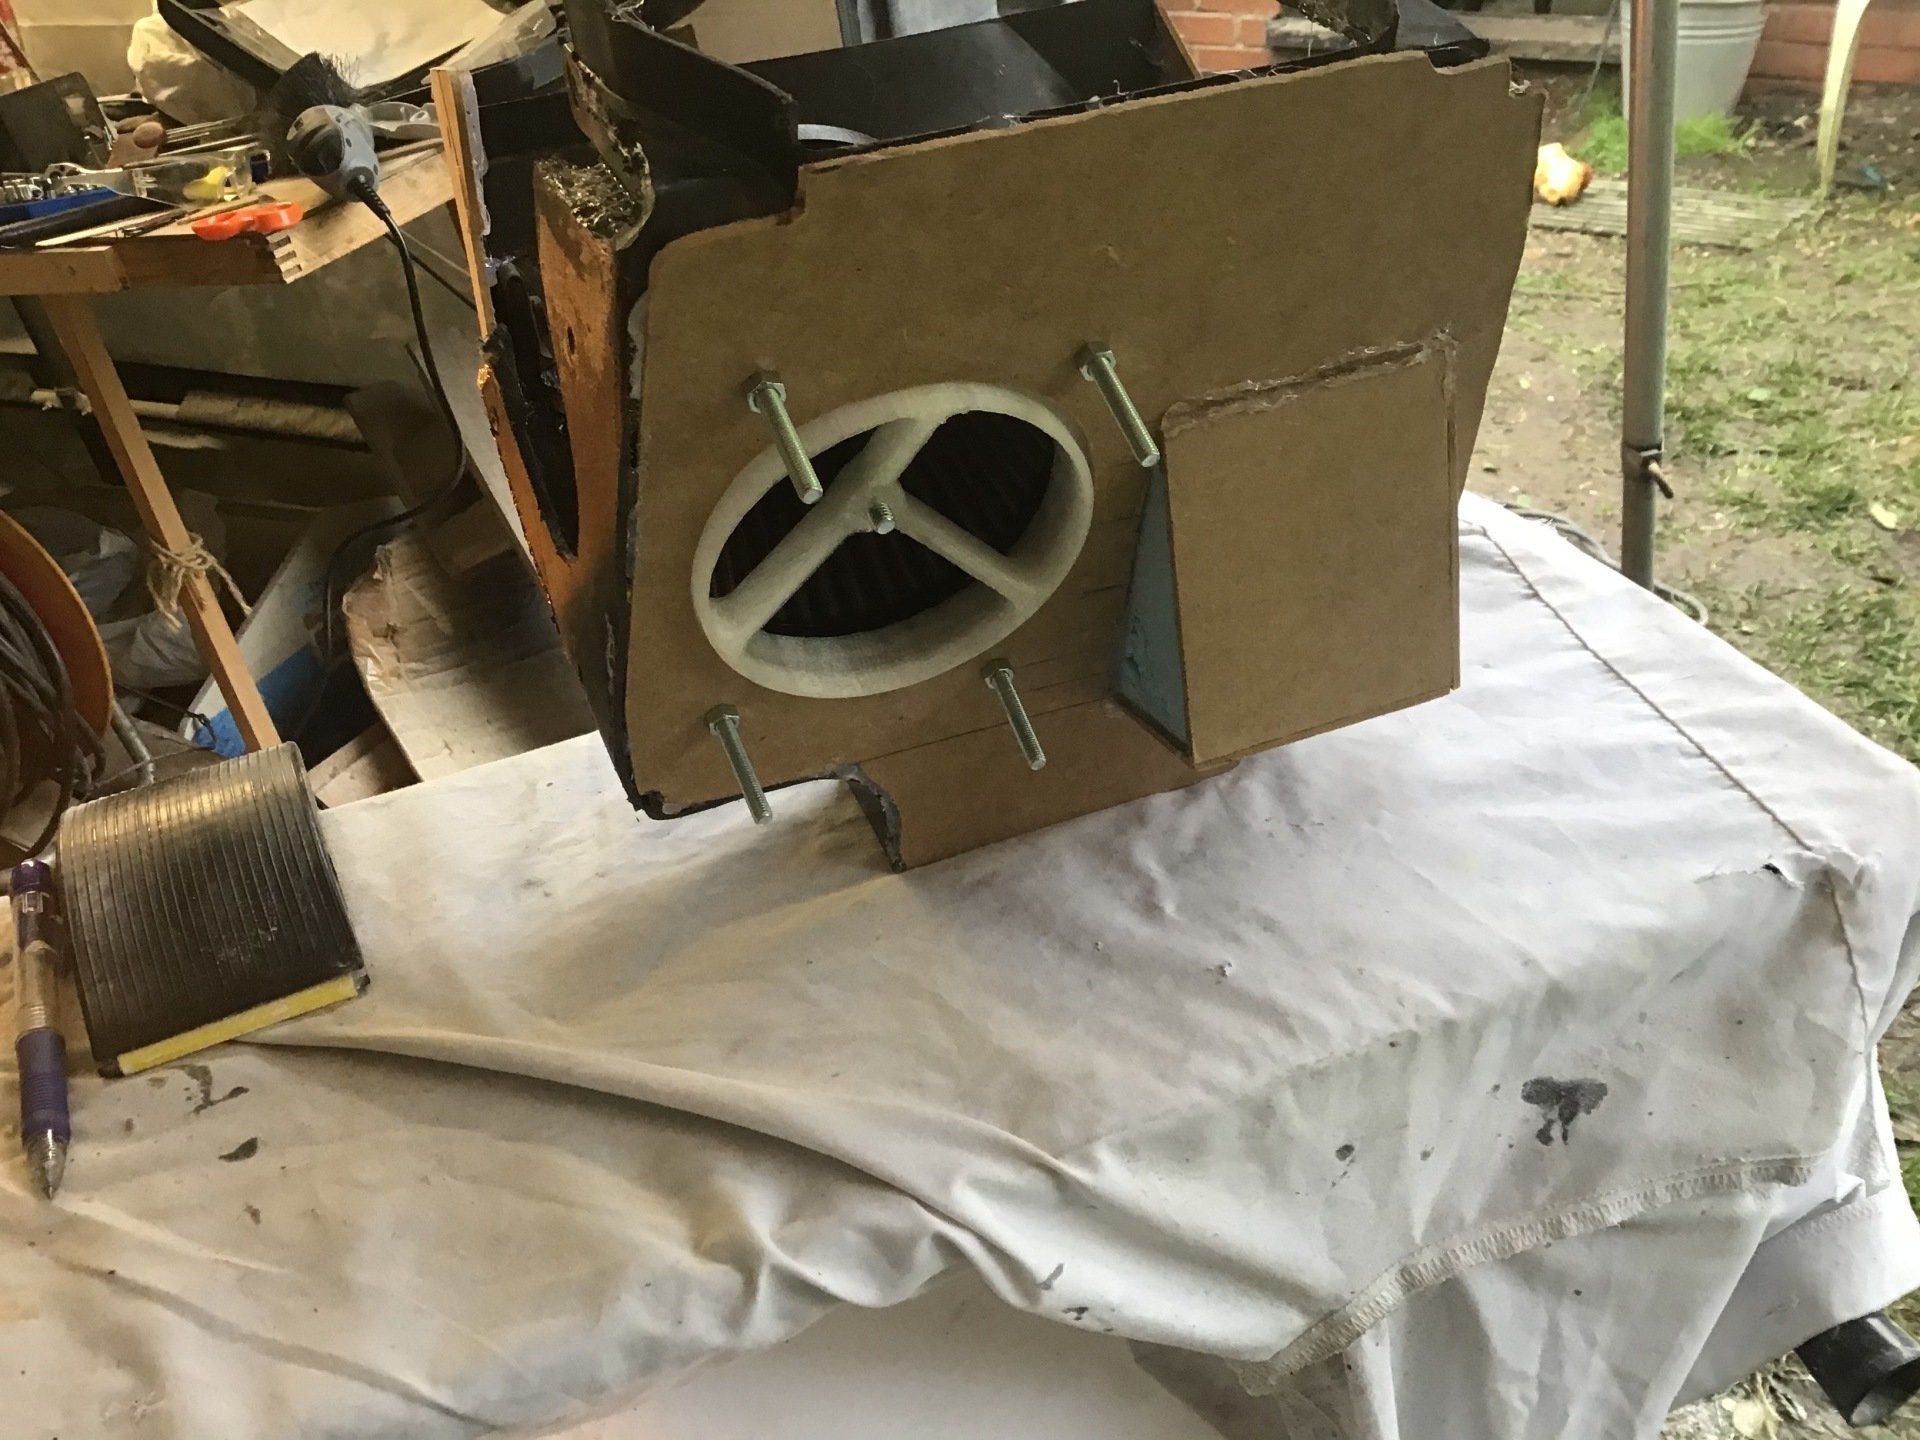
Here it is mounted up in the air box. It's a bit tight. I'd like to move the battery over a bit, which would also help to make sure that the battery box cleared the rear shock (as mentioned in part 52).
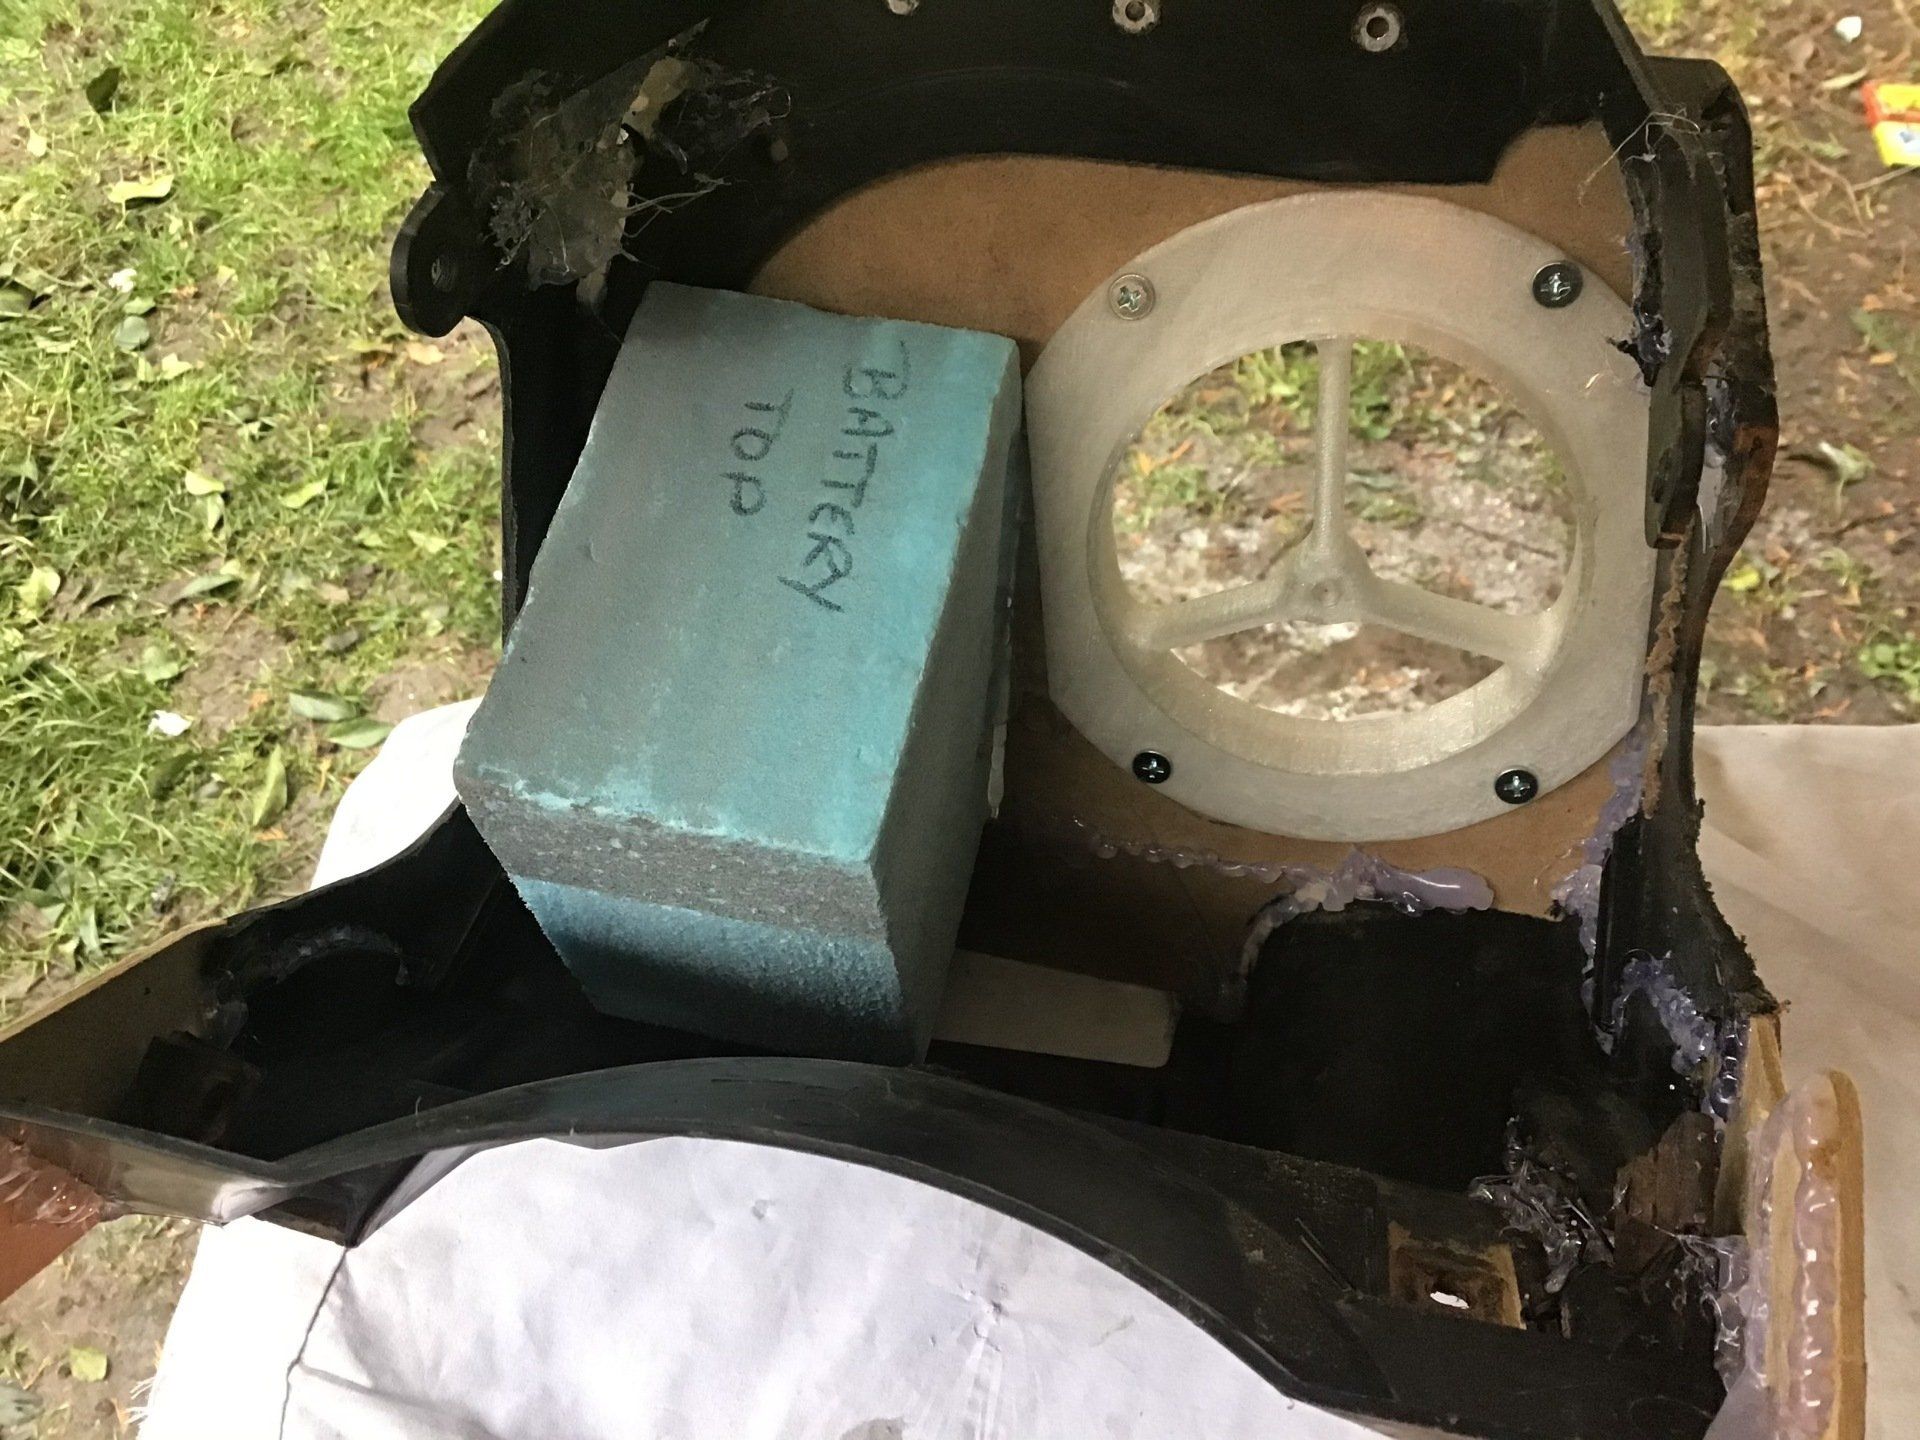
There is, thankfully, just enough room for the air filter to sit alongside the battery.
The view from the other side. Those mounting screws really don't need to be that long!
A little bit of progress, then. Next job is to move the battery box a little and then try and join air box to carb - somehow...