
Monday Articles - May 2021
Scroll down for latest installment

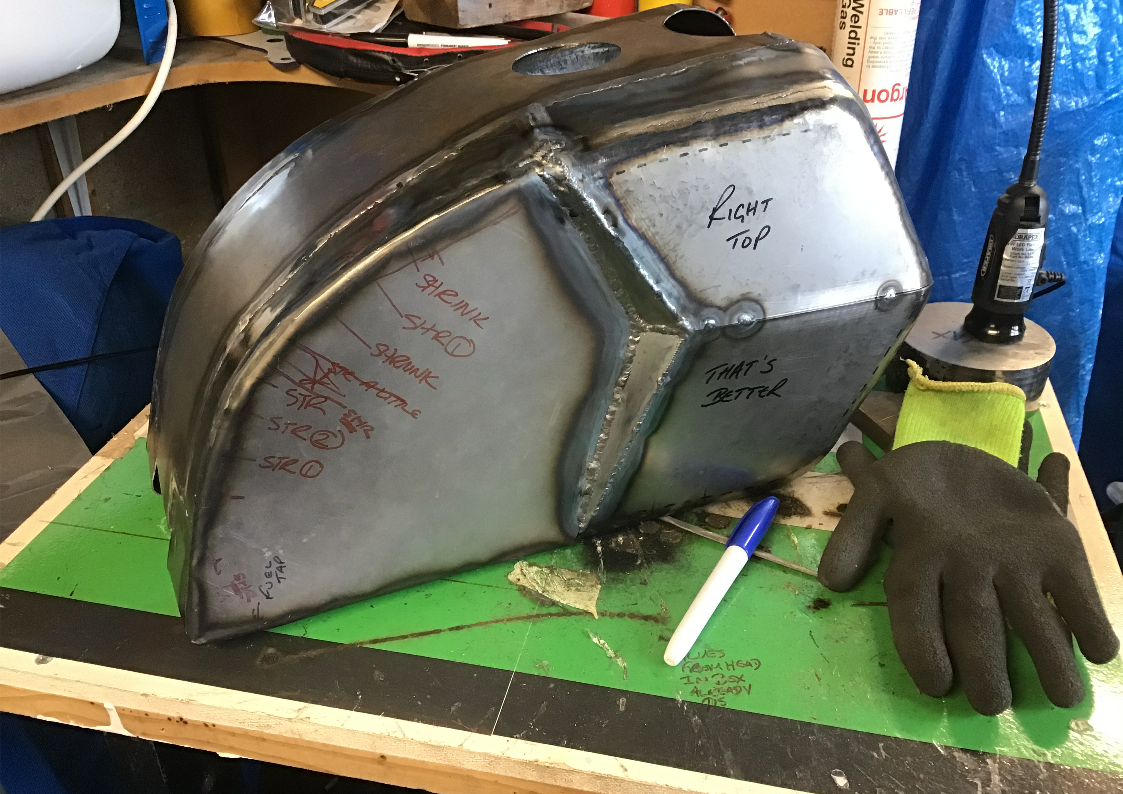
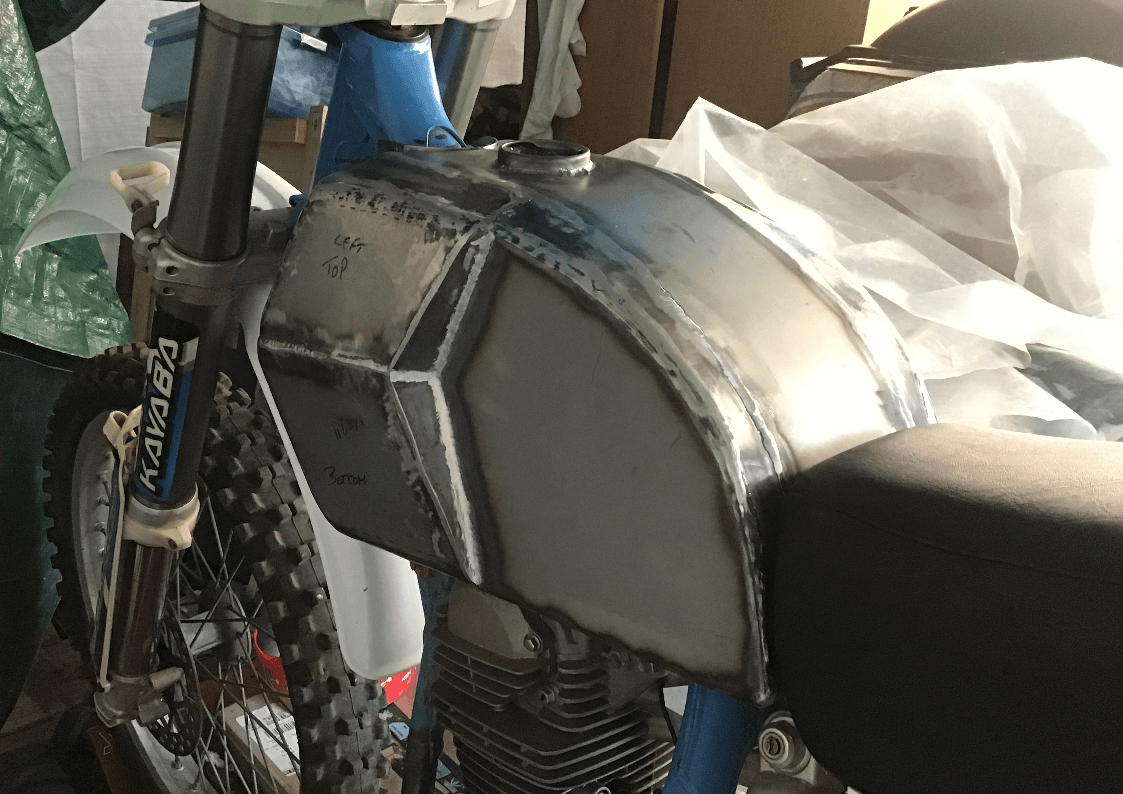
The welding of the tank has commenced. The plan of action is to join up the tack welds with short weld runs in an attempt to minimise heat distortion. Let me tell you, I’m a little stressed about doing this, I really don’t want to screw it up completely and have to start again. That stress also accounts for the lack of photos, with me being far too consumed with welding to remember to stop and take pictures.
But (at last) I’ve sorted out the TIG foot pedal which never seemed to give the same current output twice, and that’s because it often wasn’t! The pedal has a rack and pinion affair to turn the potentiometer and hence vary the output current. It works fine if you press and release the pedal slowly, but should you happen to be a bit ham-footed, the design actually allows the mechanism to skip. So, although you may have taken your foot off the pedal, the potentiometer may not have returned to its home position and you’re still getting more current than you bargained for. Armed with this knowledge, I can now get more consistent results. Here are the first few weld runs which are not great, but at least the two bits are firmly joined together.
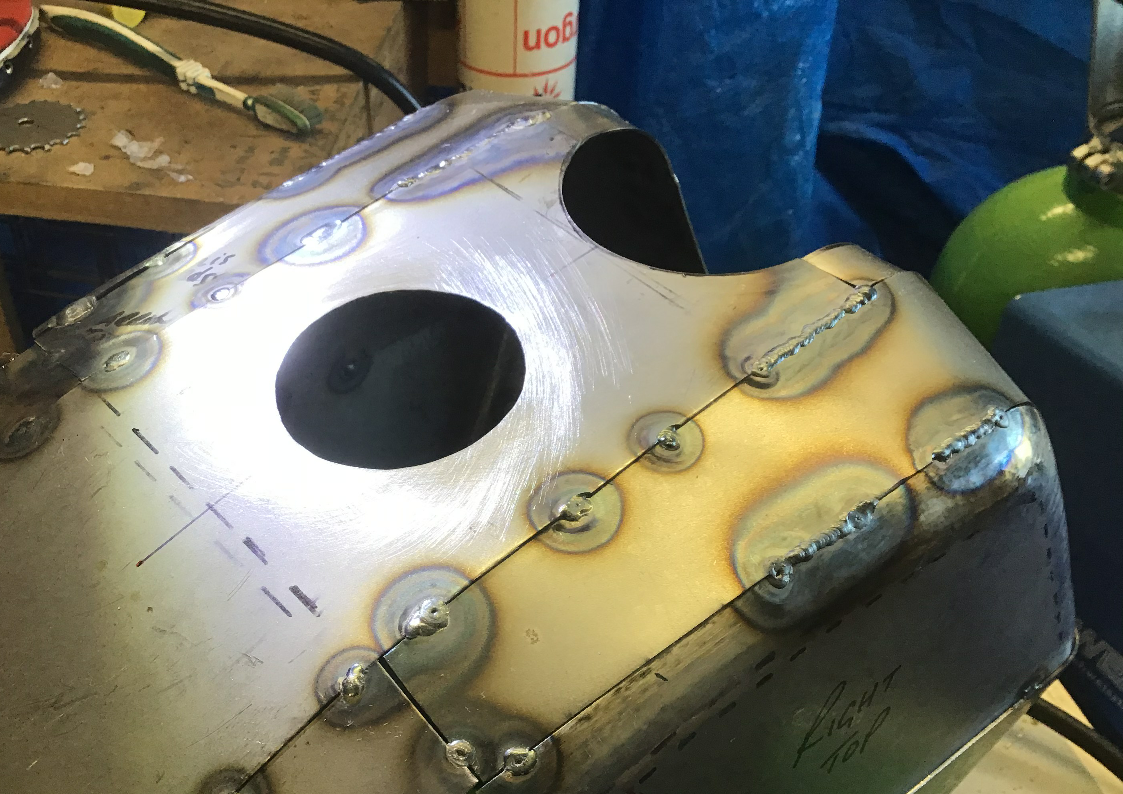
Then I remembered that I really ought to be cleaning the metal better before I started welding it, so here it is looking shinier after the application of wire brush, emery cloth and a wipe over with some acetone.
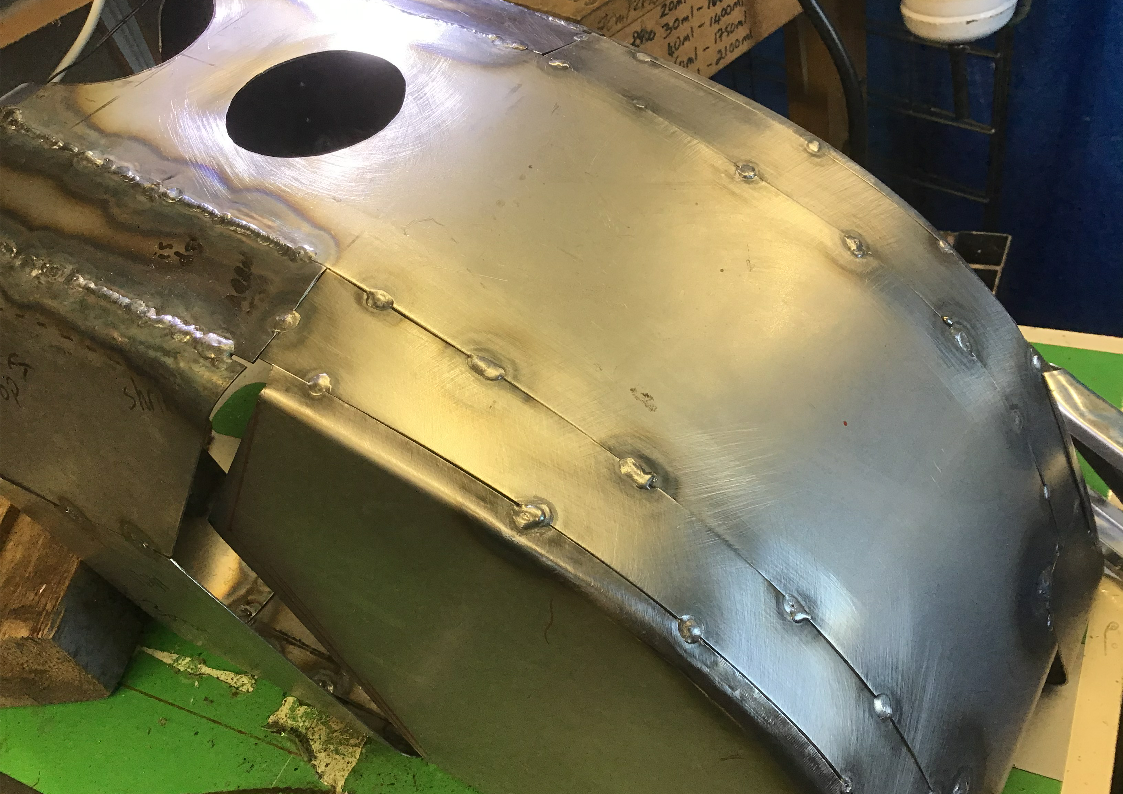
Here’s some underneathy bits. Welding standard fluctuates between mildly acceptable to good grief what was that?
And this is how far I got before I got so stressed that I needed to go have a lie down in a darkened room. Maybe by next week it’ll all be welded. Maybe…
Work on the Dirt Bike build has slowed in the last couple of weeks because at the moment I have a whole load of other sh*t going on. As a result I have had neither the time (or inclination) to spend much time in the garage. This all means that for the immediate future, you’re unlikely to get a weekly update on progress, but I’ll keep adding stuff to the website as and when time allows.
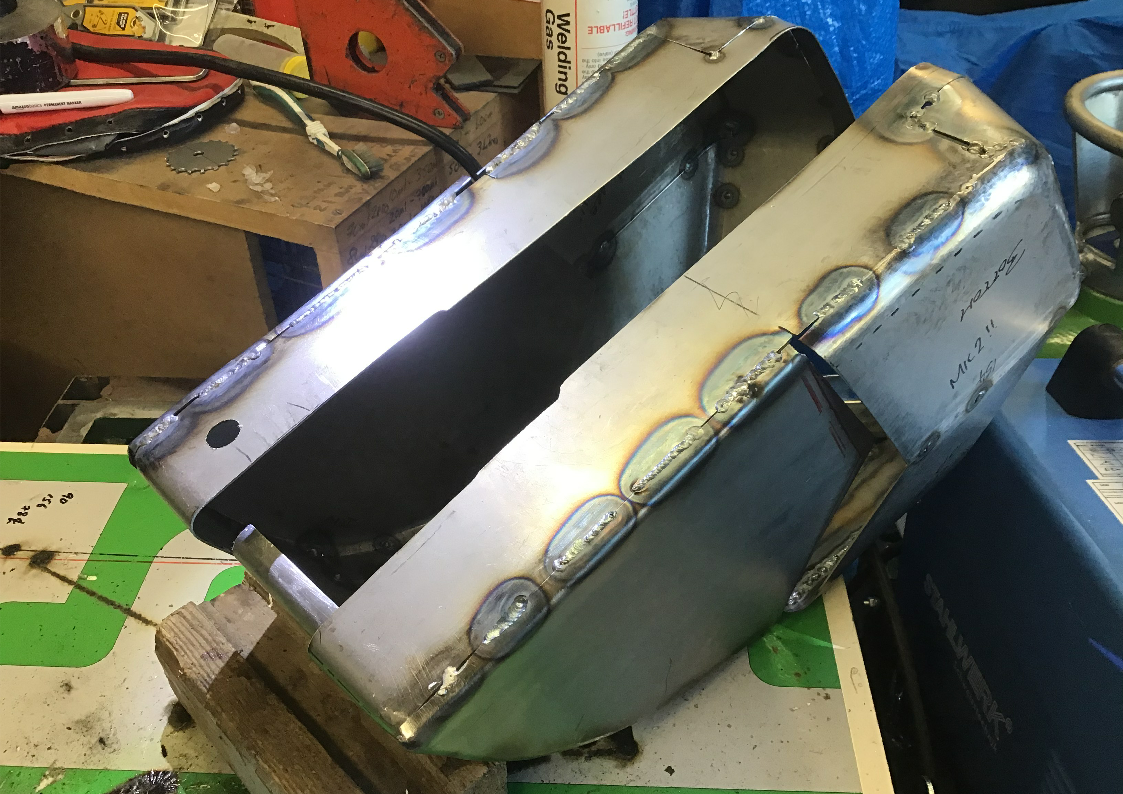
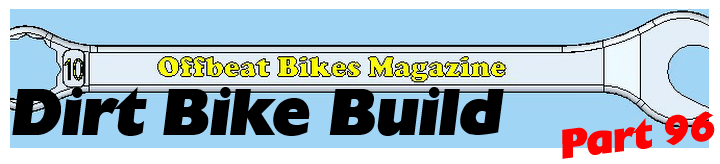
But today I have managed to do some more welding on the tank. As usual my welding is inconsistent, but it has at least stuck the pieces together! Unlike the pros who weld stuff up so neatly that they can then just planish the seam flat, I have had to get the angle grinder out.
Here’s some pictures of today’s progress.
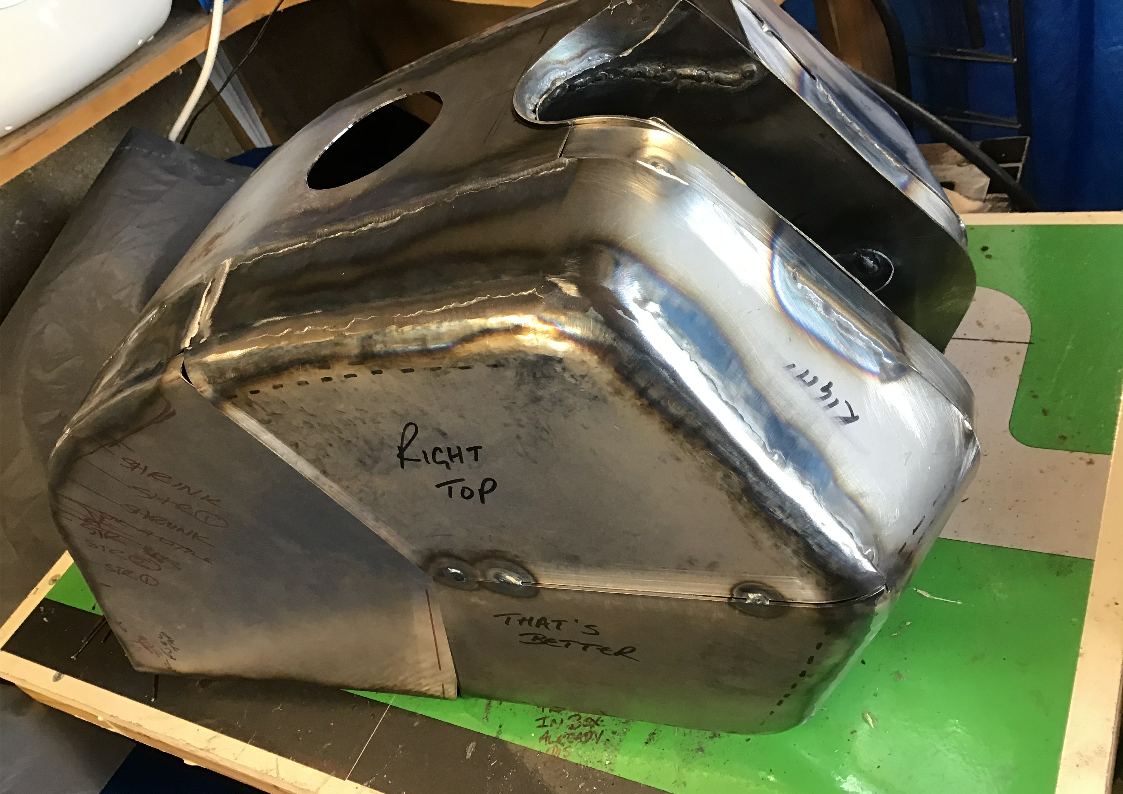
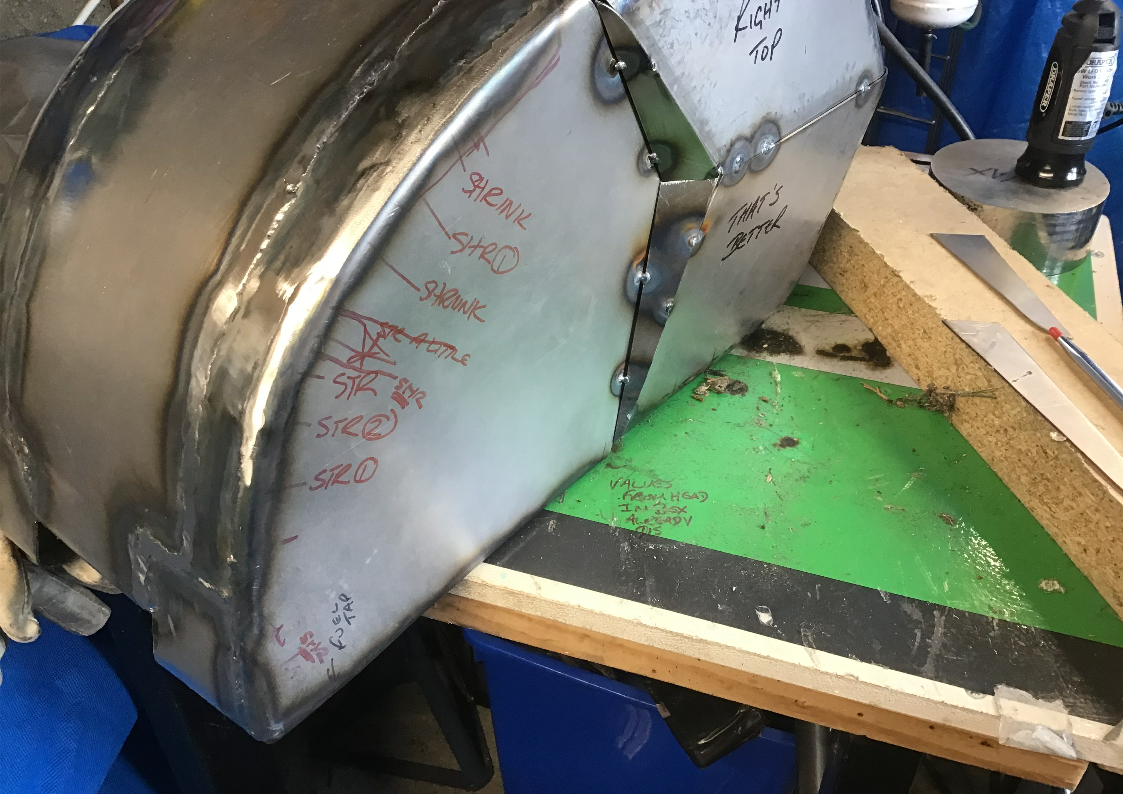
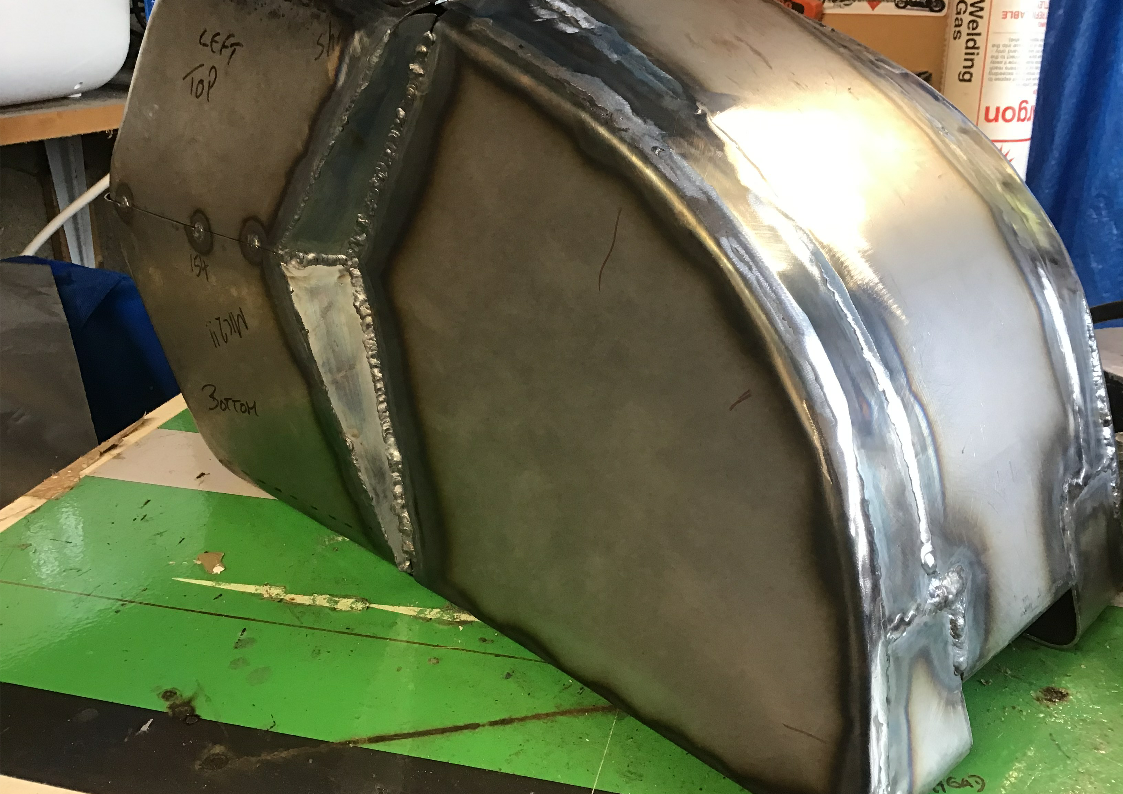
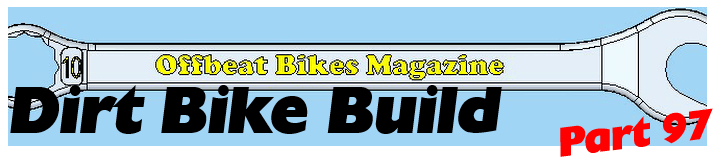
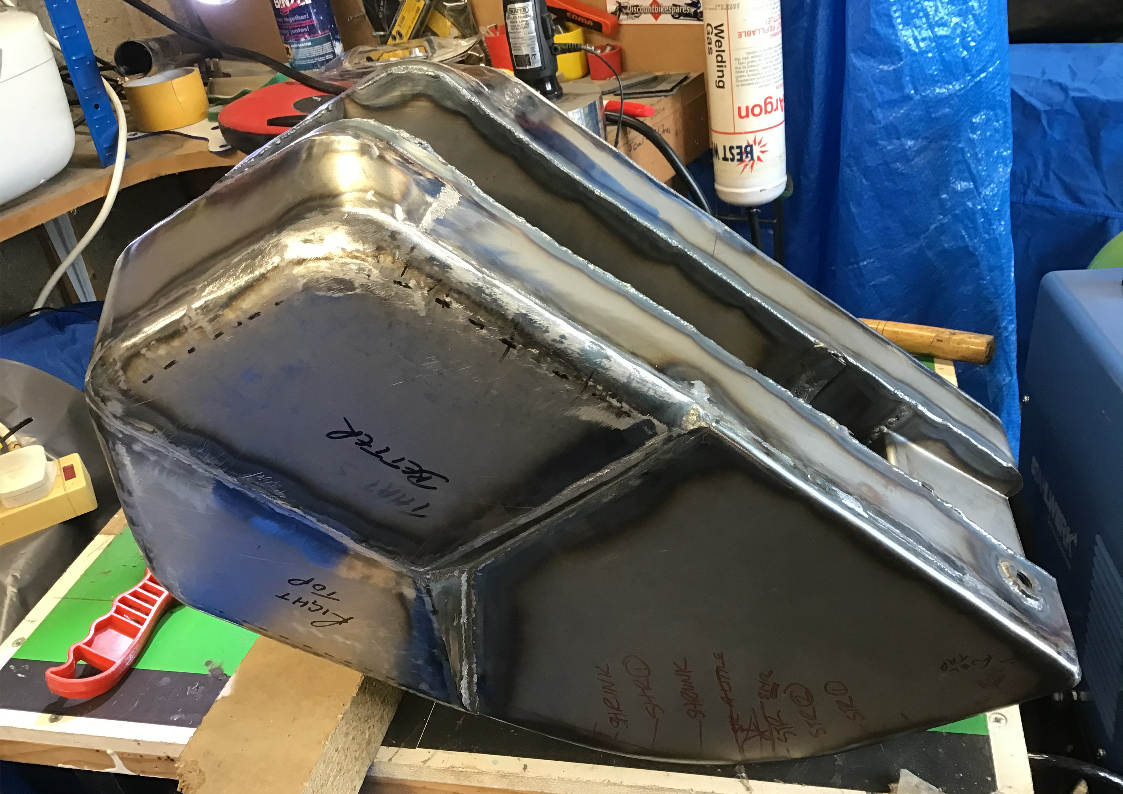
Managed to find a bit of spare time to finish welding the 'top' side of the petrol tank.
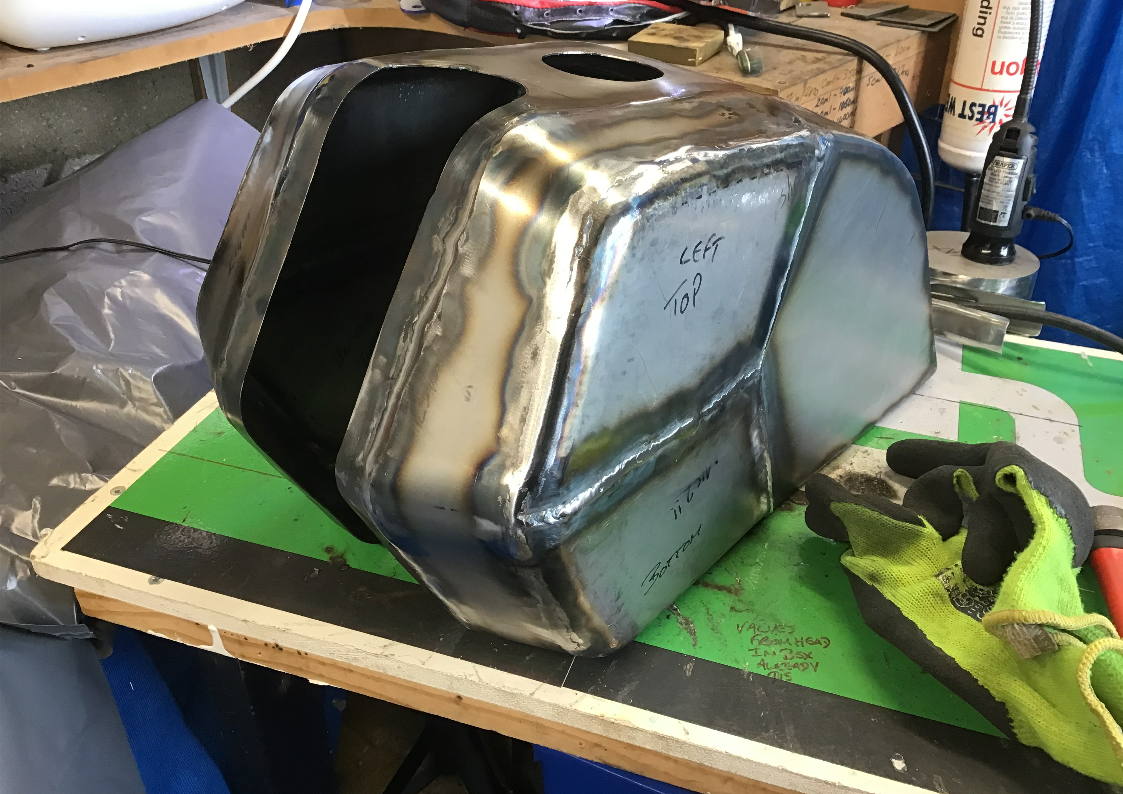
Gave the welds a bit of a tidy up using a carbide burr, they look a little better now.
I'm hoping to be able to find time this week to get this welded in too.
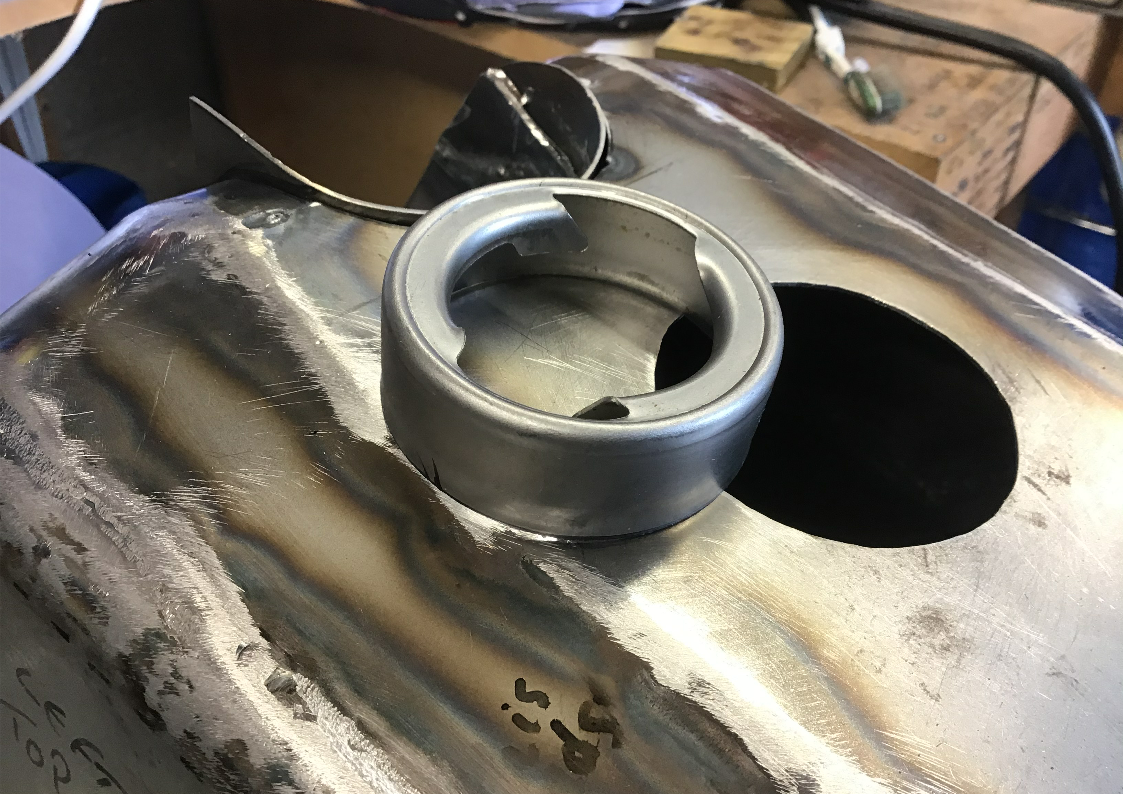
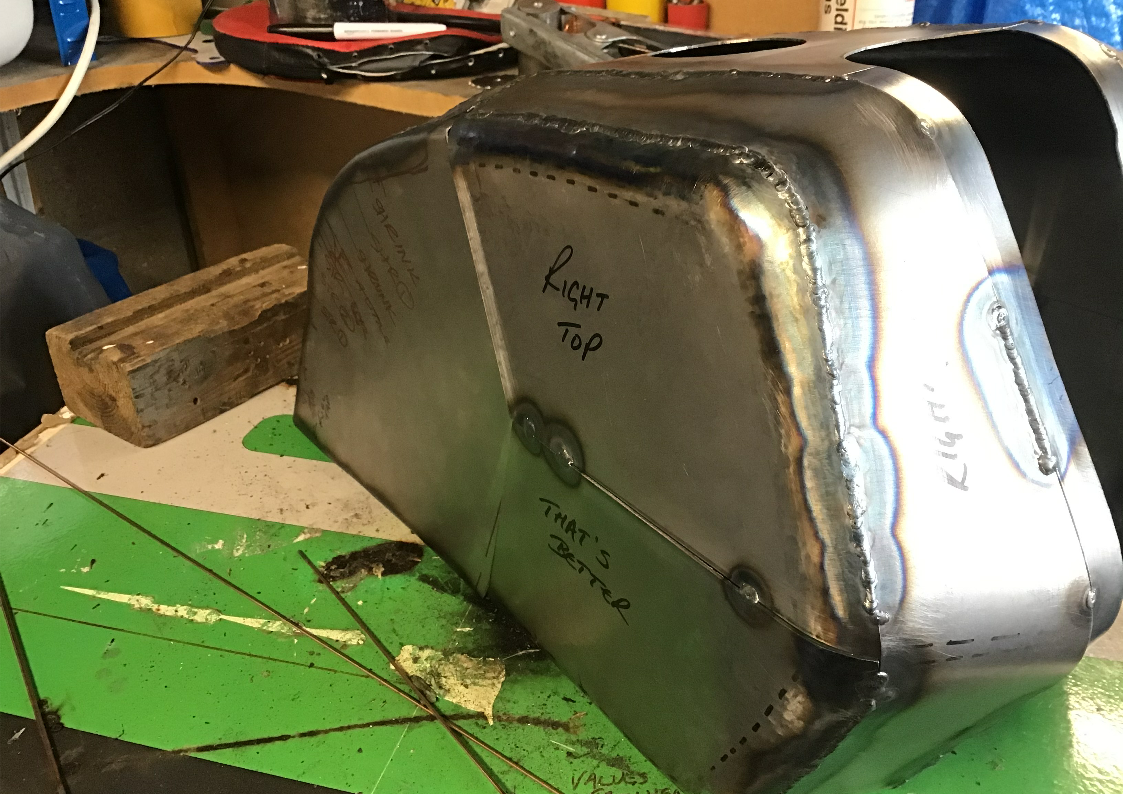
Managed to get the filler neck welded in! Was a little worried doing this bit, but actually it didn't prove too troublesome.
It took me along while searching the internet to find a steel weld in filler neck and matching cap (plenty of aluminium ones about, though). Eventually I found
THIS ONE
on Cycle Haven's website, does the job nicely and is reasonably priced at just over £15 for filler neck and cap. The filler neck is also available separately from Cycle Haven.
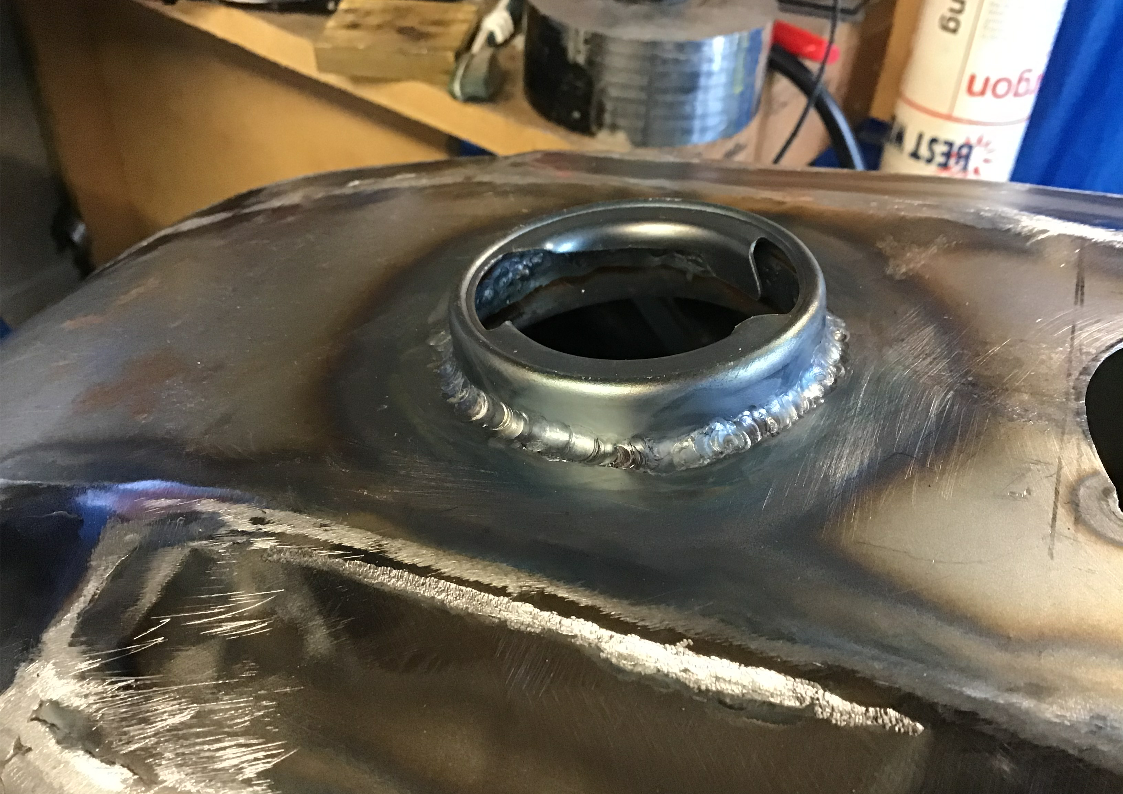
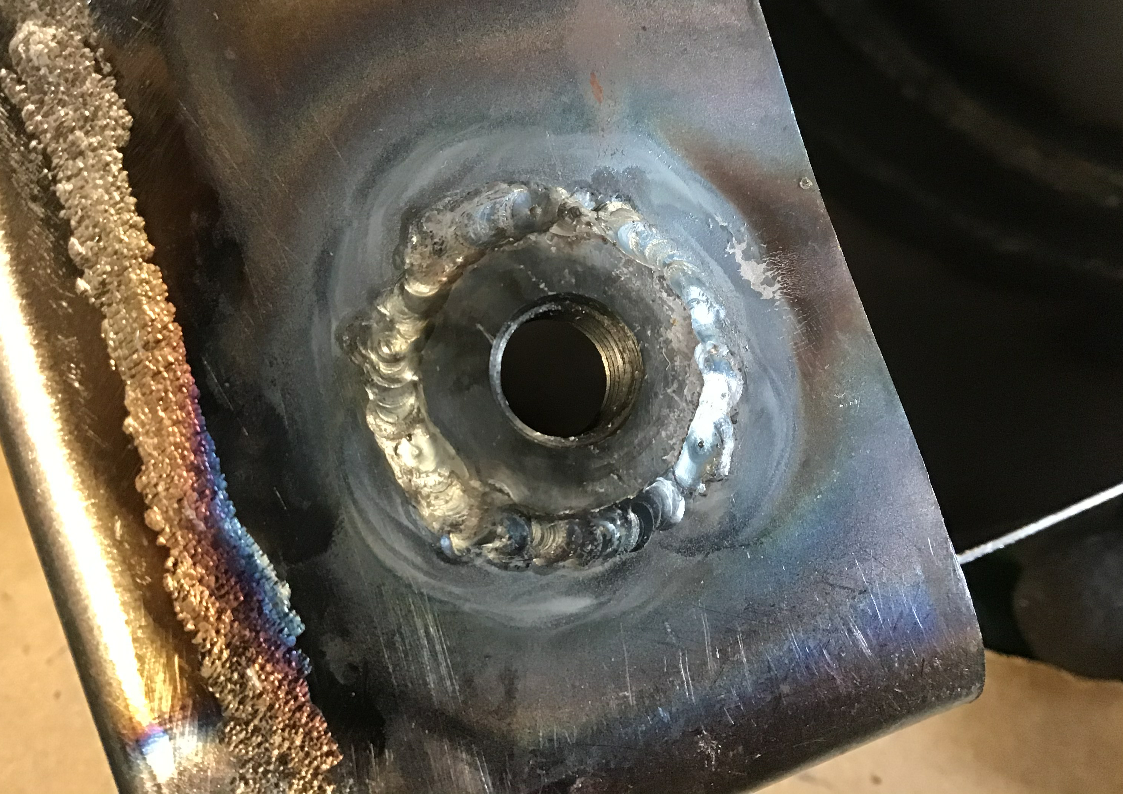
Also got the fuel tap boss welded in, so that's the top of the tank fully welded. Now I need to join tank top to tunnel.
With the top of the tank now fully welded, today I tack welded the tunnel into place and tried the tank on the bike. After a little adjustment to the rubber mountings on the frame, the tank was in eased into place.
A successful test fitting meant that there was nothing stopping me from fully welding the tunnel in place, so that’s what I spent the rest of the day doing.
All that’s required now is to fill the hole that’s left at the back, there also needs to be some kind of hook for a rear restraining strap to attach to. Then I can check for leaks. Once it’s leak free, I then need to make it look presentable. That may require quite a lot of body filler…
